Installing porcelain countertops can significantly enhance the beauty and functionality of your kitchen or bathroom. These countertops offer a perfect blend of durability and elegance, making them a popular choice among homeowners. With their resistance to scratches, heat, and stains, porcelain surfaces ensure longevity and ease of maintenance. In this guide, we’ll walk you through the step-by-step process of how to install porcelain countertops, providing tips and insights to achieve professional results. Whether you’re a DIY enthusiast or considering hiring a professional, understanding the installation process can help you make informed decisions and get the most out of your investment.

Benefits of Porcelain Countertops
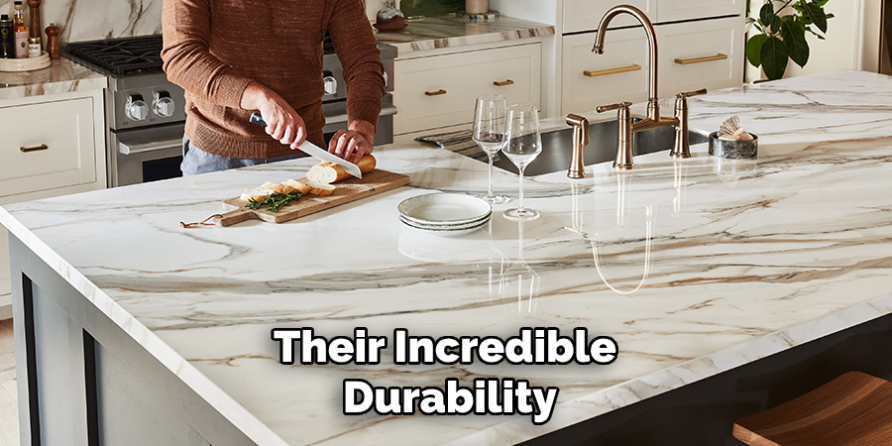
Porcelain countertops offer several advantages that make them an excellent choice for modern homes. One of the standout benefits is their durability; porcelain is incredibly strong and can withstand the wear and tear of everyday use without losing its pristine appearance. Additionally, these countertops are highly resistant to scratches, cracks, and stains, which means they maintain their elegance over time with minimal upkeep.
Porcelain is also non-porous, meaning it does not absorb liquids, reducing the risk of bacterial growth and making it an ideal surface for kitchen and bathroom environments. Moreover, porcelain countertops come in a variety of colors, patterns, and finishes, giving homeowners the flexibility to match their design preferences with ease. Their ability to mimic the look of natural stone such as marble while offering superior resilience makes them a cost-effective alternative for those seeking luxury appearances without compromising on performance.
Why Choose Porcelain Countertops
Choosing porcelain countertops for your kitchen or bathroom renovation comes with a host of compelling reasons. Foremost, their incredible durability ensures that your countertop will withstand the rigors of daily life, from food preparation to handling hot cookware, without showing signs of damage. Porcelain’s resistance to heat and its non-porous nature make it not only a safe choice but also a hygienic one, as it discourages bacterial growth and resists stains. Moreover, porcelain countertops offer unparalleled design versatility.

With a variety of finishes, colors, and patterns available, they can seamlessly fit into any design style, whether you’re aiming for a contemporary aesthetic or a more classic look. Another significant factor is the environmental benefits of porcelain. Made from natural materials and often completely recyclable, they align with eco-friendly building practices. Opting for porcelain countertops represents a smart choice for homeowners seeking a blend of beauty, practicality, and environmental consciousness in their home design.
Tools and Materials Needed
Before you begin the installation process for porcelain countertops, it is essential to gather all necessary tools and materials to ensure a smooth and efficient project. Here’s a comprehensive list to guide you:
Tools:
- Measuring Tape: Accurate measurements are critical for cutting and fitting the countertop to the exact dimensions.
- Level: Ensures that your countertops are perfectly horizontal after installation, preventing water pooling or uneven surfaces.
- Tile Cutter or Wet Saw: Used for cutting porcelain to the required sizes and shapes with precision.
- Power Drill and Drill Bits: Necessary for securing the countertop in place and installing any additional fixtures.
- Notched Trowel: Used for spreading adhesive evenly during installation.
- Caulk Gun: For applying caulking to seal edges and seams, preventing moisture penetration.

Materials:
- Porcelain Countertops: The main material, ensuring it is cut to size, with adjustments as necessary during installation.
- Adhesive or Mortar: Specifically designed for porcelain, this will secure the countertops to the base cabinets.
- Sealant: Though porcelain is largely non-porous, certain fittings or installations might benefit from additional sealant protection.
- Caulk: Selected to match the color of your countertops for a seamless look, used for waterproof finishes around edges and fixtures.
- Protective Gear: Gloves, safety glasses, and masks to protect you while cutting and installing materials.
Having these tools and materials readily available will help streamline the installation process, ensuring you are prepared for each step and can achieve a professional finish with your new porcelain countertops.
10 Methods How to Install Porcelain Countertops
Are you considering porcelain countertops for your kitchen or bathroom? You’re not alone. With their sleek look, durability, and low maintenance, porcelain countertops have become a popular choice for many homeowners, DIY enthusiasts, and interior designers. This listicle will guide you through 10 effective methods to install porcelain countertops, ensuring a seamless and professional finish.
1. Measure Accurately
Before you begin, ensure that you have precise measurements of the area where the countertop will be installed. Use a measuring tape to get the length and width, and account for any cutouts or overhangs. Accurate measurements will help prevent wastage and ensure a perfect fit.

2. Choose the Right Thickness
Porcelain countertops typically come in various thicknesses, usually between 12mm and 20mm. Thicker options provide additional durability and a more substantial look, while thinner options are lighter and easier to handle. Consider your preference and the countertop’s intended use when making this decision.
3. Prepare the Surface
Ensure that the surface where the countertop will be installed is clean, dry, and level. Any unevenness can affect the final appearance and structural integrity of the countertop. Use a spirit level to check for flatness and sand down any high spots.
4. Cut with Precision
Using a wet saw with a diamond blade, carefully cut the porcelain slab to fit your space. Make sure to wear safety goggles and gloves throughout this process. Patience and precision are key here—rushing can lead to costly mistakes.
5. Dry Fit the Countertop
Before securing the countertop, place it on the cabinetry to ensure it fits perfectly. This step allows you to make any necessary adjustments without the pressure of adhesive setting times.
6. Apply Adhesive Carefully
Select a high-quality adhesive designed for porcelain installation. Apply it evenly with a notched trowel to both the underside of the countertop and the top of the cabinetry. This ensures a strong and durable bond.
7. Secure the Countertop
Once the adhesive is applied, carefully place the countertop onto the cabinetry. Press down firmly and ensure it is level. Use clamps to hold the countertop in place while the adhesive sets.

8. Seal the Edges
To prevent moisture from seeping in, apply a silicone sealant along the edges where the countertop meets the wall or backsplash. This provides a waterproof barrier and gives a polished look to your installation.
9. Finishing Touches
Inspect the installation for any visible gaps or uneven areas. If needed, use caulk to fill minor gaps and smooth out with a damp finger or tool. Wipe away any excess adhesive or sealant with a damp cloth.
10. Clean Up
Finally, once everything is set, clean the countertop thoroughly with a non-abrasive cleaner. This removes dust and residue, leaving your new countertop gleaming and ready for use.
Things to Consider When Choosing Porcelain Countertops
When selecting porcelain countertops, there are several important factors to take into account to ensure they meet your needs and preferences. First, consider the color and pattern options available; porcelain can mimic the look of natural stone, wood, or concrete, offering versatile design possibilities to fit any aesthetic. Durability is another key consideration—porcelain is highly resistant to scratches and heat, making it ideal for busy kitchens. However, ensure the thickness is appropriate for your specific application, balancing heft with the ease of installation.
It’s also wise to evaluate maintenance requirements; while porcelain is low maintenance, choosing a finish that hides fingerprints or smudges can help keep it looking pristine with minimal effort. Additionally, consider your budget and installation costs, as porcelain can range in price. Finally, consult with a professional installer or conduct thorough research to understand any structural reinforcements or special considerations necessary for a successful installation. These factors will help you make an informed decision, ensuring your new countertops are a lasting and beautiful addition to your home.
Common Mistakes to Avoid
When installing porcelain countertops, being aware of common mistakes and how to avoid them can save both time and money. One frequent error is neglecting to accurately measure the space. Precise measurements are crucial to avoid cutting the slab incorrectly or buying an unnecessary amount of material. Another common mistake is using the wrong tools; make sure to use specialized equipment like a wet saw with a diamond blade to achieve clean cuts without cracking the porcelain.
Skimping on adhesive is another pitfall; using a high-quality adhesive specifically made for porcelain is essential to ensure a stable and long-lasting installation. Additionally, failing to level the surface can lead to a countertop that is uneven or wobbly, which impacts both appearance and function. It’s also important to properly dry-fit and seal the edges to prevent moisture damage. By being mindful of these potential missteps, you can achieve a professional finish and enjoy your porcelain countertops for years to come.
Conclusion
Installing porcelain countertops can significantly enhance the aesthetics and functionality of your kitchen or bathroom. By following the methods and considerations outlined in this guide, you can achieve a seamless installation process that ensures durability and a professional finish. Thanks for reading, and we hope this has given you some inspiration on how to install porcelain countertops!
Specialization:
- Master of wheel-throwing, hand-building, and advanced glazing techniques
- Focus on creating both functional pottery and decorative art pieces
Recognition:
- Celebrated by collectors and art enthusiasts for creating one-of-a-kind pieces that blend artistry with functionality
- Participates in local and national exhibitions, earning accolades for his innovative designs and craftsmanship
Passion:
- Deeply committed to exploring and pushing the boundaries of ceramic artistry
- Continuously experiments with new materials, firing techniques, and artistic concepts to evolve his craft
Personal Philosophy:
- Believes in the transformative power of art, aiming to evoke emotions and connections through his ceramic creations
- Advocates for sustainability in ceramics, using eco-friendly materials and practices whenever possible


