Working with clay can be a deeply rewarding experience, offering creatives the opportunity to mold and shape their ideas into tangible forms. However, one common challenge faced by both novice and experienced potters alike is dealing with clay that cracks as it dries. Understanding the causes of cracking and implementing proper techniques can make a significant difference in the quality of your finished piece. In this guide, we’ll explore how to stop clay from cracking, and share practical tips to help you maintain the integrity of your creations throughout the drying process.

The Importance of Preventing Cracking
Preventing cracking in clay is crucial for several reasons. Firstly, cracks can compromise the structural integrity of your piece, potentially leading to breakage or weakness in areas where strength is necessary. This is especially important for functional pottery, such as bowls or mugs, that need to hold liquids or weight.
Secondly, aesthetic concerns play a significant role; cracks can detract from the overall appearance of your artwork, diminishing the effort and creativity invested in its creation. Ensuring a smooth, crack-free finish allows for a polished and professional final product. Additionally, by learning and applying techniques to prevent cracking, artists gain greater control over their medium, leading to improved craftsmanship and satisfaction in their work.
Common Reasons Clay Cracks
Understanding the common reasons why clay cracks is essential in preventing these issues from arising in your work. One major cause of cracking is uneven drying. When different parts of a clay piece dry at different rates, stress is created that can lead to cracking, particularly if the surface dries much faster than the interior. Additionally, improper wedging or kneading of the clay can introduce air bubbles, which may cause breaks if not eliminated before shaping.
Another factor is the thickness of the clay—a piece that is too thick may have difficulty drying uniformly, increasing the risk of cracks. External factors such as a dry or overly humid environment can also impact the drying process, either accelerating it too quickly or causing inconsistency. Lastly, applying excessive pressure during the shaping or joining of clay can introduce weaknesses that manifest as cracks later on. By recognizing these common issues, artists can better adjust their methods and materials to foster a flawless final product.
10 Methods How to Stop Clay from Cracking
1. Choose the Right Type of Clay for Your Project

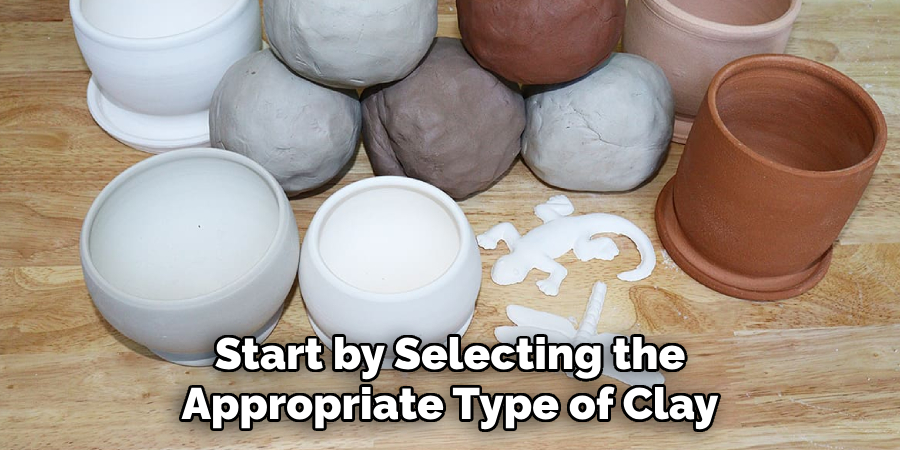
Start by selecting the appropriate type of clay for your specific project. Some clays are more prone to cracking than others, especially if they dry quickly or have a lower plasticity. Stoneware and earthenware clays are typically easier to work with for sculpting and hand-building because of their plasticity. Polymer clay is less likely to crack due to its flexibility, but air-dry clay requires more caution to prevent drying cracks. Matching your clay type to the project’s demands helps reduce the risk of cracks from the start.
2. Properly Condition the Clay Before Use
One of the most important steps to prevent cracking is conditioning your clay. Conditioning involves kneading or rolling the clay repeatedly to improve its plasticity, align the clay particles, and eliminate air bubbles that could later cause cracks. For polymer and air-dry clay, conditioning also makes the material more workable and resilient. Spend a few minutes conditioning your clay thoroughly, as this creates a more uniform structure that can withstand shaping and drying without cracking.
3. Avoid Overworking the Clay

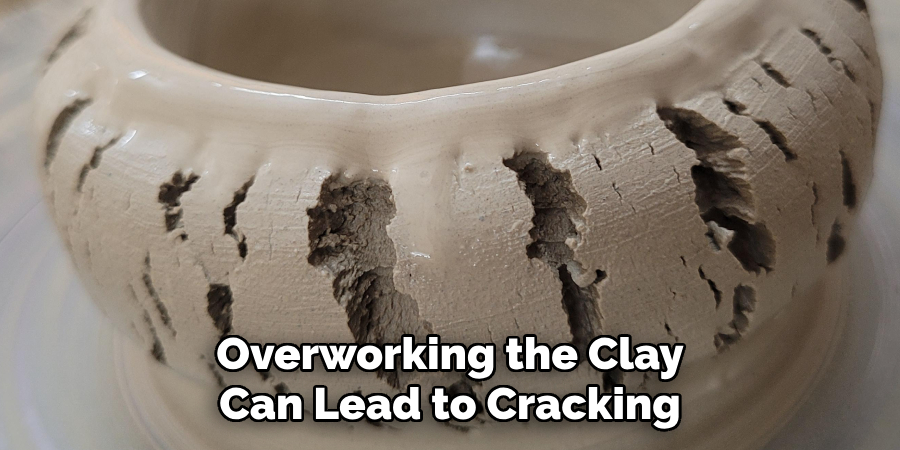
While conditioning is essential, overworking the clay can lead to cracking, particularly with natural clays. Excessive handling and reshaping cause the clay to dry out, especially if you’re using your hands directly. If you’re working with clay that tends to dry out quickly, try to avoid too much manipulation. Keep your work concise and purposeful to preserve the moisture in the clay, as this prevents small fractures from developing as it dries.
4. Add Water Sparingly and Carefully
When working with clay, particularly natural clay, adding water can help prevent cracking, but too much can be counterproductive. Apply water sparingly by dipping your fingers or using a spray bottle to lightly mist the clay surface. Too much water causes the clay to become mushy and weaken its structure, leading to cracking once it dries. A balanced amount of moisture keeps the clay malleable, reducing the risk of cracks while allowing you to shape and smooth it.
5. Keep the Clay Covered When Not in Use
To prevent premature drying and cracking, keep your clay covered whenever you’re not working with it. Plastic wrap or a damp cloth can be used to cover your project or unused clay pieces. This keeps moisture from evaporating too quickly, especially in dry or warm environments. By controlling the drying process, you can shape your piece at a comfortable pace without worrying about the clay hardening or cracking prematurely.
6. Join Pieces with Slip for a Secure Bond

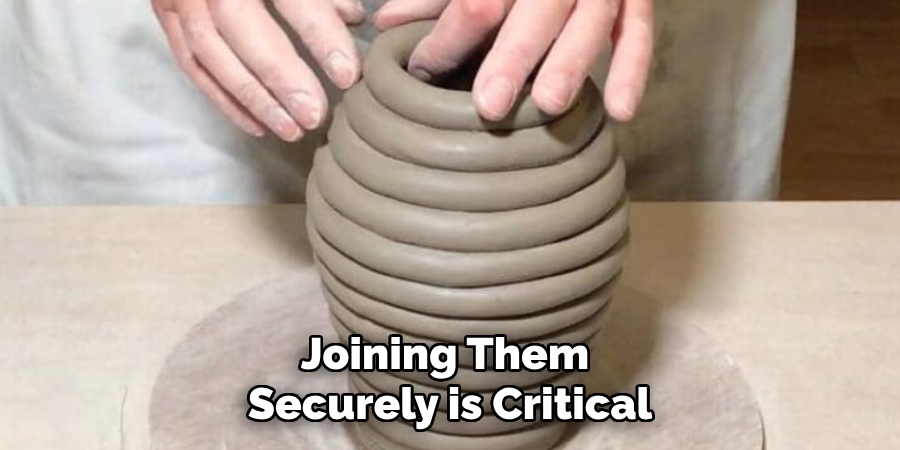
For projects involving multiple pieces of clay, joining them securely is critical to avoid cracks at the seams. Slip—a mixture of clay and water—acts as a glue when attaching pieces. Score the surfaces of both pieces by making small cuts or scratches, then apply slip to each side before pressing them together. This technique reinforces the bond between the pieces and prevents gaps or cracks from forming along the joins, which can otherwise weaken the structure.
7. Allow the Clay to Dry Slowly and Evenly
A controlled drying process is one of the most effective ways to prevent cracking, especially with air-dry or natural clay. Fast drying can lead to uneven shrinkage, which puts stress on the clay and causes cracks. After finishing your piece, place it in a cool, shaded area away from direct sunlight or heat sources. Cover it loosely with plastic or a damp cloth to slow down the drying process, allowing the moisture to evaporate evenly and reduce stress on the clay as it hardens.
8. Reinforce Vulnerable Areas
Pay attention to delicate or thin areas of your project that are more prone to cracking. These include narrow stems, thin walls, and intricate details. Reinforce these areas by adding extra clay or smoothing with slip to ensure they’re structurally sound. Applying a bit of extra clay to reinforce fragile sections adds stability and reduces the risk of stress cracks, especially during the drying or firing stages.
9. Use a Humid Environment for Drying Polymer Clay

Polymer clay doesn’t typically crack during baking, but drying the unbaked piece in a dry environment can sometimes cause it to crack. Consider placing your polymer clay in a humid area before baking to prevent it from drying too quickly. For example, cover it with a plastic sheet or place it in an airtight container for a while. This helps the clay retain moisture until you’re ready to bake it, reducing the chances of cracks forming due to sudden drying.
10. Sand and Smooth Rough Surfaces Before Drying
Sanding and smoothing the surface of your clay project before it dries or is fired helps prevent cracks from forming later. Small rough patches or uneven textures can become weak points during the drying or firing process, especially if they contain air pockets or inconsistencies. Use a damp sponge, soft brush, or fine-grit sandpaper to gently smooth the clay’s surface, removing any imperfections that might lead to cracks. This final touch ensures a strong, cohesive structure that can withstand drying and firing.
Things to Consider When Storing Clay
Proper storage is crucial to maintaining the quality and workability of your clay over time. Clay that’s not stored correctly may dry out, crack, or become contaminated with debris. Here are a few tips to consider:
- Keep Clay Airtight: Always store clay in airtight containers or plastic bags to prevent exposure to air, which causes drying. Removing as much air as possible from the container or bag helps maintain the clay’s moisture content.
- Label and Organize: If you work with multiple types of clay, label each container with the clay type and date of purchase. This helps you keep track of your supplies and ensures you use older clay first, reducing waste.
- Temperature Control: Store clay in a cool, consistent temperature environment. Extreme heat can cause the clay to soften and lose shape, while cold temperatures can make it hard and difficult to condition.
- Avoid Contaminants: Keep your clay stored separately from other materials to prevent cross-contamination. Clean your hands and tools before handling clay to maintain its purity and ensure no foreign particles are introduced.
By considering these storage tips, you can extend the longevity and quality of your clay, enabling you to achieve the best results in your art projects.
Conclusion
Preventing cracks in your clay projects involves a combination of selecting the right materials, conditioning and handling techniques, and carefully managing the drying process. By understanding the specific needs of your chosen clay type and applying the methods outlined, such as conditioning, careful moisture management, and strategic reinforcement, you can significantly reduce the risk of cracks. Thanks for reading our blog post on how to stop clay from cracking! We hope you found it helpful and informative.
Specialization:
- Master of wheel-throwing, hand-building, and advanced glazing techniques
- Focus on creating both functional pottery and decorative art pieces
Recognition:
- Celebrated by collectors and art enthusiasts for creating one-of-a-kind pieces that blend artistry with functionality
- Participates in local and national exhibitions, earning accolades for his innovative designs and craftsmanship
Passion:
- Deeply committed to exploring and pushing the boundaries of ceramic artistry
- Continuously experiments with new materials, firing techniques, and artistic concepts to evolve his craft
Personal Philosophy:
- Believes in the transformative power of art, aiming to evoke emotions and connections through his ceramic creations
- Advocates for sustainability in ceramics, using eco-friendly materials and practices whenever possible


