


Ceramic tile replacement is often necessary due to a variety of common reasons, including cracks, stains, and outdated styles. Over time, tiles can become damaged or aesthetically unappealing, diminishing the overall appearance of a space. Cracked or chipped tiles affect the visual appeal and can pose safety hazards and lead to water damage if not addressed. Stains from spills or surface wear can be difficult to clean and impact the hygiene of an area. Opting to replace damaged tiles enhances a room’s aesthetic and structural integrity.

The encouragement to undertake a tile replacement project lies in its boost to a home’s value and appeal. The process involves removing the damaged tiles, preparing the area, installing the new tiles, and grouting. Learning how to replacing ceramic tile with the right approach ensures long-lasting, flawless results while giving an old space new life.
Gathering Materials and Tools
Required Materials
When planning for how to replace ceramic tile, having the right materials is essential to ensure a successful outcome. Start by selecting replacement tiles that match or complement your existing design. You’ll also need grout to fill the spaces between tiles, and tile adhesive to provide a strong bond to the substrate. Don’t forget the grout sealer, which protects the grout from moisture and stains. Depending on your specific requirements, consider additional materials like spacers for even installation and a leveling compound if the subfloor needs adjustments. Collecting these items beforehand will streamline your tile replacement project.
Essential Tools for Tile Replacement
Equipping yourself with the proper tools will make the process of replacing ceramic tiles much more manageable. A chisel and hammer are fundamental for breaking and removing old tiles. A notched trowel will help you apply adhesive evenly to the surface, while a putty knife assists in the removal of debris. Use a grout float for effective grout application and a sponge to clean excess grout from the tile surface. Additional tools, such as a utility knife for cutting and trimming tiles, and safety gear, like gloves and goggles for protection, are also necessary to avoid potential hazards and ensure precision.
Preparing the Area and Ensuring Safety
Safety Precautions and Gear

Before beginning the tile replacement project, it is essential to prioritize personal safety by wearing the appropriate protective gear. Safety glasses are crucial to shield your eyes from flying debris and dust particles, which can be a byproduct of removal. Gloves protect your hands from sharp edges, broken tiles, and harsh chemicals. Additionally, wearing a dust mask is important to prevent inhalation of dust and other potentially harmful particles, ensuring your respiratory health throughout the procedure.
Clearing the Work Area and Protecting Surroundings
Remove any loose items and furniture from the work zone to safeguard the surrounding area. Cover adjacent tiles, walls, and surfaces with protective materials like plastic sheeting or drop cloths to prevent accidental damage from tools or dust. Consider using painter’s tape to secure protective coverings in place, ensuring that the workspace remains tidy and that nearby surfaces stay unharmed during the tile replacement process.
Removing the Damaged Tile
Loosening and Lifting the Tile
The first step in removing a damaged tile involves carefully breaking it up using a chisel and hammer. Begin by placing the chisel at the center of the tile to create an initial fracture, minimizing the risk of damaging surrounding tiles. Gently tap the chisel with a hammer to gradually break the tile into smaller pieces. It is crucial to work slowly and methodically, ensuring you maintain control over the process. Once the tile begins to fracture, continue chiseling along the cracks until the pieces can be easily lifted away. Keep all nearby tiles secured with painter’s tape to protect them while removing the damaged ones.
Clearing Away Old Adhesive and Grout
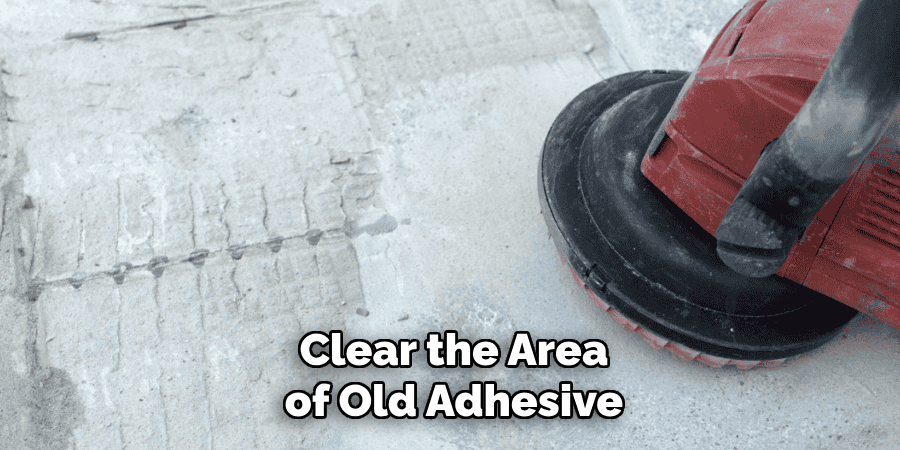
After lifting the broken tile, the next step is to clear the area of old adhesive and grout to achieve a clean, even surface. Use a putty knife or a scraper to remove any residual adhesive stuck to the substrate. It’s important to scrape thoroughly, as any remaining adhesive may hinder the installation of the replacement tile. Follow up by clearing out any old grout left in the spaces between the tiles using the same tools. Once the old grout and adhesive are fully removed, carefully sweep the area to ensure no loose debris remains, preparing the surface for the new tile installation.
How to Replacing Ceramic Tile: Preparing the Surface for New Tile Installation
Cleaning the Exposed Surface
To ensure optimal adhesion for the new tile, thoroughly clean the exposed surface once the old tile and adhesive are removed. Use a vacuum or a damp cloth to eliminate any lingering dust or debris. Then, employ a cleaning solution appropriate for the substrate to remove any greasy or oily residues that could interfere with the tile adhesive. After cleaning, allow the surface to dry completely before proceeding to the next steps. Having a smooth and clean substrate is critical to achieve a flawless, long-lasting installation.
Leveling and Repairing the Subfloor, if Necessary
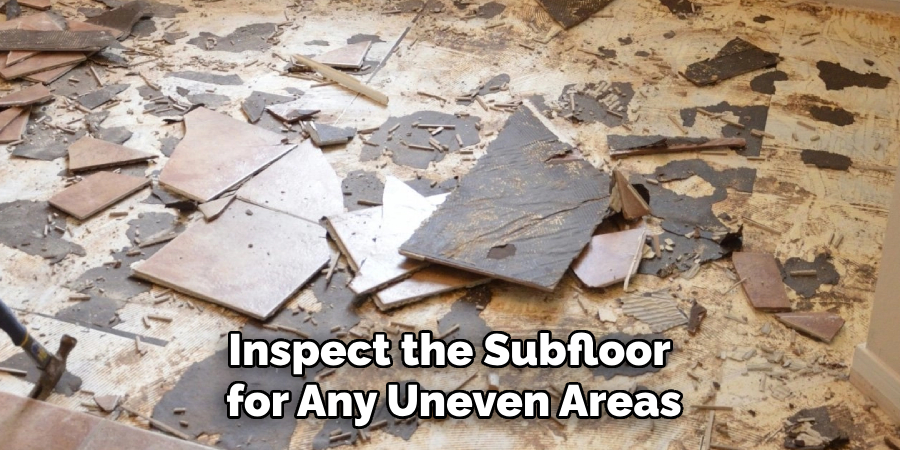
Once the exposed surface is clean, inspect the subfloor for any uneven areas or damage. Small cracks or holes can be filled with a patching compound, while significant irregularities may require the application of a leveling compound. When applying a leveling compound, follow the manufacturer’s instructions for mixing and drying times to ensure a stable and even base. Use a straight edge or level to check the flatness of the surface, making adjustments as required. Addressing these foundational issues lays the groundwork for a smooth and successful tile installation process.
How to Replacing Ceramic Tile: Installing the Replacement Tile
Applying Adhesive to the Surface
Begin by selecting an appropriate tile adhesive suitable for your specific substrate and tile type. To ensure even coverage, use a notched trowel, spreading the adhesive in a consistent, combed method across the clean, prepared surface. This approach promotes strong adhesion and allows for minor adjustments during tile placement. Hold the trowel at a 45-degree angle to create uniform ridges, which are crucial for preventing gaps and securing the tile effectively. Don’t apply too much adhesive, as excess can seep into grout spaces and complicate installation.
Positioning and Setting the Tile
Carefully align the replacement tile with the surrounding tiles, gently pressing it into the adhesive to achieve a firm bond. Start by positioning one edge of the tile first, ensuring it remains parallel with adjacent tiles to maintain a consistent grout line. Once in place, use a level to verify that the tile is even and flush with neighboring tiles, making any necessary adjustments by pressing down slightly or adding small amounts of adhesive if required. Incorporate spacers between tiles to maintain uniform joints, making grouting easier and producing a more polished finish.
Grouting the Tile and Finishing Touches
Applying Grout Around the New Tile
Once the adhesive has been set and the tile is securely in place, the next step is to fill the joints with grout. Begin by selecting a grout that suits the color and type of your tiles. Mix the grout according to the manufacturer’s instructions until you achieve a smooth, paste-like consistency. Using a rubber float, apply the grout at a 45-degree angle, pressing it firmly into the gaps to ensure full coverage. Work diagonally across the tiles to effectively fill the joints, ensuring no gaps are left between the tiles. This step is crucial to prevent moisture from seeping beneath the tile, which could compromise the installation.
Cleaning Excess Grout and Final Touches
After the grout has been applied, it is important to clean any excess grout from the tile surfaces before it hardens. Use a damp sponge or cloth, wiping diagonally across the tiles to avoid pulling grout out from between the joints. Rinse the sponge frequently to ensure it remains clean, and gently swipe over the tiles until they appear clear and polished. Allow the grout to cure according to the manufacturer’s instructions, which typically takes 24 to 72 hours. For a sparkling finish, wipe down the tiles once more with a dry cloth and seal the grout as recommended to enhance durability and resistance to staining.
Sealing and Protecting the New Tile
Applying Grout Sealer
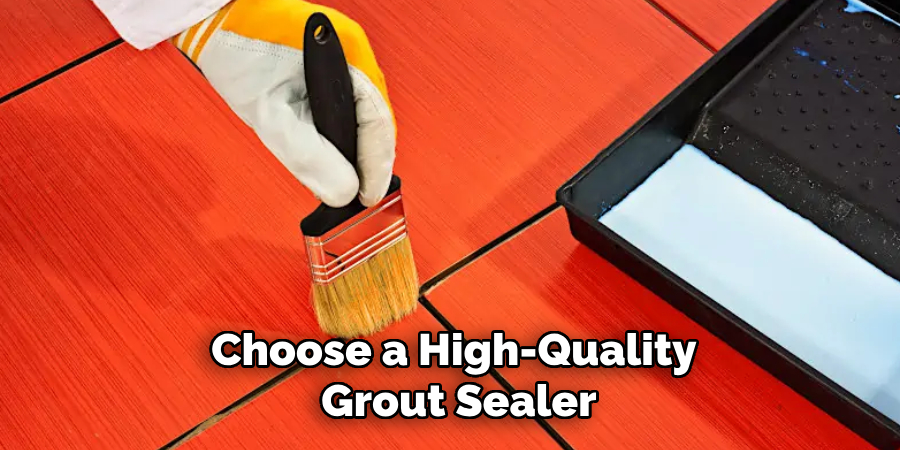
After the grout has cured, apply a grout sealer to safeguard against stains and moisture. Choose a high-quality grout sealer designed for your specific tile type and follow the manufacturer’s instructions. Use a brush or applicator to apply the sealer evenly across the grout lines, ensuring full coverage. Allow the sealer to penetrate and dry completely, applying additional coats if recommended. This crucial step protects the grout, preserving its appearance and prolonging the life of your tile installation.
Regular Maintenance Tips for Longevity
Regular maintenance is key to maintaining the beauty and durability of your tile and grout. Use a mild detergent and a soft cloth or mop for routine cleaning, avoiding harsh chemicals that can damage grout integrity. Periodically inspect your tiles and grout for any signs of wear or damage, addressing issues promptly to prevent further deterioration. Incorporating these cleaning and care practices ensures your tile installation remains pristine and long-lasting.
Conclusion
In summary, removing damaged tiles, preparing the area, installing new tiles, and grouting can be rewarding. By following these steps diligently, even DIY enthusiasts can confidently master “how to replacing ceramic tile” with excellent results. This project improves the aesthetic and functional quality of a space and offers substantial satisfaction in achieving a refreshed, flawless tile surface. Embrace this opportunity to enhance your home with a seamless tile replacement, knowing that with patience and attention to detail, a professional finish is well within reach.
Specialization:
- Master of wheel-throwing, hand-building, and advanced glazing techniques
- Focus on creating both functional pottery and decorative art pieces
Recognition:
- Celebrated by collectors and art enthusiasts for creating one-of-a-kind pieces that blend artistry with functionality
- Participates in local and national exhibitions, earning accolades for his innovative designs and craftsmanship
Passion:
- Deeply committed to exploring and pushing the boundaries of ceramic artistry
- Continuously experiments with new materials, firing techniques, and artistic concepts to evolve his craft
Personal Philosophy:
- Believes in the transformative power of art, aiming to evoke emotions and connections through his ceramic creations
- Advocates for sustainability in ceramics, using eco-friendly materials and practices whenever possible