


When installing new ceramic brake pads and rotors, proper break-in—or bedding—is crucial to ensure optimal performance and longevity. Bedding helps to transfer an even layer of brake pad material onto the rotor surface, which enhances stopping power and prevents issues such as noise and vibration.
This process can significantly improve the responsiveness and durability of your braking system. Whether you’re a seasoned mechanic or a do-it-yourself enthusiast, understanding the steps on how to break in ceramic brake pads and rotors to effectively break in your ceramic brakes is essential for maintaining safety and achieving maximum efficiency.
Why Break in Ceramic Brake Pads and Rotors?
Ceramic brake pads have become increasingly popular due to their durability, reduced dust production, and superior braking performance. However, unlike traditional brake pads that require a break-in period of 200-300 miles, ceramic brake pads need only about 50 miles to reach optimal performance.
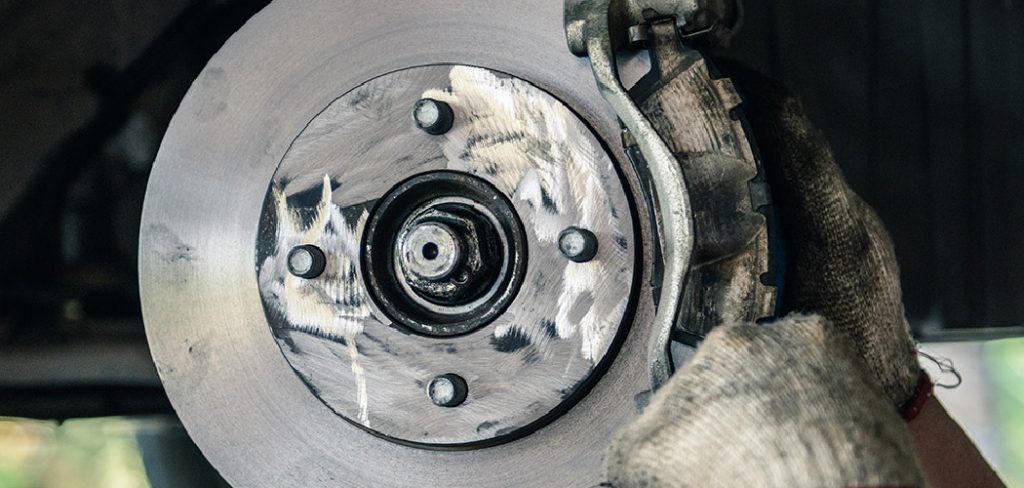
During the manufacturing process of ceramic brake pads and rotors, a layer of adhesive is applied to the surface. This adhesive can create a glaze over the rotor’s surface during the initial use if not properly bedded in. A glazed rotor surface can reduce the friction between the pad and rotor resulting in decreased braking power and potentially causing noise and vibration. Therefore, a proper break-in process is crucial for ceramic brake pads and rotors to reach their maximum efficiency.
Needed Materials
To break in your ceramic brake pads and rotors, you will need the following materials:
- New Ceramic Brake Pads
- New Set of Rotors (if Replacing Old Ones)
- Jack and Jack Stands
- Lug Wrench
8 Steps on How to Break in Ceramic Brake Pads and Rotors
Step 1: Find an Open Road
To begin the break-in process, locate an open stretch of road with little to no traffic. This will allow you to safely perform the series of stops needed during the bedding procedure without interruption. An ideal location is typically a long, straight road with minimal side streets and stop signs to ensure consistent speed and control over the vehicle.

Safety is paramount, so ensure the area is well-lit if conducted during low-light conditions and obey all traffic laws while performing the break-in procedure.
Step 2: Properly Secure Your Vehicle
After locating an open road, safely park your vehicle on a level surface and proceed to secure it with the parking brake. Make sure the vehicle is in Park (P) or in gear for manual transmission cars.
Next, loosen the lug nuts on all four wheels using a lug wrench, but do not completely remove them. This step will make it easier to remove the wheels once you have lifted the car with a jack.
Step 3: Raise Your Vehicle With a Jack
Using your jack and jack stands, lift one side of your vehicle at a time so that both front or rear wheels are off the ground at once. It is essential to support the car’s weight with jack stands for safety and stability.
The recommended lifting points for most vehicles are typically found on the frame rails or designated lift points. Refer to your vehicle’s owner’s manual for specific instructions on where to place the jack and stands.
Step 4: Removing The Wheels
Once the vehicle is securely raised on jack stands, fully remove the lug nuts you previously loosened using the lug wrench. Carefully take off each wheel and set them aside in a safe location away from your working area. Removing the wheels exposes the brake components, allowing you access to inspect and replace the old brake pads and rotors if necessary.
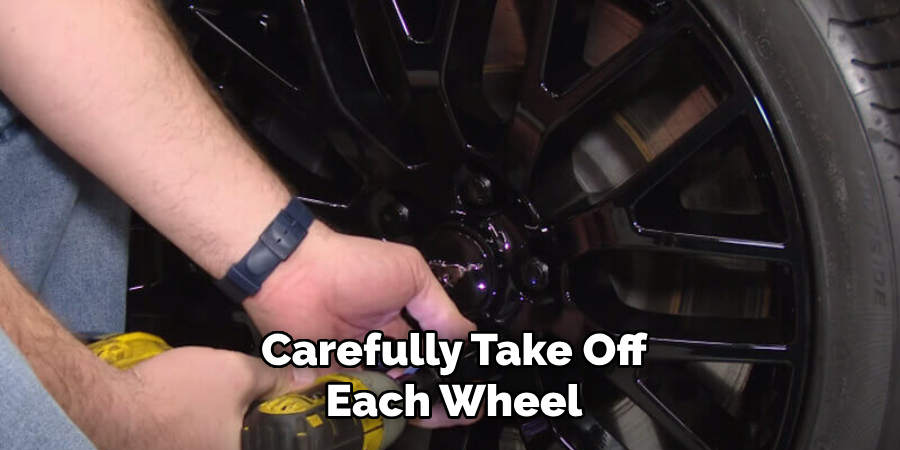
Ensure each wheel is handled with care to prevent any damage to the rims or surrounding areas. This step is crucial for providing the space needed to continue the brake installation process efficiently.
Step 5: Install The Ceramic Brake Pads
Before installing the new ceramic brake pads, take a moment to inspect the rotor surface for any debris or contamination. If necessary, clean the rotors with brake cleaner and a lint-free cloth. Next, install the new ceramic brake pads on each wheel, following the manufacturer’s instructions. Ensure they are correctly placed and secured in their designated slots.
You can also choose to add a thin layer of brake lubricant to the back of each pad, but avoid getting any on the rotor surface or braking material.
Step 6: Reinstall The Wheels
Once you have installed the new ceramic brake pads, carefully place each wheel back onto its respective axle. Make sure they are securely mounted with your lug wrench before tightening the lug nuts. Be careful not to over-tighten them as it can cause damage to the threads.
It is recommended to tighten the lug nuts in a star pattern, ensuring an even and secure fit.
Step 7: Begin The Break-in Process
To begin the break-in process, start your vehicle and drive at approximately 40 mph. Gently apply moderate pressure on the brakes for about five seconds, then release the pedal and allow the car to coast for 15 seconds.
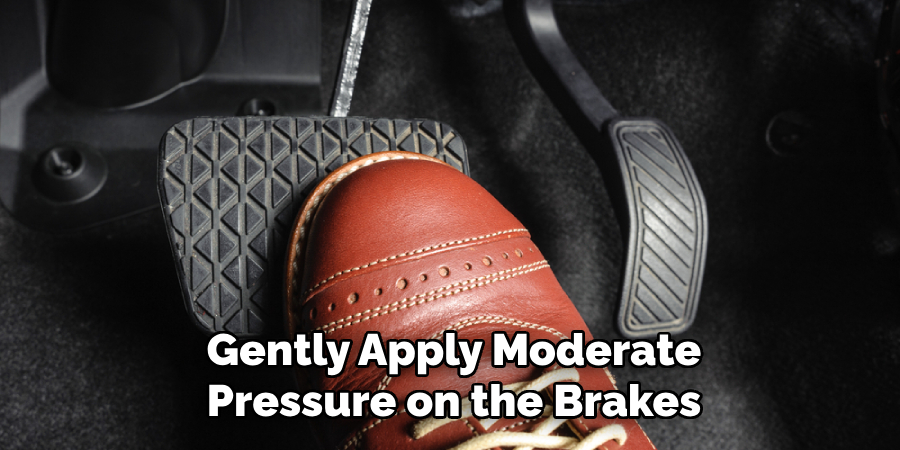
Repeat this process four or five times to evenly transfer brake pad material onto the rotor surface. This procedure generates heat that helps with bonding the brake pad material to the rotor, resulting in improved braking performance.
Step 8: Test and Evaluate
After completing the break-in process, return to your starting point and park your vehicle safely. Allow your brakes to cool down for about half an hour before driving again.
Once they have cooled, take your car for a test drive on a quiet road and be mindful of any changes in braking performance or noises. If you experience any issues such as excessive noise or vibration, it may indicate that the pads and rotors need further bedding or may require additional maintenance.
Following these steps on how to break in ceramic brake pads and rotors will ensure that your ceramic brake pads and rotors reach their full potential, providing you with the best possible braking performance. Remember to always follow the manufacturer’s instructions for your specific vehicle and brake components. Enjoy safe and efficient driving with your new ceramic brake pads and rotors!
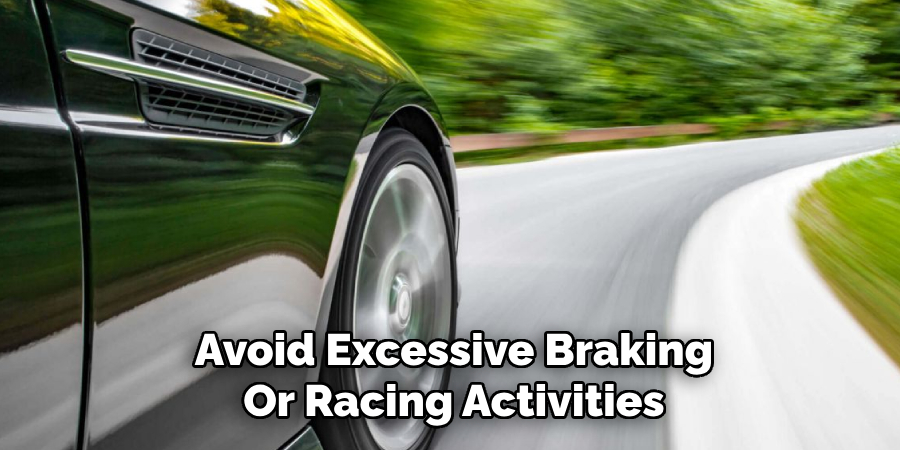
Post-Break-In Care
Once the break-in process is complete, it is essential to maintain proper care for your new ceramic brake pads and rotors. Regularly check for any signs of wear or damage, such as uneven pad wear or cracking on the rotor surface.
It is also crucial to avoid excessive braking or racing activities during the first 500 miles after the break-in process. This period allows the brake components to fully settle in and reach their optimal level of performance.
Regularly inspecting and maintaining your ceramic brakes will ensure their longevity and efficiency for a safer driving experience. So, remember to take care of them regularly!
Frequently Asked Questions
Q: Can I Perform the Break-in Process in a Parking Lot or on City Streets?
A: No, we recommend finding an open road with minimal traffic to ensure consistency and safety during the bedding procedure. The stops and speeds required during the break-in process may not be suitable for busy parking lots or city streets.
Q: How Long Does It Take to Break in Ceramic Brake Pads and Rotors?
A: The break-in process typically takes about 30 minutes, including cooling time. However, it may take a few hundred miles of regular driving before your new ceramic brake pads and rotors reach their maximum efficiency.
Q: What Happens If I Don’t Bed in My Ceramic Brake Pads and Rotors?
A: Not bedding in your ceramic brake pads and rotors can result in reduced braking performance, increased stopping distances, and potentially premature wear on the brake components. It is essential to follow the break-in process for optimal safety and efficiency.
Q: Can I Reuse My Old Brake Pads When Changing to Ceramic Brake Pads?
A: No, it is not recommended to reuse old brake pads when switching to ceramic ones. Different materials and densities can affect braking performance, and mixing them may cause uneven wear or damage to the brakes. Always replace all four brake pads at once for optimal results.
Conclusion
Upgrading to ceramic brake pads and rotors can significantly enhance your vehicle’s braking performance by offering smoother and quieter operations compared to traditional brake pads. By following the detailed steps on how to break in ceramic brake pads and rotors for installation and the essential break-in process, drivers can ensure maximum efficiency and longevity of their new components.
Prioritizing safety and adhering to the manufacturer’s guidelines will ensure that the ceramic brakes perform optimally, providing the peace of mind needed for every journey. Whether you’re new to brake maintenance or an experienced mechanic, understanding and executing these procedures is crucial for enjoying the full benefits of your advanced braking system.
Specialization:
- Master of wheel-throwing, hand-building, and advanced glazing techniques
- Focus on creating both functional pottery and decorative art pieces
Recognition:
- Celebrated by collectors and art enthusiasts for creating one-of-a-kind pieces that blend artistry with functionality
- Participates in local and national exhibitions, earning accolades for his innovative designs and craftsmanship
Passion:
- Deeply committed to exploring and pushing the boundaries of ceramic artistry
- Continuously experiments with new materials, firing techniques, and artistic concepts to evolve his craft
Personal Philosophy:
- Believes in the transformative power of art, aiming to evoke emotions and connections through his ceramic creations
- Advocates for sustainability in ceramics, using eco-friendly materials and practices whenever possible