


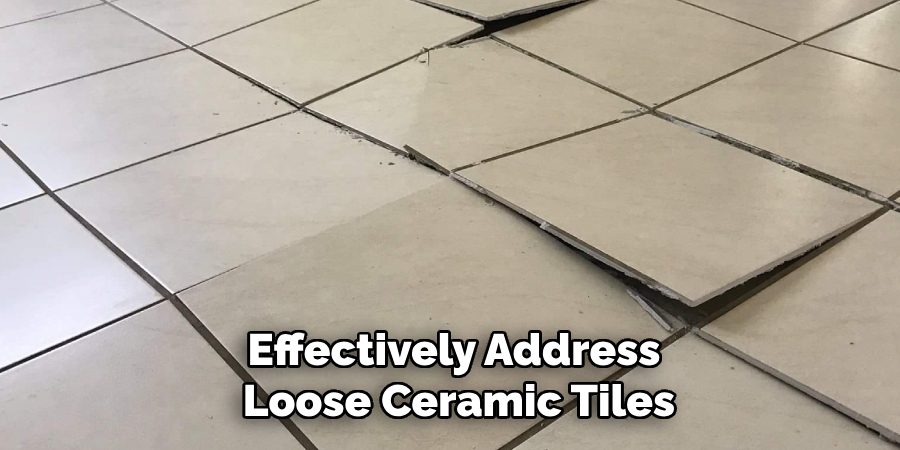
Loose ceramic tiles can be a common problem in homes, often resulting from moisture seeping beneath the tiles, natural wear and tear over time, or improper installation methods. When tiles become loose, they not only pose a risk of becoming completely detached but can also create openings that might invite further moisture damage to the underlying surfaces.

Additionally, loose tiles can detract from the overall aesthetic appeal of your flooring or wall surfaces, making areas of your home appear neglected or poorly maintained. Therefore, addressing loose ceramic tiles promptly is crucial not just for maintaining the beauty of your space but also for preventing more extensive damage in the long run. This article aims to provide you with a comprehensive step-by-step guide on how to repair loose ceramic tile, ensuring that you can restore your surfaces to their optimal condition effectively and efficiently.
Identifying the Problem
Reasons for Loose Ceramic Tiles
Loose ceramic tiles can be attributed to several common causes. One primary reason is poor adhesion, which typically arises from the use of inadequate adhesives or improper bonding during installation. Excess moisture is another common culprit, often resulting from leaks or high humidity that weakens the adhesive over time.
Additionally, settling the subfloor can create movement, leading tiles to become dislodged. Natural wear and tear, including regular foot traffic, can contribute to tiles loosening over time. Lastly, improper installation, such as insufficient adhesive coverage or improper drying times, can result in tiles losing their adherence to the subfloor. Recognizing loose tiles involves being alert to signs such as hollow sounds when tapped, visible gaps between tiles or grout lines, and tiles that visibly shift or wobble under pressure.
Assessing the Extent of the Damage
A thorough inspection of the area is essential to effectively address loose ceramic tiles. Begin by tapping on the tiles with the handle of a screwdriver or similar tool, listening for hollow sounds that suggest looseness. Observe for any visible gaps or shifting tiles as you apply pressure across the tile surface. Determining whether the issue is isolated to a single tile or if multiple tiles are affected is crucial. While inspecting, check for any underlying issues such as mold or water damage, which may be signaled by discoloration or dampness, and examine the subfloor for any signs of damage. Addressing these underlying problems is crucial during the repair process to ensure long-lasting results and prevent future occurrences.
Preparing the Area for Repair
Clear the Area Around the Loose Tile
Before beginning the repair process, ensure the area around the loose tile is clear of any furniture, rugs, or obstacles that may hinder accessibility. This allows for a safe and efficient workspace. Carefully remove any nearby items to prevent accidental damage. Prioritize safety by wearing protective gloves and eye protection while handling tools or adhesives. This precaution helps prevent injuries from sharp edges or harmful substances during the repair.
Clean the Tile and Surrounding Surface
Start by gently wiping the loose tile and surrounding grout lines with a damp cloth, removing any surface dirt and debris. A plastic scraper can help eliminate any remaining old adhesive. Follow this with a mild detergent solution to ensure all residues are eradicated. Rinse thoroughly with water and let the area dry completely. This thorough cleaning is essential, as a clean surface is crucial for achieving a strong bond when reattaching the tile.
Removing the Loose Tile
Tools You’ll Need
To effectively remove the loose tile, gather the following essential tools: a utility knife, chisel, hammer, flathead screwdriver, and safety gloves. These tools will help ensure a smooth and safe removal process.
Step-by-Step Process for Removing the Tile
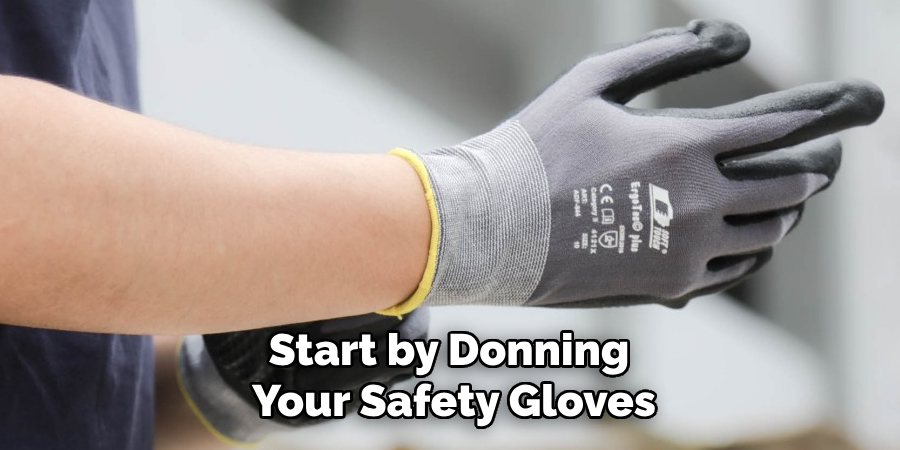
Start by donning your safety gloves to protect your hands throughout the process. Insert a utility knife into the grout lines around the loose tile to cut through any remaining grout, creating a clear separation from the surrounding tiles. Next, position a chisel at the edge of the tile at a low angle. Gently tap the chisel with a hammer to ease the tile upwards, moving systematically around all edges to loosen it evenly without damaging adjacent tiles.
Use a flathead screwdriver to gently wedge the tile from the opposite side for further support if needed. Once the tile is free, carefully scrape off the old adhesive from the underside and the subfloor or wall using the chisel or a scraper. If you plan to reuse the tile, handle it delicately to avoid any chips or cracks. Cleaning off all adhesive residue is crucial to ensure a proper fit and adhesion when reinstalling.
Preparing the Subsurface
Inspect the Subfloor or Wall for Damage
Before reattaching the tile, it’s crucial toinspecting the subfloor or wall for any moisture, cracks, or damage is crucialinspect the subfloor or wall for any moisture, cracks, or damage. Begin by visually examining the surface for any signs of dampness or water stains, which may indicate hidden moisture. Use a moisture meter if necessary to ensure the area is completely dry. Check for any visible cracks or uneven surfaces that might hinder tile installation. Repair any discovered cracks with appropriate filler or patching compounds, and allow them to dry thoroughly. Ensuring the subsurface is in optimal condition will help achieve a lasting repair.
Applying New Adhesive
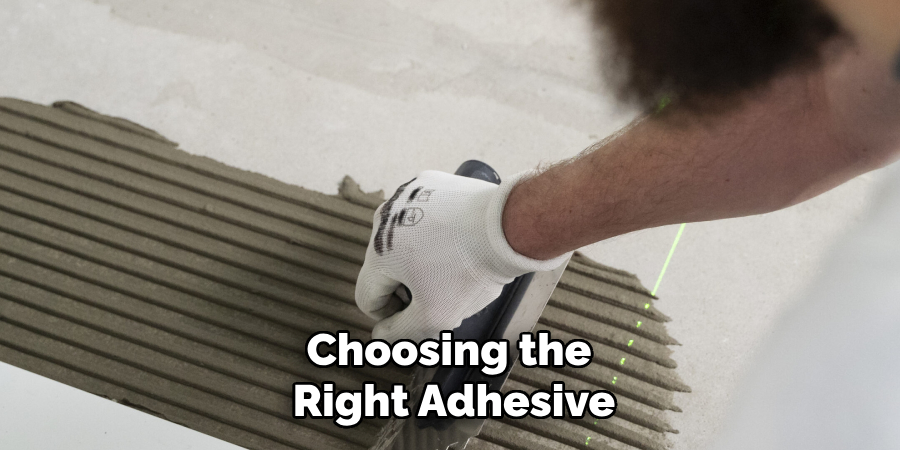
Choosing the right adhesive is fundamental for a successful tile reinstallation. Opt for thin-set mortar or mastic, depending on the specific requirements of your project and the type of tile. Thin-set mortar is often suitable for floors, while mastic is preferred for walls. Mix the adhesive according to the manufacturer’s instructions, ensuring a smooth consistency. Using a notched trowel, apply the adhesive to the prepared subfloor or wall. Hold the trowel at a 45-degree angle to spread the adhesive evenly, creating uniform ridges that cover the full area beneath where the tile will be placed. This even application ensures strong adhesion and prevents future tile loosening.
How to Repair Loose Ceramic Tile: Reinstalling the Tile
Positioning the Tile
Carefully position the tile back into place, ensuring it is perfectly aligned with the surrounding tiles. Make sure the edges are flush with adjacent tiles to maintain a level surface. Gently press down on the tile and apply even pressure across its surface to ensure it bonds effectively with the adhesive beneath. Ensuring this proper alignment and pressure will promote a strong, lasting attachment.
Using Tile Spacers
Insert tile spacers between the repaired tile and its neighboring tiles. These spacers help maintain consistent gaps for grouting, resulting in a uniform appearance. Proper use of spacers ensures the grout lines remain aligned across the entire tiled area, enhancing the overall aesthetic.
Letting the Adhesive Set
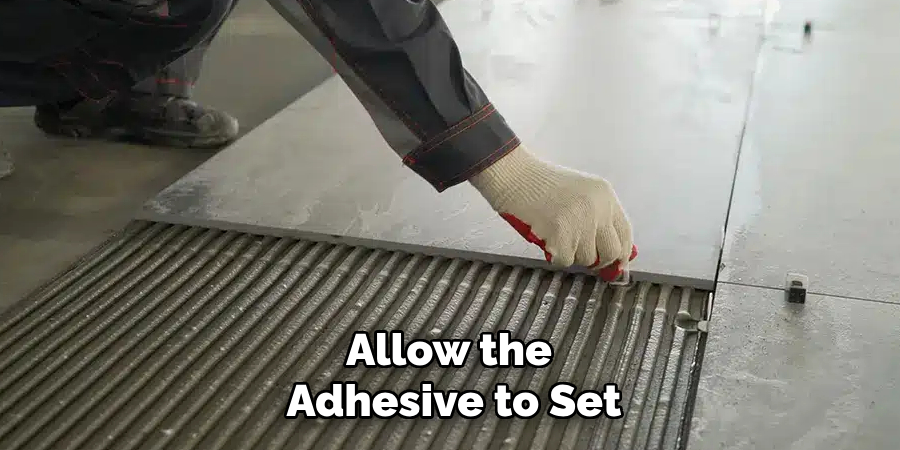
Allow the adhesive to set for at least 24 hours before walking on the tile or undertaking further steps. General drying time can vary depending on temperature and humidity levels, so ensure optimal conditions by maintaining a moderate, stable environment. Adhering to these guidelines is crucial for achieving strong, secure adhesion and preventing future issues.
Regrouting and Finishing the Repair
Applying Grout to the Tile Edges
After the adhesive has been set, it’s time to apply grout to the tile edges for a seamless finish. Mix the grout according to the manufacturer’s instructions, achieving a smooth, peanut-butter-like consistency. Using a rubber grout float, apply the grout at a 45-degree angle to the tile surface, pressing it firmly into the joints to ensure thorough filling. Once all the gaps are filled, glide the float diagonally across the tiles to remove excess grout from the surface and prevent leaving residue in the surrounding grout lines. Allow the grout to set for about 15 minutes or as recommended.
Cleaning the Tile Surface
With a damp sponge, gently wipe the tile surface to remove any grout haze, frequently rinsing the sponge with clean water to avoid smearing. Use circular motions to avoid disturbing the grout in the joints. This process reveals a clean and shiny tile surfce, free of haze. After allowing the grout to cure for the recommended time, typically 48 to 72 hours, seal the grout lines with a high-quality grout sealer. This step is essential to protect the grout from moisture and stains, ensuring longevity and maintaining the pristine look of your finished repair.
Inspecting the Repair and Final Touches
Checking the Tile for Stability
Once the grout has fully cured, you’ll want to check the stability of the repaired tile. Gently press down on the tile, moving your hand around its surface to detect any movement or signs of instability. If you notice the tile shifting, it may indicate insufficient adhesive or issues with the subfloor. In such cases, consider reapplying adhesive by carefully lifting the tile and ensuring the subfloor is level. Ensure the tile is well-aligned and let the adhesive set again before regrouting.
Final Cleaning and Touch-Up
To finish, give the entire floor or wall a thoroughthoroughly clean the entire floor or wallcleaning. Wipe down the grout lines using a damp cloth to remove any remaining grout residue, ensuring a spotless look. Check for imperfections like uneven grout lines and smooth them if needed. If the grout appears patchy, touch it up and allow it to cure once more. Finally, reapply grthe ut sealer for added protection, maintaining a fresh and polished appearance.
Conclusion
In this guide on how to repair loose ceramic tile, we’ve walked through essential steps to ensure a successful repair. Starting with careful tile removal and subsurface preparation, these steps pave the way for a solid foundation. Proper adhesive application and precise tile positioning are crucial for avoiding future issues. Regrouting and diligent final touches secure a seamless appearance. Addressing loose tiles promptly prevents further damage and maintains the beauty of your ceramic tiles. Remember to conduct regular cleaning and inspections to catch any potential issues early, ensuring the longevity and durability of your tiled surfaces.
Specialization:
- Master of wheel-throwing, hand-building, and advanced glazing techniques
- Focus on creating both functional pottery and decorative art pieces
Recognition:
- Celebrated by collectors and art enthusiasts for creating one-of-a-kind pieces that blend artistry with functionality
- Participates in local and national exhibitions, earning accolades for his innovative designs and craftsmanship
Passion:
- Deeply committed to exploring and pushing the boundaries of ceramic artistry
- Continuously experiments with new materials, firing techniques, and artistic concepts to evolve his craft
Personal Philosophy:
- Believes in the transformative power of art, aiming to evoke emotions and connections through his ceramic creations
- Advocates for sustainability in ceramics, using eco-friendly materials and practices whenever possible