


Are you experiencing frustration when your ceramic cookware starts to chip or crack? You may be wondering how to fix ceramic cookware and extend the lifespan of your favorite kitchen tools. Luckily, there are some simple steps you can take to repair and maintain your ceramic cookware.
Ceramic cookware is prevalent in many kitchens due to its non-stick surface, attractive design, and even heat distribution. However, its surface can become chipped, cracked, or scratched over time, impacting its functionality and appearance. Rather than replacing damaged cookware, many issues can be addressed with simple repair techniques.
By using the right tools and following the proper steps, you can extend the life of your ceramic cookware and continue enjoying its benefits in the kitchen. This guide will provide practical tips and solutions for effectively fixing common problems with ceramic cookware.
What Are the Causes of Damage to Ceramic Cookware?
Before we dive into the repair process, it’s essential to understand the common causes of damage to ceramic cookware. This knowledge can help you take preventative measures and maintain your cookware for years.
One major factor that can lead to cracks or chips in ceramic cookware is sudden temperature changes. For example, placing a hot pot directly on a cold surface or transferring a hot pot from the stovetop to a cool countertop can cause thermal shock and damage. Always allow your cookware to cool down gradually before exposing it to extreme temperature changes.
Another culprit for damaged ceramic cookware is metal utensils. Using metal utensils on the surface of your cookware can cause scratches and wear down the non-stick coating. Always opt for wooden, silicone, or plastic utensils instead.
Accidents also happen in the kitchen; dropping or hitting ceramic cookware against hard surfaces can lead to cracks or chips. It’s essential to handle your cookware with care and avoid rough handling.
What Will You Need?
To fix ceramic cookware, you will need the following tools and materials:
- Epoxy Adhesive or Ceramic Repair Kit: This will fill in cracks and chips.
- Sandpaper: It’s essential to have a variety of grits to smooth out the surface of your cookware.
- Small Paintbrush or Toothpick: These can help apply the adhesive or fill small cracks.
- Protective Gloves and Mask: When working with epoxy, protecting your skin and avoiding inhaling fumes is crucial.
Now that you have gathered all the necessary supplies, let’s get into the step-by-step guide for repairing ceramic cookware.
10 Easy Steps on How to Fix Ceramic Cookware
Step 1: Clean the Damaged Area
The first step in repairing your ceramic cookware is thoroughly cleaning the damaged area. Use warm water, mild dish soap, and a soft sponge to remove any grease, dirt, or food particles that may be present. Rinse the area well and ensure it is free of any soap residue, as this could interfere with the adhesive’s ability to bond correctly. After cleaning, gently dry the area using a lint-free cloth or allow it to air dry completely. The surface must be spotless and dry before proceeding to ensure the best possible repair. If the crack or chip is deep, you may also want to carefully inspect it for any loose ceramic pieces and remove them.
Step 2: Sand the Damaged Area
Once the damaged area is clean and dry, gently sand it using fine-grit sandpaper. This step helps to slightly roughen the surface, which improves the adhesive’s ability to stick securely. Be sure to sand only the immediate area around the crack or chip, avoiding too much pressure to prevent further damage. After sanding, wipe away any dust or debris with a damp, lint-free cloth and allow the area to dry completely before moving on to the next step.
Step 3: Apply the Adhesive
Carefully apply the ceramic adhesive or epoxy to the damaged area using a small brush or applicator. Ensure the adhesive is evenly distributed and fully covers the crack or chip. If repairing a more resounding crack, consider applying the adhesive in layers to ensure a stronger bond. Follow the manufacturer’s instructions regarding curing time; this step is crucial for the adhesive to set correctly. Avoid touching or moving the area while the glue is drying to ensure the repair holds firmly.
Step 4: Smooth the Repaired Area
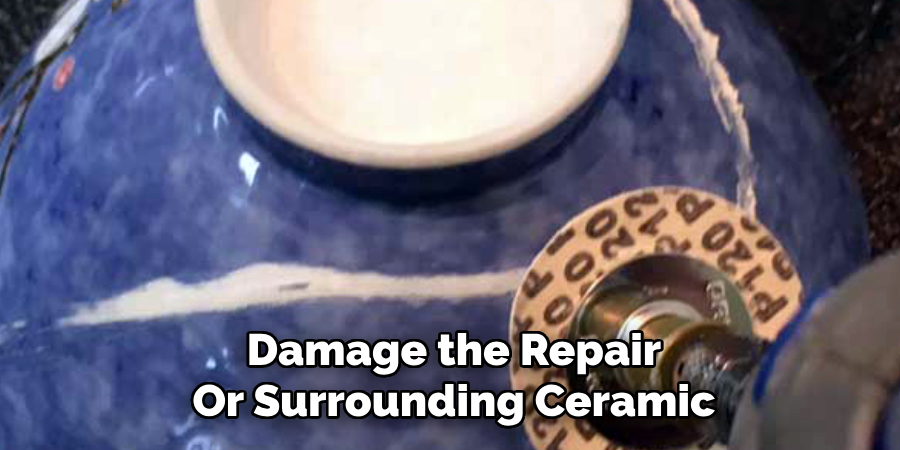
Once the adhesive has fully cured, use fine-grit sandpaper to smooth the repaired area gently. This step is essential to blend the repaired section with the surrounding surface and remove any excess adhesive that might have dried unevenly. Work carefully to avoid sanding too deeply, as this could damage the repair or surrounding ceramic. After sanding, clean the area with a damp, lint-free cloth to remove any dust or residue. For a seamless finish, inspect the area closely to ensure it feels smooth to the touch and matches the rest of the surface. If necessary, touch up with additional adhesive or sanding until the repair looks uniform.
Step 5: Apply a Protective Sealant
To ensure the repaired area remains durable and resistant to potential damage, apply a ceramic sealant over the surface. Use a small brush to carefully coat the repaired section, allowing the sealant to penetrate and create a strong barrier. Follow the manufacturer’s instructions for the drying time and curing process. This step protects the repair and helps restore the glossy finish of the ceramic, making the repaired area less noticeable. Once the sealant has thoroughly dried, the item is ready for use.
Step 6: Final Inspection and Maintenance
After completing the repair process, examine the item thoroughly to ensure the repair is secure and visually cohesive with the rest of the surface. Check for any uneven textures, gaps, or areas needing additional attention. Regular maintenance of the repaired ceramic, such as gentle cleaning and avoiding exposure to harsh conditions, will help prolong its lifespan. Proper care ensures the item remains functional and attractive for years to come.
Step 7: Preventing Future Damage
To avoid future damage to your ceramic items, implement preventive measures to keep them in good condition. Handle ceramic objects carefully, especially during cleaning or relocation, to minimize the risk of accidental drops or impacts. Use padded storage solutions or protective liners for delicate pieces. Additionally, avoid subjecting ceramics to extreme temperature changes, which can cause cracking or weakening. Being mindful of these practices will help preserve the integrity and longevity of your ceramic items.
Step 8: When to Seek Professional Help
While many ceramic repairs can be managed at home, some situations require professional assistance. If the item is of significant value, has intricate damage, or involves complex restoration, it is best to consult a ceramic repair expert. Professionals have the tools and expertise to ensure high-quality restoration while preserving the piece’s authenticity. Knowing when to seek help can save time and prevent further damage to valuable ceramic items.
Step 9: Keep Learning and Improving
Repairing ceramic cookware is a valuable skill, but it takes practice and patience to master. Don’t be discouraged if you encounter any challenges during the repair process. Keep learning and improving your technique by seeking expert advice or watching online tutorials. With practice, you will become more confident in effectively repairing different ceramic items.
Step 10: Share Your Knowledge
Once you have successfully repaired your ceramic cookware, consider sharing your knowledge with others. You may have friends or family who could benefit from this skill, especially if they also own beloved ceramics that need repair. Passing down this knowledge can help preserve cherished items and save money on professional maintenance in the future.
By following these steps and continuously improving your technique, you can confidently repair damaged ceramic items and extend their lifespan.
5 Things You Should Avoid
- Using the Wrong Adhesive: Avoid adhesives that are not heat-resistant or food-safe, as they can melt or release harmful chemicals during use. Always choose an adhesive designed for ceramic repairs and ensure it is suitable for cookware.
- Skipping Surface Preparation: Do not neglect cleaning and drying the broken pieces thoroughly before starting the repair. Dirt, grease, or residue can prevent the adhesive from bonding properly, leading to a weak or incomplete repair.
- Overlooking Safety Precautions: Handling broken ceramic pieces carefully is crucial to avoid cuts or injuries. Always wear protective gloves when working with sharp edges and ensure your workspace is free of hazards.
- Ignoring Manufacturer Guidelines: If your ceramic cookware has specific care instructions provided by the manufacturer, do not disregard them. Some ceramics may have unique properties that can affect the success of the repair.
- Rushing the Drying Process: Patience is key when repairing ceramic cookware. Avoid the temptation to rush the drying or curing process of the adhesive. Allow ample time for the adhesive to set fully before using the cookware to ensure a durable and long-lasting repair.
Conclusion
How to fix ceramic cookware can be a straightforward and rewarding process if done correctly.
By following the proper steps, such as cleaning the pieces thoroughly, using a high-quality adhesive, and allowing sufficient drying time, you can restore your cookware to a functional state. Always prioritize safety and adhere to manufacturer guidelines to ensure the repair is durable and safe.
With patience and care, you can extend the life of your ceramic cookware and continue to enjoy its benefits in your kitchen.
Specialization:
- Master of wheel-throwing, hand-building, and advanced glazing techniques
- Focus on creating both functional pottery and decorative art pieces
Recognition:
- Celebrated by collectors and art enthusiasts for creating one-of-a-kind pieces that blend artistry with functionality
- Participates in local and national exhibitions, earning accolades for his innovative designs and craftsmanship
Passion:
- Deeply committed to exploring and pushing the boundaries of ceramic artistry
- Continuously experiments with new materials, firing techniques, and artistic concepts to evolve his craft
Personal Philosophy:
- Believes in the transformative power of art, aiming to evoke emotions and connections through his ceramic creations
- Advocates for sustainability in ceramics, using eco-friendly materials and practices whenever possible