


Installing ceramic tiles on a staircase is an excellent way to combine functionality and style in your home. Ceramic tiles are renowned for their durability, which is ideal for high-traffic areas like staircases. Their ability to withstand wear and tear ensures a long-lasting surface that maintains its appeal for years. Additionally, ceramic tiles are available in slip-resistant options, providing added safety, especially in households with children or elderly residents. Another significant advantage is their easy maintenance—requiring only minimal effort to keep clean and looking new.

Tiling a staircase involves careful planning and precise execution to ensure a secure and aesthetically pleasing outcome. Safety is paramount, as stairs are used daily and must remain hazard-free during and after installation. This guide will provide a step-by-step walkthrough on how to install ceramic tile on a staircase, highlighting best practices, key safety tips, and maintenance advice for a successful and rewarding project.
Materials and Tools Needed
Before starting your staircase tiling project, gathering the right materials and tools is essential for a smooth and efficient installation.
Materials:
- Ceramic tiles: Select tiles with appropriate dimensions and an anti-slip coating for added safety.
- Thin-set mortar or tile adhesive: Used to securely bond the tiles to the staircase surface.
- Grout: Choose sanded or unsanded grout based on the spacing between the tiles.
- Tile Spacers: Essential for maintaining consistent gaps between tiles.
- Bullnose Tiles: Specifically designed for stair edges to ensure a polished and safe finish.
Tools:
- Measuring Tape and Pencil: For accurate measurements and markings on the tiles and stairs.
- Tile Cutter or Wet Saw: Required for making precise cuts to fit the tiles perfectly on the staircase.
- Trowel: This is for evenly applying tile adhesive onto the surface.
- Rubber Grout Float: Used to distribute grout evenly between the tiles.
- Sponge: To wipe away excess grout and achieve a clean finish.
Safety Gear:
- Gloves: To protect your hands during the process.
- Knee Pads: For comfort while working on your knees over extended periods.
- Goggles: To protect your eyes from debris during tile cutting or other tasks.
Equipping yourself with these materials and tools will set the foundation for a successful and professional-looking staircase tiling project.
Preparing the Staircase
Cleaning and Leveling
Before tiling, it’s crucial to properly clean and prepare the staircase. Begin by removing any old flooring, dirt, and debris to ensure a clean surface for tile adhesion. Use a broom or vacuum to clear dust, and if needed, scrub the surface with a damp cloth or mild detergent to eliminate stubborn grime. Next, inspect the staircase for imperfections such as holes, cracks, or uneven sections. Use a suitable filler or leveling compound to patch these areas, ensuring a smooth and level surface to prevent issues during tiling. Allow the repairs to dry completely before proceeding.

Measuring and Planning
Accurate measurements are vital to achieving a professional-looking result. Measure the dimensions of each step, including the tread and riser, to determine the appropriate tile sizes. Careful planning of the tile layout is equally important — start at the bottom step and work upwards to ensure alignment and consistency throughout the staircase. Consider the grout lines and the placement of cut tiles to avoid unsightly gaps or uneven patterns.
Priming the Surface
Applying a primer is essential for staircases made of porous materials such as wood or concrete. A good-quality primer enhances the adhesive bond between the tiles and the staircase, ensuring long-lasting results. Follow the manufacturer’s instructions, and allow the primer to dry thoroughly before moving on to the tiling process. Preparing the staircase properly will ensure a strong and durable foundation for your tiled masterpiece.
Cutting Tiles to Fit
Cutting tiles accurately is crucial in achieving a polished and seamless look for your staircase. Utilize a tile cutter or wet saw to make clean, precise cuts, whether you need straight lines or more intricate curved shapes. For areas that are challenging to measure or cut, such as corners or rounded edges, creating templates using cardboard or heavy paper is helpful. These templates will guide you, ensuring that your tiles fit perfectly in these tricky spaces.

Pay special attention to trimming tiles for uniform overhangs on each step. Consistent overhangs provide a professional appearance and enhance safety by maintaining an even edge. Additionally, ensure proper alignment between the tread tiles and the risers for a cohesive and balanced look. Double-check measurements before cutting and proceed slowly to avoid costly mistakes or unnecessary waste. By dedicating time and care to this step, you’ll set the foundation for a functional and aesthetically pleasing staircase.
How to Install Ceramic Tile on a Staircase: Installing the Tiles on Treads and Risers
Applying Adhesive
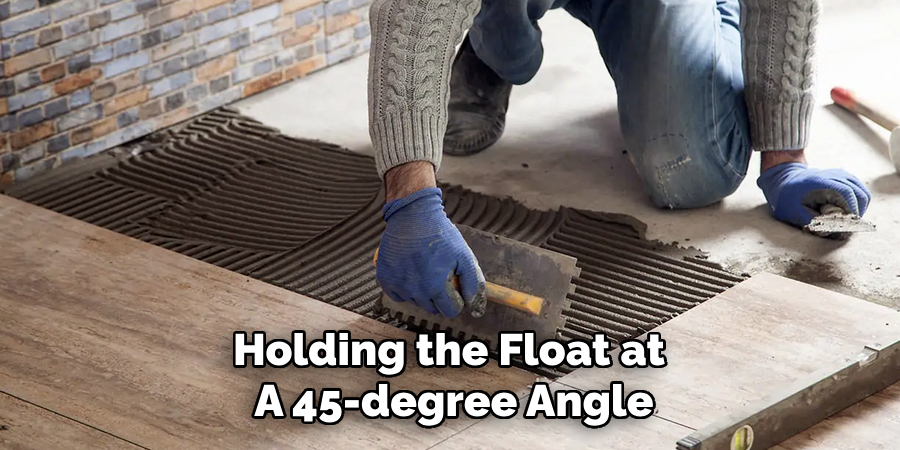
Begin by using a notched trowel to spread thin-set mortar evenly on the surface of the step. Work in manageable sections, as thin-set mortar can dry quickly. Ensure the surface is clean and smooth before applying the adhesive; this will help the tiles adhere more effectively. Hold the trowel at a consistent angle to create uniform ridges in the adhesive, improving contact with the tiles.
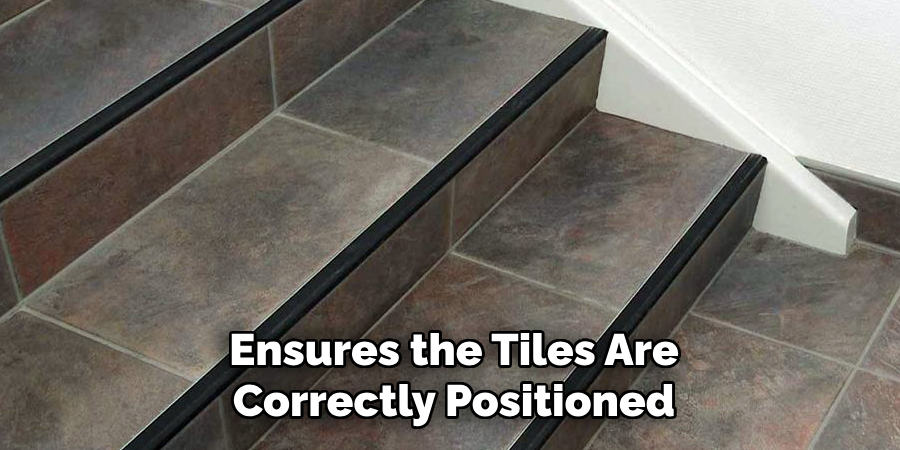
Placing the Tiles
Once the adhesive is applied, press the tiles firmly into it, starting from the center of the step and moving outward. This method helps maintain symmetry and ensures the tiles are correctly positioned. Use spacers between each tile to maintain consistent gaps, which will later be filled with grout. Double-check levels to avoid uneven surfaces and make small adjustments before the adhesive begins to set.
Securing Bullnose Tiles
For the edges of the treads, install bullnose tiles to provide a finished and professional appearance. These tiles also enhance safety by creating a smooth, rounded edge. Align the bullnose tiles carefully with the rest of the tread tiles, ensuring a seamless transition between pieces. If necessary, add adhesive beneath the bullnose tiles to secure them firmly in place.
Installing Riser Tiles
Attach tiles to the vertical risers following the alignment of the treads. Measure and adjust the tiles to fit snugly, ensuring the grout lines continue seamlessly from the treads to the risers. Press the tiles firmly into the adhesive and adjust them to achieve a clean and cohesive appearance. By following these steps, your staircase will have a professional and polished finish.
Grouting the Tiles
Mixing the Grout
Prepare the grout according to the manufacturer’s instructions, ensuring smooth and workable consistency. When choosing a grout color, consider one that complements your tiles to enhance the overall design. Mix the grout thoroughly to avoid lumps, and allow it to rest briefly per the product guidelines before application.
Applying Grout
Using a rubber float, spread the grout into the gaps between the tiles, holding the float at a 45-degree angle. Work diagonally across the tiles to push the grout deeply into the spaces, ensuring even coverage. Be methodical to avoid missing any joints and maintain a consistent finish across the surface.
Cleaning Excess Grout
Once the grout begins to set, use a damp sponge to remove excess material from the tile surfaces. Work gently to avoid disturbing the grout lines, rinsing the sponge frequently to ensure a clean wipe. At this stage, focus more on cleaning the tiles while preserving the grout in the joints.
Final Cleanup
After the grout has dried completely within 24 hours, use a dry cloth to remove any grout haze from the tile surfaces. A clean finish will highlight the craftsmanship of your tiled staircase, leaving it looking polished and professional.
Sealing and Finishing
Sealing the Grout
To protect your tiled staircase and ensure its longevity, apply a grout sealer after the grout has fully cured. This is essential for preventing moisture penetration, stains, and dirt buildup, especially in high-traffic areas like staircases. Carefully spread the sealer along the grout lines using a small brush or applicator, ensuring even coverage. Avoid getting sealer on the tile surface by wiping away any excess immediately. Allow the sealer to cure as instructed by the manufacturer, typically taking a few hours to a full day.
Inspecting the Installation
Once the sealer has fully dried, thoroughly inspect the staircase for any imperfections. Look for uneven tiles, loose edges, or gaps affecting the finished appearance or functionality. Correct any issues promptly, as they can compromise the durability and safety of the staircase. Repair work at this stage will help achieve a flawless final result.
Optional Touch-Ups
Consider installing transition strips at the top and bottom of the staircase for an added touch of finesse. These strips enhance the visual appeal and provide a smooth connection between the staircase and adjacent flooring. This finishing detail creates a cohesive, professional look, completing your tiled staircase project beautifully.

Safety Tips for Staircase Tile Installation
When tiling a staircase, safety should be a top priority. Begin by selecting slip-resistant tiles or applying an anti-slip coating to enhance traction and reduce the risk of falls. During installation, ensure all tiles are securely adhered to the surface, as loose or uneven tiles can create dangerous tripping hazards. Additionally, allowing sufficient drying and curing time for adhesives and sealers before using the staircase is critical to ensure a stable and durable bond. Always wear appropriate safety gear, such as gloves, goggles, and knee pads, to protect yourself while cutting, placing, and grouting tiles. Taking these precautions will result in a safer and more reliable tiled staircase, providing peace of mind for you and those who use it.
Maintenance Tips for Tiled Staircases
Clean tiles regularly with a damp mop to remove dirt and debris, ensuring the staircase remains tidy and appealing. Inspect grout lines periodically for wear or damage and reapply sealer to maintain their integrity and prevent moisture infiltration. Avoid harsh chemicals or abrasive tools, as these can scratch or damage the tiles and grout, diminishing their appearance. Promptly replace any cracked or loose tiles to uphold the staircase’s safety and aesthetics. Consistent maintenance will extend the life of your tiled staircase and keep it looking its best.
Conclusion
Properly understanding “how to install ceramic tile on a staircase” involves focusing on preparation, precision, and safety at every step. Start by ensuring the surface is clean and level, measure and cut tiles accurately, and use appropriate adhesives and sealers for a durable bond. Follow up with careful grouting and consistent maintenance to preserve the staircase’s quality over time. A professionally tiled staircase offers unmatched durability, elevates the overall aesthetic, and increases home value. Whether tackling it as a DIY project or opting for professional assistance, this rewarding endeavor promises long-term benefits for your home’s functionality and appeal.
Specialization:
- Master of wheel-throwing, hand-building, and advanced glazing techniques
- Focus on creating both functional pottery and decorative art pieces
Recognition:
- Celebrated by collectors and art enthusiasts for creating one-of-a-kind pieces that blend artistry with functionality
- Participates in local and national exhibitions, earning accolades for his innovative designs and craftsmanship
Passion:
- Deeply committed to exploring and pushing the boundaries of ceramic artistry
- Continuously experiments with new materials, firing techniques, and artistic concepts to evolve his craft
Personal Philosophy:
- Believes in the transformative power of art, aiming to evoke emotions and connections through his ceramic creations
- Advocates for sustainability in ceramics, using eco-friendly materials and practices whenever possible