


Are you tired of your glossy ceramic pieces and want to create something with a more matte finish? Look no further – here’s a step-by-step guide on how to create a matte glaze effect on your pottery.
Creating a matte glaze effect can add a sophisticated and subtle finish to ceramics, paintings, or furniture pieces. This technique is widely appreciated for its smooth, non-reflective surface that enhances texture and depth, making it a popular choice among artists and designers.
Whether working with pottery, wood, or other materials, achieving the perfect matte glaze requires careful preparation, the right materials, and a nuanced application process.
This guide will walk you through the essential steps to master this versatile and timeless effect.
What Are the Benefits of a Matte Glaze?
Before we dive into the process, let’s examine why matte glaze is an excellent choice for your next project.
- Unique and Sophisticated: Unlike glossy finishes that are commonly used, matte glazes create a more subtle and refined look, making your piece stand out.
- Enhances Texture: The non-reflective surface draws attention to the texture of your piece, highlighting its intricacies and adding depth.
- Hides Imperfections: If you’re working with materials with slight flaws or imperfections, a matte glaze can help camouflage them better than glossy finishes.
- Versatile: You can use matte glazes on various materials such as ceramics, wood, or walls. The possibilities are endless.
- Timeless: Matte glazes have been used for centuries and still remain a popular choice due to their timeless appeal.
Now that you know the benefits of creating a matte glaze effect, let’s get started on how to create one yourself!
What Will You Need?
- Glaze: Choose a matte glaze from your preferred brand. Alternatively, you can mix equal parts of glossy and matte glazes to create a custom finish.
- Brushes: Use a soft-bristled brush for smooth application and a stiffer brush for detailed work.
- Sponge: This will come in handy for blending and adding subtle variations in the glaze.
- Clean Water: To keep your brushes clean while working with different colors.
- Spray bottle: To add moisture and prevent the glaze from drying too quickly.
Once you have all your materials, find a well-ventilated and clean workspace to begin the process.

10 Easy Steps on How to Create a Matte Glaze Effect
Step 1: Prepare Your Piece
Begin by thoroughly cleaning your piece to remove any dust, grease, or residue that might interfere with the glaze application. Use a damp sponge or cloth to wipe down the surface and allow it to dry completely. If your piece is ceramic, ensure it has been bisque-fired and is ready for glazing.
Any debris or imperfections left on the surface could become more noticeable after applying the glaze, so take your time during this step. Additionally, inspect your piece for any cracks or chips that may need smoothing or repair before proceeding to the next stage. Proper preparation ensures a flawless matte glaze finish and sets the foundation for professional-looking results.
Step 2: Mix Your Glaze
Once your piece is prepared, it’s time to mix your matte glaze. Ensure the glaze is thoroughly stirred to achieve a consistent texture, free of lumps or separation. Use a clean stir stick or mixing tool and follow the manufacturer’s instructions for the right consistency, which is usually similar to heavy cream.
If the glaze has thickened over time, add a small amount of water to thin it out gradually, stirring as you go. Properly mixed glaze is key to achieving an even application and the desired matte finish.
Step 3: Apply the Glaze
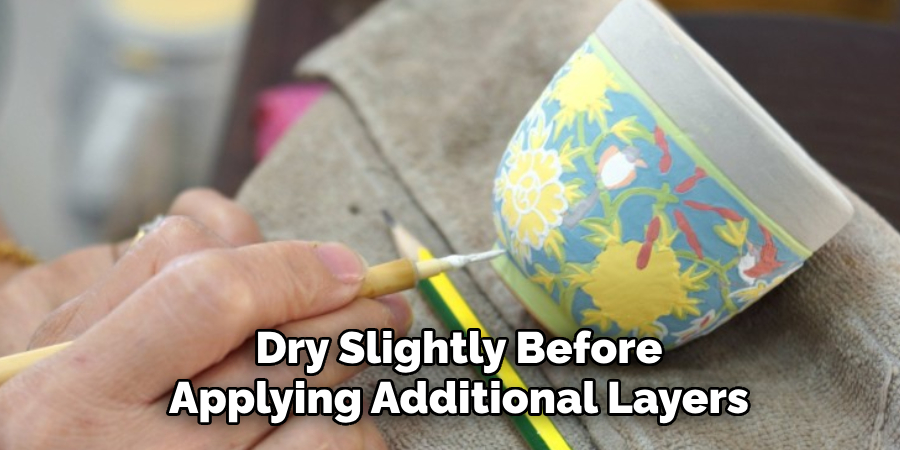
With your glaze adequately mixed, you can now apply it to your piece. Apply the glaze in even, smooth strokes using a soft brush to avoid streaks or uneven texture. Start with a thin coat and allow it to dry slightly before applying additional layers. Two to three coats are typically necessary to achieve full coverage and a consistent matte finish.
Be sure to catch any drips and avoid overlapping strokes excessively, which can create uneven areas. Work in a well-ventilated space to ensure the glaze dries uniformly and without interruption.
Step 4: Allow the Glaze to Dry
Once all the coats have been applied, allowing the glaze to dry thoroughly is crucial. Follow the manufacturer’s recommended drying time, which can vary depending on the type of glaze and environmental conditions. Avoid touching or moving the piece during this period to prevent smudging or imperfections.
For best results, place the piece in a clean, dust-free area to ensure a smooth and even finish. Patience during this step will help achieve the desired matte look and improve the durability of the glazed surface.
Step 5: Seal the Surface
After the glaze has fully dried, consider sealing the surface to add an extra layer of protection. A matte sealant can help preserve the finish and enhance durability, primarily if the piece will be handled frequently or exposed to environmental factors.
Apply the sealant evenly using a clean brush or spray, following the product’s instructions carefully. Allow the adhesive to cure completely before using or displaying your piece to ensure long-lasting results.
Step 6: Maintain Your Matte-Glazed Piece
Proper maintenance is essential to keep your matte-glazed piece looking its best over time. Clean the surface gently with a soft, damp cloth to avoid scratches or damage.
Avoid using harsh chemicals or abrasive materials, as they can compromise the finish. If necessary, use a mild soap diluted in water, ensuring you rinse thoroughly and dry immediately. With regular care, your matte-glazed piece will retain its beauty and durability for years.

Step 7: Troubleshooting Common Issues
Even with careful attention, you may encounter some challenges when working with matte glazes. For instance, uneven application can lead to patchy finishes. To address this, lightly sand the surface and reapply the glaze evenly. Crazing or fine cracks in the finish may occur if the glaze and the underlying material expand at different rates; ensuring proper firing temperatures and cooling times can mitigate this issue.
Additionally, if the matte finish appears too glossy, it may suggest over-firing. Identifying and resolving these common issues will help refine your techniques and achieve consistently excellent results.
Step 8: Storing and Preserving Your Matte-Glazed Pieces
Proper storage is essential to maintain the quality and longevity of your matte-glazed creations. Keep your pieces in a dry, temperature-controlled environment to prevent moisture-related damage or cracking. Avoid stacking pieces directly on top of one another without a protective layer, such as soft cloth or foam, to avoid scratches or chipping.
Consider wrapping individual pieces in acid-free tissue paper for added protection if storing for long periods. Thoughtful storage practices will ensure your matte-glazed items remain pristine over time.
Step 9: Keep Experimenting
As with any art form, experimentation is key to mastering matte glaze techniques. Don’t be afraid to try different colors, layering techniques, or even mixing your custom shades.
Some artists also experiment with different firing temperatures and times to achieve unique effects on the same glazes. With time and practice, you’ll discover what works best for you and develop a personal style that sets your pieces apart.
Step 10: Share Your Masterpieces
Once you’ve created pieces you’re proud of, sharing them can be one of the most rewarding aspects of your artistic journey. Start by showcasing your work to friends, family, and local art communities. Social media platforms like Instagram, Pinterest, and TikTok provide excellent spaces to display your creations, connect with fellow ceramic artists, and gain inspiration.
Consider participating in art fairs, craft markets, or exhibitions to reach a broader audience. If you’re comfortable, document your process through photos or videos to give viewers insight into your techniques and the effort behind your art. Sharing your matte-glazed masterpieces allows you to inspire others and opens doors to collaborations, commissions, or even selling your work professionally.
By following these steps and embracing experimentation, you can master the art of matte glaze and create stunning pieces that stand out.
5 Things You Should Avoid
- Skipping Proper Surface Preparation: Neglecting to clean and sand the surface thoroughly before applying the glaze can result in uneven textures or poor adhesion, compromising the matte effect.
- Using the Wrong Glaze: Choosing a glaze unsuitable for matte finishes or experimenting with untested products can lead to inconsistent results and unexpected glossy patches.
- Overapplying Glaze: Applying too much glaze in a single layer can make the surface look streaky or uneven. Thin, even coats are essential for achieving a smooth matte finish.
- Ignoring Drying Times: Rushing through the drying process or applying additional coats before the previous layer has thoroughly dried can ruin the surface and create undesirable textures.
- Not Sealing the Finish Properly: Failing to seal the matte glaze with an appropriate topcoat or protective layer can leave the surface vulnerable to damage, stains, or wear over time.

Conclusion
How to create a matte glaze effect requires attention to detail, the right materials, and patience throughout the process.
You can ensure exceptional results by adequately preparing the surface, selecting the appropriate glaze, applying thin, even coats, respecting drying times, and sealing the finish properly. Avoiding common mistakes and following these steps diligently will help you create a smooth, durable, and professional matte finish that meets your expectations.
With practice and care, mastering the art of matte glazing can significantly elevate your projects’ quality.
Specialization:
- Master of wheel-throwing, hand-building, and advanced glazing techniques
- Focus on creating both functional pottery and decorative art pieces
Recognition:
- Celebrated by collectors and art enthusiasts for creating one-of-a-kind pieces that blend artistry with functionality
- Participates in local and national exhibitions, earning accolades for his innovative designs and craftsmanship
Passion:
- Deeply committed to exploring and pushing the boundaries of ceramic artistry
- Continuously experiments with new materials, firing techniques, and artistic concepts to evolve his craft
Personal Philosophy:
- Believes in the transformative power of art, aiming to evoke emotions and connections through his ceramic creations
- Advocates for sustainability in ceramics, using eco-friendly materials and practices whenever possible