


Installing a kiln vent is an essential step for creating a safe and efficient workspace, especially in pottery studios where proper ventilation is crucial. A kiln vent helps to remove fumes, heat, and moisture generated during the firing process, ensuring a healthier environment and more consistent firing results.

This guide on How to install a kiln vent will walk you through the steps needed to install a kiln vent properly, helping to protect both your health and your kiln.
Why Install a Kiln Vent?
As mentioned earlier, proper ventilation is crucial when working with a kiln. Here are some of the main reasons why you should install a kiln vent:
Health and Safety:
The fumes produced during firing can be harmful to your health if inhaled for prolonged periods. A kiln vent helps to remove these fumes and create a safer working environment. It also reduces the risk of fire hazards by removing excess heat.
Consistent Firing Results:
A kiln vent helps to regulate the temperature and humidity levels inside the kiln, ensuring more consistent firing results. This is especially important for professional potters who rely on precise firing temperatures for their work.
Protects Your Kiln:
Excessive heat and moisture can damage your kiln over time. Installing a kiln vent helps to remove these elements, prolonging the life of your kiln and reducing maintenance costs.
Needed Materials
Before you start installing your kiln vent, make sure to gather all the necessary materials. Here’s a list of what you’ll need:
Kiln Vent System:
There are various types of kiln vent systems available in the market, including wall-mounted, roof-mounted, and floor-mounted options. Choose one that is suitable for your kiln and workspace.
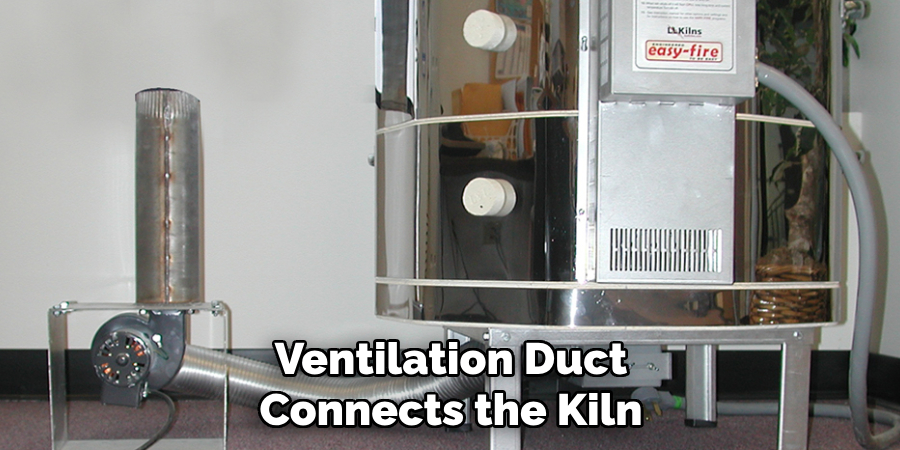
Ventilation Duct:
The ventilation duct connects the kiln to the vent system. Make sure to measure the distance between your kiln and the desired location for your vent system to ensure you have enough duct length.
Exhaust Fan:
An exhaust fan helps to remove fumes from the kiln and push them through the ventilation duct. Be sure to select a fan with sufficient power for your specific setup.
Drill:
You’ll need a drill to create holes in your kiln’s walls or roof for the ventilation duct and fan.
Screwdriver:
A screwdriver will be needed to secure the vent system, duct, and exhaust fan in place.
Caulk:
Caulk helps to seal any gaps or holes around the ventilation duct and fan, ensuring a tight fit and maximizing efficiency.
7 Steps on How to Install a Kiln Vent
Step 1: Choose the Location
The first step in installing a kiln vent is to choose an appropriate location for the vent system. Start by identifying the safest and most efficient spot in your workspace. Ensure that the kiln is positioned near an exterior wall or ceiling where the vent can expel fumes outside the building.
Avoid placing the vent system near windows or air intakes to prevent any fumes from re-entering the workspace. Consider the length of the ventilation duct — a shorter duct will improve efficiency and make installation easier.
Additionally, make sure the chosen location allows for easy maintenance and operation access to the kiln. Proper planning at this stage will set the foundation for a safe and functional kiln vent installation.

Step 2: Preparing the Kiln
Before beginning the installation, it’s important to prepare your kiln for the vent system. Start by thoroughly cleaning the exterior of the kiln to remove any dust, debris, or residue that could interfere with the installation. Next, carefully measure and mark the locations where the ventilation duct and other components will be attached. Use a pencil or marker for this step to ensure accuracy.
If your kiln requires modifications, such as drilling holes for the ventilation duct, refer to the manufacturer’s instructions to determine the correct placement and size of the holes.
Be sure to wear safety equipment like gloves and goggles while drilling. Take care to avoid damaging any critical parts of the kiln, such as heating elements or insulation. Proper preparation of the kiln will ensure a smooth and secure installation process for your vent system.
Step 3: Installing the Vent System
Once your kiln is prepared, you can begin installing the vent system. Follow the manufacturer’s instructions to secure the vent system in place using screws or any other recommended method. Make sure to leave enough space for the ventilation duct and fan to connect later on.
Otherwise, the vent system itself is relatively easy to install and can usually be completed in a matter of minutes.
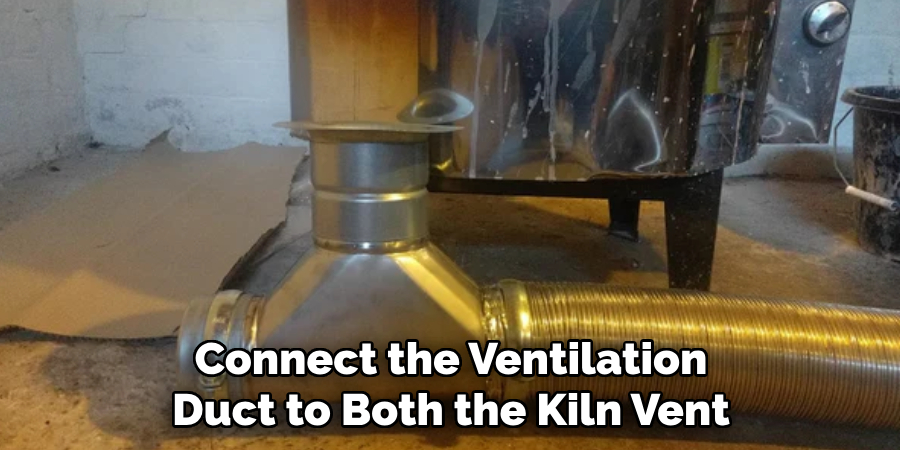
Step 4: Connecting the Ventilation Duct
Next, connect the ventilation duct to both the kiln vent and exhaust fan. Use clamps or tape provided by the manufacturer to secure each end of the duct in place. The connection should be tight enough to prevent any air leaks but not too tight to restrict airflow. It’s important to make sure there are no kinks or bends in the duct that could impede proper ventilation.
If the duct is too long, you may need to trim it to fit your specific installation. Use caution when cutting the duct and avoid damaging any heating elements or insulation on the kiln.
Step 5: Installing the Exhaust Fan
With the ventilation duct in place, the next step is to install the exhaust fan. Begin by positioning the fan at the designated location, which is typically at the end of the ventilation duct nearest to the exterior outlet. Ensure the fan is aligned correctly to expel the fumes outside the building. Follow the manufacturer’s instructions to attach the fan securely, using screws or brackets if necessary.
Once the fan is in place, connect it to the ventilation duct by attaching the fan’s inlet to the duct’s open end. Use clamps or tape to create a secure, airtight seal.
Check for any gaps or air leaks and seal them with caulk as needed to maintain efficiency. After the fan is installed and connected, double-check that all parts are tightly secured and that the fan has access to a power source. Properly installing the exhaust fan is essential for effective ventilation and ensures the safety and functionality of your kiln vent system.
Step 6: Powering Up and Testing the Vent System
Before running your kiln with the new vent system, it’s important to test everything first. Turn on the exhaust fan and check for proper airflow by placing a sheet of paper near the outlet — if the paper is sucked towards the outlet, it indicates that air is flowing out correctly. Next, turn on your kiln and observe the function of the vent system during different stages of firing.
You should notice fumes being expelled through the duct and outside your building. If there are any issues or concerns with how the vent system is operating, refer to troubleshooting tips from the manufacturer or consult a professional.
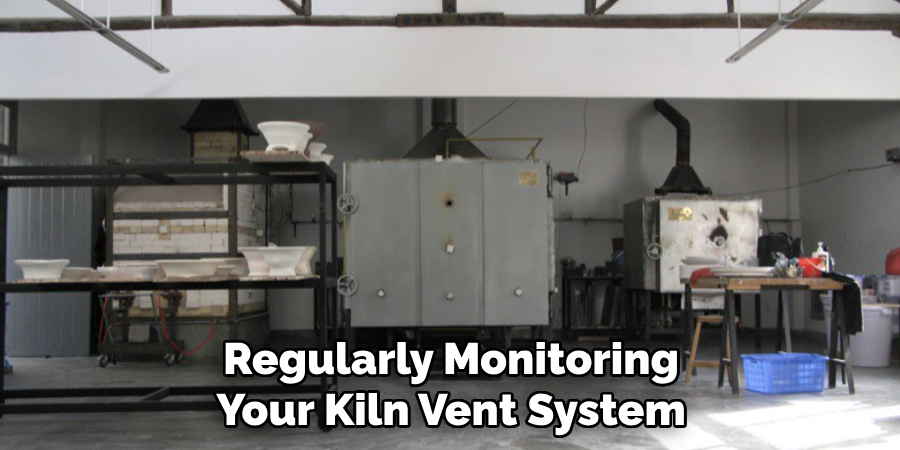
Step 7: Regular Maintenance and Monitoring
Once your kiln vent system is installed and functioning correctly, it’s important to regularly maintain and monitor its performance. Check the ventilation duct for any signs of wear or damage, such as tears or holes, which could impact airflow. Additionally, clean the exterior of the exhaust fan to prevent any buildup of dust or debris that could impede its function.
Regularly monitoring your kiln vent system will help to ensure its longevity and efficiency in removing fumes from your workspace. It’s also important to follow recommended maintenance schedules provided by the manufacturer to keep your vent system running smoothly.
Following these steps on How to install a kiln vent and properly installing a kiln vent system will not only improve the safety of your workspace but also enhance the overall experience of operating a kiln. With proper installation, maintenance, and monitoring, you can enjoy your kiln with peace of mind, knowing that it is functioning safely and efficiently.
Safety Considerations
As with any installation process, it’s crucial to follow safety protocols when installing a kiln vent system. Wear appropriate protective gear, such as gloves and goggles, during the installation process.
Additionally, make sure to read and fully understand all instructions provided by the manufacturer before beginning the installation. If you are unsure about any steps or have concerns about the installation process, consult a professional for assistance.
Do not attempt to modify or alter your kiln or its components without proper knowledge and understanding of how it may affect its function and safety. Take caution when drilling holes or trimming the ventilation duct to avoid damaging critical parts of the kiln.
Regularly inspect and maintain your kiln vent system to ensure its proper function and safety. If you notice any issues or concerns, consult a professional for assistance.
By following these safety considerations, you can ensure a safe and successful installation of your kiln vent system.
When to Call a Professional?
While installing and maintaining a kiln vent system can often be done by following the provided instructions, there are situations where calling a professional is essential.
If you encounter issues such as unclear manufacturer guidelines, difficulty in securely attaching the ventilation components, or concerns about properly sealing the system to prevent air leaks, professional expertise can save time and ensure safety.
Additionally, if your kiln’s location presents challenges, such as limited space for proper ventilation or structural constraints for routing the exhaust, a professional can help you devise and execute an effective solution. Electrical work, such as wiring the exhaust fan to a power source, should also be handled by a qualified professional if you lack the necessary experience or tools.
Another reason to contact a professional is if you notice operational issues after installation, such as inadequate airflow, unusual noises from the fan, or persistent fumes in your workspace. These could indicate underlying problems that require specialized knowledge to address.
Reaching out to a professional ensures that your kiln vent system is installed and maintained correctly, providing both efficiency and peace of mind.
Frequently Asked Questions
Q: How Much Does It Cost to Install a Kiln Vent?
A: The cost of installing a kiln vent can vary depending on the type and size of the kiln, as well as the specific vent system being installed. On average, installation costs can range from $200-$500. It’s important to consult with manufacturers and professionals to determine the best vent system for your kiln and budget.
Q: Do I Need a Professional to Install My Kiln Vent?
A: While some individuals may feel comfortable installing their own kiln vents, it is generally recommended to hire a professional for installation. This ensures that the vent system is properly installed and meets safety standards. Additionally, hiring a professional can save time, avoid potential errors, and ensure proper maintenance of your kiln vent system in the long run.
Q: How Often Should I Clean or Replace My Kiln Vent System?
A: The frequency of cleaning or replacing your kiln vent system will vary depending on usage and manufacturer recommendations. Generally, it is recommended to clean the exterior of the exhaust fan and check for any damage or wear every few months.
It’s also important to regularly monitor the performance of your kiln vent system and replace any damaged parts as needed. Refer to the manufacturer’s instructions for specific maintenance schedules for your kiln vent system.

Conclusion
Installing a kiln vent system is a key step in ensuring both the safety and efficiency of your workspace. By carefully following the outlined steps on How to install a kiln vent — from preparation to regular maintenance — you can create a reliable setup that effectively removes harmful fumes and maintains proper ventilation.
A well-installed kiln vent system not only protects your health but also enhances the lifespan and performance of your kiln.
Always refer to the manufacturer’s guidelines and prioritize safety throughout the process. With attention to detail and regular upkeep, your kiln vent system will provide cleaner air and a more enjoyable kiln operation experience for years to come.
Specialization:
- Master of wheel-throwing, hand-building, and advanced glazing techniques
- Focus on creating both functional pottery and decorative art pieces
Recognition:
- Celebrated by collectors and art enthusiasts for creating one-of-a-kind pieces that blend artistry with functionality
- Participates in local and national exhibitions, earning accolades for his innovative designs and craftsmanship
Passion:
- Deeply committed to exploring and pushing the boundaries of ceramic artistry
- Continuously experiments with new materials, firing techniques, and artistic concepts to evolve his craft
Personal Philosophy:
- Believes in the transformative power of art, aiming to evoke emotions and connections through his ceramic creations
- Advocates for sustainability in ceramics, using eco-friendly materials and practices whenever possible