


Are you an artist or hobbyist who enjoys working with pottery? If so, then you know how important it is to have a functioning kiln to fire your pieces.
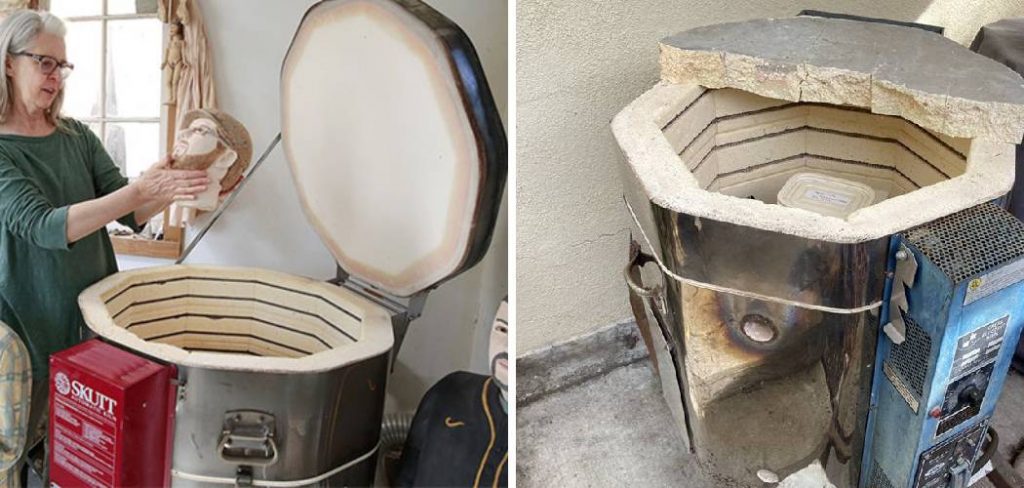
How to repair a kiln lid is an essential maintenance task that helps ensure the longevity and efficient functioning of your kiln. Over time, kiln lids can experience wear and tear due to repeated exposure to high temperatures, handling, and general usage. Cracks, chipping, or warping are common issues that can impact performance and even result in heat loss or uneven firing. By addressing these problems promptly and following the correct repair methods, you can restore your kiln lid to optimal condition and avoid more extensive damage in the future.
This guide will provide step-by-step instructions and tips to effectively repair a kiln lid and keep your kiln working at its best.
What Are the Causes of Kiln Lid Damage?
Before we dive into the repair process, it’s crucial to understand what can cause damage to your kiln lid. The most common causes include:
- Extreme Temperatures: As a kiln lid is exposed to high temperatures repeatedly, it can experience thermal shock and begin to crack or warp.
- Handling: Improper handling when opening or closing the kiln can pressure the lid and cause cracks.
- Wear and Tear: Regular usage over time can lead to chipping, pitting, or warping of the kiln lid.
These factors can impact the structural integrity of your kiln lid and affect its ability to seal correctly, maintain even heat distribution, and regulate temperature. Now that you understand some common cause,s let’s move on to the repair process.
What Will You Need?
To repair your kiln lid, you will need the following materials:
- Ceramic fiber blanket or insulation wool
- High-temperature refractory cement or mortar
- Respirator mask
- Gloves
- Safety goggles
- Paintbrush or trowel for application
It’s essential to use high-quality materials designed specifically for kiln repairs to ensure a successful and long-lasting fix.
10 Easy Steps on How to Repair a Kiln Lid
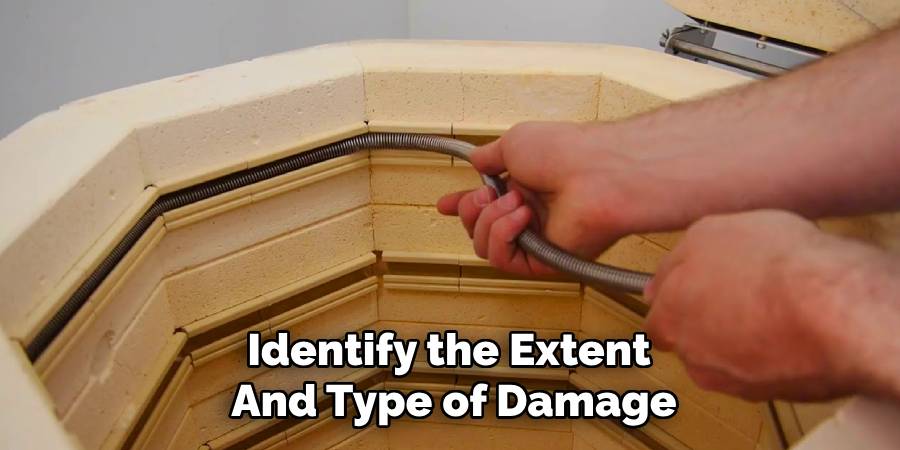
Step 1: Assess the Damage
Begin by closely inspecting the kiln lid to identify the extent and type of damage. Look for visible cracks, chips, or areas where the material appears to be thinning or deteriorating. Pay particular attention to the edges and corners, as these are ordinary wear-and-tear areas. Use a flashlight to examine any deeper fractures that may not be immediately noticeable. Gently press on the damaged areas to check for weak spots or instability.
Document the damage by taking notes or photos to help guide the repair process and ensure you address all problem areas. This step is crucial in determining the amount of material needed for repair and prioritizing the areas requiring immediate attention.
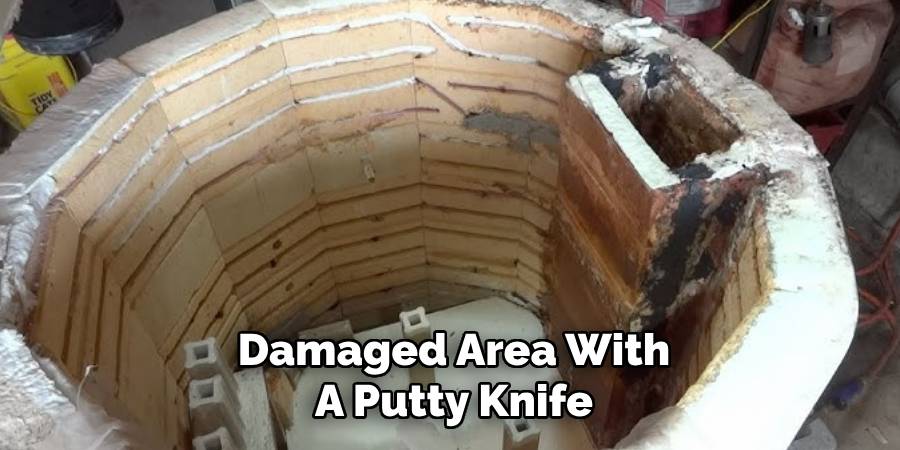
Step 2: Gather the Necessary Tools and Materials
Once you have assessed the damage, collect all the tools and materials needed for the repair. Typical items include kiln cement, refractory brick or fiberboard (if replacements are required), a putty knife, sandpaper, a brush or vacuum for cleaning debris, and protective gloves. Having these items ready ensures a smooth repair process without interruptions. Double-check that the materials are rated for high temperatures and are designed explicitly for kiln repairs to guarantee durability and safety.
Step 3: Clean the Kiln
Before starting the repair, thoroughly clean the damaged areas of the kiln. Use a brush or vacuum to remove loose debris, dust, or old cement from the cracks and surfaces. A clean surface ensures the adhesive materials bond properly and the repairs last longer. Use a damp cloth to remove stubborn particles, but ensure the kiln is completely dry before applying any repair materials. Proper cleaning is essential for achieving a professional and reliable repair.
Step 4: Apply the Repair Materials
Once the kiln is clean and dry, you can begin applying the repair materials. If using kiln cement, carefully spread it over the damaged area with a putty knife, ensuring that you press it firmly into any cracks or gaps. For more extensive repairs or replacements, fit the refractory brick or fiberboard into place, trimming as necessary for a snug fit. Smooth out the surface of the cement to ensure even coverage and prevent weak points.
Follow the manufacturer’s instructions for curing, which may involve allowing the repaired area to air dry for a specified amount of time before firing the kiln. Taking the time to complete this step thoroughly will ensure the repair is robust and long-lasting.
Step 5: Reassemble and Test the Kiln
After the repaired areas have appropriately cured, carefully reassemble the kiln by reinserting any removed components during disassembly. Ensure that all parts, such as shelves, elements, and panels, are securely and correctly in place. Double-check connections, particularly electrical components, to confirm they are tight and functioning as intended. Before conducting a full firing, it is crucial to test the kiln to verify that the repair was successful. Start by running a low-temperature test firing to assess performance and detect irregularities.
Monitor the kiln closely during this process for unusual noises, uneven temperatures, or other signs of malfunction. If issues are observed, revisit the repair steps to address the problem. A successful test firing confirms the repair’s effectiveness and restores confidence in the kiln’s safety and functionality for regular use.
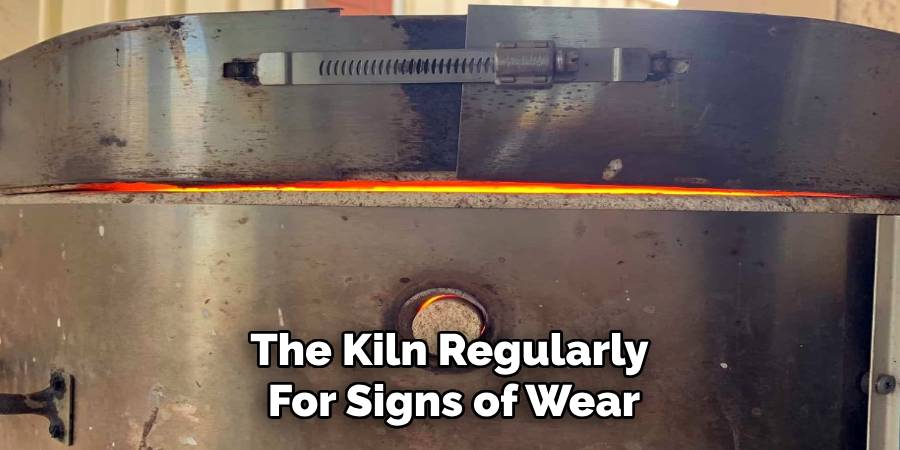
Step 7: Regular Maintenance and Safety Checks
Establish a routine maintenance schedule to prolong your kiln’s lifespan and ensure consistent performance. Inspect the kiln regularly for signs of wear, such as brick cracks, loose elements, or damaged electrical connections. Clean the interior to remove debris or glaze drips that could interfere with firing. Additionally, verify that the kiln’s ventilation system is functioning correctly to prevent the build-up of harmful fumes. Perform periodic safety checks on the power supply and temperature controls, ensuring they operate within normal parameters. Maintaining your kiln in optimal condition can prevent unexpected breakdowns and enhance its efficiency over time.
Step 8: Documenting Repairs and Maintenance
Keeping detailed records of all repairs and maintenance performed on your kiln is essential for long-term reliability. Maintain a log that includes dates, the nature of the issue, parts replaced, and any adjustments made. This documentation can serve as a valuable reference for troubleshooting future problems, ensuring that recurring matters are addressed effectively. Additionally, these records can be helpful if you need to consult with a technician or decide to sell the kiln in the future. A well-documented maintenance history demonstrates your commitment to proper care and can add value to the equipment.
Step 9: Cleaning the Kiln Interior
Regularly cleaning the interior of your kiln is crucial for maintaining its performance and longevity. After every few firings, inspect the kiln shelves, walls, and floor for any residue, glaze drips, or debris. Use a soft brush or vacuum to remove loose particles, and carefully scrape off any stubborn glaze remnants to prevent them from damaging future pieces during firings. Ensuring the kiln interior is clean will result in more consistent firing results and protect the kiln’s elements from unnecessary wear. Always follow manufacturer guidelines when cleaning to avoid accidentally causing damage.
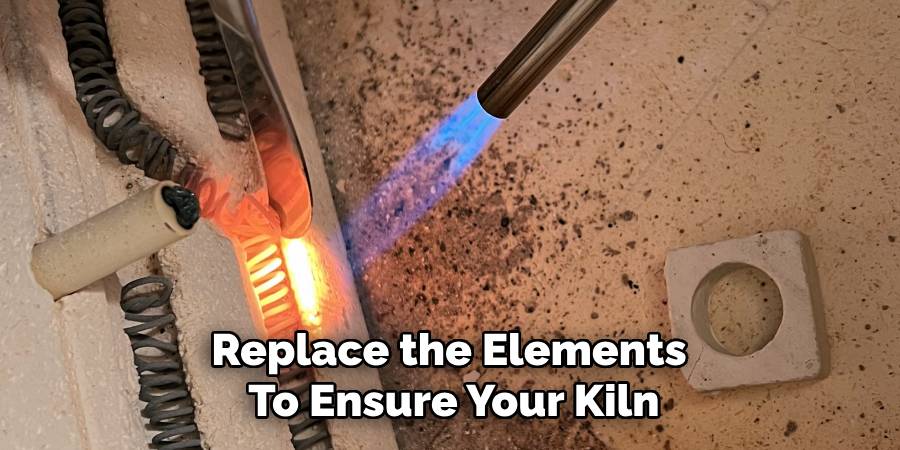
Step 10: Inspecting and Replacing Kiln Elements
Over time, the heating elements in your kiln can wear out, affecting its ability to reach and maintain the desired temperatures. Regularly inspect the components for signs of wear, such as thinning, sagging, or uneven heating. If you notice any of these issues, replace the elements to ensure your kiln continues to perform efficiently. Always follow the manufacturer’s recommendations when purchasing replacement elements and consult the kiln’s manual or a professional technician for installation guidance. Properly maintaining the heating elements can significantly extend the life of your kiln and improve the quality of your firings.
By following these steps and taking the necessary precautions, you can successfully repair and maintain your kiln for reliable performance.
5 Things You Should Avoid
- Using the Wrong Adhesive or Cement: Avoid using adhesives or cements that are not explicitly designed for high-temperature applications. Regular household adhesives will not withstand the intense heat inside a kiln and can lead to further damage during operation.
- Ignoring Cracks Until They Worsen: Do not ignore small cracks or chips in the kiln lid, as they can expand over time with repeated firings. Addressing damage early can save you from more costly and extensive repairs later.
- Over-tightening Bolts or Fasteners: Over-tightening screws or bolts when repairing a kiln lid can put unnecessary strain on the lid material, leading to breakage or warping. Tighten only as much as is needed to secure the parts firmly.
- Using Improper Tools: Steer clear of using generic tools unsuitable for kiln repair tasks. Improper tools can cause accidental damage to the kiln lid, making the repair process more complex and less effective.
- Skipping the Curing Process: After applying high-temperature cement or adhesive, don’t skip the curing process recommended by the manufacturer. Firing the kiln too soon can compromise the bond and result in ineffective repairs. Always follow the specified curing times to ensure long-lasting fixes.
Conclusion
How to repair a kiln lid requires careful attention to detail and adherence to best practices to ensure safety and longevity.
By inspecting for damage regularly, using the correct tools, and following manufacturer guidelines, you can effectively address issues without causing further harm. Avoid common mistakes like over-tightening bolts or skipping the necessary curing process, as these can undermine the success of your repairs.
With patience and proper maintenance, your kiln lid can be restored to optimal condition, allowing you to continue your projects with confidence and efficiency.
Specialization:
- Master of wheel-throwing, hand-building, and advanced glazing techniques
- Focus on creating both functional pottery and decorative art pieces
Recognition:
- Celebrated by collectors and art enthusiasts for creating one-of-a-kind pieces that blend artistry with functionality
- Participates in local and national exhibitions, earning accolades for his innovative designs and craftsmanship
Passion:
- Deeply committed to exploring and pushing the boundaries of ceramic artistry
- Continuously experiments with new materials, firing techniques, and artistic concepts to evolve his craft
Personal Philosophy:
- Believes in the transformative power of art, aiming to evoke emotions and connections through his ceramic creations
- Advocates for sustainability in ceramics, using eco-friendly materials and practices whenever possible