


; Ceramic art is a timeless craft celebrated for centuries, combining functionality with creativity. It involves shaping and firing clay to create both artistic and practical pieces, whether they be intricately designed sculptures or handmade bowls for daily use. The process allows for personal expression and serves as a therapeutic outlet, encouraging creativity and mindfulness.
Furthermore, creating ceramics offers the rewarding experience of crafting unique, handmade items that bring beauty and purpose to everyday life. This article aims to serve as a comprehensive step-by-step guide on how to make a creative ceramic pieces. From selecting the right materials to mastering techniques and applying decorative finishes, this guide is designed to inspire and assist beginners and seasoned makers alike in their ceramic journeys.
Choosing the Right Clay and Tools
Selecting the appropriate clay and tools is a crucial first step in creating ceramic pieces. The type of clay you choose will determine your work’s final texture, durability, and functionality.
Types of Clay
- Earthenware: This low-fired, porous clay is ideal for creating decorative pieces. It is easy to work with and often comes in rich, earthy colors, making it a great choice for beginners. However, it may not be suitable for items meant to hold liquids as it remains somewhat porous even after firing.
- Stoneware: A mid- to high-fired clay, stoneware is known for its durability and versatility. This type of clay is a go-to choice for functional ceramics like plates, bowls, and mugs due to its strength and water-resistant properties.
- Porcelain: This high-fired, fine clay is most commonly used for intricate and delicate work. It offers a smooth finish and translucent quality but requires advanced skills due to its more challenging handling properties.
Essential Tools
- Pottery wheel (optional, used for wheel-thrown pieces).
- Clay cutting wire and sculpting tools to shape and manipulate the clay.
- Sponges, wooden ribs, and other shaping tools for smoothing and refining your work.
- Slab roller or rolling pin for hand-building techniques like slabs or coils.
- Kiln or access to one, as firing is essential to harden and complete the ceramic pieces.
With the right materials and tools, you’ll be ready to begin exploring the creative and rewarding world of ceramics!
How to Make a Creative Ceramic Pieces: Hand-Building vs. Wheel-Throwing Techniques
Getting started in ceramics often involves exploring both hand-building and wheel-throwing techniques, each offering distinct methods and creative possibilities.
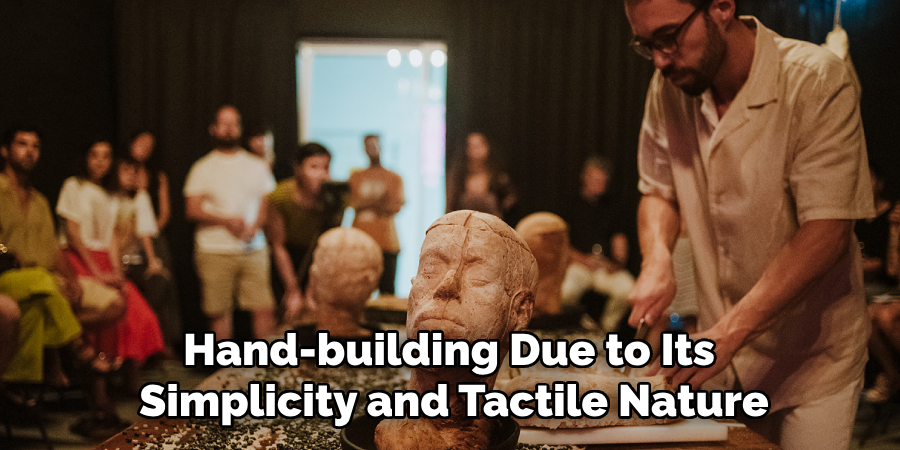
Hand-Building Methods
- Slab Technique: This involves rolling clay into flat sheets using a rolling pin or slab roller. These slabs are then cut into shapes that can be assembled to create geometric or freeform structures.
- Coil Method: Long, rope-like coils of clay are rolled and stacked to build organic forms or textured pieces. This method is particularly versatile for creating expressive, sculptural designs.
- Pinch Pots: Simple and rounded forms like bowls can be crafted by pinching and molding a ball of clay with the fingers. This method is especially intuitive and accessible for beginners.
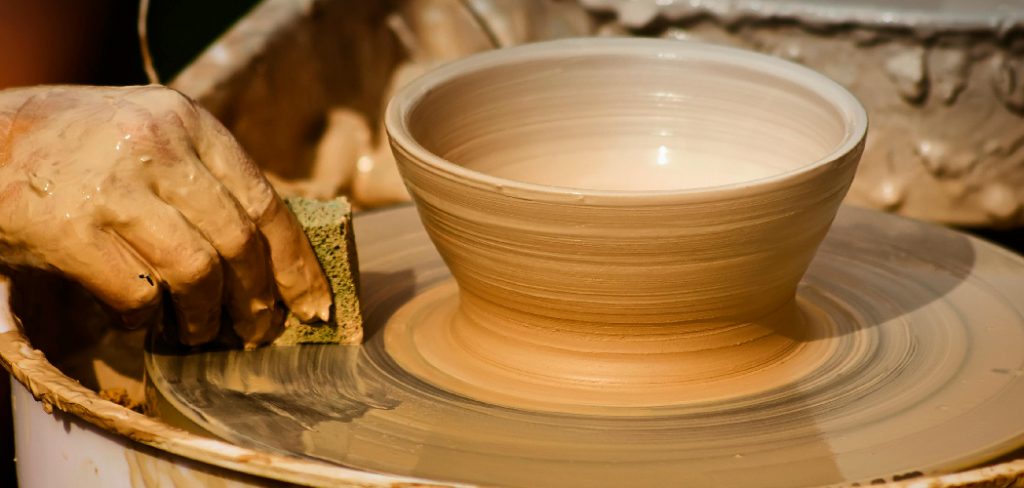
Wheel-Throwing Basics
- Centering: The first step in wheel-throwing involves centering the ball of clay on the wheel to ensure balance and symmetry.
- Pulling and Shaping: Using steady hands and tools, the clay is shaped into forms such as bowls, mugs, and vases by compressing and pulling up the walls.
- Trimming: Once the basic form is created, excess clay is trimmed, and the piece is refined for a smooth, polished finish.
Choosing the Right Technique
Beginners often start with hand-building due to its simplicity and tactile nature. Once foundational skills are established, moving to wheel-throwing can unlock new creative opportunities. Combining techniques results in truly one-of-a-kind designs for the adventurous, blending the structural precision of wheel-throwing with the textural variety of hand-built elements. Exploring both methods allows artists to expand their versatility and artistic expression in ceramics.
Shaping and Adding Texture
Adding texture and shaping clay are vital steps in giving life and character to ceramic creations. Artists can employ various techniques to create dynamic surfaces and captivating forms, each adding depth and individuality to the finished piece.
Carving and Etching
Carving and etching are excellent for adding intricate patterns and details. Using loop tools, needles, or similar implements, artists can cut or scrape into the surface of the clay to create designs before it fully dries. From delicate geometric lines to bold, flowing motifs, carved textures significantly enhance a piece’s visual interest.
Impressions and Stamping
Another way to achieve unique surface details is through impressions and stamping. Artists can create organic and distinctive patterns by pressing objects like leaves, lace, or textured materials into the clay’s surface. This technique allows for infinite possibilities, as almost any textured object can be repurposed to leave a mark, yielding results that are often both personal and surprising.
Altering Forms
For those seeking more sculptural or abstract outcomes, altering forms is an exciting avenue. Hand-shaping clay into asymmetrical or organic forms enhances its natural aesthetic. Some artists cut and rejoin sections to experiment with shapes, creating bold, avant-garde designs. These methods allow for creating pieces that are as much an exploration of form as they are functional or decorative objects.
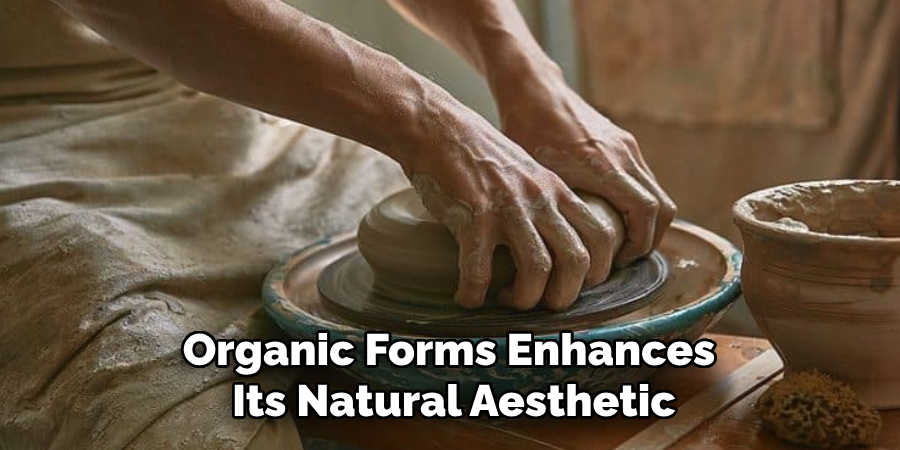
By combining these techniques, artists can push the boundaries of their creativity, resulting in one-of-a-kind ceramics that reflect both technical skill and personal vision.
Drying and Preparing for Firing
Proper drying is a vital step in the ceramic-making process, as it ensures the durability and quality of the final piece.
Air Drying
Allowing clay to dry slowly is crucial to prevent cracking. Sudden changes in temperature or airflow can lead to uneven drying, which might cause weak spots or structural damage. Patience during this stage is key to maintaining the integrity of the piece.
Leather-Hard Stage
At this stage, the clay has partially dried and becomes firm but still retains some moisture, making it ideal for refining details or attaching additional pieces. Artists often use this time to carve designs, smooth surfaces, or add elements like handles or decorative textures.
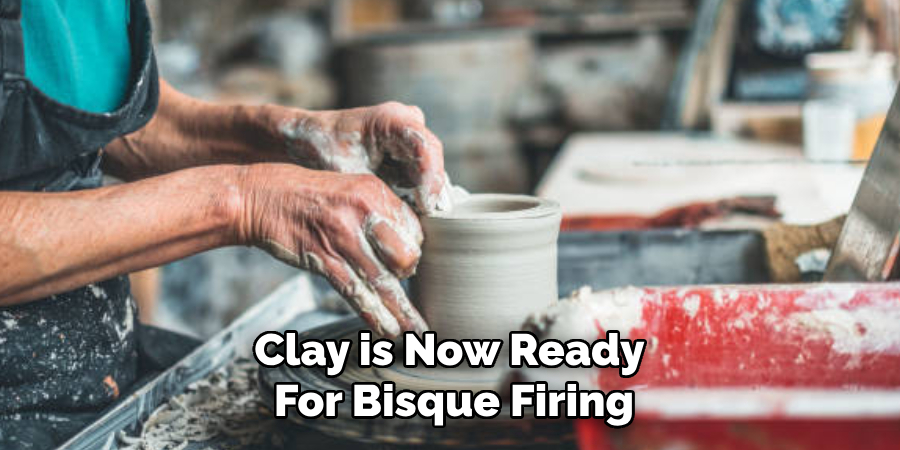
Bone Dry Stage
Once the clay is fully dried, it reaches the bone dry stage. At this point, the piece is fragile and light in color, as all moisture has evaporated. Bone dry clay is now ready for bisque firing, the first kiln firing that prepares the piece for glazing.
Tips for Preventing Cracks
To avoid cracks during drying, ensure that pieces dry evenly. Use plastic coverings or store them in humidity-controlled areas to slow drying. This method minimizes rapid moisture loss, preventing stress-related fractures in the clay.
Bisque Firing and Glazing Techniques
Bisque Firing Process
Bisque firing is a crucial step in ceramics that transforms dried clay into a durable, porous material ready for glazing. During this process, the dried bone pieces are placed in a kiln and fired at a lower temperature, typically around 1,800°F (982°C). This first firing stage drives out all organic material and strengthens the piece while maintaining its porosity, allowing it to absorb glaze in the next steps effectively. It’s essential to fire pieces slowly and ensure they are scorched to prevent cracking or explosions in the kiln.
Choosing a Glazing Method
Once the piece has been bisque-fired, glazing begins. Choosing the right glazing method is essential for achieving the desired aesthetic and functional results.
- Dipping: This involves submerging the ceramic piece into a container of liquid glaze, which provides even and consistent coverage for larger surfaces.
- Brushing: This technique uses brushes to hand-apply glaze perfect for finer details, allowing for more artistic control and textured finishes.
- Spraying: Applying glaze with an airbrush or sprayer creates smooth gradients, subtle layers, and soft transitions between colors.
Tips for Unique Glaze Effects
Experimentation with glazing can result in striking and unique effects. For example, layering different glazes can add depth and vibrant color variations to a piece. Similarly, using wax resist, a technique that involves applying wax to certain areas, prevents the glaze from adhering, leaving those sections unglazed for contrast or functional designs. Through these methods, artists can bring creativity and individuality to their ceramic pieces.
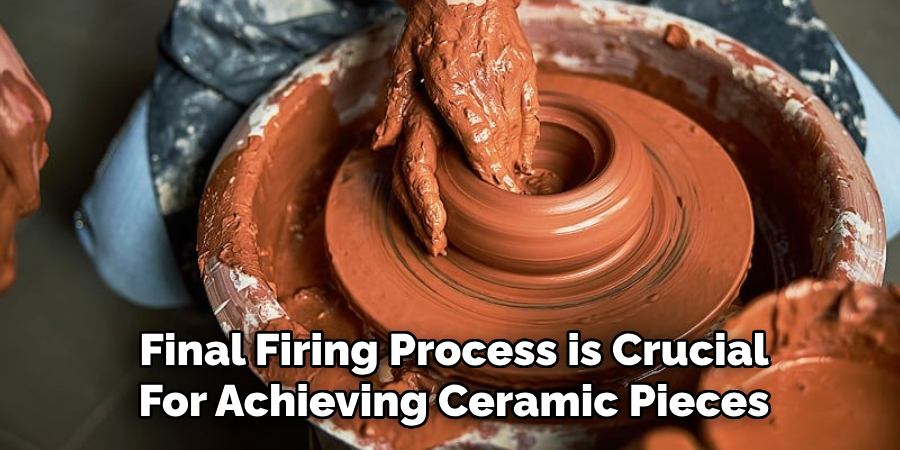
Final Firing and Finishing Touches
Glaze Firing
The final firing process is crucial for achieving ceramic pieces’ durable and visually appealing finish. Glaze firing involves heating the kiln to a higher temperature to melt and fuse the glaze, creating a glossy, smooth surface. The required temperature varies depending on the type of clay and glaze used; for instance, stoneware is typically fired at Cone 5-10, while earthenware is fired at Cone 06-04. Following the recommended firing range accurately is essential to prevent defects, such as crazing or warping, and ensure the best results.
Polishing and Smoothing
After the final firing, some ceramic pieces may require polishing and smoothing to enhance their appearance and functionality. Sanding any rough edges or surfaces can provide a refined finish, making the piece more pleasant to handle and visually clean. Use fine-grit sandpaper or wet-sanding techniques to achieve the best results while diminishing any imperfections.
Alternative Finishes
To further personalize ceramic artwork, artists can explore alternative finishes. Metallic finishes or matte effects can add contrast and drama to a piece, while underglazes provide a versatile option for detailed painting and intricate designs. These finishes, paired with the glaze, create stunning visual effects highlighting the artist’s creativity and craftsmanship.
Conclusion
The ceramic-making process is a rewarding blend of creativity and technique. Starting with choosing the right clay, shaping it into a desired form, and adding texture, each step builds toward a unique creation. After drying, glazing, and the final firing, the transformation is complete, revealing a beautiful piece of art. For anyone learning how to make a creative ceramic pieces, experimenting with different styles and finishes unlocks endless possibilities. Remember, patience is key—mastering ceramics takes time and practice. Allow yourself to explore, make mistakes, and refine your skills, as each piece tells a story of your artistic growth.
Specialization:
- Master of wheel-throwing, hand-building, and advanced glazing techniques
- Focus on creating both functional pottery and decorative art pieces
Recognition:
- Celebrated by collectors and art enthusiasts for creating one-of-a-kind pieces that blend artistry with functionality
- Participates in local and national exhibitions, earning accolades for his innovative designs and craftsmanship
Passion:
- Deeply committed to exploring and pushing the boundaries of ceramic artistry
- Continuously experiments with new materials, firing techniques, and artistic concepts to evolve his craft
Personal Philosophy:
- Believes in the transformative power of art, aiming to evoke emotions and connections through his ceramic creations
- Advocates for sustainability in ceramics, using eco-friendly materials and practices whenever possible