


Are you looking for a creative and unique way to decorate your home or make personalized gifts? Making a bow out of clay is the perfect solution! Not only is it easy to do, but it also adds a beautiful touch to any project.
How to make a bow out of clay is a fun and creative project that allows you to explore your artistic skills. Whether you’re making it as a decorative piece, a unique gift, or a part of a larger craft project, this process is both simple and rewarding. With just a few basic materials and some simple steps, you can shape and design a beautiful clay bow that showcases your personal style.
This guide will walk you through the process, from preparing the clay to adding the finishing touches.
What are the Benefits of Making a Bow Out of Clay?
There are many benefits to making a bow out of clay, including:
- Accessible: Compared to other materials like fabric or ribbon, clay is relatively inexpensive and can be found at most craft stores.
- Personalization: With clay, you can shape and design your bow in any way you want. You can also add colors, patterns, or textures to make it truly unique.
- It’s Durable: Once the clay has been baked and hardened, it becomes strong and long-lasting. This makes it perfect for use as a decorative piece or gift.
- It’s Versatile: A clay bow can be used in various ways, from adorning gifts or home decor to being incorporated into other craft projects.
- It’s Fun: Making a bow out of clay is not only easy but also enjoyable. It’s a great way to be creative and explore your artistic side.
What Will You Need?
To make a bow out of clay, you will need:
- Clay (air-dry or oven-bake)
- Rolling pin
- Craft knife or scissors
- Ruler
- Cutting mat
- Baking sheet (if using oven-bake clay)
- Paints or markers (optional)
Once you have gathered all of your materials, you’re ready to get started!
9 Easy Steps on How to Make a Bow Out of Clay
Step 1: Prepare Your Clay
Begin by selecting the type of clay you want—air-dry clay requires no baking, while oven-bake clay needs to be cured in the oven. Ensure your workspace is clean and organized, as this will make the process smoother. Place a cutting mat or work surface protector to avoid any mess. Knead the clay thoroughly to make it soft and pliable.
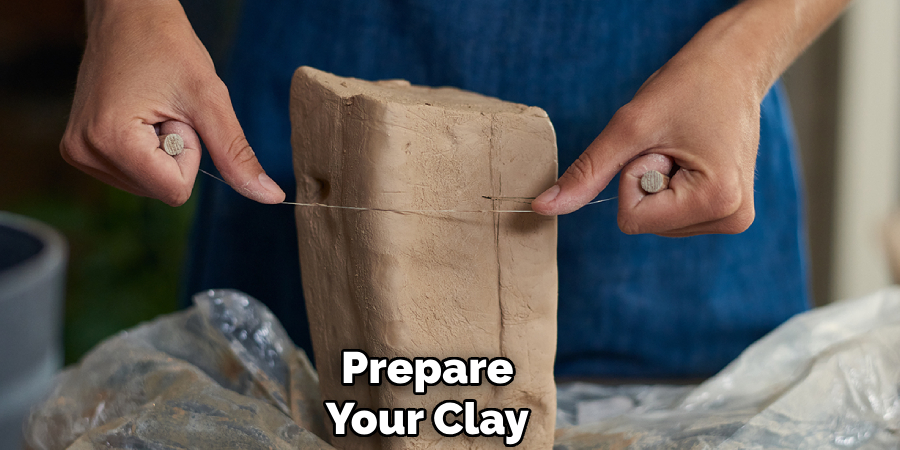
This step is important because it removes air bubbles and makes the clay easier to shape. If your clay feels too firm, you can warm it up with your hands or add a small amount of water to air-dry clay to improve its consistency.
Step 2: Roll Out the Clay
Roll out the clay into a flat, even sheet using a rolling pin or similar tool. Aim for a thickness of about 1/8 inch to ensure the bow is sturdy but still lightweight. Ensure the clay is evenly rolled to avoid weak spots that might lead to cracking. Use a ruler to check for uniform thickness across the sheet if needed.
Step 3: Cut the Clay Pieces
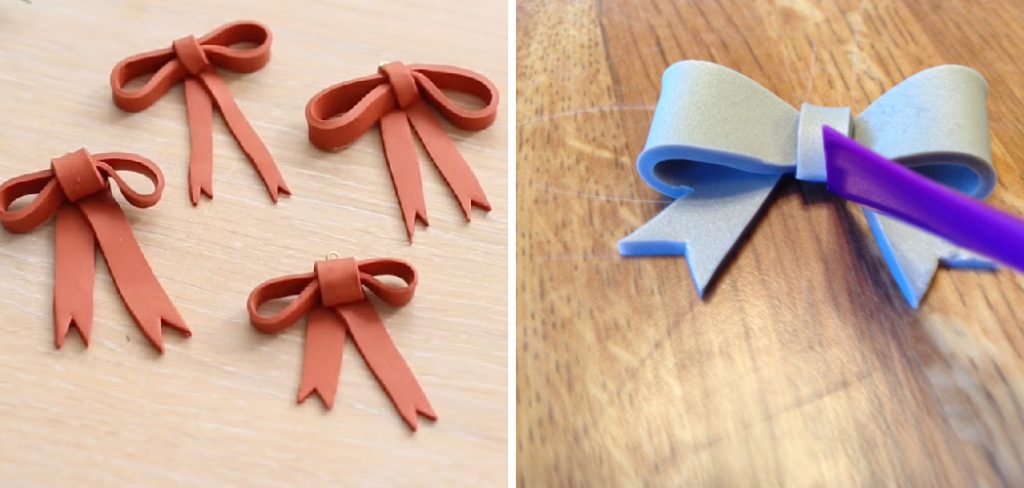
Carefully cut out the pieces needed to form your bow using a craft knife or clay cutter. Typically, you will need one rectangle for the bow loop, a smaller strip for the center wrap, and another longer strip if you add ribbon tails. Adjust the sizes of these pieces based on the desired size of your finished bow. Take your time to ensure clean edges, as this will help achieve a polished final look. Press them lightly onto the clay to guide your cuts if you’re using templates.
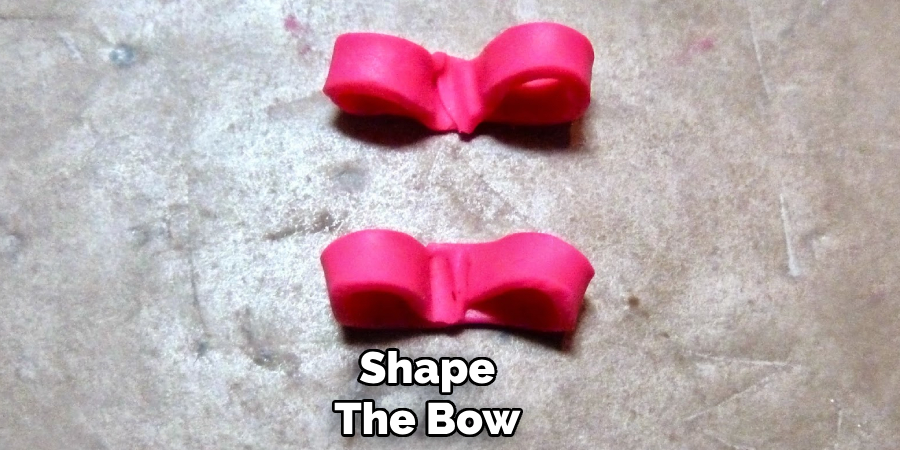
Step 4: Shape the Bow
Take the rectangle piece for the bow loop and gently fold it in half lengthwise, bringing the short ends together to form the loop. Press the ends together lightly, ensuring they adhere without distorting the shape. Use your fingers to adjust and smooth the loop until it resembles the desired bow shape. If adding ribbon tails, position the longer strip beneath the loop, arranging it in a V-shape or cut into a fishtail design for added detail.
Step 5: Secure the Bow
To secure the smaller strip designated for the center wrap, wrap it around the middle of the bow loop. This holds the loop in place and adds a finished and decorative touch to the bow.
Ensure the ends of the strip meet on the backside of the bow, trimming any excess material if necessary. Press the strip gently but firmly to attach it, using a small amount of adhesive if needed to hold everything in place. Adjust the bow and tails to ensure a balanced and polished appearance.
Step 6: Attach the Bow
Once the bow is complete, it’s time to attach it to your desired surface or item. Depending on the project, you can use double-sided tape, glue, or even a wire to secure the bow. For gifts, attach the bow to the wrapping paper or ribbon securely, ensuring it stays put during handling.
If using the bow for decorations or crafts, position it carefully and make any final adjustments to the loops and tails for the best presentation. Take a moment to admire your perfectly crafted bow, adding a delightful finishing touch to your project.
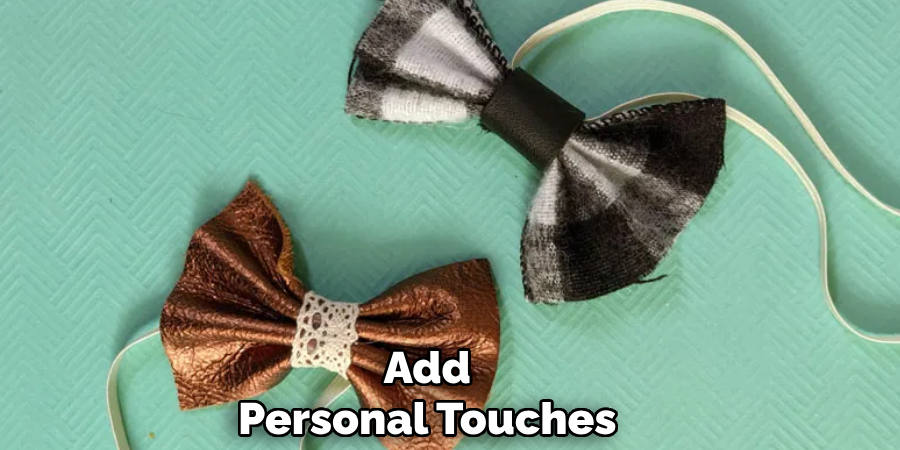
Step 7: Add Personal Touches
To make your bow truly unique, consider adding personal touches that reflect your style or the occasion. You can embellish the bow with small decorative items like beads, faux flowers, or glitter. Use a hot glue gun to attach these embellishments securely to the bow. Select decorations that match the theme if the bow is for a specific event, such as a birthday or holiday. These small additions can elevate the bow’s look, making it stand out as a custom piece tailored to your project.
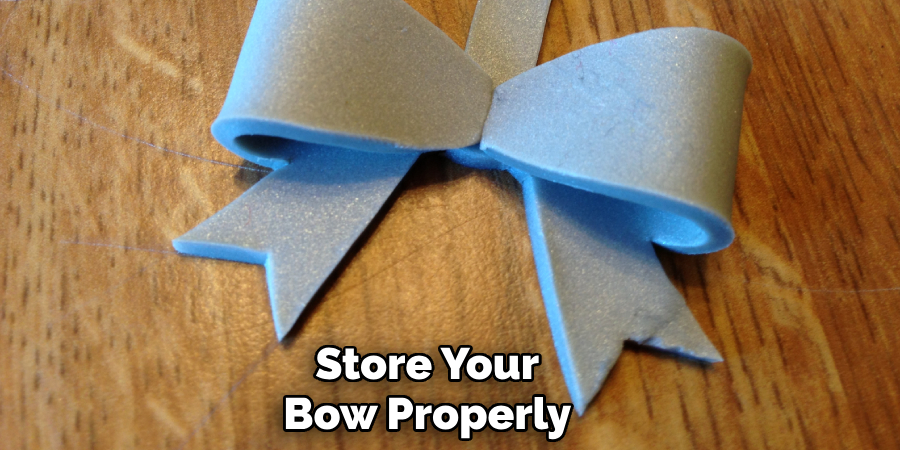
Step 8: Store Your Bow Properly
Once your bow is crafted and decorated, it’s essential to store it properly to maintain its shape and beauty. If you are not using the bow immediately, place it in a clean, dry area away from direct sunlight or heat, which can cause fading or distortion. Consider using a box or container to protect the bow from dust and damage.
For larger or more elaborate bows, use tissue paper to cushion them and help preserve their form. Proper storage ensures your bow remains pristine and ready to use whenever you need it.
Step 9: Keep Experimenting
Making a bow out of clay is highly versatile and customizable, so don’t be afraid to experiment with different shapes, sizes, colors, and decorations. As you gain more experience and confidence, try creating bows for various occasions or incorporating the technique into other crafts. With practice, you’ll master the art of clay bow-making and have a fun and creative skill to add to your repertoire. Remember always to enjoy the process and let your imagination run wild!
By following these nine easy steps, you can create beautiful clay bows to add a handmade touch to any project.
5 Things You Should Avoid
- Using Too Much Water: While water is essential to keep the clay workable, using excessive water can make the clay too soft and prone to collapse. Always use a small amount to maintain the right consistency.
- Skipping the Kneading Process: Properly kneading the clay helps remove air bubbles that can cause cracks or weak spots in the bow. Neglecting this step might lead to a fragile final product.
- Rushing the Shaping Process: Patience is key when shaping the bow. Moving too fast can result in uneven edges or an incomplete design, so take your time to perfect the shape.
- Drying Too Quickly: Avoid placing the bow in direct sunlight or near a heat source to accelerate drying. Rapid drying can cause cracks or warping. Allow the clay to dry naturally.
- Not Sealing Properly: Failing to seal the bow after it dries can make it susceptible to damage from moisture or environmental factors. Permanently seal the finished piece with an appropriate glaze or varnish.
By avoiding these common mistakes, you can ensure a successful and durable clay bow creation.
How to Make a 3-Loop Bow?
One of the most popular and versatile bow designs is the three loop bow. It can be used for various occasions such as gift wrapping, floral arrangements, or even as a hair accessory. Here’s a step-by-step guide on how to make your own 3-loop bow using ribbon:
- Start by cutting a long piece of ribbon, around 2-3 feet long, depending on the size of your desired bow. The longer the ribbon, the bigger and fuller the bow will be.
- Take one end of the ribbon and make a small loop, securing it with your fingers or a clip.
- Begin making a second loop in the opposite direction, overlapping the first loop slightly at the base.
- Continue making loops, alternating directions, and gradually increasing in size until you have three loops on each side.
- Once you have six loops total, secure them together at the center with a wire or twist tie.
- Adjust and fluff out the loops to your desired shape and fullness.
- Cut another small ribbon and wrap it tightly around the center, securing the loops in place.
Your 3-loop bow is now ready to be used! Experiment with different ribbon colors and textures for unique variations.
Conclusion
How to make a bow out of clay is a fun and creative project that allows for endless customization.
By following the steps above, you can craft a beautiful and durable clay bow that is perfect for decorative purposes. Remember to shape each piece carefully, ensure symmetry and balance, and take your time during baking or drying for optimal results.
With practice and experimentation, you can refine your technique and create unique clay bows in various colors, sizes, and designs to suit any purpose.
Specialization:
- Master of wheel-throwing, hand-building, and advanced glazing techniques
- Focus on creating both functional pottery and decorative art pieces
Recognition:
- Celebrated by collectors and art enthusiasts for creating one-of-a-kind pieces that blend artistry with functionality
- Participates in local and national exhibitions, earning accolades for his innovative designs and craftsmanship
Passion:
- Deeply committed to exploring and pushing the boundaries of ceramic artistry
- Continuously experiments with new materials, firing techniques, and artistic concepts to evolve his craft
Personal Philosophy:
- Believes in the transformative power of art, aiming to evoke emotions and connections through his ceramic creations
- Advocates for sustainability in ceramics, using eco-friendly materials and practices whenever possible