


Are you interested in processing wild clay but don’t know where to start? Look no further! This guide will cover everything you need to know about processing wild clay and turning it into usable material for pottery and other ceramics.
Processing wild clay is a rewarding endeavor that connects you to natural materials in their most raw form. Wild clay, often sourced directly from the earth, must be refined and prepared before it can be used for pottery, sculpture, or other creative projects. The process involves careful collection, purification, and testing to ensure the clay’s usability and workability.
By learning how to process wild clay, you can create art and functional objects that carry a deep, natural connection to the land while gaining a greater appreciation for the craft.
What are the Benefits of Processing Wild Clay?
Processing wild clay has several benefits that make it an appealing option for artisans and hobbyists alike.
- Connection to the Land: As mentioned, processing wild clay allows you to connect with nature by sourcing materials directly from the earth. This can add a unique and meaningful element to your creative process.
- Cost-effective: Compared to purchasing commercially processed clay, processing wild clay can save you money in the long run. Once you have mastered the process, you can collect and refine your clay without spending money on buying it.
- Sustainability: By using locally sourced materials, processing wild clay promotes sustainability by reducing carbon emissions associated with transportation and minimizing waste from commercial clay production.
- Customization: Processing wild clay gives you complete control over the type and quality of the clay you use. This allows for endless possibilities regarding color, texture, and other unique characteristics that can add depth and character to your creations.
What Will You Need?
Before diving into the process of processing wild clay, it’s essential to have the right tools and materials on hand. Here are some items you will need:
- Shovel or Trowel: This is used to dig up the clay from its natural source.
- Buckets: These will be used to collect and store the clay and for mixing and refining it.
- Screen or Strainer: This will help remove debris or impurities from the clay.
- Water Source: You will need water to mix with the clay and create a workable consistency.
- Large Container or Tub: This will be used for soaking and aging the clay.
- Tarp or Plastic Sheet: This will serve as a workspace and help contain any mess during the process.
- Drying Surface: Once the clay is processed, it must dry on a flat surface before it can be used.
10 Easy Steps on How to Process Wild Clay
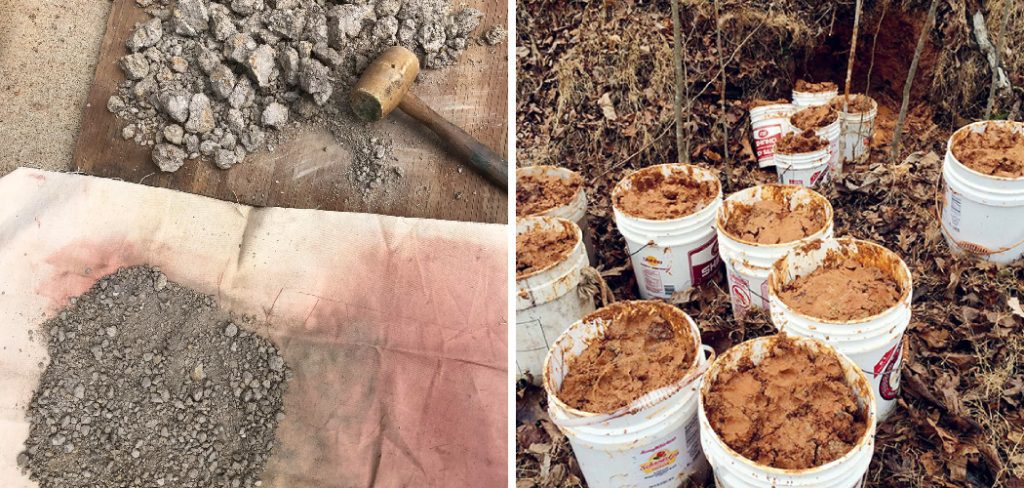
Step 1: Collecting Wild Clay
The first step in processing wild clay is to locate a suitable natural source. Wild clay can typically be found near riverbanks, lakeshores, construction sites, or any area where the ground has been exposed. Look for soil that feels sticky and clumps together when wet, which is a strong sign of high clay content. Once you’ve identified a promising spot, use your shovel or trowel to dig a manageable amount of clay-rich soil.
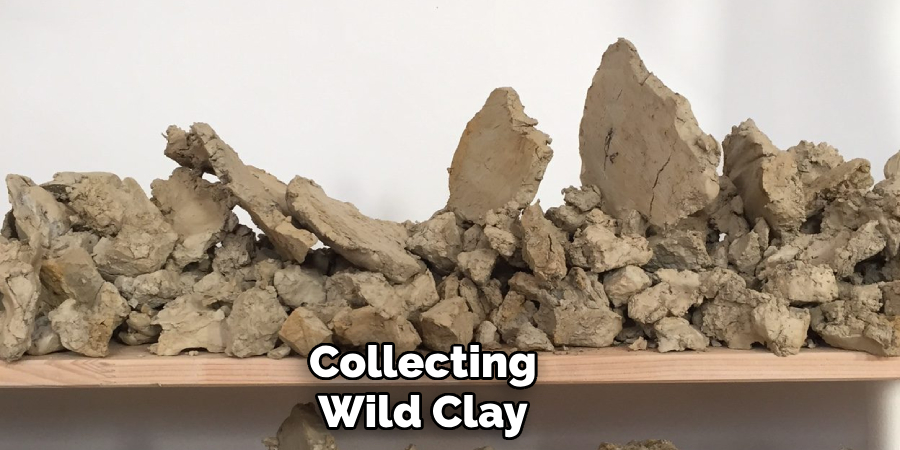
Be mindful of the environment and avoid overharvesting—take only what you need to maintain the area’s natural balance. Place the collected material into your buckets or containers, ensuring it’s free from large rocks or organic debris. It’s best to dig a few inches below the surface layer, as this often contains the purest clay deposits. Transport the collected clay back to your workspace to proceed with the next steps.
Step 2: Drying and Crushing the Clay
Once you’ve collected your wild clay, the next step is to prepare it for further processing by drying and crushing it. Spread the clay-rich soil in a thin layer on a tarp or a flat surface in a dry, sunny area. Allow it to dry completely, which can take a few hours to several days, depending on the weather and the moisture content of the clay.
Once the soil is arid, break it into smaller chunks using a mallet, rock, or simply your hands. Crushing the clay helps to separate it from impurities, such as small rocks or organic matter, and makes it easier to process in the subsequent steps. Aim for a fine, crumbly texture to achieve the best clay refining results.
Step 3: Soaking the Clay
After the clay has been thoroughly dried and crushed, the next step is to rehydrate it through soaking. Place the powdered clay into a large container and add enough clean water to submerge the material completely. Stir the mixture well to ensure all the clay particles are exposed to the water, breaking up any remaining lumps as you go.
Allow the clay and water mixture to sit undisturbed for 24 to 48 hours. During this time, the clay will absorb the water, and impurities such as sand and debris may settle at the bottom or float to the top. This soaking process helps separate fine clay particles from unwanted materials, making it easier to refine the mixture in the next step.
Step 4: Sieving the Clay
Once the clay has finished soaking, the next step is to sieve the mixture to remove any remaining impurities. Pour the clay and water mixture into another container using a fine mesh sieve or screen. This process helps separate fine clay particles from larger debris, such as stones or organic matter, ensuring a smoother final product.
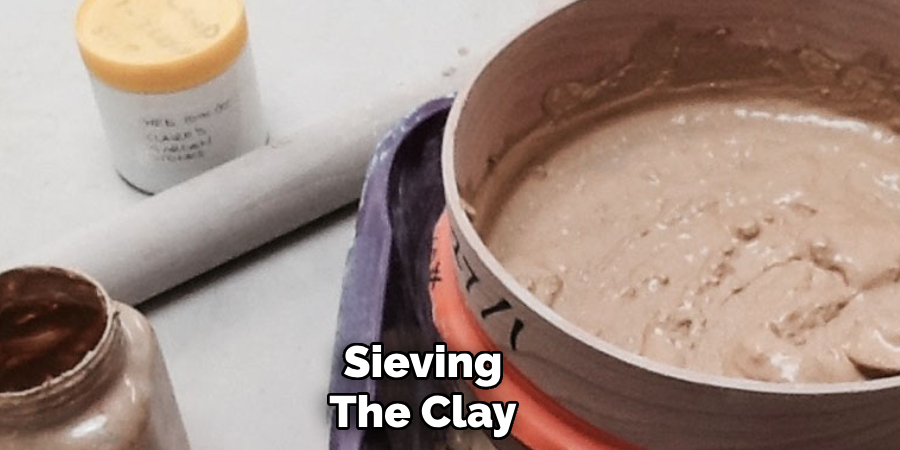
Depending on the consistency of the mixture, you may need to use a spatula or your hands to press the clay through the sieve gently. Repeat this step if necessary to achieve a uniformly smooth clay slurry, which will be ready for further processing.
Step 5: Removing Excess Water
After sieving, the clay slurry must have its excess water removed to reach the desired consistency. Pour the slurry into a porous material, such as a plaster slab, cotton sheet, or canvas, to help absorb the water.
Spread the slurry evenly over the surface and leave it to sit for several hours or until the clay begins to firm up. You can periodically replace the porous material for faster results if it becomes saturated. Once the clay has reached a workable texture, it is ready to be kneaded and used for your project.
Step 6: Kneading the Clay
Kneading is essential to ensure the clay has a uniform texture and remove any air pockets that could compromise your final piece. Begin by placing the clay on a clean, flat surface, such as a wooden board or a stone slab. Use the palms of your hands to press and fold the clay repeatedly, turning it after each fold.
This process, known as wedging, helps align the clay particles and improves its workability. Continue kneading for several minutes until the clay feels smooth and consistent. Properly prepared clay is ready for shaping, molding, or any other creative endeavor.
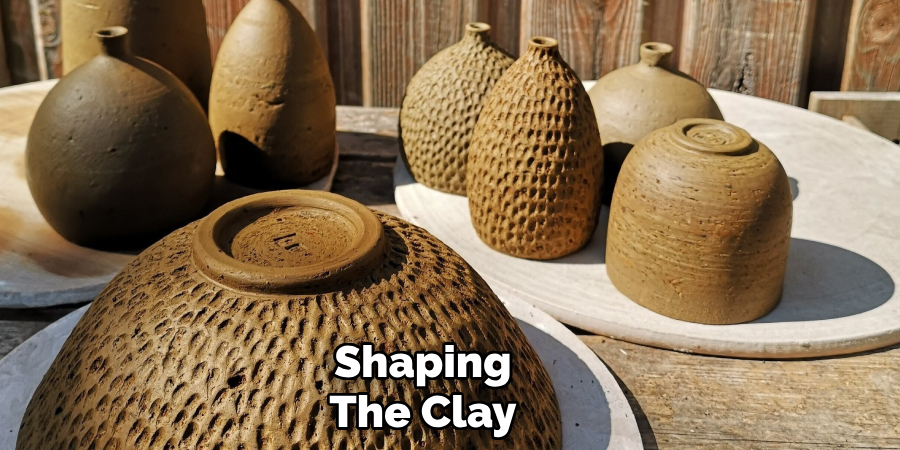
Step 7: Shaping the Clay
With your clay adequately prepared, you can shape it into your desired form. Start by deciding on your desired technique, such as hand-building, coiling, or wheel throwing. Use simple tools like wooden paddles or modeling sticks to shape and refine your piece for hand-building. If using coils, roll out even strips of clay and layer them carefully, smoothing out the joins as you build.
For wheel throwing, center the clay on the wheel, use steady hands to mold it as it spins and apply gentle pressure to achieve the desired shape. Keep the clay slightly moist during the shaping process to prevent cracking.
Step 8: Drying the Clay
After shaping your clay piece, allowing it to dry thoroughly before firing is essential. Place your work on a flat, non-stick surface in a well-ventilated area, away from direct sunlight or extreme drafts, which can cause uneven drying or warping. Depending on the size and thickness of your piece, drying may take several days or even weeks.
To ensure consistent drying, turn or rotate the piece occasionally. Be patient during this step, as rushing the drying process can lead to cracks or other imperfections in the final product.
Step 9: Bisque Firing
Once your clay piece has dried completely, it is time for the bisque firing process. This step involves placing the dry clay into a kiln and firing it at a lower temperature to harden the piece and prepare it for glazing. Carefully load your piece into the kiln, ensuring it does not touch others to prevent damage.
The bisque firing typically reaches temperatures between 1730°F and 1940°F (945°C to 1060°C), depending on the type of clay used. Allow the kiln to cool completely before removing your piece to avoid thermal shock. After bisque firing, your creation will transform into a porous but sturdy ceramic, ready for the next step.
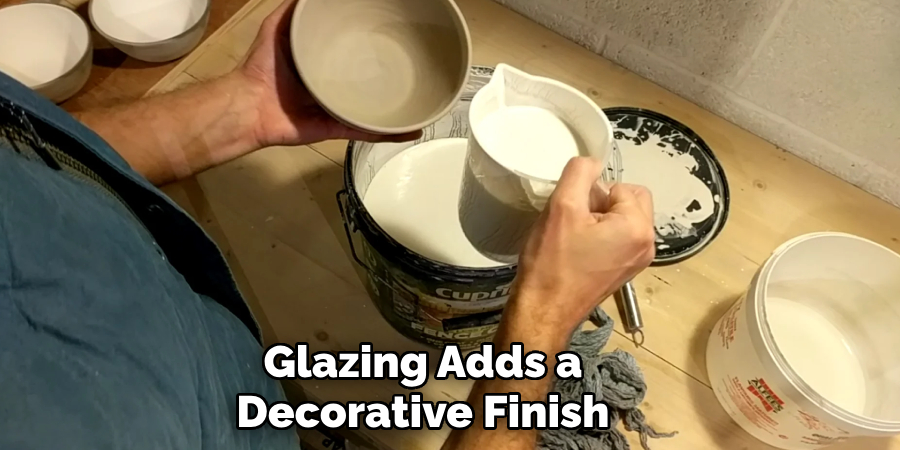
Step 10: Glazing
With your bisque-fired piece ready, the next step is glazing. Glazing adds a decorative finish and creates a waterproof seal on your ceramic piece. Begin by preparing the piece, wiping off any dust with a damp sponge to ensure the glaze adheres evenly.
Choose your desired glaze type and apply it using your preferred method: dipping, brushing, or spraying. Be sure to apply an even coat and follow the specific instructions for your glaze. Allow the glaze to dry thoroughly before moving on to the final firing stage. Glazing enhances both the utility and beauty of your ceramic creation.
By following these steps, you can create beautiful and functional pieces using natural clay.
Conclusion
How to process wild clay is a rewarding endeavor that connects you to the earth and allows you to create unique, handcrafted ceramic pieces.
By following the outlined steps—harvesting, preparing, testing, shaping, and firing—you can transform raw, natural clay into durable, beautiful works of art. Patience and attention to detail are key, as each stage requires care and precision.
Whether you are crafting for utility, artistic expression, or both, working with wild clay provides a profound sense of accomplishment and a deeper appreciation for the natural world.
Specialization:
- Master of wheel-throwing, hand-building, and advanced glazing techniques
- Focus on creating both functional pottery and decorative art pieces
Recognition:
- Celebrated by collectors and art enthusiasts for creating one-of-a-kind pieces that blend artistry with functionality
- Participates in local and national exhibitions, earning accolades for his innovative designs and craftsmanship
Passion:
- Deeply committed to exploring and pushing the boundaries of ceramic artistry
- Continuously experiments with new materials, firing techniques, and artistic concepts to evolve his craft
Personal Philosophy:
- Believes in the transformative power of art, aiming to evoke emotions and connections through his ceramic creations
- Advocates for sustainability in ceramics, using eco-friendly materials and practices whenever possible