


Clay crafting is a versatile and rewarding hobby that allows you to transform simple materials into unique pieces of art. Among the many possibilities, learning how to make a clay skull is both a fun and creative project, ideal for those who enjoy expressing their artistic side.
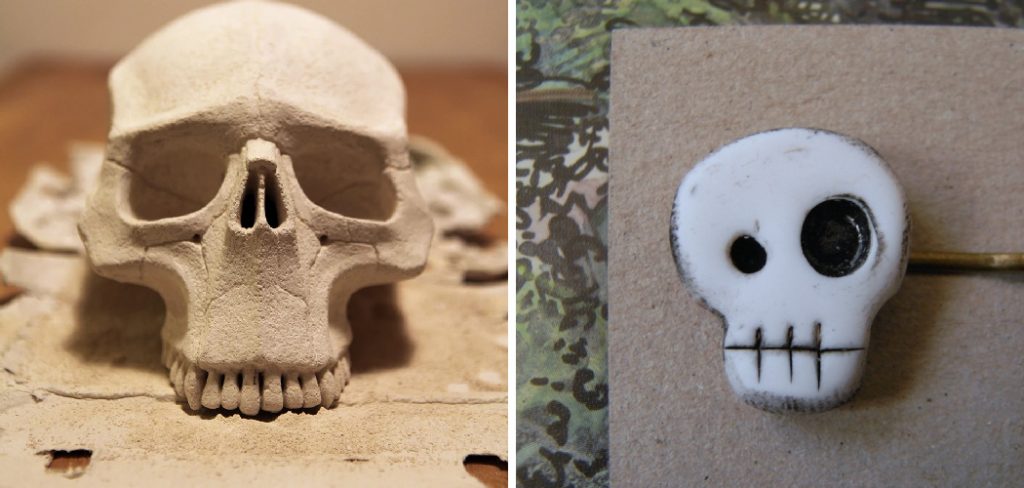
Clay skulls are commonly used as decorations for Halloween or Day of the Dead celebrations, and they can also serve as intricate sculptures that add a bold statement to any space. Whether you’re a beginner or a seasoned hobbyist, this project provides a chance to develop sculpting techniques while exploring your creativity. The purpose of this guide is to walk you through the step-by-step instructions on how to sculpt, detail, and finish a clay skull, ensuring an enjoyable experience that results in a masterpiece you’ll be proud to display.
Materials and Tools Needed
To create a stunning clay skull, it’s essential to gather the right materials and prepare your workspace properly. Below is a comprehensive list of everything you’ll need:
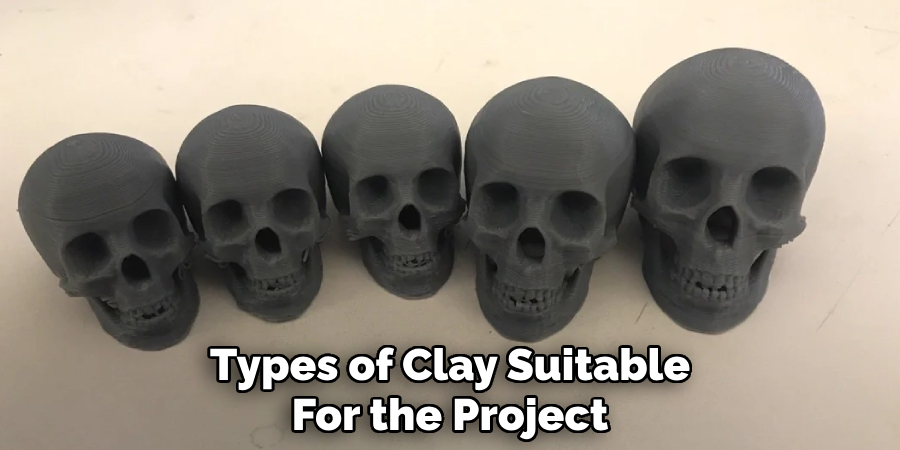
Types of Clay Suitable for the Project
- Air-dry clay – A popular choice for beginners due to its ease of use and minimal equipment needs. No firing or baking is required, and it hardens naturally over time.
- Polymer clay – Ideal for detailed work and comes in many vibrant colors. It requires baking in a home oven to set.
- Traditional ceramic clay – Recommended for more advanced sculptors. This clay needs to be fired in a kiln to achieve a durable finish.
Basic Sculpting Tools
- Sculpting knives – Perfect for carving and shaping the finer details.
- Shaping tools – These help form smooth curves and edges in your design.
- Wire loops – Useful for removing excess clay and achieving intricate details.
- Smoothing tools – Essential for refining the surface and preparing it for decoration.
Optional Materials
- Paints and brushes – For adding vibrant colors or intricate patterns after the clay has dried or been fired.
- Sealant – Helps protect your finished piece and provides a polished look.
- Accessories – Items such as rhinestones or beads can be used for additional decoration.
Work Surface Preparation
Set up a clean, flat workspace equipped with parchment paper or a craft mat to protect your table. This surface will prevent your clay from sticking and make cleanup easier. Ensure proper lighting and keep all tools and materials within reach for a smooth sculpting process.
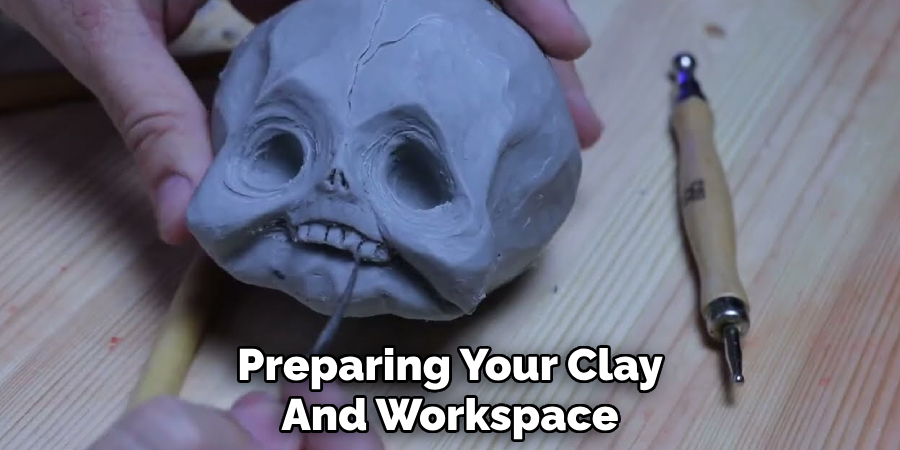
Preparing Your Clay and Workspace
Conditioning the Clay
Before you begin sculpting, properly condition your clay by kneading it until it becomes soft and pliable. Conditioning warms the clay, improves its texture, and ensures it’s evenly distributed, preventing cracks in the final piece. Roll, fold, and press the clay repeatedly, and if it feels too firm, try warming it slightly in your hands or using a clay roller for assistance.
Setting Up a Clean, Organized Workspace
A tidy workspace is key to a successful project. Lay out parchment paper or a craft mat on a flat surface to protect your table. Position your tools, accessories, and materials within easy reach so you can work efficiently. Keep a damp cloth or baby wipes nearby for quick cleaning of your hands and tools to avoid transferring dust or residue to your clay.
Preventing Clay from Drying Out
Polymer clay can dry out if left exposed for long periods. When not in use, wrap it securely in plastic wrap or store it in an airtight container. Additionally, misting your clay lightly with water can help maintain its workability during extended sculpting sessions.
Optional: Using Armature Wire or Foil
For creating lightweight structures, such as a skull base, consider using armature wire or aluminum foil. These materials provide a sturdy framework while reducing the amount of clay needed, making your sculpture easier to handle and fire. Ensure the armature is shaped to your desired form before layering clay over it.
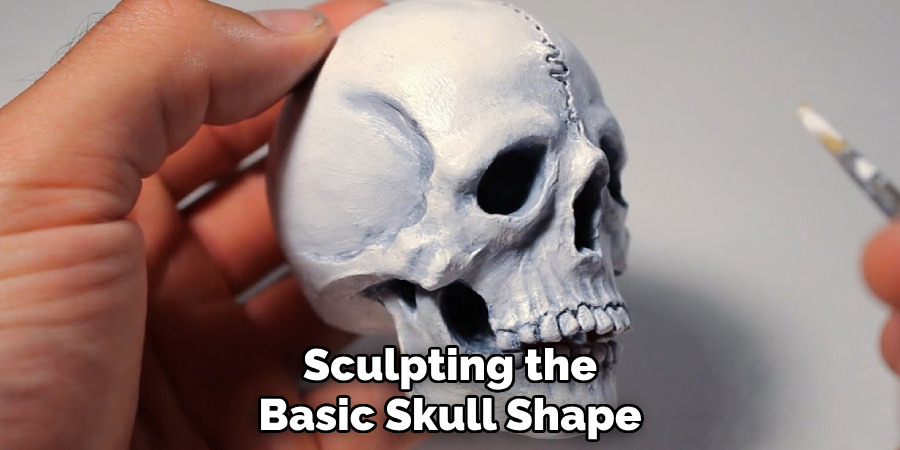
How to Make a Clay Skull: Sculpting the Basic Skull Shape
Step 1: Forming the Skull Base
Begin by forming a rough oval or rounded shape as the base of your skull. Use your hands to compress and shape the clay into a general skull-like structure. This base will serve as the foundation for the rest of your details, so aim for a size and proportion that align with your desired outcome. If you are using armature wire or aluminum foil as a core, ensure the clay evenly covers the framework to create a sturdy starting point.
Step 2: Creating the Jawline and Cheekbones
Next, add clay to the lower portion of the base to begin crafting the jawline. Build it up gradually, shaping the angular structure to mimic the appearance of a human skull. Pay special attention to the cheekbone areas, as these features add depth and dimension to your sculpture. Use small, manageable pieces of clay to incrementally bulk out these regions, ensuring that each addition is well-blended into the base to avoid weak spots.
Step 3: Smoothing the Surface and Defining the Overall Shape
Once the basic structure is in place, begin smoothing out the surface of your skull using your fingers, clay tools, or a damp sponge. This not only enhances the finish but also helps you better define the contours of your sculpture. Carefully refine the details, such as the ridges and planes, to capture the shape and essence of a skull while maintaining a clean surface.
Tips for Maintaining Symmetry and Proportion
Throughout the sculpting process, regularly check your work from multiple angles. Use a ruler or calipers to measure key points on either side of the skull to ensure symmetry. Taking occasional breaks to step back and view your sculpture as a whole can help you notice proportional inconsistencies, allowing you to make corrections before moving on to finer details. Patience and precision are key to achieving a realistic and balanced result.
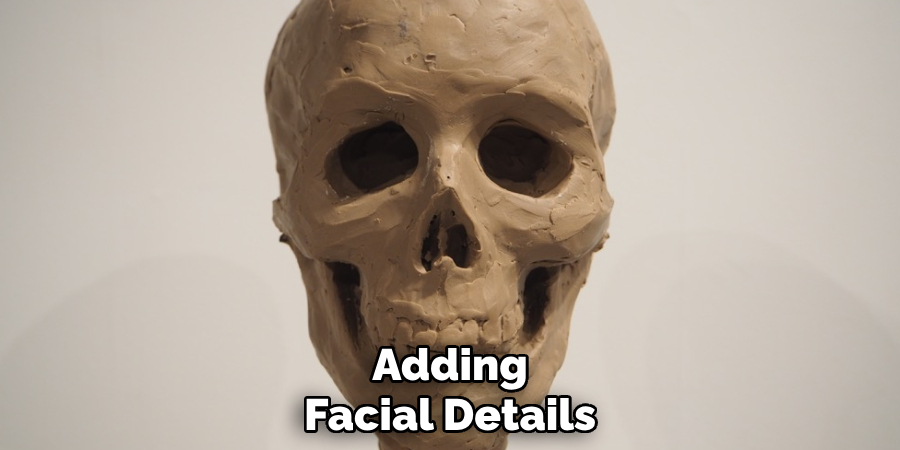
Adding Facial Details
When your sculpture’s overall structure and proportions are complete, it’s time to focus on adding facial details that will bring the piece to life. Precision and careful observation play an essential role during this stage. Pay close attention to anatomical references or creative designs if you are pursuing a stylized appearance.
Sculpting the Eye Sockets
Start by marking the placement of the eye sockets on the skull. Use an appropriate tool, like a loop or ball stylus, to carve out oval or round indentations, ensuring they align symmetrically on each side of the face. The depth and shape of the sockets should match the intended scale and expression of the sculpture. Smooth the edges to create a subtle, natural transition into the surrounding bone structure.
Forming the Nasal Cavity
Next, sculpt the nasal cavity by carefully creating the characteristic shape of the nose hole. Typically, this area forms a triangular or heart-shaped opening, depending on the anatomical or stylistic requirements. Use reference images to refine the contours and adjust the depth, ensuring the nasal cavity feels realistic and proportional.
Detailing the Teeth
When shaping the teeth, decide whether to sculpt each tooth individually or use impressions for a cohesive look. For individual teeth, carve out small, evenly spaced rectangles or other natural shapes along the jawline. Using an imprint tool or pressing a mold can save time while maintaining realism. Smooth transitions between the teeth and bone structure are important for a lifelike result.
Adding Texture and Fine Lines
Finally, add textures and fine lines to enhance the realism or stylized quality of the facial features. Use small carving tools to create subtle cracks, wrinkles, or grooves that mimic natural bone details. Alternatively, for a stylized approach, emphasize exaggerated textures or decorative patterns to give your sculpture a unique character. Keeping your tools clean and precise during this process is critical to achieving a polished finish.
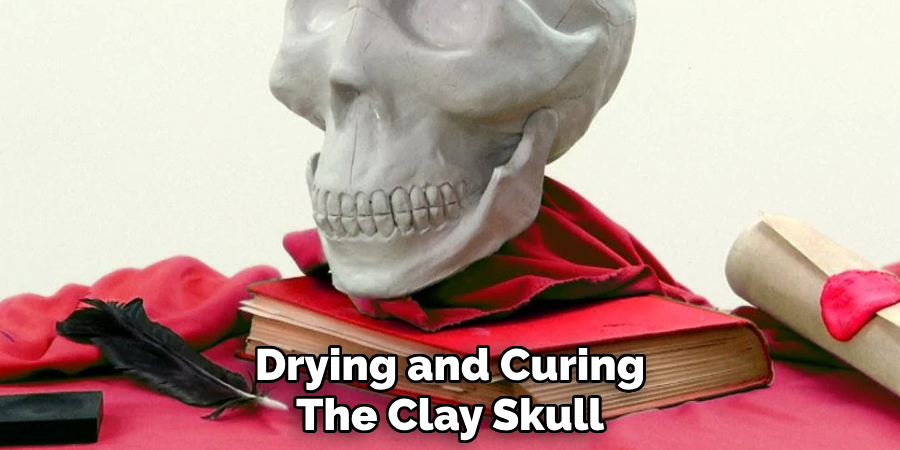
Drying and Curing the Clay Skull
Instructions Based on Clay Type
The drying and curing process varies depending on whether you are using air-dry clay or polymer clay. For air-dry clay, place the skull in a cool, dry, and well-ventilated space, ensuring it is protected from direct sunlight or intense heat, as these can cause uneven drying and cracks. Drying times for air-dry clay generally range from 24-72 hours, depending on the size and thickness of the sculpture. Rotate the piece occasionally to ensure all sides dry evenly.
For polymer clay, preheat your oven according to the manufacturer’s instructions, typically between 230°F and 275°F (110°C to 135°C). Place the sculpture on a baking tray lined with parchment paper and bake for the recommended time, usually 15 minutes per 1/4 inch (6 mm) of thickness. Avoid overbaking, as this may degrade the clay or alter its color.
Tips for Avoiding Cracks or Warping
To prevent cracking or warping, ensure the clay is evenly distributed during sculpting and avoid overly thin areas that may dry or bake unevenly. For air-dry clay, spritzing lightly with water during drying can help maintain moisture balance. For polymer clay, support delicate features with aluminum foil or other heat-resistant materials during baking.
How to Know When the Skull is Fully Hardened
An air-dried sculpture is ready when it feels completely firm and no longer cool to the touch, indicating it has fully released moisture. For polymer clay, the skull should harden and feel solid upon cooling after baking. Once cured, the sculpture can be sanded or painted without risk of distortion, signaling it is ready for finishing touches.
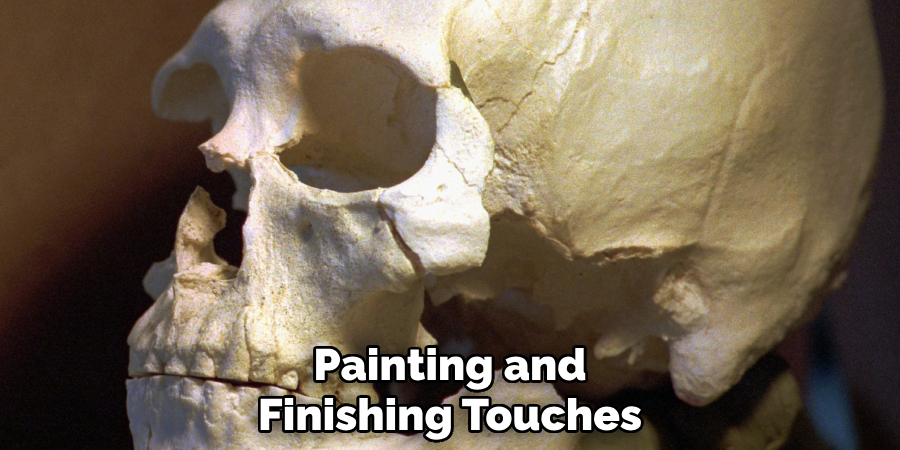
Painting and Finishing Touches
Choosing the Right Paint for Your Clay Type
Selecting the appropriate paint is crucial for achieving a professional finish on your sculpture. Acrylic paint is the best choice for both air-dry and polymer clay due to its versatility, vibrant color options, and fast-drying properties. For optimal results, ensure the sculpture’s surface is clean and smooth before applying the paint. If you are working with porous air-dry clay, consider applying a primer or base coat to even out absorption and enhance color vibrancy.
Painting Techniques for Shadows, Highlights, and Details
To bring your skull sculpture to life, focus on creating realistic shadows and highlights. Begin with a base coat of color, and then use darker shades to define recessed areas, giving depth and dimension. For highlights, use a dry-brushing technique with lighter shades to accentuate raised details such as ridges or edges. Fine brushes or detailed tools are ideal for adding intricate patterns, cracks, or other textural elements to mimic natural features.
Applying a Sealant to Protect the Finished Sculpture
Once the paint has dried completely, apply a clear sealant to protect your work. Matte or glossy finishes can be chosen based on your desired effect. The sealant not only locks in the colors but also prevents wear and damage over time.
Optional Decoration Ideas
To add a unique touch to your skull sculpture, experiment with decorations such as metallic paints for a striking reflective effect or glitter for a whimsical flair. Other embellishments like rhinestones, beads, or even incorporated lighting can enhance the sculpture’s visual appeal, making it truly one of a kind.
Displaying and Caring for Your Clay Skull
Ideas for Displaying Your Clay Skull Safely and Attractively
When displaying your clay skull, placement is key to ensuring both safety and visual impact. Choose a sturdy surface such as a mantelpiece, bookshelf, or coffee table to prevent accidental falls. To create an eye-catching display, consider placing the sculpture on a decorative stand or within a glass case for added protection. Surround it with complementary décor, such as candles, seasonal elements, or other artistic pieces, to create a cohesive arrangement.
Tips for Cleaning and Maintaining the Skull Over Time
To keep your clay skull looking its best, gently dust it with a soft cloth or a small paintbrush to reach detailed areas. Avoid using water or harsh cleaning products, especially if the finish is not waterproof. Adding a fresh layer of sealant every few years can help maintain its durability and color vibrancy, ensuring it remains beautiful over time.
Suggestions for Gifting or Using the Skull in Various Decorative Setups
A clay skull can make a thoughtful and personalized gift for art lovers or those with an affinity for unique décor. Present it in a custom box or alongside complementary items like candles or flowers. Alternatively, use it in diverse settings, such as centerpiece arrangements, themed parties, or even as part of seasonal displays like Halloween or Day of the Dead celebrations, where it adds charm and character.
Conclusion
Learning how to make a clay skull is a rewarding and creative process that begins with sculpting the basic form and moves on to refining details before finishing with painting or glazing. Each step allows room for personalization, making every piece truly unique.
Experimenting with various styles and clay types can open up endless possibilities for both beginners and experienced artists. One final tip is to practice patience and fully immerse yourself in the creative journey—it’s through this process that you’ll achieve the most satisfying results while honing your skills and bringing your artistic vision to life.
Specialization:
- Master of wheel-throwing, hand-building, and advanced glazing techniques
- Focus on creating both functional pottery and decorative art pieces
Recognition:
- Celebrated by collectors and art enthusiasts for creating one-of-a-kind pieces that blend artistry with functionality
- Participates in local and national exhibitions, earning accolades for his innovative designs and craftsmanship
Passion:
- Deeply committed to exploring and pushing the boundaries of ceramic artistry
- Continuously experiments with new materials, firing techniques, and artistic concepts to evolve his craft
Personal Philosophy:
- Believes in the transformative power of art, aiming to evoke emotions and connections through his ceramic creations
- Advocates for sustainability in ceramics, using eco-friendly materials and practices whenever possible