


Porcelain figurines have been cherished for centuries for their delicate beauty and intricate detailing. These timeless pieces of art are highly sought after by collectors and enthusiasts alike, symbolizing elegance and craftsmanship.
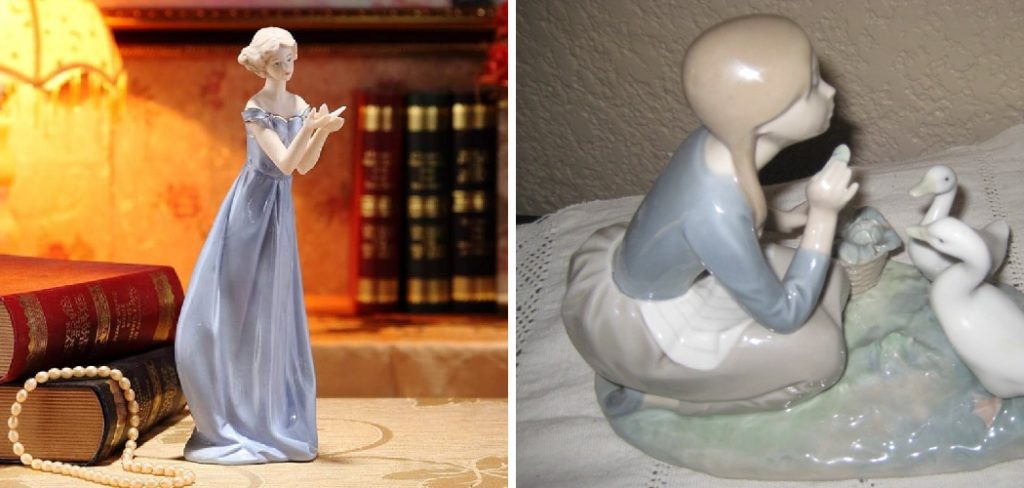
The creation of porcelain figurines allows artists and hobbyists to bring their imaginative designs to life, offering an enriching experience that combines creativity and skill. Whether you’re fascinated by the artistic process or looking to begin your own collection, understanding how to make porcelain figurines opens the door to a captivating craft. This article will serve as a comprehensive step-by-step guide, walking you through every stage of the process—from shaping and sculpting the figurine to the final glazing and firing. By the end, you’ll have the knowledge needed to create stunning porcelain figurines that reflect your personal artistry and passion.
Understanding Porcelain and Its Properties
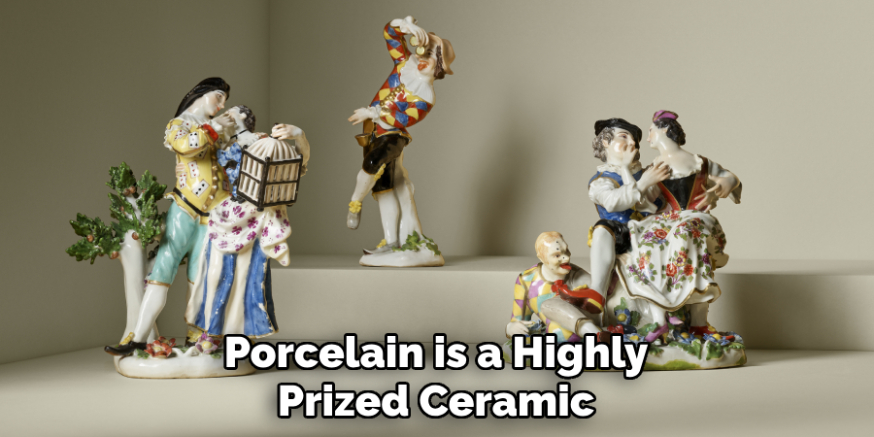
Porcelain is a highly prized ceramic material known for its delicate beauty and exceptional strength. It is composed of a mixture of kaolin clay, feldspar, and quartz, which gives it its unique properties. Kaolin provides the material with its fine texture and plasticity, while feldspar and quartz contribute to its durability and ability to withstand high temperatures during firing. When properly fired, porcelain becomes smooth, white, translucent, and remarkably durable, making it the ideal medium for intricate artistic creations like figurines.
Porcelain differs significantly from earthenware and stoneware, two other common types of ceramics. Earthenware, typically characterized by a reddish or brown color, is more porous and less durable than porcelain. Stoneware, on the other hand, is more robust but lacks the translucent, refined quality that defines porcelain. These distinctions make porcelain particularly appealing for creating detailed and elegant objects.
Porcelain is preferred for figurines due to its ability to capture fine detail and smooth finishes while maintaining a delicate and sophisticated appearance. Its inherent translucence also adds an ethereal quality to the final pieces, elevating their aesthetic appeal. Whether for handmade artwork or decorative collections, porcelain remains the material of choice for artists and collectors seeking timeless beauty and elegance.
Gathering Materials and Tools
Creating with porcelain requires assembling the right materials and tools to ensure a successful and safe experience. Below are the essential items needed for working with this elegant material:
Essential Materials
- Porcelain clay or commercial porcelain slip: These form the foundation of your work, offering the malleability and fine texture required for intricate designs.
- Glazes and underglazes: Used to add color, texture, or shine to the finished pieces, enhancing their visual appeal.
- Mold-making materials (if using molds): Ideal for crafting multiple identical items or ensuring precise details.
Tools Needed
- Sculpting tools: Such as loops, carving knives, and ribbon tools to shape and refine your designs.
- Brushes: For painting details and applying glazes evenly to the surface of your work.
- Kiln: An essential tool for firing the porcelain at high temperatures, solidifying and finishing the piece.
Safety Gear
To ensure a safe environment during the crafting process, always use protective equipment. Masks can help prevent inhalation of fine particles, while gloves protect hands from potentially harmful materials. Additionally, proper ventilation is crucial when working with glazes or kilns to avoid exposure to fumes.
Designing Your Figurine
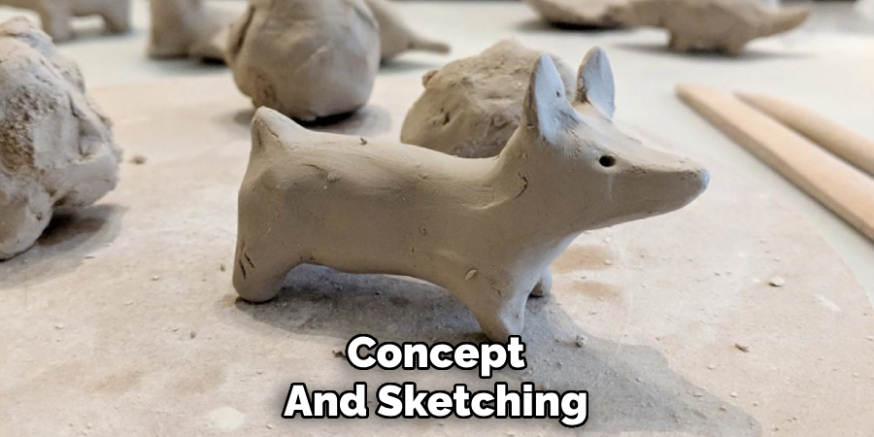
Concept and Sketching
The first step in creating a porcelain figurine is to develop a clear concept and sketch a detailed design. Planning is essential to ensure your vision comes to life seamlessly. Begin by brainstorming and outlining your ideas, taking into account the figurine’s size and its intended pose.
Please pay attention to fine features such as facial expressions, posture, or intricate details that will give the piece its unique character. A thorough sketch acts as a roadmap, helping you visualize proportion, balance, and alignment before moving on to the hands-on creation stage.
Creating a Model or Armature
To give structure and support to your figurine, it is often necessary to build an initial model or armature. This framework—typically made from materials like wire or basic clay—serves as the skeleton of your design, ensuring stability throughout the sculpting process. The size and pose of your sketch help guide this step. A well-constructed armature will prevent collapses or distortions during crafting and allow finer details to be added without compromising the overall structure.
Choosing Between Hand Sculpting and Using Molds
When shaping your figurine, you can opt for hand sculpting or using molds, each with its own advantages. Hand sculpting allows for a completely custom design and intricate, personal touches, though it may require more time and skill.
On the other hand, molds provide consistency and can speed up the creation of identical features, making them ideal for repetitive or production work. Choosing the best method depends on your artistic goals and the complexity of your design.
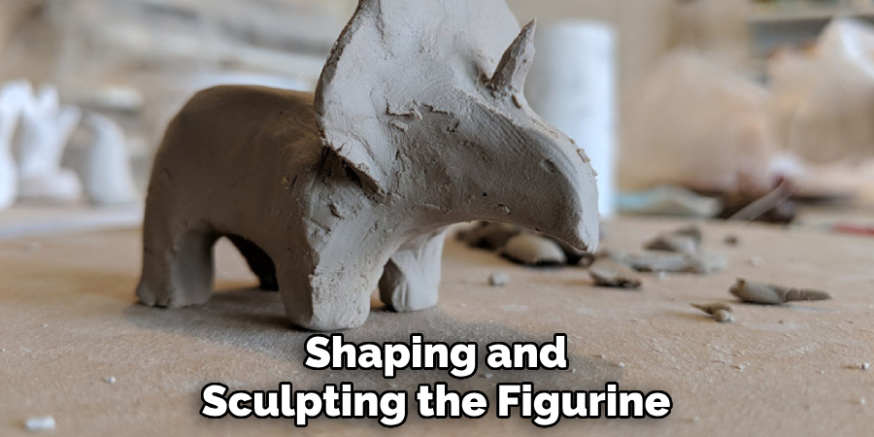
How to Make Porcelain Figurines: Shaping and Sculpting the Figurine
When working with porcelain clay, there are several techniques to shape and sculpt your figurine. Porcelain is known for its delicate nature, so precision and care are essential throughout the process.
Techniques for Hand-Building
Hand-building offers a versatile and creative approach, allowing you to form unique figurines. There are three primary methods to consider:
- Pinching: This involves shaping clay by pinching it between your fingers to form the desired structure. It’s ideal for creating small, organic shapes with subtle details.
- Coiling: Coils, or rolled-out ropes of clay, can be layered and smoothed to build larger forms. This technique works well for creating robust and hollow structures.
- Slab Method: Flattened sheets of clay are cut and assembled to create geometric forms or components. This technique is excellent for adding structured elements to your figurine.
Using Molds
Molds are a practical tool when aiming for consistency or intricate repetitive designs.
- Preparing Molds: Ensure molds are clean and dry, and apply a releasing agent if necessary.
- Pouring Slip: For slip casting, fill the mold with liquid clay (slip) and allow it to set until a thick shell forms.
- Removing Castings: Carefully remove the semi-hardened figure from the mold to avoid damage, ensuring it retains its shape.
Detailing
Once the basic structure is complete, add fine details with sculpting tools. Carve textures, refine edges, and etch patterns to enhance the figurine. This step requires patience and an eye for precision.
Smoothing Surfaces and Refining Shapes
Gently smooth out surfaces using a damp sponge or fine tools. This step not only improves the appearance but also ensures there are no weak points that might lead to cracks during firing.
Drying and Preparing for Firing
Thoroughly drying the clay is a critical process. Allow the figurine to dry slowly and evenly in a controlled environment to prevent cracks or warping. Depending on its thickness, this may take several days. Once dry, scrutinize the piece before the initial firing stage.
By following these steps, you can create a porcelain figurine that is both durable and showcases artistic flair.
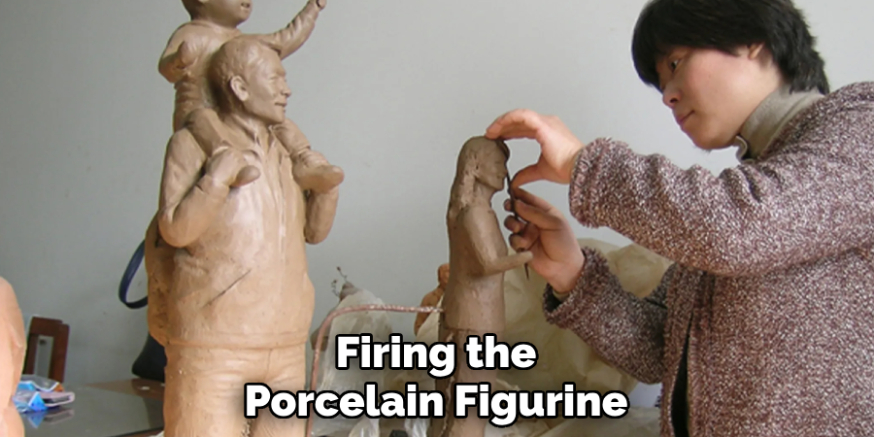
Firing the Porcelain Figurine
Bisque Firing
The first firing process, known as bisque firing, prepares the porcelain figurine for glazing. This stage is carried out at a lower temperature, typically between 1,800°F and 2,100°F (982°C to 1,149°C), depending on the type of porcelain used. The firing duration can range from several hours to an entire day, allowing the figurine to harden and any remaining moisture to escape gradually. Proper temperature control is crucial to prevent cracking or other damage during this stage.
Glazing
Once bisque fired, the figurine is ready for glazing. At this stage, you can apply a glaze or underglaze to add color, texture, and a glossy or matte finish. Glaze enhances the aesthetic appeal of the figurine while sealing the surface, making it more durable and less porous. Ensure an even application of the glaze, avoiding excessive buildup, which could result in drips or imperfections during the final firing.
Glaze Firing
The second firing, known as glaze firing, vitrifies the glaze, giving the figurine its final, polished appearance. This firing typically occurs at a higher temperature, between 2,100°F and 2,400°F (1,149°C to 1,316°C), depending on the glaze and porcelain type. During this stage, the figurine becomes both stronger and more visually refined.
Safety Precautions When Using a Kiln
When working with a kiln, safety should always be a priority. Wear heat-resistant gloves and protective eyewear, and ensure the kiln is in a well-ventilated area to prevent the buildup of harmful fumes. Always follow the manufacturer’s instructions for operating the kiln to ensure a safe and successful firing process.
Painting and Finishing Touches
Hand Painting Details
Adding intricate details by hand is a key step in enhancing the uniqueness and character of each figurine. Using underglaze or overglaze paints allows for vibrant and precise decoration. Underglaze is applied before the final firing, while overglaze is added after firing and requires an additional low-temperature firing to set. Artists can use fine brushes, sponges, or stencils to achieve the desired patterns and effects.
Applying Final Coats
To protect the painted surface and provide a glossy finish, a clear glaze or varnish is often applied. This layer not only enhances the shine but also ensures the durability of the piece, making it resistant to wear and tear over time.
Adding Accessories or Mixed Media Elements
For a unique touch, non-porcelain materials like metal, fabric, or beads can be incorporated into the design. These elements can be glued or attached post-firing, adding texture and originality to the finished figurine.
Common Challenges and How to Overcome Them
Cracking and Warping
Cracking and warping are common issues that arise during the drying and firing stages, often due to uneven drying or improper shaping techniques. To prevent these problems, ensure that your piece dries slowly and evenly by covering it with plastic to control moisture loss. Additionally, avoid creating overly thick or uneven areas in the design, as these are more prone to stress. During firing, a gradual temperature increase reduces the risk of thermal shock, helping the piece maintain its integrity.

Glaze Defects
Glaze issues such as crazing, pinholes, or blistering can undermine the aesthetic quality of your work. Crazing often occurs due to a mismatch between the clay body and the glaze’s thermal expansion. Using compatible materials and testing your glaze can help avoid this. Pinholes and blistering are typically caused by impurities or trapped air. To fix these, ensure proper surface preparation and fire to the correct temperature for your glaze formula.
Mold Problems
Air bubbles and incomplete castings are challenges when working with molds. To prevent air bubbles, tap the mold gently or use a vibrating table to release trapped air during pouring. For complete castings, ensure the slip consistency is appropriate and fill the mold slowly and steadily. Regularly cleaning and maintaining your molds also contributes to better results.
Conclusion
Creating porcelain figurines is a rewarding process that balances artistry and technical skill. From initial design and mold preparation to pouring slip, refining details, and firing, each step requires patience and precision. Learning how to make porcelain figurines takes time and practice, but experimentation and attention to detail can greatly enhance your results.
By refining techniques and developing your style, you can craft unique, delicate works of art. The joy of transforming raw materials into beautiful, handcrafted porcelain pieces brings immense satisfaction, making the effort well worth it for any aspiring ceramic artist.
Specialization:
- Master of wheel-throwing, hand-building, and advanced glazing techniques
- Focus on creating both functional pottery and decorative art pieces
Recognition:
- Celebrated by collectors and art enthusiasts for creating one-of-a-kind pieces that blend artistry with functionality
- Participates in local and national exhibitions, earning accolades for his innovative designs and craftsmanship
Passion:
- Deeply committed to exploring and pushing the boundaries of ceramic artistry
- Continuously experiments with new materials, firing techniques, and artistic concepts to evolve his craft
Personal Philosophy:
- Believes in the transformative power of art, aiming to evoke emotions and connections through his ceramic creations
- Advocates for sustainability in ceramics, using eco-friendly materials and practices whenever possible