


Pottery wheels are essential tools in the art of ceramics, enabling creators to shape clay into beautiful and functional pieces, such as bowls, vases, and plates. These spinning devices have been used for centuries and remain central to the craft of pottery-making.

For beginners and hobbyists, learning how to use a pottery wheel can be an enriching experience. Not only does it provide an opportunity to develop new creative skills, but it also offers a therapeutic and hands-on outlet for self-expression. Mastering the pottery wheel may seem intimidating at first, but with practice and patience, anyone can enjoy the satisfaction of creating something unique from a lump of clay.
This article will guide you through the essential steps, from setting up your workspace to shaping and molding clay effectively, helping you feel confident in your pottery wheel journey.
Understanding the Pottery Wheel Basics
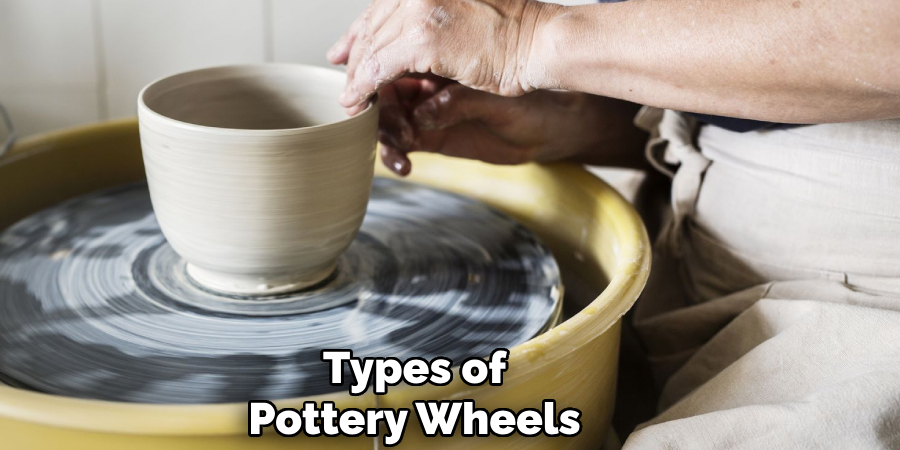
Types of Pottery Wheels
There are two main types of pottery wheels: electric wheels and kick wheels. Electric wheels are powered by a motor, making them easier for beginners and more convenient for potters who require consistent speed. They are typically lightweight and compact, making them easier to transport and store.
On the other hand, kick wheels, often considered more traditional, rely on manual effort to spin the wheel using a foot-operated mechanism. While kick wheels provide a tactile and meditative experience, they require more physical exertion and tend to be heavier and harder to move.
Main Parts of a Pottery Wheel
Understanding the components of your pottery wheel is essential to using it effectively. The wheel head, where the clay is placed, is the centerpiece of the pottery wheel. The foot pedal or kick mechanism controls the wheel’s speed, while the motor (in electric wheels) powers its rotation.
A splash pan surrounds the wheel head to catch excess water and clay during use, keeping your workspace clean. Additionally, many pottery wheels include a tool tray, providing a convenient place to store sculpting tools and sponges.
How the Wheel Works
Pottery wheels work by rotating the wheel head, either via an electric motor or manual power. This rotation allows the potter to use centrifugal force to shape the clay evenly. Speed control is crucial, as higher speeds are ideal for centering the clay, while slower speeds are better for shaping finer details and trimming. Mastering speed adjustment will greatly enhance your ability to create smooth, symmetrical pieces.
Gathering Necessary Supplies and Tools
Essential Materials
To begin your pottery wheel journey, it’s essential to gather the right materials. Begin with clay types designed explicitly for wheel throwing, such as stoneware or porcelain, depending on your desired outcome and skill level. You’ll also need a water container, which helps keep your hands and the clay moist while you work. Sponges are also essential, aiding in smoothing the clay and cleaning the wheel during and after use.
Basic Tools
Several basic tools are indispensable for pottery. A wire cutter is used to slice clay off the block and remove finished pieces from the wheel. Rib tools, available in wood, metal, or plastic, help refine surfaces and shapes. A needle tool enables delicate adjustments and scoring, while trimming tools are essential for adding finishing touches to your work. These tools would allow potters to achieve precision and detail, making them essential to any project.
Workspace Setup
An efficient and comfortable workspace is just as important as the tools themselves. Select a seating arrangement that keeps you relaxed yet stable during extended periods of work. Proper lighting is crucial to help you see the intricacies of your project, and a designated clay preparation area should be organized to ensure a smooth workflow from start to finish.
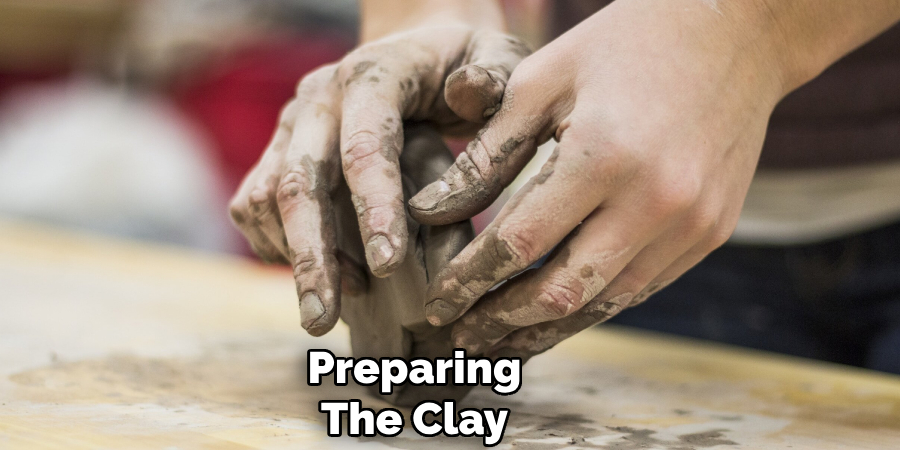
Preparing the Clay
Before beginning the shaping process, properly preparing the clay is essential to ensure your final piece is smooth, strong, and free of flaws. Below are key steps to prepare your clay effectively:
Wedging the Clay
Wedging is a crucial technique that helps remove air bubbles and creates a uniform clay consistency. Start by placing the clay on a sturdy, non-stick surface, then press and knead it firmly using a motion similar to folding dough. Repeat this process several times, rotating the clay as you go, to ensure an even texture. Proper wedging not only prevents air pockets that can cause cracks during the firing process but also aligns the clay particles, making it easier to shape on the wheel.
Forming the Clay Ball
Once the clay is wedged, it should be shaped into a smooth, round ball. The size of the ball will depend on the project you have in mind. For beginners, starting with a smaller piece of clay can make the centering process more manageable. A well-formed ball with a consistent density will make it easier to manipulate on the wheel and ensure a balanced piece.
Centering the Clay on the Wheel Head
Centering the clay is a critical step in pottery. Start by placing the clay ball directly in the center of the wheel. With the wheel spinning at a moderate speed, use damp hands to apply even pressure. Push the clay downward and inward simultaneously, letting the wheel’s motion guide your hands. Repeat this process until the clay is stable and rotates without wobbling. Proper centering sets the foundation for shaping your piece and prevents structural imbalances later in the process.
How to Use a Pottery Wheel: Basic Techniques
Once the clay is centered, the next step is shaping it into your desired form. Below are fundamental techniques for working on the wheel, each critical to creating functional and visually pleasing pottery.
Opening the Clay
To begin shaping, you first need to open the clay. With the wheel spinning at a steady speed, use your thumbs or fingers to press into the center of the clay ball while anchoring your hands for stability. Push downward to create an initial hole, ensuring your pressure is even to avoid uneven walls. Be mindful not to pierce through the bottom; leave a consistent thickness for the base, typically about half an inch.
Pulling Up the Walls
After opening, start pulling up the walls to form the height and thickness of your piece. Place one hand inside the opening and the other on the outer surface of the clay. Apply gentle, even pressure as you lift the clay upward, allowing the wheel’s rotation to assist in elongating the walls. Keep your motions steady and repeat the process in stages to maintain even thickness throughout. Adjust the wheel speed as necessary—slower speeds often help maintain better control during this step.
Shaping and Refining
Now that the basic structure is formed, you can begin shaping and refining your design. Whether crafting bowls, cups, or other forms, use a combination of your hands and pottery tools to define the shape. Sponge off excess water as you work to prevent the clay from becoming too saturated. Rib tools are excellent for smoothing surfaces, while shaping tools can help achieve precise angles or curves.

Maintaining Consistent Speed and Pressure
Throughout the process, controlling the wheel’s speed and the pressure you apply to the clay is vital. A slower wheel speed often provides better control during delicate stages, while moderate pressure ensures the clay responds predictably without becoming distorted. Maintain a steady rhythm, and always keep your hands supported to reduce unintended shifts. With practice and attention to detail, these techniques will help you create well-balanced and aesthetically pleasing pieces.
Common Challenges and How to Overcome Them
Dealing with Off-Center Clay
Off-center clay is a common issue that can disrupt the symmetry of your creation. If you notice the clay wobbling on the wheel, stop and assess its position. To re-center, apply firm, even pressure with your hands while the wheel spins at a moderate speed. Keep your elbows anchored to your body or the splash pan for stability. If re-centering proves too tricky, don’t hesitate to start over—remove the clay, wedge it again to remove air bubbles, and position it properly on the wheel before continuing.
Preventing Collapse
Thin walls and weak spots can lead to the collapse of your piece, especially as it grows taller. To avoid this, ensure that the base and walls are evenly thick by using consistent pressure during shaping. Avoid over-thinning the walls, particularly near the top, as this area is more prone to weakening. Periodically compressing the clay with a rib tool also helps reinforce its structure and minimize the risk of collapse.
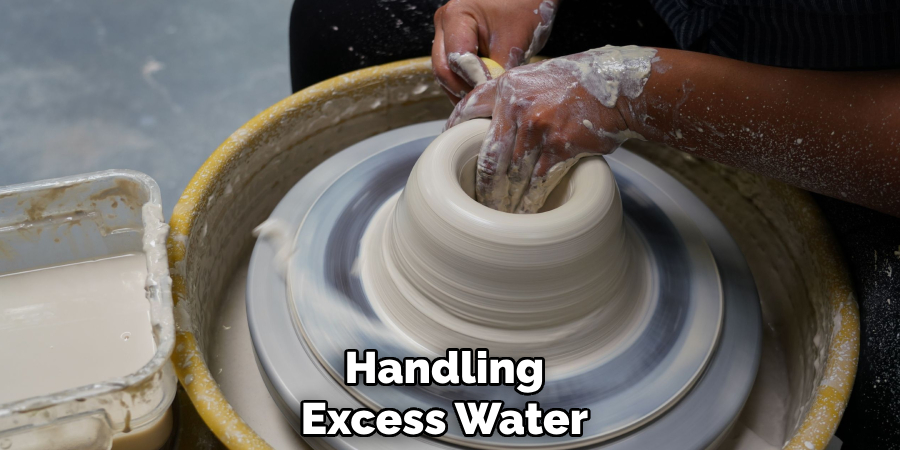
Handling Excess Water
Excess water on the clay or wheel can cause instability and weaken your piece. Use a sponge to remove standing water as you work, and minimize water use by keeping it to a minimum. By maintaining the right balance of moisture, you can create smoother, more durable pieces.
Finishing Touches and Removing the Piece
Trimming Excess Clay
Once your piece is shaped and stable, use trimming tools to clean up the base and refine its form. Carefully remove any excess clay around the foot of the piece to ensure it has a smooth and even finish. Trimming not only enhances the aesthetic of your work but also prevents uneven drying, which could result in cracks or warping.
Cutting the Piece Off the Wheel
When your piece is finished and ready to be removed from the wheel, use a wire tool to cut it free safely. Hold the wire tool taut and slide it carefully beneath the base while keeping it level. This ensures a clean separation without damaging the form.
Initial Drying
After removal, place your piece in a controlled environment to reach the leather-hard stage. This step is crucial for even drying and preparing the clay for the next phase, such as trimming, decoration, or firing.
Tips for Beginners to Improve Quickly
Practice Consistently
Dedicate regular sessions to your craft to build muscle memory and gain confidence in your skills. Even short but frequent practices can lead to noticeable improvements over time. Repetition helps refine techniques and creates familiarity with tools and materials.
Learning from Mistakes
Mistakes are an essential part of the learning process. Instead of getting discouraged, use errors as opportunities to understand what went wrong and how to correct it. Experimentation fosters creativity and helps you discover new approaches.

Seeking Feedback and Tutorials
Take advantage of available resources such as online videos, classes, or workshops. Engaging with a community of artists or hobbyists can provide valuable advice, encouragement, and constructive critiques to help you grow.
Conclusion
From preparation to shaping and finishing, mastering the art of pottery requires dedication and practice. Begin by understanding the basics of how to use a pottery wheel, preparing your clay, and centering it with care. Progress through shaping your piece, applying techniques learned, and finishing with intricate detailing or glazing.
Remember, every step is a chance to improve and refine your craft. Be patient with your progress and enjoy the creative process. Skills with the pottery wheel will develop over time, and with persistence, you’ll see remarkable results, transforming lumps of clay into beautiful, unique works of art.
Specialization:
- Master of wheel-throwing, hand-building, and advanced glazing techniques
- Focus on creating both functional pottery and decorative art pieces
Recognition:
- Celebrated by collectors and art enthusiasts for creating one-of-a-kind pieces that blend artistry with functionality
- Participates in local and national exhibitions, earning accolades for his innovative designs and craftsmanship
Passion:
- Deeply committed to exploring and pushing the boundaries of ceramic artistry
- Continuously experiments with new materials, firing techniques, and artistic concepts to evolve his craft
Personal Philosophy:
- Believes in the transformative power of art, aiming to evoke emotions and connections through his ceramic creations
- Advocates for sustainability in ceramics, using eco-friendly materials and practices whenever possible