
Glazes are thin, translucent coatings applied to various surfaces such as ceramics, paintings, furniture, or even food. These coatings not only enhance the visual appeal of the object but also serve functional purposes. Glazes add depth to colors, protect surfaces from wear, and improve texture and tone. By using glazes, you can achieve striking finishes that elevate any craft or culinary project to a higher artistic or practical level.
The importance of understanding how to use glazes lies in their versatility and transformative capability. Whether you are crafting pottery, finishing a wooden piece, or adding a glossy effect to a painting, mastering the application and techniques of glazing can significantly enrich your creations. This guide will walk you through the different types of glazes, their applications, and the methods to use them effectively in various contexts, including ceramics, wood finishing, and painting.
Types of Glazes and Their Applications
Ceramic Glazes
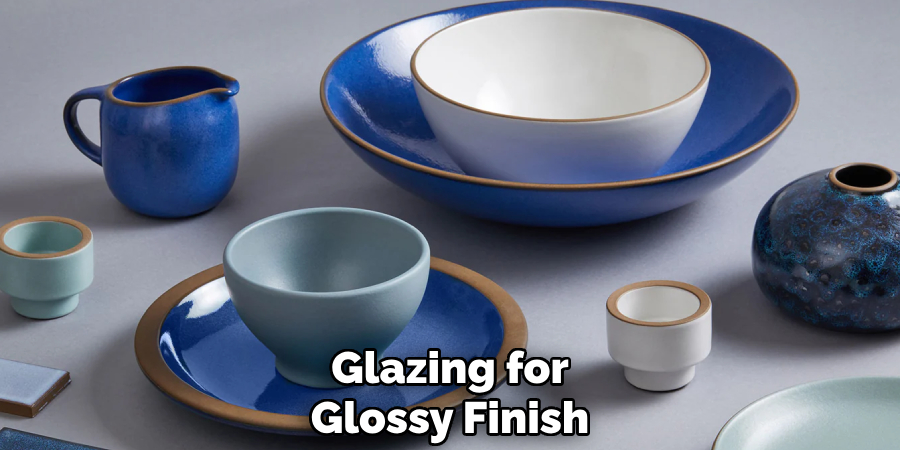
Ceramic glazes are a glass-like coating applied to clay surfaces before firing in a kiln. They serve dual purposes, enhancing the functionality and aesthetics of ceramic pieces. Functionally, glazes create a waterproof surface, making pottery suitable for everyday use, like holding liquids. Aesthetically, they offer a range of finishes, from glossy to matte, and can introduce intricate textures and colors, elevating the artistry of ceramic creations.
Wood Glazes
Wood glazes are typically applied over paint or stain to enhance the wood grain or introduce character to the surface. They are popular for achieving an aged or weathered effect, adding depth and richness to furniture or wooden décor. These glazes are particularly useful in restoration projects and can adapt to both classic and modern design styles.
Art/Painting Glazes
Art or painting glazes consist of thin layers of translucent paint used to modify the color and tone of the underlying surface. Artists leverage these to create depth, blend colors seamlessly, and add luminosity to their work. This technique has been employed in classical oil painting and continues to enrich mixed media and acrylic art.
Food Glazes
Food glazes are glossy finishes applied to pastries, fruits, or meats, enhancing both their presentation and flavor. Common examples include sugar-based glazes for donuts or a rich, savory glaze for roasted meats. They provide an appealing sheen, making culinary creations more visually enticing.
Each type of glaze plays a pivotal role in elevating the medium it is used on, from practical applications to artistic or culinary enhancements.

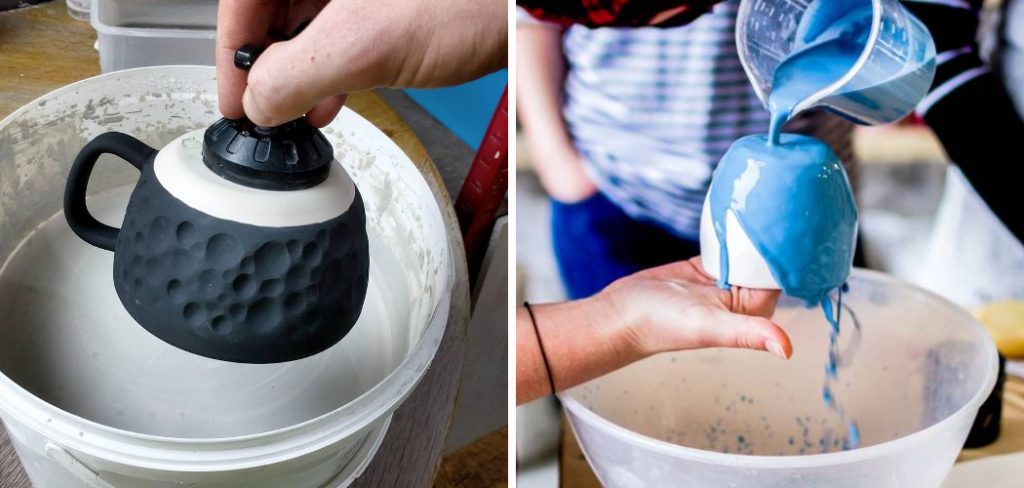
How to Use Ceramic Glaze
Step 1: Preparing the Pottery
Before applying ceramic glaze, ensure the pottery piece has been bisque-fired. This initial firing strengthens the clay, making it porous enough to absorb the glaze effectively. Additionally, clean the surface of the pottery to remove any dust or debris, as this can affect the adhesion of the glaze and its final appearance.
Step 2: Choosing the Right Glaze
Selecting the appropriate glaze is crucial for achieving the desired effect. Consider whether a glossy, matte, raku, or crackle finish aligns with your artistic vision. Each glaze type offers unique textures, shine, and visual details, so take time to explore which option best complements your pottery design.
Step 3: Application Techniques
There are several ways to apply glaze, including dipping, brushing, pouring, or spraying. When dipping, submerge the piece evenly in a glaze container to create a uniform coating. For brushing, use a soft-bristled brush and apply multiple thin layers for smooth coverage.
Pouring allows for creative flow patterns, while spraying ensures an even finish, especially on larger pieces. Regardless of the method, pay attention to consistent application and thickness to avoid common glaze defects, such as drips, uneven coverage, or bubbling.
Step 4: Firing the Piece
After glazing, carefully load the pottery into the kiln, ensuring the pieces do not touch to prevent sticking. Set the kiln to the appropriate temperature based on the glaze’s cone range, as firing at the correct temperature is vital for proper glaze maturation. Always follow safety precautions, such as using heat-resistant gloves and ensuring proper ventilation, to create a successful and safe firing experience.

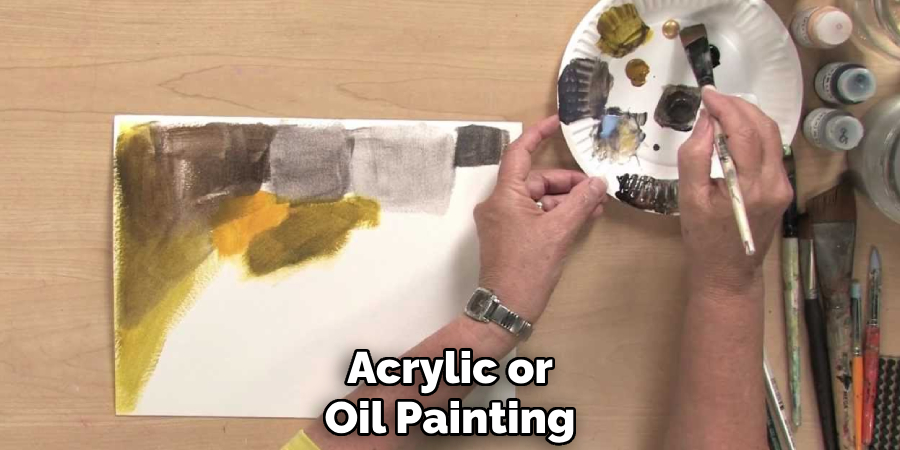
How to Use Glazes: In Acrylic or Oil Painting
Step 1: Understanding Glazing Mediums
To achieve the best results when glazing, it’s crucial to select the appropriate medium for your painting type. For oil painting, linseed oil is widely used as it enhances the transparency and flow of the glaze. For acrylics, an acrylic glazing medium is essential, as it ensures the right consistency and prevents the paint from drying too quickly. Choosing the correct medium is the foundation for a successful glazing process.
Step 2: Mixing the Glaze
Begin by combining your chosen medium with a small amount of pigment. It’s important to use a higher ratio of medium to pigment, as this will maintain the glaze’s transparency and allow the light to pass through the layers. Test different ratios to find the right balance for your desired effect. Aim for a smooth, even mixture that flows easily when applied.
Step 3: Layering Techniques
When applying glazes, use a soft, high-quality brush to minimize streaks. Apply thin, even coats to your painting, ensuring each layer is fully dry before adding the next. This technique helps to build depth and richness in the artwork, creating a luminous, three-dimensional effect. Patience is key, as rushing the layering process can lead to unwanted texture or muddiness.
Step 4: Final Fixatives or Varnishes
Once your glazing is complete, you may choose to seal the painting with a final fixative or varnish. This step can protect the surface from dust and fading while enhancing the overall sheen and vibrancy of your work. Both matte and gloss options are available, depending on your preferred finish.
Glazing Food for a Glossy Finish
Glazing food is a versatile culinary technique aimed at achieving a shiny, appetizing appearance while often enhancing flavor or preserving freshness. Whether adding a finishing touch to pastries, fruits, or savory dishes, glazing can elevate the visual appeal and quality of the final product. The choice of glaze and application method plays a crucial role in achieving a desirable finish.
Types of Edible Glazes
- Sugar-based Glazes: Ideal for coating fruits, pastries, or cakes, these glazes create a sweet, translucent sheen that highlights the natural vibrancy of the ingredients.
- Gelatin-based Glazes: Perfect for desserts like tarts or as a stabilizer, these glazes provide a smooth, glossy layer that helps lock in moisture.
- Egg-based Glazes: Commonly used on breads and rolls, egg washes can result in a golden, shiny crust that enhances texture and flavor.
How to Apply
- Brushing: For pastries and breads, use a soft pastry brush to apply melted sugar or egg glaze while the food is still warm.
- Piping or Dipping: For fruits or evenly coated items, use piping tools or dip the food directly into the glaze for full coverage.
Tips for Success
- Avoid over-glazing to prevent a sticky or overly thick finish.
- Use a soft brush to ensure an even shine and a clean, professional appearance.
- Apply the glaze with precision while warm for the best results.
Common Mistakes When Using Glazes and How to Avoid Them
Too Thick Application
Applying a glaze too thickly can lead to undesirable results such as runs, uneven textures, or a cloudy finish. To avoid this, always apply glazes in thin, even layers. Build additional coats gradually if needed, allowing each layer to dry properly before adding the next.
Inadequate Surface Prep
Skipping proper surface preparation often causes the glaze to adhere poorly or even peel off. Always clean and dry the surface thoroughly before glazing, and consider lightly sanding if working with porous materials like wood or ceramics.
Wrong Glaze for the Surface
Not all glazes are suitable for all materials. For optimal results, ensure that the type of glaze you are using is suitable for your specific project. For instance, food-safe glazes should be used for edible surfaces, while specialized glazes are necessary for ceramics or furniture.
Skipping Sealant (Furniture/Wood)
When working with furniture or wooden pieces, neglecting to apply a sealant after glazing can cause the glaze to wear off over time. Finish your project with a protective topcoat to preserve the glaze and enhance durability.
Poor Ventilation (Ceramics)
When glazing ceramics and firing them in a kiln, inadequate ventilation can pose health risks due to fumes. Always work in a well-ventilated area and follow all safety protocols to protect yourself and others.
Conclusion
Glazing is a transformative technique that adds depth, protection, and aesthetic appeal to a variety of crafts, including ceramics, woodworking, painting, and even cooking. Understanding how to use glazes effectively begins with proper surface preparation, selecting the right glaze type for your project, and applying it with precision.
By experimenting with different techniques, you can achieve unique, personalized finishes that highlight your creativity. However, always prioritize safety by following usage instructions, ensuring proper ventilation, and using the appropriate tools. With these considerations in mind, glazing can elevate your projects and bring your artistic vision to life.