


How to drill a hole in a glazed ceramic pot may seem daunting, but with the right tools and techniques, it can be performed safely and effectively.

This process is often necessary for creating drainage holes in pots intended for planting, which helps prevent water from accumulating at the bottom and potentially damaging plant roots. Whether you’re repurposing an old ceramic pot or customizing a new one, taking the time to understand the method will help you achieve a clean and precise hole while minimizing the risk of cracking or chipping the glaze.
In this guide, we’ll explain the essential steps and considerations for successfully drilling a hole in a glazed ceramic pot, ensuring your project is both functional and aesthetically pleasing.
What Will You Need?
Before getting started, gather the necessary tools and materials to complete the task. Here’s a list of items you should have on hand:
- Glazed Ceramic Pot: This can be an old or new pot as long as it is properly cleaned and dried.
- Diamond-tipped Drill Bit: Unlike traditional drill bits, diamond-tipped ones are specifically designed for drilling through hard materials like ceramic.
- Masking Tape or Painter’s Tape: This will help prevent the drill bit from slipping across the smooth surface of the glazed ceramic pot.
- Water: Drilling through ceramic generates heat, so it’s crucial to have water on hand to cool down the drill bit.
- Drill With Variable Speed Setting: A drill with adjustable speed is recommended, as it allows you to control the drilling process and avoid damaging the pot.
- Safety Gear: When working with power tools, it’s always a good idea to wear safety glasses and gloves. These will protect your eyes from flying debris and your hands from potential accidents.
Once you have all the necessary items, it’s time to begin the drilling process.
10 Easy Steps on How to Drill a Hole in a Glazed Ceramic Pot
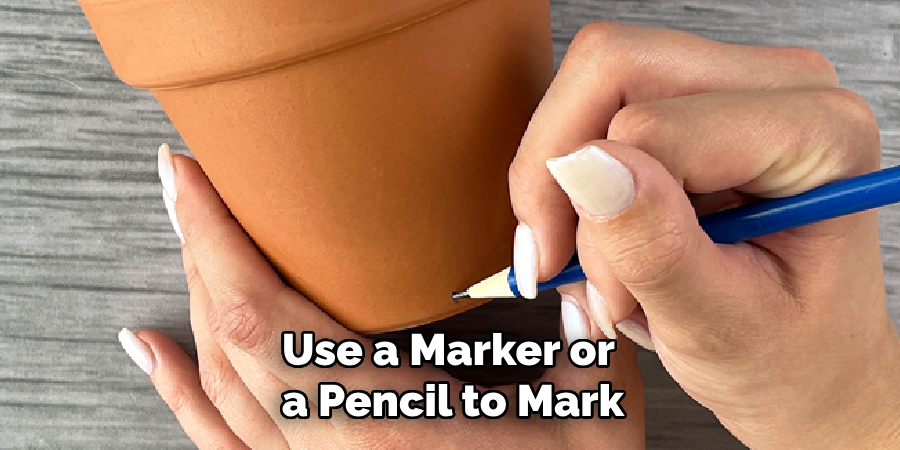
Step 1. Mark the Drilling Spot:
Use a marker or a pencil to mark the exact spot where you want to drill the hole. To help guide the placement of the hole and ensure it is centered or appropriately positioned, consider using a measuring tape or ruler to identify the ideal location. Placing a strip of masking or painter’s tape over the marked area can add an extra layer of protection to the glaze, reducing the risk of cracking or chipping as you begin drilling. The tape also provides friction to prevent the drill bit from slipping. Ensure the pot rests securely on a stable surface before moving to the next step.
Step 2. Prepare the Drill:
Attach the diamond-tipped drill bit to your drill, ensuring it is securely fastened. Set your drill to its lowest speed setting to start with gentle pressure. This helps to minimize heat buildup and reduces the risk of cracking the glaze. Having a small container of water nearby or positioning the pot under a gentle stream of water can help keep the drill bit cool. This precaution is important for maintaining the integrity of the drill bit and the ceramic pot. Ensure you’re wearing your safety gear before you proceed to drill.
Step 3. Start Drilling:
Begin the drilling process by positioning the drill bit perpendicular to the pot’s surface at the marked location. Apply light and steady pressure as you slowly initiate the drilling. Allowing the drill to do the work, forcing it can lead to cracking or damaging the pot. As you drill, periodically stop to check the temperature of the drill bit and the pot, ensuring neither is overheating. Dip the drill bit into the water or pour water over the drilling area to keep it cool.
This cooling process helps prevent the pot from shattering and extends the life of your drill bit. Be patient and maintain a consistent speed to penetrate the ceramic surface gradually. Once the drill bit breaks through the glaze, continue drilling through to the other side of the pot with careful attention to maintaining control and steady pressure. Patience and precision during this step are vital to creating a clean, smooth hole without inadvertently creating chips or cracks in the ceramic.
Step 4. Finish the Drilling:
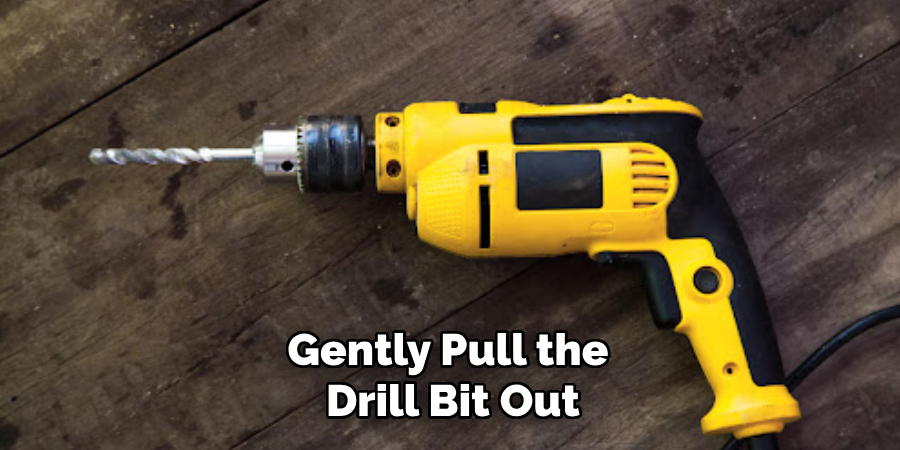
Once you’ve drilled through to the other side, gently pull the drill bit out of the hole, applying light pressure to ensure the exit point is as smooth as possible. Avoid abrupt movements or using too much force, which could cause the hole’s edges to chip. Once the drill bit is out, examine the hole to ensure it meets the desired size and smoothness. If necessary, you can use a piece of fine-grit sandpaper to carefully smooth out any rough edges or small chips around the hole. Finally, rinse the pot to remove any dust or ceramic residue, and let it dry completely before using it as planned.
Step 5. Clean Up and Inspect:
After completing the drilling, cleaning the pot and inspecting your work is essential. Use a damp cloth to wipe away any remaining dust or ceramic particles. Review the newly created hole to ensure it is smooth, free of significant chips, and large enough for adequate drainage. If there are any rough edges or chips, gently sand them down with fine-grit sandpaper to achieve a more polished finish. Allow the pot to dry thoroughly before planting or using it for your intended purpose. Completing these final steps ensures that your ceramic pot is ready for use, with a hole that serves its function and maintains its aesthetic appeal.
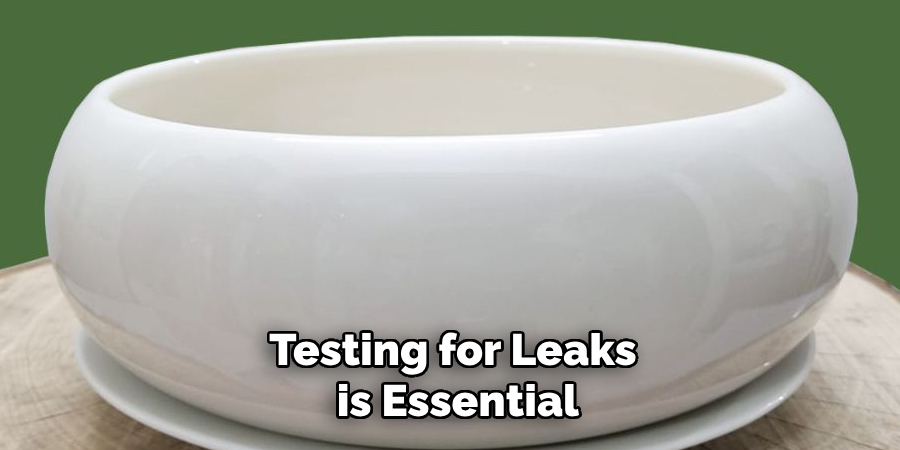
Step 6. Test for Leaks:
Before putting your newly-drilled ceramic pot to use, testing for leaks is essential to ensure the hole is adequate. Fill the pot with water and observe if water drains smoothly through the hole. This verifies the hole’s functionality and checks for any unintended cracks or weak spots in the ceramic that might compromise its use. Your pot is ready for planting if the water drains well without leaking from other areas. However, if you notice any hairline cracks or minor leaks outside the drilled hole, consider applying a waterproof sealant designed explicitly for ceramics around those spots to reinforce and prevent further damage. Testing for leaks is crucial, especially if you plan to use the pot indoors, to avoid any potential water damage to your flooring or surfaces.
Step 7. Seal the Edges (Optional):
If desired, sealing the edges of the drilled hole can provide additional strength and ensure a smooth finish. Choose a silicone or water-resistant sealant appropriate for ceramic materials. Apply the sealant carefully around the hole’s edge using a small brush or your finger to cover any rough or exposed surfaces. Allow the adhesive to dry thoroughly per the manufacturer’s instructions before using the pot. This step is optional but recommended if the pot will be in a high-moisture environment or if additional durability is desired. Sealing can help maintain the integrity of the pot for long-term use and prevent any potential damage from water exposure.
Step 8. Plant Your Greenery:
With the hole successfully drilled and any necessary sealing complete, you can now move on to planting. Choose suitable soil for your plant type and fill the pot, leaving enough room for your plant’s root ball. Gently place the plant into the soil, ensuring the roots are well-covered and the plant is stable. Lightly press down on the soil around the plant to remove air pockets and ensure good root contact with the soil. Water the plant thoroughly, allowing excess water to drain out through the hole as a final check for unobstructed drainage. Arrange your pot in a location that meets the plant’s sunlight and temperature requirements.
Step 9. Maintenance and Care:
Regularly maintain your newly planted greenery by providing appropriate water, sunlight, and nutrient requirements specific to your plant species. Monitor the moisture level in the soil often, adjusting your watering routine to ensure that the plant receives enough hydration without causing waterlogging. Prune any dead or yellowing leaves to promote healthy growth. Periodically check for any signs of disease or pests, and take timely actions to address these issues based on your plant’s specific needs. Proper care will not only keep your plant thriving but also ensure that your ceramic pot remains in excellent condition, maintaining both functionality and aesthetic value over time.
Step 10. Enjoy Your Creation:
With the planting complete and the pot placed in its optimal location, take the time to enjoy the natural beauty it contributes to your space. The process of drilling and planting might have required patience and precision, but the reward of having a self-crafted piece gracing your home or garden is gratifying. Appreciate the unique combination of craftsmanship and nature, and allow it to serve as a daily reminder of your creativity and hard work. Share the joy and satisfaction of your project with friends or family, and consider documenting the process to inspire future gardening adventures. Whether a focal point in your living room or a charming addition to your balcony, your ceramic pot now stands as both a functional piece and an aesthetic enhancement, cultivating a sense of accomplishment and serenity.
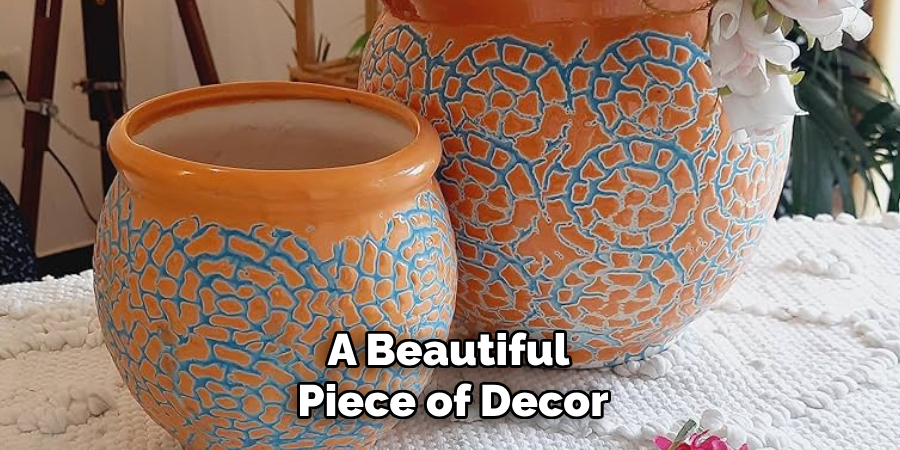
By following these steps and carefully creating a hole in your ceramic pot, you will not only have a functional planter but also a beautiful piece of decor.
Conclusion
How to drill a hole in a glazed ceramic pot can transform it into a functional and attractive planter, expanding its use and enhancing your gardening options. The process, while requiring patience and care, is accessible to most DIY enthusiasts with the right tools and techniques.
By following the outlined steps, including proper tool selection, safety measures, and testing the finished product, you can ensure the pot’s functionality and aesthetic appeal are preserved. This process not only customizes the pot to suit your planting needs but also offers a rewarding project that combines practical and creative elements.
Whether you are a seasoned gardener or a beginner, taking time to precisely and carefully drill into ceramic expands your options in plant care and decorating your space with personal touches.
Specialization:
- Master of wheel-throwing, hand-building, and advanced glazing techniques
- Focus on creating both functional pottery and decorative art pieces
Recognition:
- Celebrated by collectors and art enthusiasts for creating one-of-a-kind pieces that blend artistry with functionality
- Participates in local and national exhibitions, earning accolades for his innovative designs and craftsmanship
Passion:
- Deeply committed to exploring and pushing the boundaries of ceramic artistry
- Continuously experiments with new materials, firing techniques, and artistic concepts to evolve his craft
Personal Philosophy:
- Believes in the transformative power of art, aiming to evoke emotions and connections through his ceramic creations
- Advocates for sustainability in ceramics, using eco-friendly materials and practices whenever possible