


Aged terra cotta pots have become a beloved element in gardens and home interiors, admired for their rustic, weathered charm that evokes a sense of timeless beauty. Their imperfections, soft patina, and natural textures add warmth and character, making them ideal for enhancing any space. However, waiting for the natural aging process to occur can take years, and not everyone has the patience to see their pots develop a patina naturally.
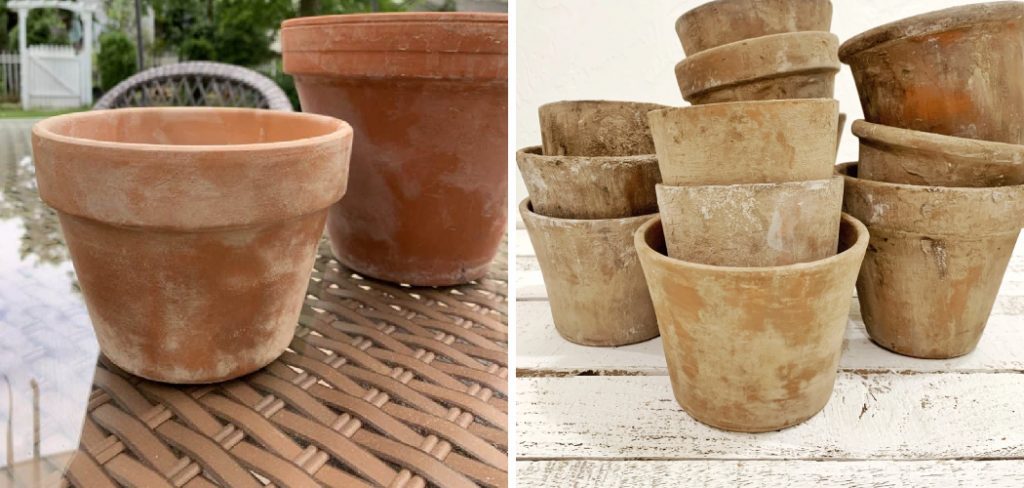
This is where DIY aging techniques come in—a creative solution for achieving the aged look without the long wait. This article provides a comprehensive, step-by-step guide on how to age terra cotta pots, exploring various methods to help you create stunning, one-of-a-kind pieces to elevate your garden or home. Whether you prefer a subtle vintage look or a more dramatic weathered effect, these tips will help you achieve the perfect finish for your style.
Why Age Terra Cotta Pots?
Aging terra cotta pots offer numerous advantages, whether you’re aiming to enhance your garden’s aesthetics, improve plant care, or express your creativity.
Aesthetic Appeal
One of the primary reasons to age terra cotta pots is to achieve a vintage, time-worn look that exudes charm and character. Aged pots blend seamlessly into traditional garden settings or rustic home décor, creating a more cohesive and natural feel. Their weathered appearance often evokes a sense of history, adding depth and warmth to any outdoor or indoor space.
Benefits in Gardening
Aged terra cotta pots are not just beautiful; they can also benefit your plants. Over time, mineral deposits develop on the pot’s surface, which can improve breathability and regulate soil moisture levels. The aged texture allows for better water absorption and evaporation, creating an ideal environment for healthy root growth and preventing overwatering issues.
Customization and Creativity
Aging your own pots also offers endless opportunities for customization. Whether you prefer a mossy green patina or a whitewashed finish, you can tailor the look of your pots to match your garden or home décor. This process allows you to infuse your personality into your space, turning simple pots into unique works of art.
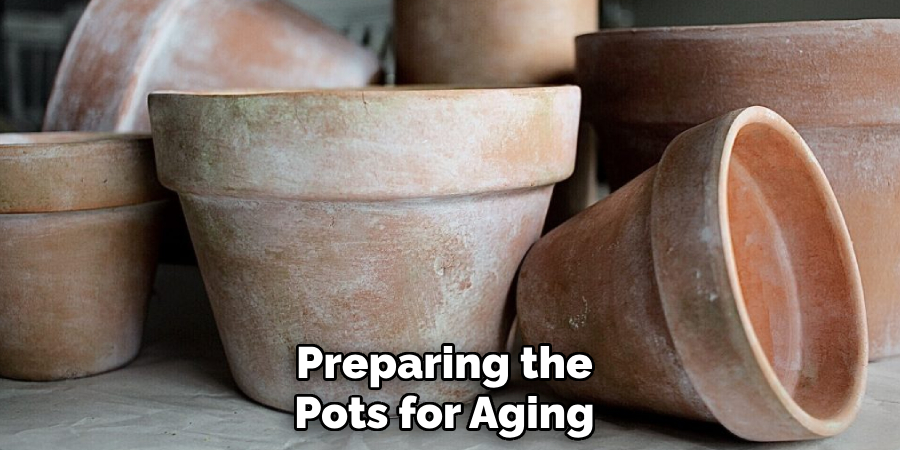
Preparing the Pots for Aging
Cleaning the Pots
The first step in preparing your pots for aging is to clean them thoroughly. Remove any dirt, dust, or lingering labels using water and a stiff scrub brush. Ensuring the pots are free from debris will help the aging materials adhere properly and create a uniform finish. Be thorough in this step, as residue can interfere with the desired effect.
Drying Thoroughly
It is crucial to begin with completely dry, clean pots. Moisture can hinder the application of aging materials and may even lead to uneven results. Allow your pots to air dry in a warm, sunny location, or use a clean towel to pat them dry if needed.
Safety Tips
If you’re working with natural aging substances like moss or buttermilk, or even synthetic materials like paint, always ensure you’re in a well-ventilated area. This precaution protects you from fumes or odors that may arise during the process. Wearing gloves is recommended to avoid any skin irritation from the materials.
Optional Surface Sanding
For improved material adhesion, lightly scuff the surface of your pots with fine-grit sandpaper. This step is beneficial when working with glossy or smooth pots, as it creates a slightly rough texture for the aging substances to cling onto effectively.
How to Age Terra Cotta Pots: Using Lime or Garden Lime Wash
Materials Needed
- Garden lime
- Water
- A brush
Step-by-Step Instructions
- Mixing the Lime Wash
Begin by mixing garden lime with water to create a soft, chalky paste. The consistency should resemble thick paint—easily spreadable but not too watery. Adjust the ratio of lime to water as needed to achieve the desired texture.
- Applying the Mixture
Use a brush or sponge to apply the lime wash onto your pot’s surface. Work in even strokes or dabs, depending on the pattern you wish to create. For a more natural effect, you can layer the lime wash unevenly to create a realistic aging appearance.
- Drying the Pot
Allow the pot to dry naturally in a well-ventilated area. For faster results, you can bake the pot at a low temperature in the oven to set the lime wash more quickly. Ensure the pot is completely dry before proceeding to the next step.
- Adding Finishing Touches
Once the lime wash has dried, you can gently sand the edges and raised surfaces of the pot using fine-grit sandpaper. This step creates a distressed and weathered look, giving your pot a beautifully aged appearance.

By using garden lime, this method provides a soft, powdery finish that adds charm and character to plain pots, perfect for complementing rustic or vintage-inspired décor.
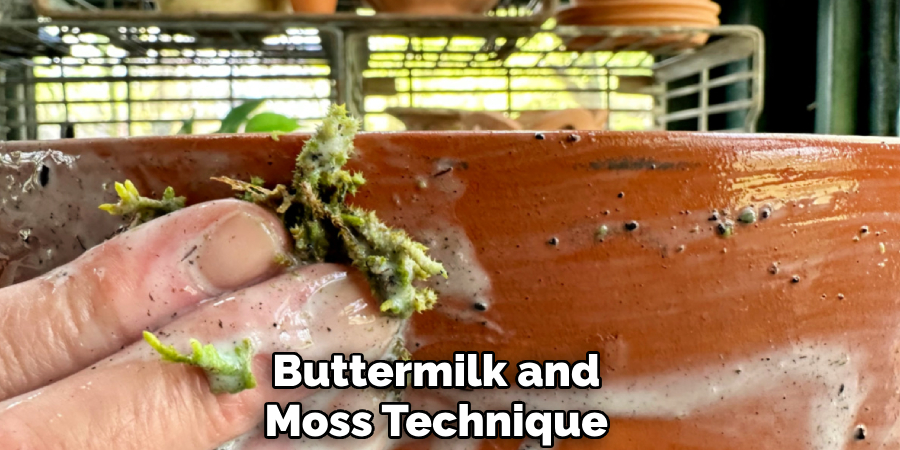
Buttermilk and Moss Technique
This method is perfect for those who want to create a naturally aged look by promoting moss growth on their pots. It offers an organic and earthy appeal, blending seamlessly with garden settings.
Materials Needed
- Buttermilk
- Live moss
- Blender
- Brush
Creating the Moss Slurry
Begin by tearing the live moss into small pieces and combining it with buttermilk in a blender. Blend the mixture until it forms a smooth, paintable paste. The consistency should be thick enough to adhere to the surface of the pot but spreadable.
Applying the Mixture
Using a brush, generously apply the moss and buttermilk paste onto the surface of your pot. Focus on areas where you want moss growth to appear most prominently. Once coated, place the pot in a shaded and damp environment, such as a corner of your garden or under a tree.
Curing and Growing
Allow the pot to sit undisturbed for several weeks. Over time, natural moss growth will begin to develop, giving the pot an aged, weathered appearance. Be patient during this process, as moss takes time to adapt and grow.
Maintenance Tips
To ensure the moss thrives, mist the pot regularly with water to maintain a moist environment. Avoid placing the pot in direct sunlight, as this can dry out the moss and hinder its growth. With proper care, your pot will develop a lush, vibrant appearance, transforming it into a unique and charming garden accessory.
Vinegar, Yogurt, or Compost Aging
Aging pots using vinegar, yogurt, or compost is a versatile and effective way to achieve a natural, weathered look.
Vinegar Aging
Spraying white vinegar onto the surface of the pot is an excellent method for creating mineral streaks and discoloration. The acid in the vinegar reacts with the surface, mimicking the effects of prolonged weather exposure. For best results, apply multiple light coats and allow the pot to dry between applications.
Yogurt Aging
Another popular technique involves applying plain yogurt to the pot. The natural cultures in yogurt promote the growth of fungi and moss, which can give the pot an aged, mossy patina over time. Spread the yogurt evenly across the surface, then place the pot in a shaded, moist area to encourage the yogurt to develop.
Compost Burial Method
For a more earthy approach, partially burying the pot in compost is a great option. Leave it buried for 2–4 weeks, allowing beneficial microbes and bacteria to interact with the pot’s surface. This process can produce a rich, organic patina, making the pot look naturally aged.
Results and Time Frame
The visible aging effects will vary based on the method used and environmental conditions, but with patience, these techniques can transform plain pots into beautifully weathered garden highlights.
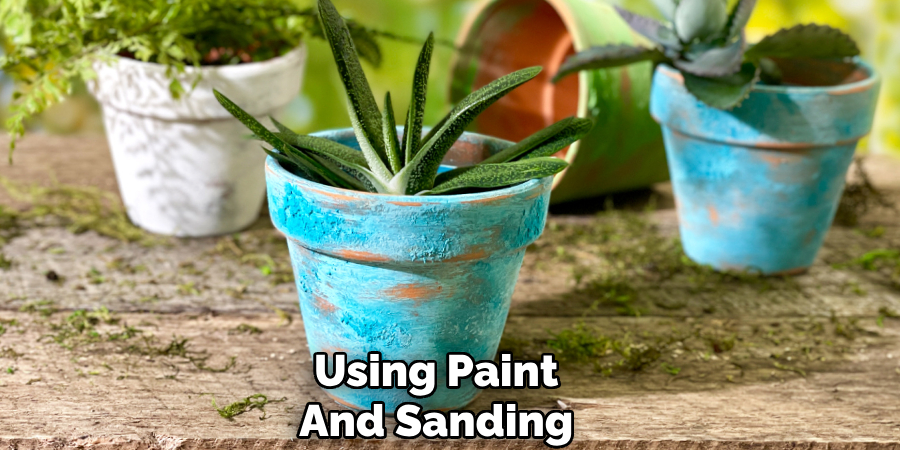
Using Paint and Sanding for a Faux-Aged Look
Dry Brushing Technique
One effective way to achieve a faux-aged look is by using the dry brushing technique. Begin by dipping a dry paintbrush very lightly into off-white or gray acrylic paint. Remove any excess paint by dabbing it with a paper towel, then gently brush it over the pot’s surface. This technique leaves a subtle, streaky texture that mimics natural weathering.
Sanding and Layering
To add depth to the appearance, consider sanding and layering paint. Start by applying a base coat in a darker tone and allow it to dry. Next, apply a lighter topcoat, such as white or cream. Once dry, use sandpaper to gently distress the edges and raised areas, revealing the darker layer underneath for a multi-dimensional, timeworn effect.
Sealing the Finish
For additional durability and to preserve the aged appearance, you can apply a matte sealant. This step is optional but recommended for outdoor use.
Tips for Success and Common Mistakes
Do’s and Don’ts
To achieve the best results while aging terra cotta, avoid using harsh chemicals that can degrade the material over time. Instead, stick to natural methods or mild, non-abrasive solutions that maintain the pot’s integrity. Be patient during the aging process, especially if opting for natural methods like moss growth, as these techniques take time to develop their full effect.
Consistency Across Pots
If you’re working on aging multiple pots for a cohesive look, aim to use the same aging method on all of them. This ensures uniformity in texture and color, giving your collection a harmonious, curated appearance.
Mixing Techniques
For a more creative and unique finish, consider experimenting with a combination of aging techniques. Blending processes such as layering paint and natural weathering can result in pots with intricate textures and character.
Conclusion
Learning how to age terra cotta pots allows you to transform simple clay containers into charming, aged garden treasures. Techniques like applying a lime wash, creating a moss slurry, using vinegar for patina, or layering paint can achieve stunning results, each offering its own distinct aesthetic.
By experimenting with these methods, you can discover the approach that best complements your gardening style and outdoor decor. With a little creativity and effort, aging terra cotta pots can add character to your garden, transforming ordinary planters into personalized and timeless pieces of art.
Specialization:
- Master of wheel-throwing, hand-building, and advanced glazing techniques
- Focus on creating both functional pottery and decorative art pieces
Recognition:
- Celebrated by collectors and art enthusiasts for creating one-of-a-kind pieces that blend artistry with functionality
- Participates in local and national exhibitions, earning accolades for his innovative designs and craftsmanship
Passion:
- Deeply committed to exploring and pushing the boundaries of ceramic artistry
- Continuously experiments with new materials, firing techniques, and artistic concepts to evolve his craft
Personal Philosophy:
- Believes in the transformative power of art, aiming to evoke emotions and connections through his ceramic creations
- Advocates for sustainability in ceramics, using eco-friendly materials and practices whenever possible