


Building a kiln for ceramics is an essential step for any pottery enthusiast or professional looking to fire their creations at home. A kiln provides the high temperatures needed to harden clay and set glazes, transforming raw materials into durable and beautiful ceramic pieces. Whether you are interested in constructing a simple, small-scale kiln or a more complex, large-capacity one, understanding the basic principles and techniques involved can save you time and resources.
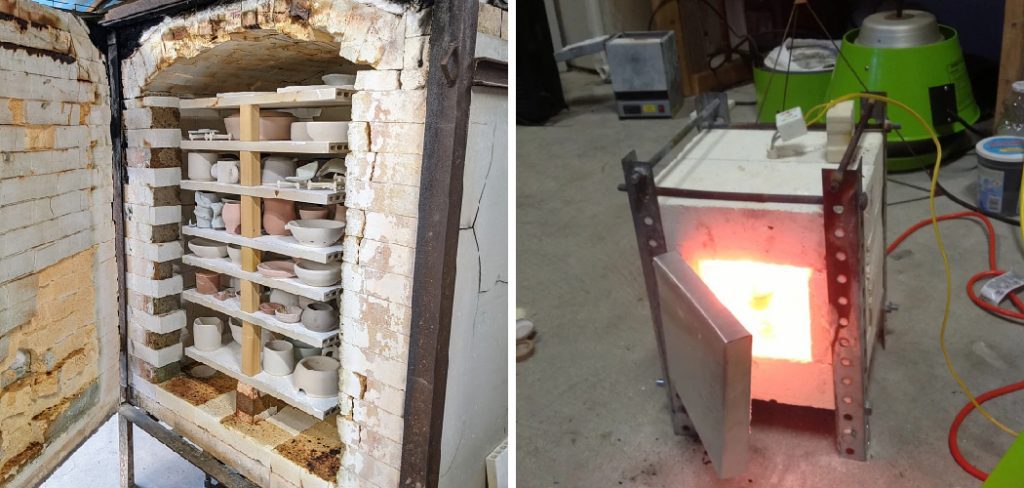
This guide on how to build a kiln for ceramics will walk you through the essentials of building your own kiln, covering everything from planning and materials to safety considerations.
Why Build Your Own Kiln?
While there are many pre-made kilns available on the market, building your own allows for more customization and control over the firing process. This can be beneficial for artists who have specific needs or preferences when it comes to firing their ceramic creations.
Additionally, building your own kiln can be a fun and rewarding experience. It allows you to learn new skills and gain a deeper understanding of how kilns work, which can enhance your overall pottery practice.
Needed Materials
Before you begin construction on your kiln, it’s important to gather all the necessary materials and tools. Here are some of the essential items you will need:
Fire Bricks or Refractory Bricks:
These specialized bricks are designed to withstand high temperatures and provide insulation for the kiln. Make sure to choose bricks that can withstand the temperature range you will be firing at.
Kiln Shelf:
This flat, sturdy surface is used to hold and support your ceramic pieces during firing. It should also be made of a material that can withstand high temperatures, such as cordierite or silicon carbide.
Metal Frame:
A metal frame is needed to support the weight of the kiln and provide stability. You can build your own frame using steel rods or purchase pre-made ones.
Burner:
If you are building a gas-fired kiln, you will need a burner to heat up the kiln. There are various types of burners available, so make sure to choose one that is suitable for your kiln design and firing needs.
Insulation Materials:
Insulation materials such as ceramic fiber, vermiculite, or perlite are used to keep the heat inside the kiln and prevent it from escaping. The type of insulation you choose will depend on your budget and desired level of insulation.
8 Simple Step-by-step Guidelines on How to Build a Kiln for Ceramics
Step 1: Determine the Type of Kiln You Want to Build
The first step in building your kiln is deciding on the type of kiln that best suits your needs. There are several common types of kilns, including electric, gas-fired, and wood-fired kilns. Each type has its own advantages and considerations.
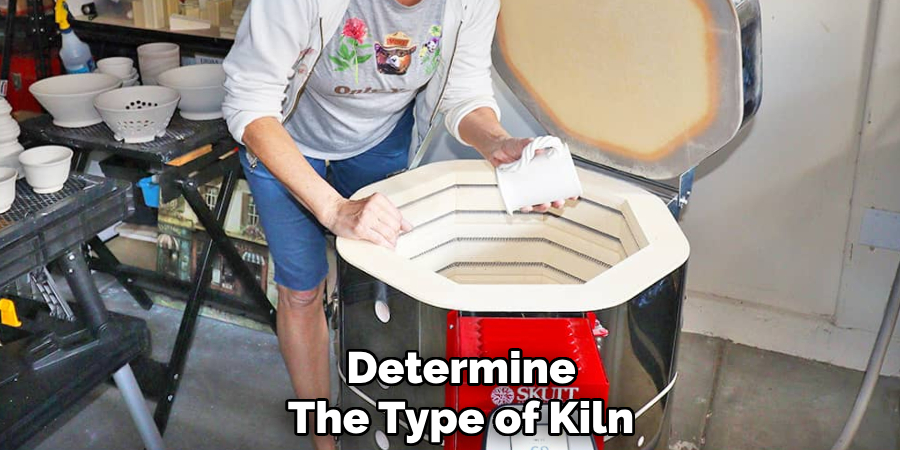
Electric Kiln:
These kilns are easier to use and maintain, as they rely on electricity to heat the kiln chamber. They are ideal for small-scale projects and offer precise control over temperature, making them suitable for beginners and professionals alike. However, they can be more expensive to operate in the long run due to electricity costs.
Gas-fired Kiln:
These kilns use propane or natural gas as a fuel source and are suitable for larger-scale projects. They offer faster firing times and produce unique atmospheric effects on ceramics. However, they require careful ventilation and monitoring during use.
Wood-fired Kiln:
These traditional kilns use wood as a fuel source and produce unique effects on ceramics due to the interaction between fire and ash. They are often used by experienced potters looking for a more hands-on approach to firing, but they require skill and careful control of the temperature.
Step 2: Create a Plan and Design
Once you have decided on the type of kiln you want to build, the next step is to create a detailed plan and design. Start by sketching out the dimensions and overall structure of your kiln. Consider how much space you have available for the kiln and make sure the design fits your workspace and firing needs.
When designing your kiln, factor in the materials you will be using, such as the thickness of the fire bricks or insulation. Take into account the placement of the kiln shelf, burner (if applicable), and ventilation. Ensure there is enough space inside the kiln to accommodate your pottery pieces while allowing for proper airflow and heat distribution.
It’s also important to consider any safety regulations or codes that may apply in your area and make sure your kiln design complies with them. Consulting with a professional or experienced potter can be helpful in this step.
Step 3: Build the Foundation
The foundation of your kiln is critical for ensuring stability and safety during operation. Begin by selecting a level and heat-resistant surface on which to construct your kiln. Outdoor spaces such as concrete slabs or gravel beds are ideal, as they can handle high temperatures and provide a sturdy base. Avoid placing your kiln directly on wooden floors, grass, or any flammable materials.
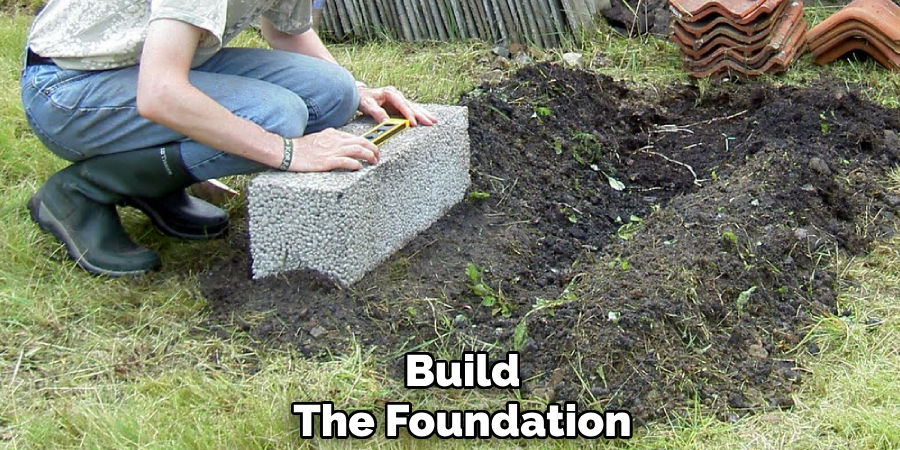
Start by outlining the area where the kiln will be placed, ensuring it matches the dimensions in your design. For added stability, you can lay a base of fire bricks or refractory bricks on the ground. These bricks will act as a buffer between the kiln and the surface beneath it, preventing heat transfer and maintaining structural integrity. Make sure the bricks are arranged evenly and securely, leaving no gaps that could cause the kiln to shift during firing.
Step 4: Construct the Kiln Walls
The walls of your kiln will provide insulation and support for the firing chamber. Begin by laying out a solid layer of bricks along the edge of your foundation, creating the base of your kiln. Cut any necessary bricks to fit using a brick saw or diamond blade.
Use fire clay to secure the bricks in place and ensure a tight seal between them. Continue building up the walls, leaving spaces for ventilation and for inserting the burner (if applicable). As you build upwards, use smaller-sized bricks for added stability.
Step 5: Install Insulation Materials
Once you have constructed the walls of your kiln, it’s time to install the insulation materials. Begin by lining the inside walls of your kiln with ceramic fiber or other insulation material, making sure to cover all areas evenly. This will help retain heat and prevent it from escaping through the walls of your kiln.
Next, add a layer of insulating material on top of the bricks laid out for the base of your kiln. You can use a combination of ceramic fiber, vermiculite, or perlite for this step, depending on your budget and desired level of insulation.
Step 6: Insert Kiln Shelf and Burner (If Applicable)
Before inserting any pottery pieces, you need to place a kiln shelf on top of the base bricks. Make sure the shelf is level and secure to avoid any accidents during firing.

If you are using a gas-fired kiln, this is also the time to insert the burner into its designated space. Follow the manufacturer’s instructions for proper installation and make sure it is securely in place.
Step 7: Fire Up Your Kiln
Once your kiln is fully assembled and all components are securely in place, you are ready to fire it up. Start by double-checking that all safety precautions are followed, including proper ventilation, a stable foundation, and any necessary protective gear. Ensure that the kiln is situated away from flammable materials and that you have a fire extinguisher on hand, just in case.
If you are using an electric kiln, connect it to a reliable power source and set the desired firing temperature on the control panel. Gradually increase the heat to allow the kiln and pottery to adjust without thermal shock. For a gas-fired kiln, ignite the burner according to the manufacturer’s instructions, and monitor the flame to ensure it burns evenly and safely. With a wood-fired kiln, start by building a small fire using dry kindling and gradually adding larger pieces of wood until the kiln chamber reaches the desired temperature.
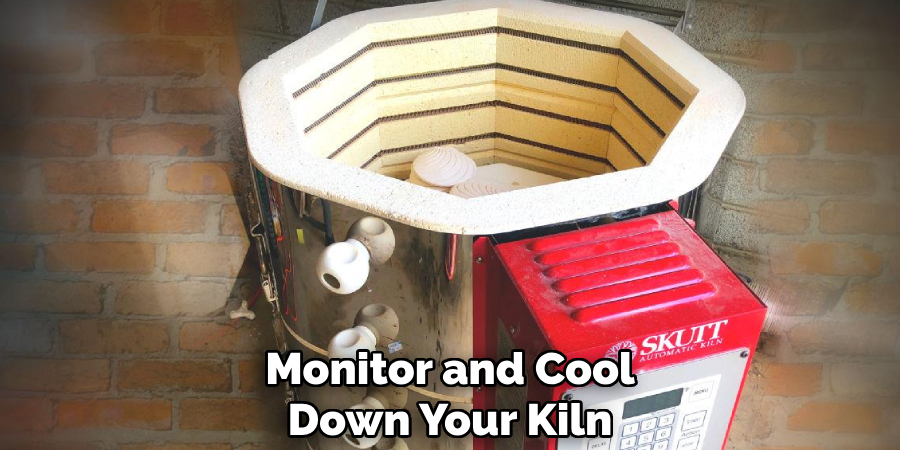
Step 8: Monitor and Cool Down Your Kiln
During the firing process, it’s important to monitor your kiln regularly to ensure that everything is running smoothly. Keep an eye on the temperature using a pyrometer or thermocouple and make any necessary adjustments to maintain the desired temperature. Once the firing is complete, let your kiln cool down gradually before opening it. This will help prevent thermal shock and potential damage to your pottery pieces.
Following these steps on how to build a kiln for ceramics will help you build a reliable, efficient and safe kiln for all your pottery firing needs. Remember to always prioritize safety when working with high temperatures, and consult with experienced potters or professionals if needed. With proper planning and construction, your homemade kiln can be a valuable tool in your pottery journey. So, don’t hesitate to start building your own kiln today! Happy potting!
Conclusion
Building your own kiln can be a rewarding endeavor that not only enhances your pottery-making process but also deepens your understanding of ceramics. By carefully planning, gathering the right materials, and following proper construction steps on how to build a kiln for ceramics, you can create a kiln that meets your specific needs and lasts for years to come.
Always prioritize safety throughout the process, and don’t be afraid to seek advice from other experienced potters. With dedication and effort, your homemade kiln will become an essential part of your creative endeavors, enabling you to bring your artistic visions to life. Happy firing!
Specialization:
- Master of wheel-throwing, hand-building, and advanced glazing techniques
- Focus on creating both functional pottery and decorative art pieces
Recognition:
- Celebrated by collectors and art enthusiasts for creating one-of-a-kind pieces that blend artistry with functionality
- Participates in local and national exhibitions, earning accolades for his innovative designs and craftsmanship
Passion:
- Deeply committed to exploring and pushing the boundaries of ceramic artistry
- Continuously experiments with new materials, firing techniques, and artistic concepts to evolve his craft
Personal Philosophy:
- Believes in the transformative power of art, aiming to evoke emotions and connections through his ceramic creations
- Advocates for sustainability in ceramics, using eco-friendly materials and practices whenever possible