


Creating your own kiln for pottery is a rewarding project that allows you to fire clay pieces at home. Whether you’re an experienced potter or a beginner looking to explore the world of ceramics, constructing a kiln provides an opportunity to learn about the firing process and expand your artistic capabilities.
This guide will walk you through the basics of how to build a kiln for pottery, covering essential materials, design considerations, and safety tips to ensure a successful and enjoyable experience.
The Importance of Kilns in Pottery
Kilns are an essential tool in the world of pottery, as they serve as the final step in transforming raw clay into durable, finished ceramic pieces. The firing process in a kiln not only hardens the clay but also brings out the vibrant colors of glazes and strengthens the material to make it long-lasting.
Without kilns, pottery would lack the durability and functionality that make it suitable for everyday use, such as in dishes, mugs, and decorative items. Additionally, kilns allow potters to experiment with a range of techniques and finishes, giving life to creative designs and intricate textures. The ability to control temperature and firing duration is pivotal in achieving the desired results in every ceramic project, making kilns a vital component of any potter’s craft.
Choosing the Right Kiln Type for Your Needs
Selecting the right type of kiln is a critical step in ensuring your pottery projects meet your expectations. There are several types of kilns available, each suited to different needs and levels of experience. Electric kilns are a popular choice for beginners and hobbyists due to their ease of use, precise temperature controls, and minimal maintenance. For those seeking more traditional or advanced firing methods, gas kilns provide flexibility and control over the firing atmosphere, making them ideal for creating unique finishes and effects.
Alternatively, wood-fired kilns offer a time-honored approach to pottery, producing distinctive textures and colors through the interaction of flame, ash, and clay. Before deciding, consider factors such as your budget, available space, and the kind of pottery you plan to create. By understanding the strengths of each kiln type, you can choose the one that best aligns with your artistic goals and firing requirements.
10 Methods How to Build a Kiln for Pottery
1. Constructing a Traditional Pit Kiln
A pit kiln is one of the oldest and simplest methods for firing pottery, requiring only a hole in the ground and combustible materials. To build a pit kiln, dig a hole about 2 to 3 feet deep and wide enough to accommodate your pottery. Line the bottom with a layer of sawdust or straw to provide insulation and prevent direct contact with the ground.

Arrange your pottery carefully, then cover it with additional layers of sawdust, wood, dried grass, or charcoal. Once the pit is filled, ignite the combustible materials and allow them to burn slowly. Covering the pit partially with bricks or soil helps retain heat. The firing process takes several hours, with temperatures reaching up to 1,500°F (815°C), sufficient for primitive pottery.
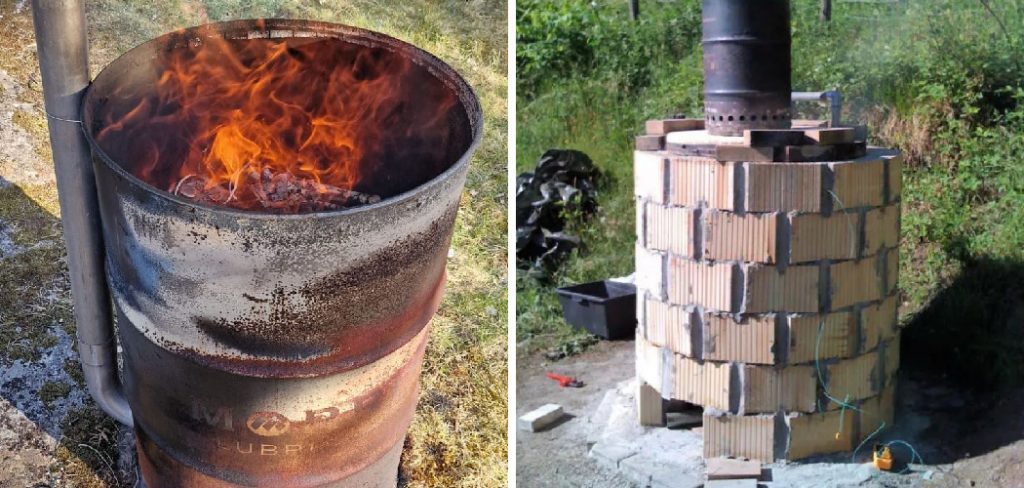
2. Making a Brick Kiln for Controlled Firing
A simple brick kiln provides better heat retention and durability than a pit kiln. To construct one, build a small rectangular or dome-shaped chamber using firebricks, ensuring there are openings for airflow and fuel. Firebricks are ideal because they can withstand high temperatures without cracking.
The top of the kiln can be left open or covered with a removable lid made from additional bricks or metal sheets. Fuel such as wood or charcoal is burned inside the chamber to gradually raise the temperature. A chimney or small vent helps control airflow, allowing for a more efficient and even firing process.
3. Building a Barrel Kiln for Portable Firing
A barrel kiln is an excellent option for potters who need a portable and cost-effective firing solution. To create one, use a metal barrel (such as a 55-gallon drum) and modify it to function as a kiln. Cut a small opening at the bottom for ventilation and fuel access. Line the inside with firebricks or a layer of high-heat insulation to improve heat retention.
Arrange pottery inside on a raised platform or shelf, then fill the lower section with wood, sawdust, or other combustibles. Ignite the kiln and allow the fire to burn slowly, reaching up to 1,800°F (982°C). Covering the top with a metal lid helps control heat distribution.
4. Constructing a Cob Kiln Using Natural Materials
A cob kiln is an eco-friendly and inexpensive kiln built from clay, sand, and straw. To create one, form a dome-like structure using a mixture of these materials, shaping an enclosed firing chamber. Leave openings at the base for fuel insertion and airflow.
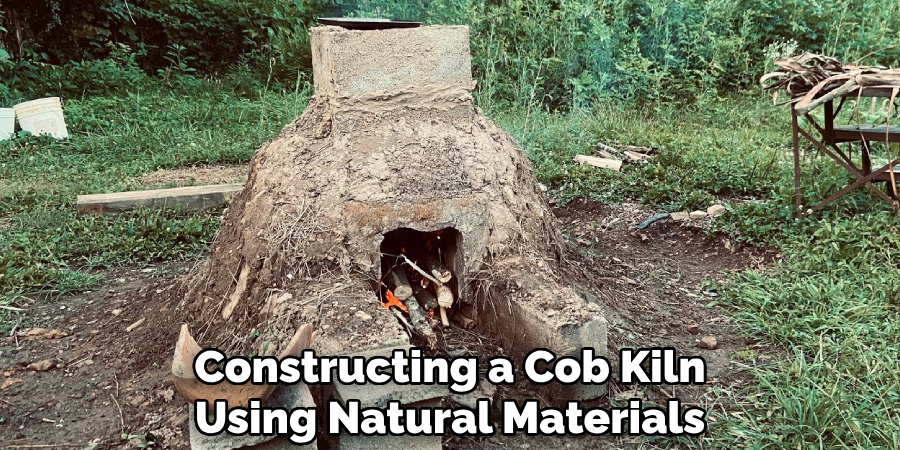
Once the cob dries and hardens, the kiln becomes a functional, heat-resistant firing structure. Cob kilns are particularly popular in off-grid or sustainable pottery practices. Although they take time to dry and cure, they offer a durable and reusable option for firing pottery at temperatures up to 1,600°F (871°C).
5. Constructing a DIY Raku Kiln for Quick Firing
A raku kiln is designed for rapid, low-temperature firing, often used in the traditional Japanese raku technique. To build one, modify a large metal trash can by cutting a small hole near the bottom for a propane burner. Line the inside with ceramic fiber insulation to retain heat. A removable lid, also insulated, helps trap heat inside.
When firing, pottery is heated to about 1,800°F (982°C) in under an hour. Once red-hot, pieces are removed with tongs and placed in sawdust or other combustible materials for rapid cooling, creating crackled glaze effects unique to raku pottery.
6. Making a Gas Kiln for High-Temperature Firing
A gas kiln is a great option for potters who need high firing temperatures while maintaining control over the process. To build a gas kiln, use an insulated chamber made of firebricks or ceramic fiberboard. Install one or more propane or natural gas burners at the base, ensuring proper ventilation through adjustable air vents or chimneys.
Gas kilns can reach temperatures of 2,300°F (1,260°C), making them suitable for stoneware and porcelain firing. Proper insulation and an adjustable burner system allow for controlled temperature increases, ensuring even heating throughout the chamber.
7. Constructing an Electric Kiln from an Old Oven
Repurposing an old electric oven is a cost-effective way to build a kiln for low-fire ceramics. Modify the oven by replacing its heating elements with high-temperature kiln elements. Line the interior with insulating firebricks to improve heat retention. Install a programmable thermostat or kiln controller to regulate temperature settings.
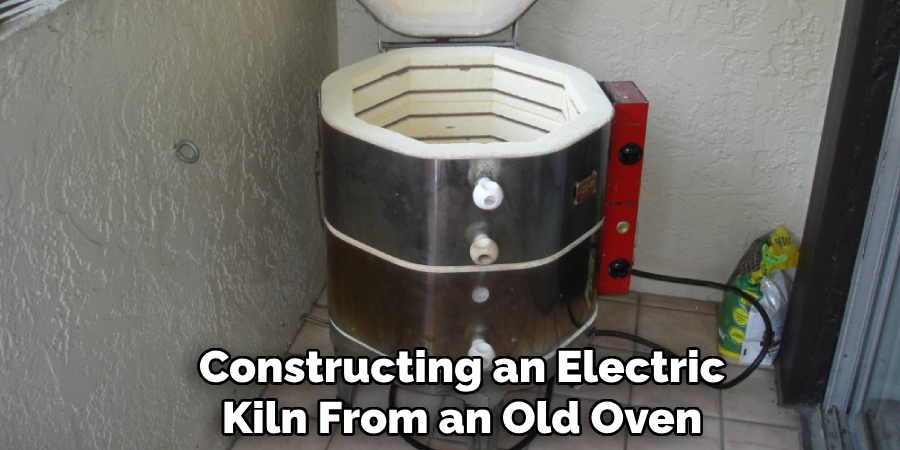
While homemade electric kilns typically reach only 1,800°F (982°C), they are sufficient for earthenware and some mid-fire clays. Safety precautions, such as proper electrical wiring and ventilation, are essential when converting an oven into a kiln.
8. Creating a Top-Loading Kiln for Space Efficiency
A top-loading kiln design is efficient for small studios with limited space. Construct a vertical chamber using firebricks, allowing pottery to be stacked on shelves inside.
The heating elements or burners should be installed at the bottom, with a lid that can be opened from the top. This design ensures even heat distribution and easy loading of multiple pottery pieces. A top-loading kiln is ideal for electric or gas firing, offering compact yet effective firing capabilities.
9. Building a Sawdust Kiln for Low-Temperature Firing
A sawdust kiln is an alternative firing method that uses slow-burning sawdust to gradually heat pottery. To construct one, create a simple metal or brick container with ventilation holes. Layer sawdust at the bottom, place pottery inside, and cover it with additional sawdust. Ignite the sawdust and allow it to smolder over several hours.
This method produces unique, smoky surface effects on pottery, often resulting in deep black or textured finishes. Sawdust kilns are particularly popular for decorative or primitive pottery styles.
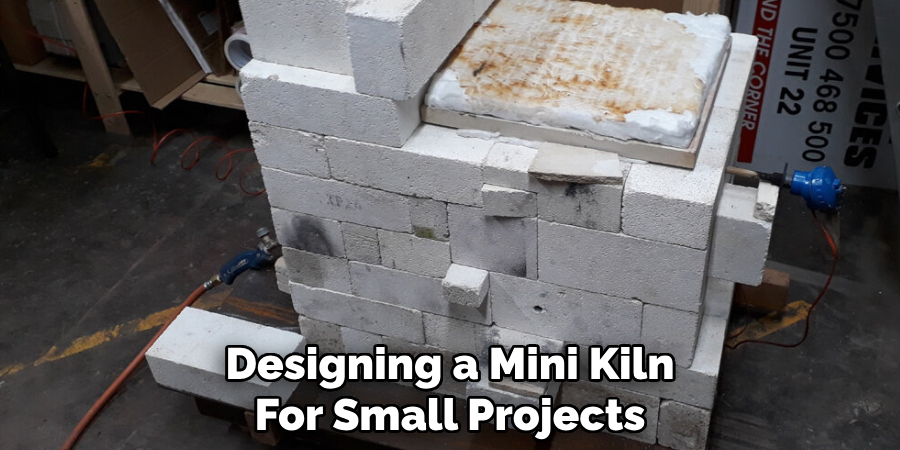
10. Designing a Mini Kiln for Small Projects
For small-scale pottery or experimental firing, a mini kiln can be built using a fireproof box lined with ceramic fiber insulation. The heat source can be a small propane torch or an electric heating coil. This setup allows for quick test firings and glaze experiments without needing a full-sized kiln. Mini kilns are particularly useful for jewelry-making, tiny sculptures, or testing glaze effects before committing to a larger batch.
Conclusion
Building a kiln for pottery can be an exciting and rewarding process, allowing artists to fire their creations without relying on expensive commercial kilns. Whether opting for a primitive pit kiln, an eco-friendly cob kiln, or a sophisticated gas or electric kiln, each method offers unique benefits and firing capabilities.
Understanding the principles of heat retention, airflow, and insulation ensures that homemade kilns perform efficiently and safely. So, there you have it – a quick and easy guide on how to build a kiln for pottery.
Specialization:
- Master of wheel-throwing, hand-building, and advanced glazing techniques
- Focus on creating both functional pottery and decorative art pieces
Recognition:
- Celebrated by collectors and art enthusiasts for creating one-of-a-kind pieces that blend artistry with functionality
- Participates in local and national exhibitions, earning accolades for his innovative designs and craftsmanship
Passion:
- Deeply committed to exploring and pushing the boundaries of ceramic artistry
- Continuously experiments with new materials, firing techniques, and artistic concepts to evolve his craft
Personal Philosophy:
- Believes in the transformative power of art, aiming to evoke emotions and connections through his ceramic creations
- Advocates for sustainability in ceramics, using eco-friendly materials and practices whenever possible