


Are you a pottery enthusiast who loves to create ceramic pieces in your kiln? If so, then you know that keeping your kiln shelves clean is essential to maintaining the quality and longevity of your work.
How to clean kiln shelves is an essential part of maintaining a well-functioning kiln and ensuring the quality of your ceramic projects. Over time, shelves can accumulate glaze drips, kiln wash residue, and other debris that may affect the firing process or damage future pieces. Proper cleaning not only extends the lifespan of your shelves but also prevents contamination and unwanted marks on your ceramics.
With the right tools and techniques, cleaning kiln shelves can be a straightforward task, ensuring optimal performance and pristine results for your work.
What Are the Causes of Buildup on Kiln Shelves?
Before diving into the cleaning process, it’s essential to understand why kiln shelves get dirty in the first place. Here are some common causes of buildup on kiln shelves:
- Glaze Drips: When glazes are applied too thick or runny, they can drip onto your kiln shelf during firing.
- Kiln Wash Residue: Kiln wash is a protective layer that prevents clay from adhering to the shelf during firing. However, if not adequately removed after each use, it can build up and cause issues.
- Firing Debris: During a firing cycle, small pieces of clay or glaze can flake off and land on the shelves, creating a layer of debris.
- Contaminants From Previous Firings: If you fire different types of clay or glazes in your kiln, residues can transfer to your shelves and cause unwanted marks.
Knowing these potential causes can help you prevent buildup on your kiln shelves by adjusting your firing techniques or regularly cleaning them afterward.
What Will You Need?
To clean your kiln shelves effectively, you will need the following materials:
- A Wire brush: A stiff-bristled wire brush is ideal for removing glaze drips and hardened buildup on your shelves.
- A Scraper: A scraper or putty knife can help remove stubborn residue without damaging the surface of your shelf.
- Water: You’ll need a water source to wet your shelves before cleaning.
- Kiln Wash Remover: This solution dissolves excess kiln wash residue.
- Safety Gear: To protect yourself from any fumes or debris, it’s essential to wear gloves, eye protection, and a dust mask while cleaning.
Once you have all the necessary materials, follow these steps to clean your kiln shelves effectively.
10 Easy Steps on How to Clean Kiln Shelves
Step 1. Prepare Your Workspace
Before you begin cleaning your kiln shelves, it is crucial to organize your workspace. Choose a well-ventilated area, as some cleaning processes can release dust or fumes that may be harmful if inhaled. Lay down a protective sheet or drop cloth to catch any debris or residue from the shelves during cleaning. Ensure your materials and tools, such as the wire brush, scraper, water source, and kiln wash remover, are within easy reach. Proper lighting is also essential, as it helps you identify all areas that require attention. Lastly, wear your safety gear, including gloves, a dust mask, and eye protection, to keep yourself safe. Setting up your workspace properly ensures the cleaning is efficient, secure, and mess-free.

Step 2. Remove Loose Debris
Begin by removing any loose debris or remnants of kiln wash from the shelves. Use a wire brush or scraper to loosen and lift off any loose particles gently. Be careful not to apply excessive force, as this can damage the surface of the shelves. Focus on areas where glaze drips or other residues are most prominent. Collect the debris immediately to prevent it from spreading in your workspace. This step ensures a cleaner surface and prepares the kiln shelves for more thorough cleaning in later steps.
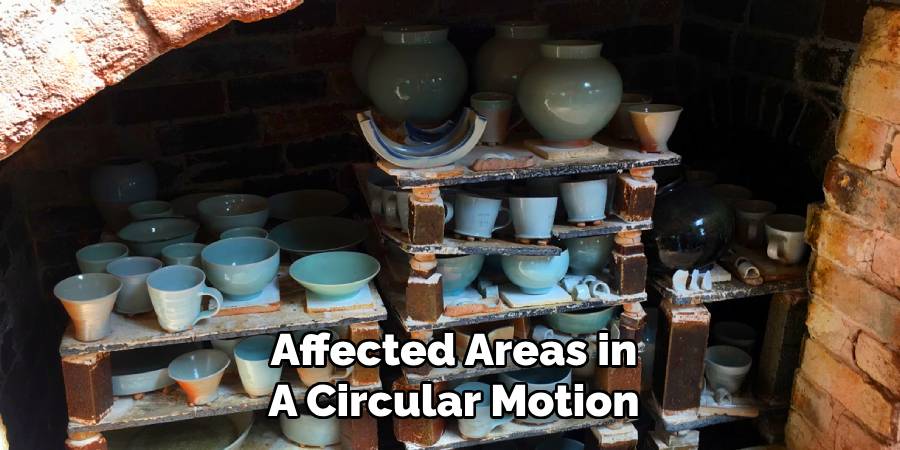
Step 3. Sand the Kiln Shelves
Once the loose debris has been removed, the next step is to sand the surface of the kiln shelves to eliminate any remaining rough spots or stubborn residues. Use a medium-grit sandpaper or a sanding block for this purpose. Gently sand the affected areas in a circular motion, being mindful not to excessively wear down the shelf surface. This process helps to smooth out imperfections and ensures an even surface for future use. After sanding, wipe the shelves with a damp cloth to remove any dust created during this step.
Step 4. Apply Kiln Wash
After sanding and cleaning the kiln shelves, the next essential step is to apply kiln wash. Kiln wash acts as a protective barrier between the shelves, and any glaze drips or spills during firing, preventing permanent damage to the shelves. Prepare the kiln wash according to the manufacturer’s instructions, ensuring a smooth and well-mixed consistency. Using a soft-bristled brush, apply an even, thin layer of kiln washes across the surface of the shelves, avoiding any cracks or crevices. Allow the first layer to dry completely before applying a second coat if needed. Once dry, the shelves will be ready for use in your subsequent firing, offering enhanced durability and easier maintenance.
Step 5. Load the Kiln Carefully
Once the kiln shelves are prepared, it’s time to load the kiln for firing. Begin by placing the shelves securely inside the kiln, ensuring they are level and evenly spaced to promote consistent heat distribution. Arrange your pieces on the shelves with enough space between them to allow proper air circulation and prevent glaze from dripping onto neighboring items. Heavier or larger pieces should be placed on the bottom shelves for stability, while lighter items can go on the upper shelves. Always follow the kiln’s maximum loading capacity guidelines to prevent damage to the equipment or your work.
Step 6. Set the Firing Schedule
After loading the kiln, set the appropriate firing schedule for your project. This involves programming the kiln controller to determine the rate of temperature increase, the target temperature, and the cooling rate. Be sure to select the correct firing program based on the type of clay and glaze you are using, as different materials require specific firing temperatures. For instance, earthenware typically fires at lower temperatures, while stoneware and porcelain require higher heat. Always double-check your materials’ specifications to avoid over- or under-firing, which could compromise the quality of your finished pieces. A carefully planned firing schedule will ensure consistent, professional results.

Step 7. Monitor the Firing Process
Once the kiln is firing, it is crucial to monitor the process to ensure everything is running smoothly. While modern kilns often have automated controllers, it is still a good practice to periodically check the kiln to confirm there are no unexpected issues, such as unusual noises, odors, or error messages on the controller. Avoid opening the kiln during firing, as sudden temperature changes can damage your work and the kiln itself. Stay within a safe distance of the kiln and follow the manufacturer’s safety guidance.
Step 8. Allow the Kiln to Cool Properly
Once the firing process is complete, allowing the kiln to cool down slowly and naturally is essential. Rapid cooling can cause thermal shock, leading to cracks or damage in your pieces. Keep the kiln closed during the cooling phase to maintain a controlled environment and avoid sudden exposure to cooler air. Many kilns have built-in cooling programs, but always ensure the temperature has returned safely before opening the kiln. Patience during this step is critical to preserving the integrity and quality of your work.
Step 9. Unload the Kiln with Care
Once the kiln has cooled completely and it is safe to open, carefully unload your pieces. Wear protective gloves if the kiln or any items inside are still warm. Inspect each item for any irregularities or damage that may have occurred during the firing process. Handle your work with attention to detail to avoid accidental breakage. This is the moment to appreciate the results of your effort and the transformation your pieces have undergone. Store and display your finished work appropriately to prevent damage and showcase your creations beautifully.
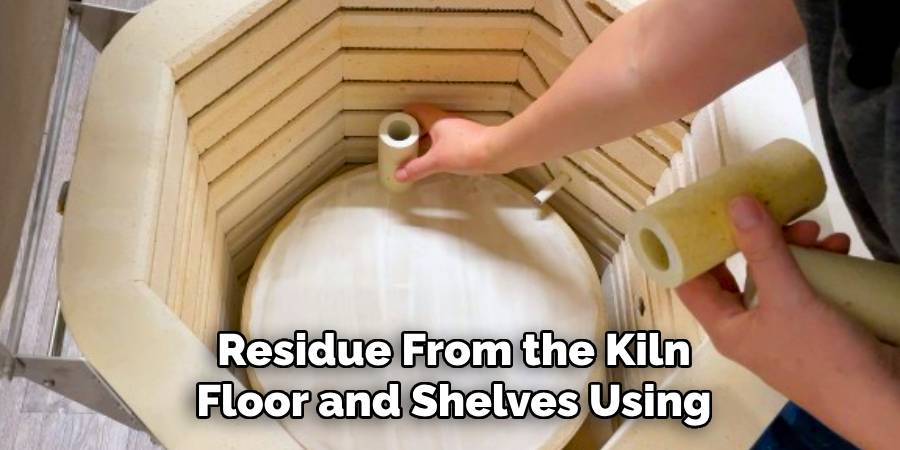
Step 10. Clean and Maintain the Kiln
After completing your firing, cleaning and maintaining your kiln is essential to ensure its longevity and optimal performance. Remove debris or residue from the kiln floor and shelves using a soft brush or vacuum. Check the kiln elements and walls for signs of wear, cracks, or damage, and replace any components as needed. Regularly inspect and, if necessary, reapply kiln wash to shelves to prevent glaze drips from permanently adhering to the surface. Proper kiln maintenance protects your equipment and helps ensure consistent results for all future firings.
Following these steps, you can fire your work to achieve professional and high-quality results.
Conclusion
How to clean kiln shelves is a crucial part of maintaining your kiln and ensuring the quality of your firings.
Begin by carefully scraping off any glaze drips or residue with a metal scraper, being cautious not to damage the shelf surface. A grinding tool can be used to smooth the area for stubborn spots. After cleaning, reapply a fresh coat of kiln wash to protect the shelves from future glaze drips and make cleaning easier after subsequent firings.
Regularly maintaining your kiln shelves extends their lifespan and helps prevent imperfections in future ceramic projects.
Specialization:
- Master of wheel-throwing, hand-building, and advanced glazing techniques
- Focus on creating both functional pottery and decorative art pieces
Recognition:
- Celebrated by collectors and art enthusiasts for creating one-of-a-kind pieces that blend artistry with functionality
- Participates in local and national exhibitions, earning accolades for his innovative designs and craftsmanship
Passion:
- Deeply committed to exploring and pushing the boundaries of ceramic artistry
- Continuously experiments with new materials, firing techniques, and artistic concepts to evolve his craft
Personal Philosophy:
- Believes in the transformative power of art, aiming to evoke emotions and connections through his ceramic creations
- Advocates for sustainability in ceramics, using eco-friendly materials and practices whenever possible