


Terra cotta pots are a favorite among gardeners for their natural, breathable clay material that promotes healthy plant growth. The porous nature of the clay allows for better air circulation and water drainage, which benefits a wide range of plants.

However, with regular use, terra cotta pots often develop stains, mineral buildup, mold, or algae, which can not only detract from their appearance but also impact the health of the plants they hold. This article provides a detailed, step-by-step guide on how to clean terra cotta pots, helping you restore their original beauty and ensure they remain functional for years to come. By incorporating routine cleaning into your gardening tasks, you can prevent contamination and prolong the life of your beloved pots. Whether for aesthetic reasons or plant health, learning how to properly maintain terra cotta pots is an essential part of gardening care.
Why Cleaning Terra Cotta Pots Matters
Cleaning terra cotta pots is not just about aesthetics; it plays a crucial role in maintaining plant health and extending the life of your pots. Over time, these porous containers can harbor disease-causing mold, bacteria, and other pathogens that could affect the growth and vitality of your plants. Regular cleaning prevents these issues from spreading to new plants, providing a safer growing environment.
Additionally, terra cotta pots often accumulate salt and mineral deposits from excess fertilizer or hard water, which appear as an unsightly white crust on the surface. These build-ups can interfere with the pot’s breathability and compromise the clay’s integrity. By removing these deposits, you maintain the pot’s natural porosity essential for healthy root systems.
Cleaning also enhances the pot’s appearance, restoring its rich, earthy color and preserving its timeless aesthetic appeal. Furthermore, routine maintenance helps prevent cracks and deterioration of the clay, ensuring that your pots remain functional and sturdy over the years.
For gardeners who reuse pots, cleaning becomes even more critical. Residual soil contaminants left in unclean pots can harm new plants by introducing past pests or pathogens. By adopting a habit of thorough cleaning, you protect your plants and get the most out of your terra cotta pots.
Supplies You’ll Need
To effectively clean terra cotta pots and restore their functionality, you’ll need a few essential tools and materials. Here’s what you should gather before getting started:
- Stiff-bristle brush or sponge – For scrubbing away dirt, debris, and mineral buildup.
- White vinegar – A natural cleaning agent that helps dissolve mineral deposits.
- Baking soda (optional) – Useful for gentle abrasion to tackle tough stains.
- Bleach or hydrogen peroxide – For disinfecting the pots and eliminating harmful bacteria or fungi.
- Bucket or sink – To soak pots and prepare cleaning solutions.
- Mild dish soap – A general cleaner for removing surface grime.
- Old towels or drying rack – To air dry the pots after cleaning.
- Optional: Sandpaper – Ideal for smoothing rough edges or removing stubborn stains.
With these supplies on hand, you’ll be ready to maintain your terra cotta pots with ease.
Initial Dry Cleaning Steps
Before deep cleaning, it’s crucial to prepare your terra cotta pots by removing excess dirt and debris. These initial steps will ensure a thorough cleaning process and help preserve the integrity of your pots.
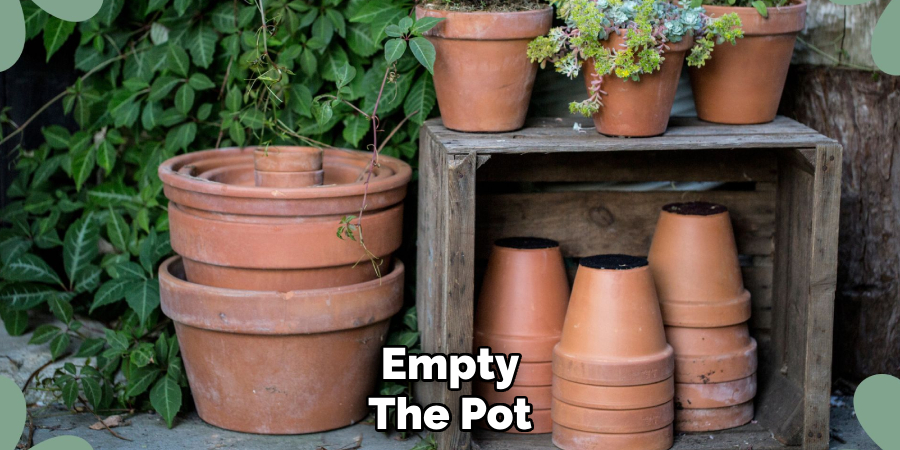
Step 1: Empty the Pot
Start by emptying the pot completely. Remove any remaining soil, dead roots, or plant debris. Be sure to inspect the pot for cracks or damage as you work.
Step 2: Brush Off Loose Dirt
Use a dry brush or stiff bristle brush to scrub off dried dirt, algae, or moss from the interior and exterior surfaces of the pot. Pay extra attention to corners and grooves where grime tends to accumulate.
Step 3: Rinse with Water
Once the loose dirt has been brushed off, thoroughly rinse the pot with water. This step helps remove any lingering debris and prepares the pot for the next stage of cleaning, which typically involves soaking and disinfecting. Be sure to pour out any water remaining inside the pot after rinsing.
These steps provide a solid foundation for maintaining clean and long-lasting terra cotta pots that are ready for reuse.
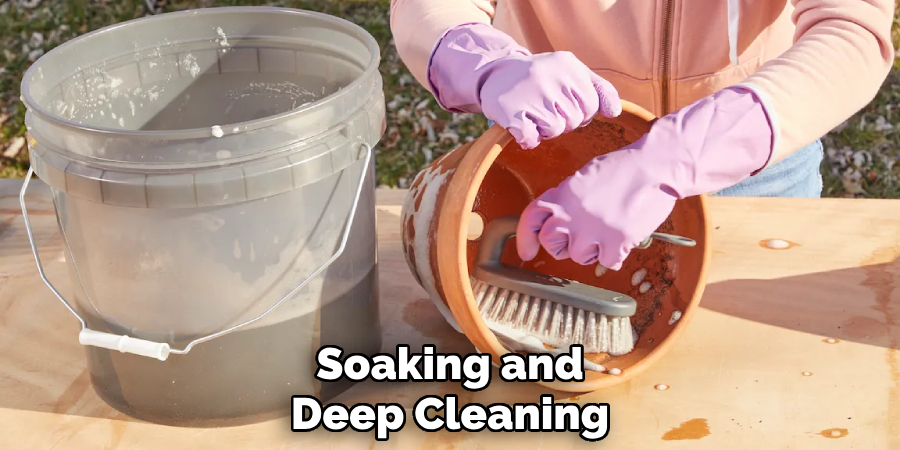
How to Clean Terra Cotta Pots: Soaking and Deep Cleaning
Step 1: Vinegar Solution Soak
To tackle mineral deposits and stubborn residue, start by preparing a vinegar solution. Mix 1 part white vinegar with 3 parts water in a container large enough to submerge your pots. Place the terra cotta pots into the solution and allow them to soak for approximately 30 minutes. This process helps break down mineral buildups caused by water and fertilizer. Ensure the entire pot is submerged for an even cleanse.
Step 2: Scrub After Soaking
After soaking, remove the pots and use a sponge or brush to scrub away any loosened stains. Concentrate on areas such as the rims and the inner surfaces, as these tend to retain the most residue. The scrubbing should not require much effort as the vinegar will have softened most of the buildup. Rinse the pot thoroughly with clean water to remove any remnants of the vinegar solution.
Alternative: Baking Soda Paste
For particularly stubborn spots that persist after soaking, a baking soda paste can be an effective alternative. Create the paste by mixing baking soda with water until it reaches a thick, spreadable consistency. Apply the paste directly onto the problem areas and allow it to sit for about 10 minutes. Gently scrub the treated areas with a sponge or brush, then rinse thoroughly. Baking soda is a natural, gentle abrasive that works well for removing tough stains without damaging the pot.
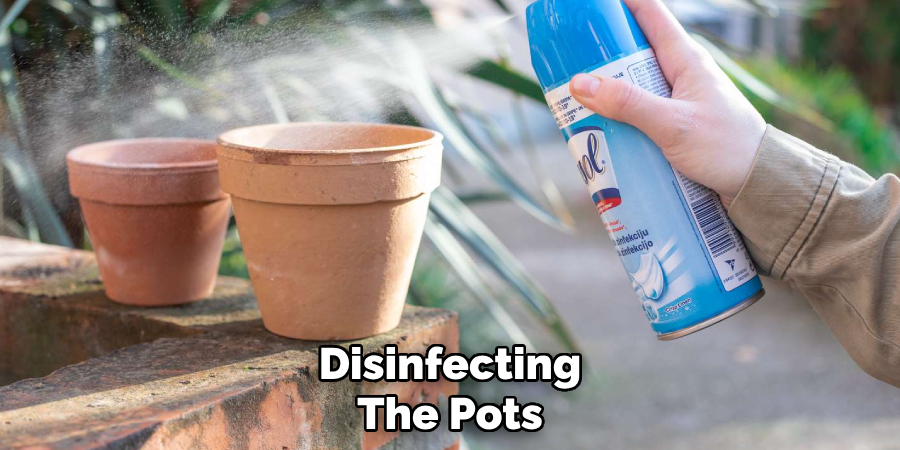
Disinfecting the Pots
Properly disinfecting pots is essential to eliminate any lingering bacteria, fungi, or harmful pathogens that could affect future plants. Here are two effective methods to ensure your pots are clean and safe for reuse:
Using Bleach Solution
Mix a solution of 1 part bleach to 9 parts water in a bucket large enough to submerge your pots. Place the pots into the solution and allow them to soak for approximately 10 minutes. This method effectively kills bacteria and fungi lingering on the surfaces. After soaking, ensure you rinse the pots thoroughly with clean water multiple times to remove any bleach residue, which could harm plants.
Using Hydrogen Peroxide (Alternative)
For a natural disinfectant option, spray or soak the pots with 3% hydrogen peroxide. Allow the solution to remain on the pots for 10-15 minutes to ensure harmful microorganisms are neutralized. Once the time has elapsed, rinse the pots thoroughly with clean water.
Rinse and Dry
After disinfecting, rinse all pots multiple times to ensure no traces of bleach or hydrogen peroxide remain. Finally, allow the pots to air dry completely before using them again to avoid introducing moisture-based organisms into the soil.
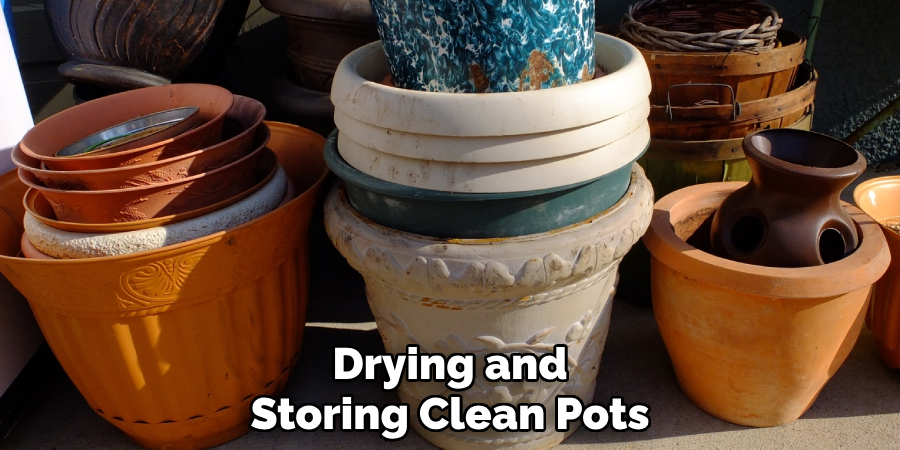
Drying and Storing Clean Pots
Air Dry Thoroughly
Once the pots have been rinsed, it is essential to ensure they dry completely to avoid any build-up of mold or other harmful microorganisms. Place the pots in a sunny location, as sunlight can aid in faster drying while also naturally disinfecting the pots further. If outdoor drying is not an option, set the pots on a clean towel in a well-ventilated indoor area.
Check for Moisture
Before storing, turn each pot upside down to ensure there is no water trapped inside or in any hard-to-reach areas. Even small amounts of moisture left behind can encourage unwanted mold or mildew to grow. Inspect thoroughly and repeat the drying process if necessary.
Proper Storage Tips
To maintain the cleanliness of your pots, stack them carefully or store them upright in a dry, well-ventilated area. Avoid placing them in damp basements, outdoor sheds with high humidity, or other areas prone to moisture, as this could compromise their condition. Using shelving or closed storage bins can help protect the pots from dust and pests while keeping them organized and ready for their next use. With proper drying and storage, your pots will remain clean and in top condition for your gardening needs.
Tips for Long-Term Maintenance
Preventative Cleaning
To keep your pots in excellent condition, lightly rinse them between uses and brush off any buildup before it hardens. Consistent cleaning prevents deposits and keeps your gardening tools ready for future use.
Use Pot Liners or Sealers
Consider using pot liners to minimize soil and mineral buildup inside the pots. Additionally, for terracotta or clay pots, applying a sealing agent can protect the surface from excessive water absorption and stains. While optional, these steps can prolong the lifespan of your pots, making maintenance more manageable.
Avoid Overwatering
Excess moisture not only affects plant health but also accelerates the accumulation of mineral deposits inside pots. Water your plants appropriately to reduce this buildup and keep your pots looking clean and functional for years.
Conclusion
Properly maintained terra cotta pots not only enhance the appearance of your garden but also promote healthier plants by preventing the buildup of harmful residues. Understanding how to clean terra cotta pots and incorporating routine cleaning and drying into your gardening habits will extend the life of your pots while reducing the risk of contamination.
By taking these simple yet effective steps, you can protect your investment and ensure your plants thrive in a clean, healthy environment. Make pot cleaning a regular part of your gardening routine, and enjoy the benefits of well-cared-for pots and flourishing greenery.
Specialization:
- Master of wheel-throwing, hand-building, and advanced glazing techniques
- Focus on creating both functional pottery and decorative art pieces
Recognition:
- Celebrated by collectors and art enthusiasts for creating one-of-a-kind pieces that blend artistry with functionality
- Participates in local and national exhibitions, earning accolades for his innovative designs and craftsmanship
Passion:
- Deeply committed to exploring and pushing the boundaries of ceramic artistry
- Continuously experiments with new materials, firing techniques, and artistic concepts to evolve his craft
Personal Philosophy:
- Believes in the transformative power of art, aiming to evoke emotions and connections through his ceramic creations
- Advocates for sustainability in ceramics, using eco-friendly materials and practices whenever possible