


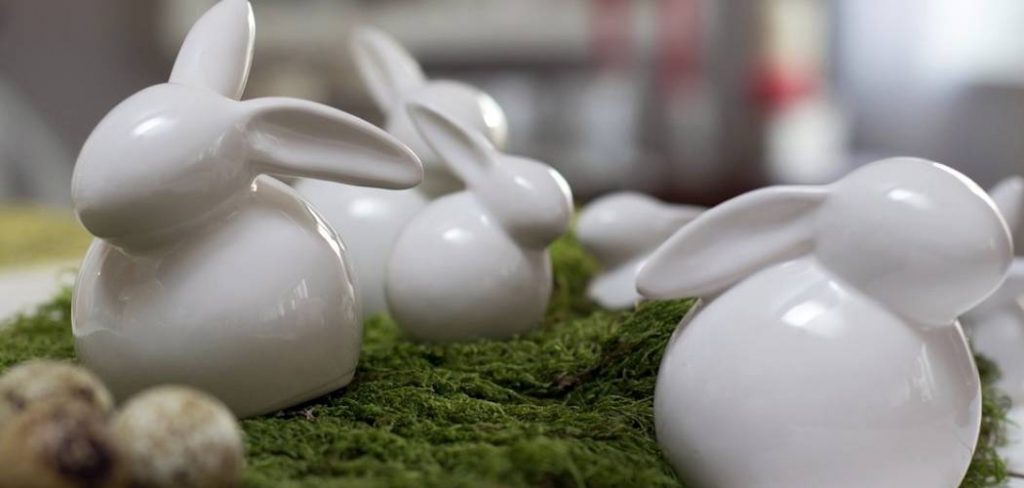
Are you looking for a creative and fun project to do at home? Why not try making your very own ceramic bunny? This adorable and customizable creature can serve as a cute decoration or even a thoughtful gift for someone special.
How to create ceramic bunny is a fun and rewarding craft project that allows you to explore your creativity while working with clay. Whether a seasoned ceramic artist or a beginner, crafting a bunny figurine requires patience, attention to detail, and a few essential tools. This guide will walk you through the steps to mold, shape, and finish your ceramic bunny, resulting in a charming piece you can display, gift, or even use as seasonal décor.
Following these instructions will teach you basic techniques and tips to bring your vision to life. Let’s get started!
What Are the Benefits of Creating Ceramic Bunny?
Before diving into the technical steps of making a ceramic bunny, it’s essential to understand the benefits of this craft. Here are a few reasons why creating ceramic bunnies can be a fun and rewarding activity:
- Express Your Creativity: Making ceramic bunnies allows you to express your creativity and create something unique and personal. You can choose the colors, textures, and designs that reflect your style and imagination.
- Therapeutic Activity: Working with clay has been proven to have therapeutic benefits, such as reducing stress and improving mental well-being. Molding clay into a bunny can help relax your mind and focus on the present moment.
- Learn New Skills: Creating ceramic bunnies involves various techniques such as molding, shaping, and glazing. By learning these skills, you can expand your artistic abilities and explore new ways of crafting with clay.
- Personalized Gifts: A handmade ceramic bunny makes a thoughtful and personalized gift for friends or family. You can customize the design to suit their preferences or add a special touch by incorporating their name or initials into the figurine.
- Decorative Piece: Ceramic bunnies make charming decorative pieces that add a whimsy touch to any room. You can display them on shelves and mantles or as centerpieces for seasonal decorations.
These are just a few benefits of creating ceramic bunnies, and there are many more to discover as you embark on this craft project.
What Will You Need?
Before getting started, you will need to gather the following materials and tools:
- Clay: Choose a clay that is suitable for ceramic projects. Air-dry or oven-bake clays are good options for beginners.
- Sculpting Tools: You can use various sculpting tools such as clay knives, loop tools, and wire cutters to shape and detail your bunny.
- Rolling Pin: A rolling pin will help flatten out the clay evenly.
- Glaze: This is an optional step, but adding glaze to your finished ceramic bunny can give it a glossy finish and protect it from wear and tear.
Once you have these essential items, you can start creating your own ceramic bunny!
9 Easy Steps on How to Create Ceramic Bunny
Step 1: Prepare Your Workspace
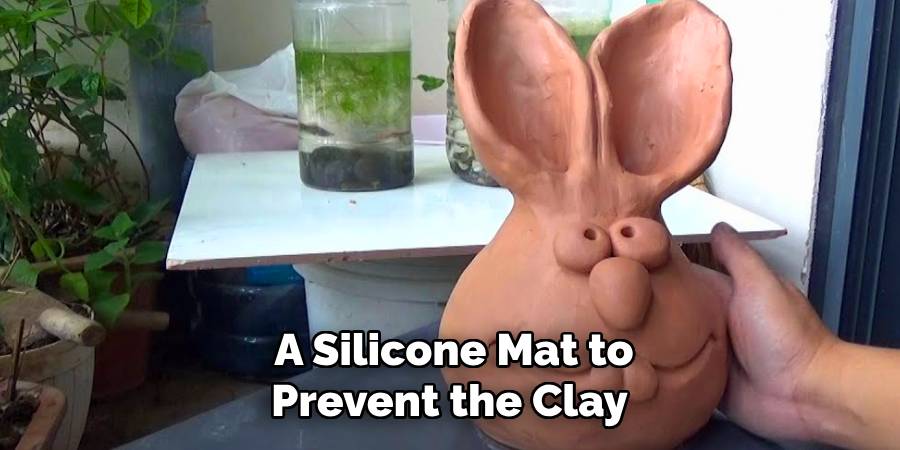
Before you begin crafting, setting up a clean, organized, and well-lit workspace is essential. Choose a flat, sturdy surface to work on, such as a table or countertop, and cover it with a protective layer like parchment paper, wax paper, or a silicone mat to prevent the clay from sticking. Ensure you have all your tools and materials within easy reach, including your clay, sculpting tools, rolling pin, and any additional items you might use, like water for smoothing or a towel for cleaning up.
It’s also a good idea to wear an apron or old clothing to protect yourself from any mess. Lastly, if you are working with oven-bake clay, ensure your oven is preheated and ready for use. Having a dedicated, well-prepared area will help you focus on your craft and make the process more enjoyable from start to finish.
Step 2: Condition the Clay
To ensure your ceramic bunny has a smooth and even texture, it’s essential to condition the clay before shaping it. Start by taking a manageable amount of clay and kneading it thoroughly with your hands. This process will soften the material, making it more pliable and easier to work with. If the clay feels too firm, you can warm it slightly with the heat of your hands or add a small amount of water, depending on the type of clay you are using. Continue kneading until the clay becomes uniform in consistency and free of cracks. Properly conditioned clay is key to creating a polished and professional-looking final piece.
Step 3: Shape the Bunny
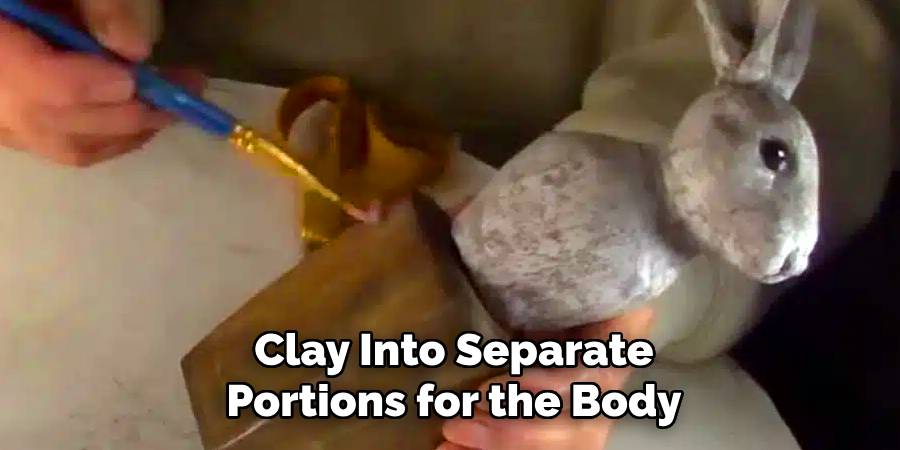
Once the clay is conditioned, you can begin shaping your ceramic bunny. Start by dividing the clay into separate portions for the body, head, ears, and tail. Roll the body and head into smooth, slightly oval shapes, ensuring they are proportional to one another. Attach the head to the body by gently pressing the two pieces together and blending the seam with your fingers or a sculpting tool.
For the ears, roll two small pieces of clay into elongated shapes and flatten them slightly before attaching them to the top of the bunny’s head. Finally, a small ball for the tail is shaped and attached to the back of the body. To bring your bunny to life, refine the details, such as smoothing edges and sculpting facial features.
Step 4: Bake the Bunny
After shaping your ceramic bunny, it’s time to harden the clay by baking it. Refer to your clay’s packaging for specific baking instructions, as temperatures and times may vary depending on the brand and type of clay used. Preheat your oven to the recommended temperature, and place your bunny on a baking sheet lined with parchment paper to prevent sticking. Carefully position the bunny to ensure it retains its shape during baking. Bake for the suggested time, monitoring closely to avoid overbaking, which can cause discoloration or cracking.
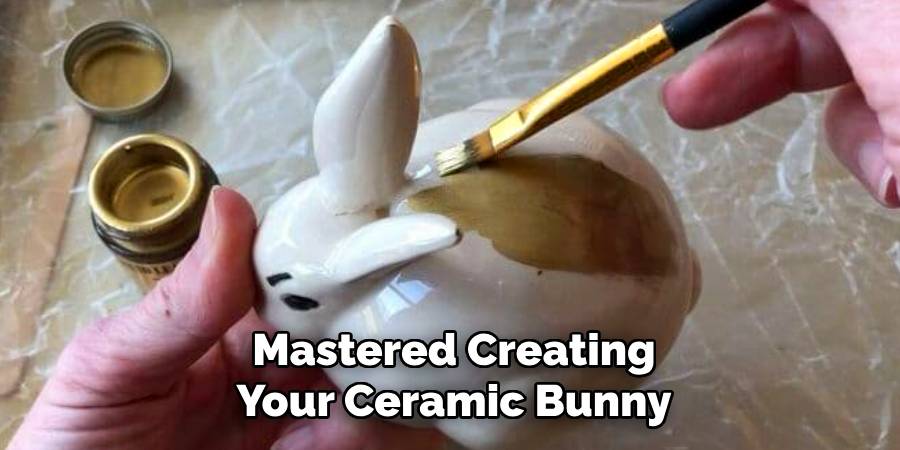
Step 5: Paint and Add Final Details
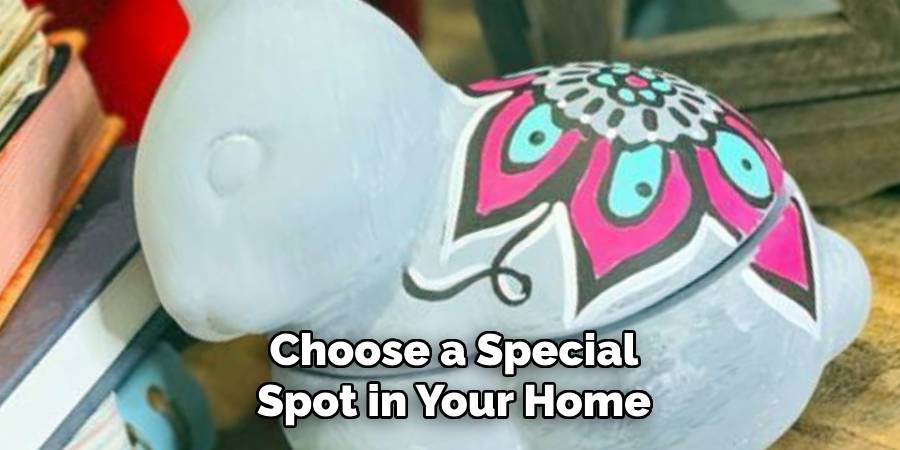
Once your ceramic bunny has cooled completely, it’s time to add a personal touch with paint and decorations. Use acrylic paint to bring your bunny to life by adding color and intricate details. Begin with a base coat and allow it to dry before adding smaller designs like patterns, facial features, or even a textured fur effect. You can apply a clear sealant to protect the paint and give your bunny a subtle shine for a polished finish. Optional embellishments like tiny bows, beads, or glitter can add charm. Take your time, and enjoy the creative process as you finalize your adorable ceramic bunny.
Step 6: Display and Celebrate Your Creation
Now that your ceramic bunny is complete, it’s time to showcase your handiwork! Choose a special spot in your home or garden where your bunny can be admired. It could be part of a seasonal display, a centerpiece for a festive table, or a charming addition to a shelf. If gifting your bunny, package it carefully with tissue paper or a decorative box to highlight your craftsmanship. Celebrate your creativity and the effort you’ve put into crafting this unique and delightful piece!
Step 7: Care and Maintenance
To ensure your ceramic bunny remains in excellent condition, it’s essential to provide proper care. If displayed outdoors, place it in a sheltered location to protect it from extreme weather conditions or prolonged sunlight exposure, which may cause fading or damage. For indoor displays, dust your bunny gently with a soft, dry cloth to keep it looking pristine. If you’ve used a clear sealant, occasional wiping with a damp cloth can help preserve its shine. Taking these small steps will ensure your ceramic bunny continues to bring joy for years.
Step 8: Show Off Your Creation
Now that your ceramic bunny is complete and well cared for, it’s time to showcase it! Place it in a spot where it can bring joy to others, such as a mantlepiece, windowsill, or garden nook. Share your creative process and finished piece with friends and family; it’s a great way to inspire others to explore their artistic side. If you’re proud of your work, consider sharing photos on social media or joining crafting communities to connect with like-minded individuals. Celebrate your achievement and enjoy the happiness your handmade bunny adds to its surroundings!
Step 9: Explore Variations
Once you’ve mastered creating your ceramic bunny, why not experiment with variations? Try different poses, sizes, or designs to make a collection of unique pieces. You could incorporate seasonal themes, such as adding a scarf for winter or flowers for spring. To elevate your creations, experiment with different painting techniques, like ombre effects or intricate patterns. By exploring these variations, you’ll continue to hone your skills and keep the crafting experience fresh and exciting.
By following these steps, you can create a beautiful and unique ceramic bunny that will bring joy and charm to any space.
Conclusion
How to create ceramic bunny is a rewarding and creative process that allows you to express your artistic vision while developing your crafting skills.
By carefully following the steps, from gathering materials to experimenting with unique variations, you can bring your ideas to life and create a truly one-of-a-kind piece. Whether you keep it as a charming decoration, gift it to a loved one, or use it as inspiration for future projects, your handmade ceramic bunny will undoubtedly be a source of pride and joy.
Crafting is as much about the experience as the final product, so enjoy every moment of your creative journey!
Specialization:
- Master of wheel-throwing, hand-building, and advanced glazing techniques
- Focus on creating both functional pottery and decorative art pieces
Recognition:
- Celebrated by collectors and art enthusiasts for creating one-of-a-kind pieces that blend artistry with functionality
- Participates in local and national exhibitions, earning accolades for his innovative designs and craftsmanship
Passion:
- Deeply committed to exploring and pushing the boundaries of ceramic artistry
- Continuously experiments with new materials, firing techniques, and artistic concepts to evolve his craft
Personal Philosophy:
- Believes in the transformative power of art, aiming to evoke emotions and connections through his ceramic creations
- Advocates for sustainability in ceramics, using eco-friendly materials and practices whenever possible