


Ceramic surface textures play a crucial role in enhancing the visual and tactile qualities of pottery and sculpture. These textures not only add depth and character to clay pieces but also transform them into unique works of art that engage both the eye and the touch. Textures can evoke emotional responses, create dramatic effects, and distinguish functional ware from purely artistic creations.
Learning how to create textured ceramic surfaces allows artists and hobbyists to elevate their craft, adding personal expression and dimension to their work. This article explores various techniques for adding texture, essential tools to get started, the timing of application during the ceramic process, and creative tips to inspire innovation. Whether you’re a beginner or an experienced ceramicist, you’ll find plenty of insights to take your textured ceramics to the next level.
Tools and Materials for Creating Texture
Basic Tools
Essential tools for creating texture in ceramics include loop tools, needle tools, ribs, and sponges. Loop tools are excellent for carving grooves and removing clay, while needle tools allow for intricate detailing or piercing. Ribs, available in various materials like wood, rubber, or plastic, help shape and smooth surfaces while adding unique patterns. Sponges are handy for refining textures and ensuring even moisture distribution.
Found Objects
Common objects found around you can be repurposed to add intricate details to your ceramics. Items like lace, leaves, shells, buttons, and fabric can create beautifully organic or geometric imprints. These objects add texture with a personal or natural touch, encouraging creativity by incorporating patterns from everyday items.
Custom-Made Tools
For a truly personalized approach, consider carving your own stamps or rollers from materials such as clay or wood. By crafting your own tools, you can develop distinctive patterns and styles that reflect your artistic vision. These custom tools add a one-of-a-kind element to your work, making it truly unique.
Safety and Cleaning Tips
Maintaining your tools is critical for achieving consistent results and ensuring longevity. Clean your tools thoroughly after each use to prevent clay from hardening or causing damage. Keeping tools in good condition not only ensures precision but also helps avoid unintentional markings on soft clay. Always handle tools with care, prioritizing both safety and cleanliness.
How to Create Textured Ceramic Surfaces: Techniques for Hand-Texturing Clay
Stamping and Pressing
Stamping and pressing are versatile methods for adding texture to clay surfaces. To press objects into the clay without distortion, ensure the clay is at the right consistency—firm yet workable. Use tools or found objects like leaves, lace, or stamps with defined patterns.
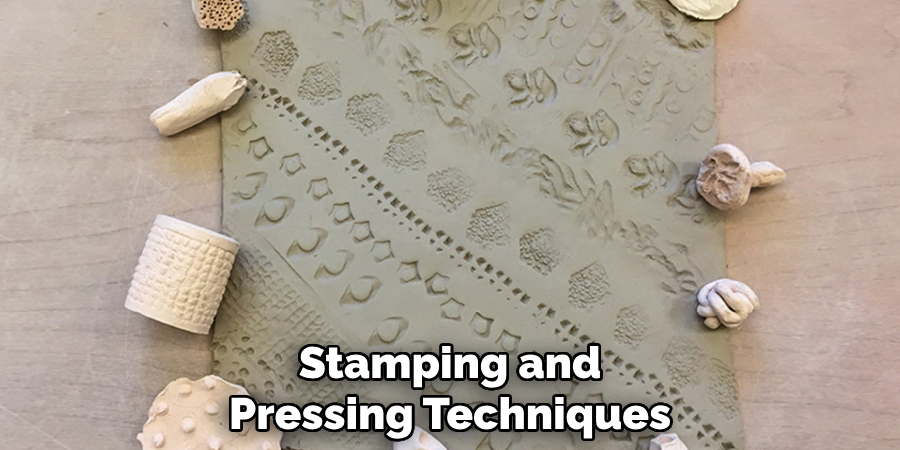
Gently press the object evenly across the surface to avoid shifting or uneven impressions. Take your time and experiment with different pressures to achieve a consistent design. Always clean your objects beforehand to prevent sticking or unwanted residue on the clay.
Carving and Incising
Carving and incising are excellent techniques for creating intricate details such as fine lines or deep grooves. Use specialized carving tools, such as loop tools or needle-tipped instruments, to draw patterns or images into the clay. For best results, work on leather-hard clay, which is firm enough to hold details without collapsing. Plan your design and carve slowly to avoid accidental slips. These methods provide depth and allow for enhanced detail in your creations.
Piercing and Cut-Outs
Piercing and cut-out techniques help create decorative perforations that add an airy, delicate quality to clay projects. Use sharp tools like craft knives, hole cutters, or circular cutters to remove sections of the clay carefully.
To maintain the structural integrity of your piece, make sure the surrounding clay is thick enough to support the design. These perforations are great for functional items like lanterns or purely artistic expressions.
Burnishing with Texture
Burnishing is a technique where the clay surface is polished with a smooth stone, spoon, or metal tool to achieve a combination of shine and raised patterns. Start by lightly rubbing the surface in small circular motions while the clay is at the leather-hard stage.
When incorporating texture, ensure the raised areas are highlighted during the burnishing process for contrast. This technique not only enhances the tactile qualities of your work but also adds a professional finish.
Layering Techniques
Layering involves applying multiple levels of texture using methods like slip trailing or adding thin layers of clay. Slip trailing allows for raised patterns by using slip (liquid clay) applied with a piping bag or bottle.
Alternately, thin layers of soft clay can be applied to the surface to build dimension before impressing textures. Allow each layer to partially dry before applying the next for greater control.
Combining Methods
Mixing techniques can result in dynamic and complex textured surfaces. For example, you can start with stamping to establish a base pattern and then carve over the design for added detail.
Alternatively, combine burnishing with piercing to juxtapose shiny, smooth surfaces against open, airy sections. Experimenting with these combinations helps you discover unique textural effects that align with your creative vision.
Using Texture Rollers and Molds
Texture rollers and molds are excellent tools for creating consistent and intricate designs on clay surfaces.
Texture Rollers
Pre-made or DIY texture rollers allow you to imprint patterns onto clay slabs or vessels quickly. Whether using commercially available rollers with pre-designed patterns or crafting your own with creative materials, the key to success lies in even application.
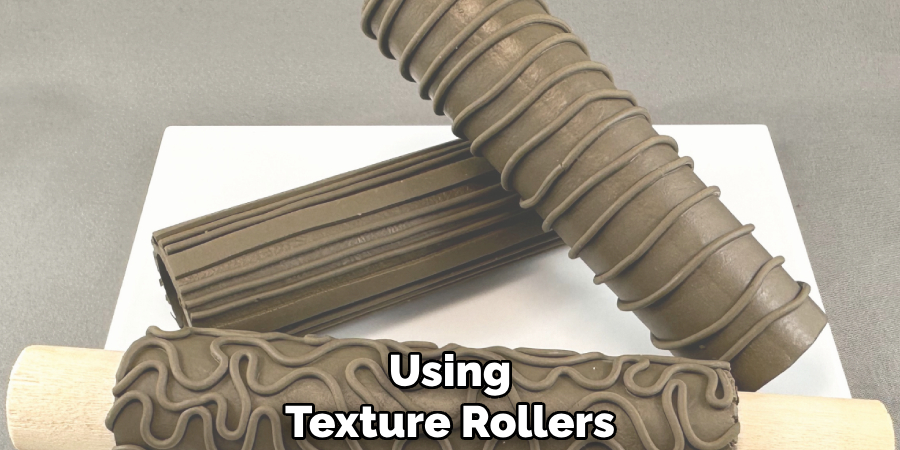
Begin by rolling the tool smoothly across the surface of your clay, applying constant pressure to ensure the design transfers without distortion. It can be helpful to practice on a scrap piece of clay to familiarize yourself with the pressure needed and avoid pressing too hard, which can leave uneven or unintended marks.
Molds and Stamps
Molds and stamps, whether made of plaster, bisque, or silicone, are useful for achieving repeatable and detailed designs on your clay surface. When using molds, lay your clay evenly over the design and apply firm, uniform pressure to ensure all details are captured. For stamps, press the tool into the clay with care, keeping your movements steady to align patterns correctly with previous imprints. To minimize sticking, consider lightly dusting the mold or stamp with cornstarch or using a release agent.
By practicing consistent pressure and careful alignment, these tools can efficiently add professional and creative textures to your ceramic pieces.
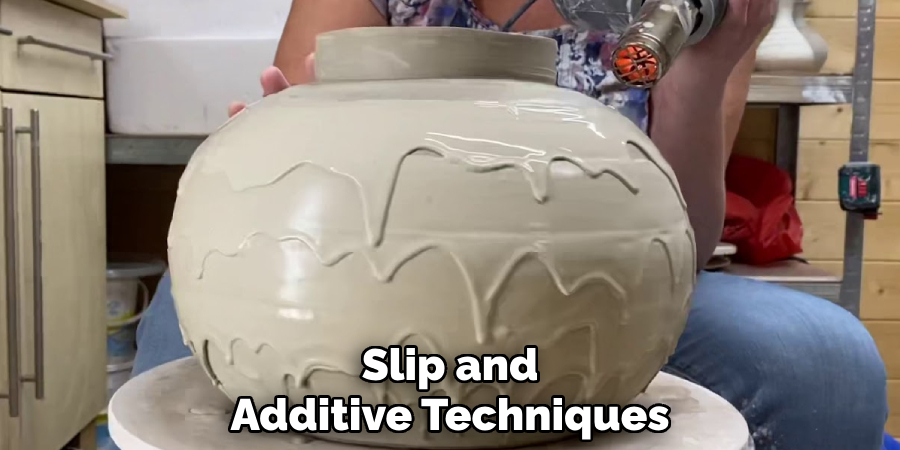
Slip and Additive Techniques
Slip trailing is an exciting and versatile method for adding intricate, raised designs to your ceramic pieces. Using squeeze bottles filled with liquid clay, you can create fine lines, patterns, and decorative accents with precision and control. This technique works particularly well for adding dimension and depth to your work.
Another effective approach is sprigging and appliqué, where small clay elements—or sprigs—are attached to the surface of your piece. These additions can be molded, stamped, or hand-sculpted separately before being affixed to your base form, allowing you to build surface height and create visually striking detail.
Using textured slabs is yet another technique to explore. Patterned slabs are created by impressing textures into flat sheets of clay and then attaching them to your base forms. This method offers an opportunity to incorporate dynamic patterns into your work, seamlessly blending form and decoration.
Combining slip techniques with textures can further elevate your designs. Applying slip over carved or stamped surfaces enhances these textures, bringing out details and adding contrast to the finished piece. By experimenting with these additive techniques, you can achieve endlessly creative and professional results in your ceramic artistry.
Timing and Drying Considerations
Best Clay Stage for Each Technique
To achieve optimal results, it is essential to work with your clay at the appropriate stage for each technique. For stamping, soft clay is ideal, as it allows for clean impressions to be made with minimal effort.
Carving, on the other hand, works best at the leather-hard stage, providing enough firmness to hold intricate details without collapsing. Sprigging should be done when the clay is slightly firm to ensure the added decorations adhere securely without distorting the form.
Drying Techniques
Proper drying is crucial to prevent issues such as cracking or warping, especially with deep textures. Slow drying is recommended, as it allows moisture to evaporate evenly throughout the piece. Covering your work loosely with plastic or using damp bags can help control the drying rate to prevent cracks.
Avoiding Warping
To maintain flat or evenly shaped textured pieces, place them on supportive surfaces or use forms during drying. Rotating the pieces periodically can also help avoid uneven drying and maintain consistency in their shape.
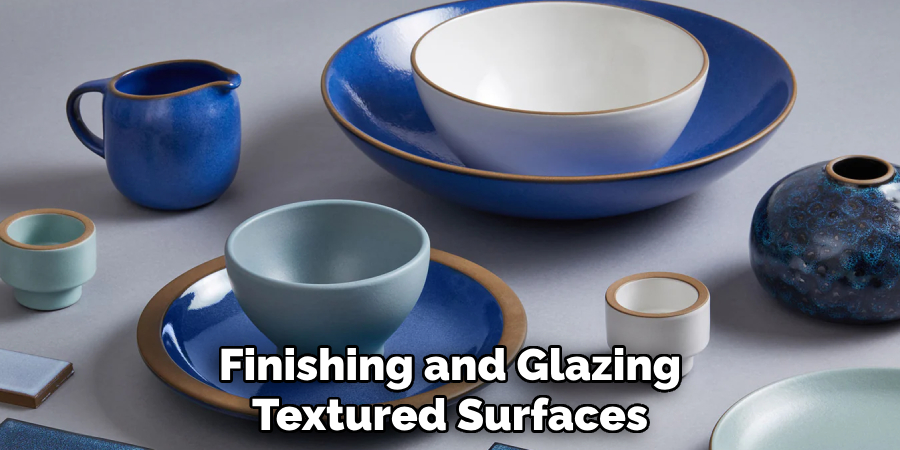
Finishing and Glazing Textured Surfaces
Highlighting Texture with Glaze
To emphasize the intricacies of textured surfaces, transparent glazes, celadon, or oxide washes are highly effective. These finishes can settle into the grooves, highlighting the depth and detail, and creating visual contrast. Applying wash techniques carefully ensures the texture remains the focal point without overwhelming it.
Brushing vs. Dipping
When glazing textured pieces, brushing is often preferred over dipping to prevent clogging fine details with excessive glaze. Brushing allows for controlled application, enabling you to target specific areas without oversaturating the texture. However, dipping can also work for larger pieces if you thin the glaze appropriately and focus on even, light coats.
Firing Tips
The firing stage requires attention, as deep textures can influence how the glaze behaves. For pieces with intricate details, adjust firing schedules to suit the clay type and texture depth, ensuring even results and preventing defects like glaze pooling or stress cracks.
Conclusion
Understanding how to create textured ceramic surfaces involves mastering techniques such as stamping, carving, slip trailing, and additive methods. Each approach allows for unique designs and tactile qualities, offering endless possibilities for customization.
Don’t be afraid to experiment with everyday objects or allow your personal creativity to guide the process—unexpected tools can often yield stunning results. Textured ceramic surfaces not only enhance the visual and tactile appeal of your work but also elevate both functional and artistic pieces, making each creation truly one-of-a-kind. Continue to explore and refine these methods to add depth and character to your ceramic artistry.
Specialization:
- Master of wheel-throwing, hand-building, and advanced glazing techniques
- Focus on creating both functional pottery and decorative art pieces
Recognition:
- Celebrated by collectors and art enthusiasts for creating one-of-a-kind pieces that blend artistry with functionality
- Participates in local and national exhibitions, earning accolades for his innovative designs and craftsmanship
Passion:
- Deeply committed to exploring and pushing the boundaries of ceramic artistry
- Continuously experiments with new materials, firing techniques, and artistic concepts to evolve his craft
Personal Philosophy:
- Believes in the transformative power of art, aiming to evoke emotions and connections through his ceramic creations
- Advocates for sustainability in ceramics, using eco-friendly materials and practices whenever possible