


Decorating a ceramic mug can be a fun and creative project that allows you to personalize your kitchenware while exercising your artistic skills. Whether you’re looking to create a custom gift for a loved one or simply want to add a personal touch to your morning coffee routine, understanding the basic techniques and materials needed is essential.

In this guide on how to decorate a ceramic mug, we’ll explore the steps involved in selecting the right supplies, preparing your mug for decoration, and applying various design techniques to achieve a stunning final product.
Why Decorate a Ceramic Mug?
Decorating a ceramic mug offers a unique opportunity to express your individuality and creativity. It transforms a simple, utilitarian object into a personalized work of art that reflects your style and preferences. Customizing mugs can also serve as a heartfelt gift idea, allowing you to convey a personal message or commemorate a special occasion.
Beyond personal expression, decorated mugs can enhance your daily routine by introducing a touch of joy and warmth each morning. Additionally, engaging in this craft can be a therapeutic activity, providing a relaxing and enjoyable outlet for artistic exploration.
Materials
Before you begin decorating your ceramic mug, it’s important to gather all the necessary materials. These may include:
A Plain Ceramic Mug:
Choose a plain white ceramic mug as your base. This provides a blank canvas for experimentation and ensures that your design will stand out.
Paint or Markers:
Select non-toxic, food-safe paints or markers specifically designed for use on ceramics. These can be found at most craft stores and come in an array of colors to suit your desired design.
Paint Brushes:
Invest in a variety of paintbrushes to achieve different effects, such as fine lines or broader strokes. Make sure to have both small and large brushes on hand.
Stencils or Decals:
If you’re not comfortable with freehand painting, stencils or decals can be used to create designs on your mug. These can be found at craft stores or made at home using contact paper and a cutting tool.
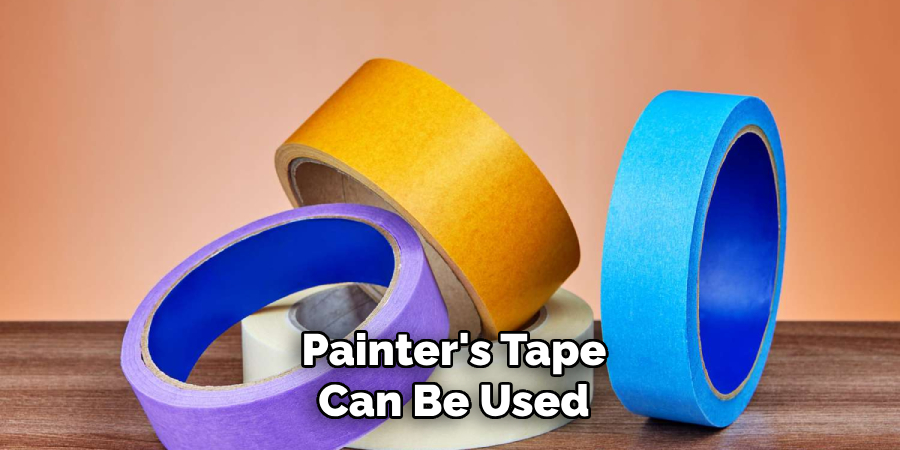
Painter’s Tape:
Painter’s tape can be used to create clean, straight lines or to mask off areas you don’t want to paint.
Clear Coat Sealant:
To protect your design and ensure it lasts, use a clear coat sealant specifically designed for use on ceramics.
Step-by-step Instructions on How to Decorate a Ceramic Mug
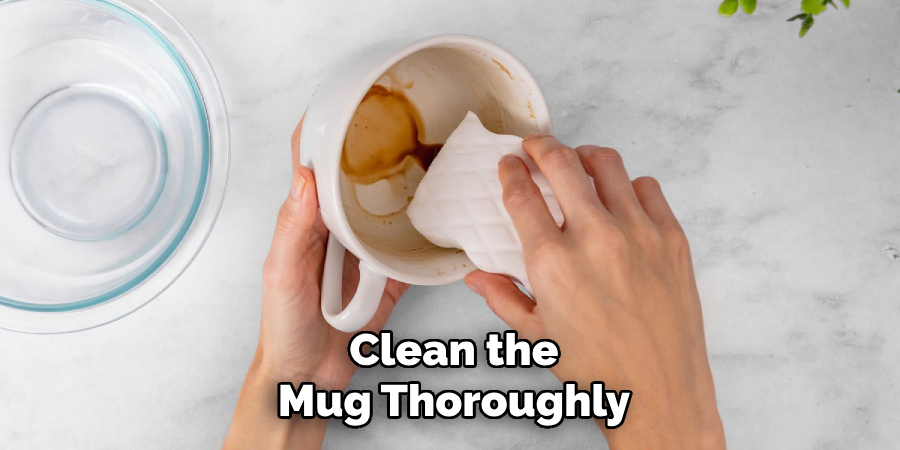
Step 1: Clean Your Mug
Begin by thoroughly cleaning your ceramic mug to ensure that your design adheres properly to the surface. Use mild dish soap and warm water to wash away any dirt, grease, or residues. After washing, rinse the mug well and dry it completely with a lint-free towel.
Avoid using any harsh chemicals or abrasives as they might damage the glaze or create scratches that could interfere with the application of your design. A clean and smooth surface is crucial for achieving a professional-looking finish on your decorated mug.
Step 2: Plan Your Design
Take a moment to sketch out your design on paper before applying it to your ceramic mug. This preparation allows you to visualize the final look and make any necessary adjustments to your concept. Consider the size and shape of your mug, and decide how your design will flow around its surface. You might choose patterns, quotes, or illustrations that resonate with you.
If using multiple colors, decide the areas where each color will be applied to achieve a balanced and attractive outcome. This step is crucial in ensuring a well-thought-out and cohesive design that will impress once transferred onto the mug. If using stencils or decals, plan your placements for optimal effect.
Step 3: Apply Your Design
Once you’ve decided on your design, it’s time to apply it to your mug. If using stencils or decals, carefully adhere them to the mug’s surface, making sure they are flat and free from air bubbles. If using freehand painting, use a pencil to lightly sketch out your design before applying any paint. This allows room for corrections and avoids mistakes.
For those using markers, simply start drawing directly onto the mug with the desired colors. Make sure to cover all areas evenly, and use multiple layers for more vibrant hues.
If using paints, always start with lighter colors first and build up to darker shades. Use thin coats to avoid smudging or paint buildup. Allow each layer to dry completely before adding another.
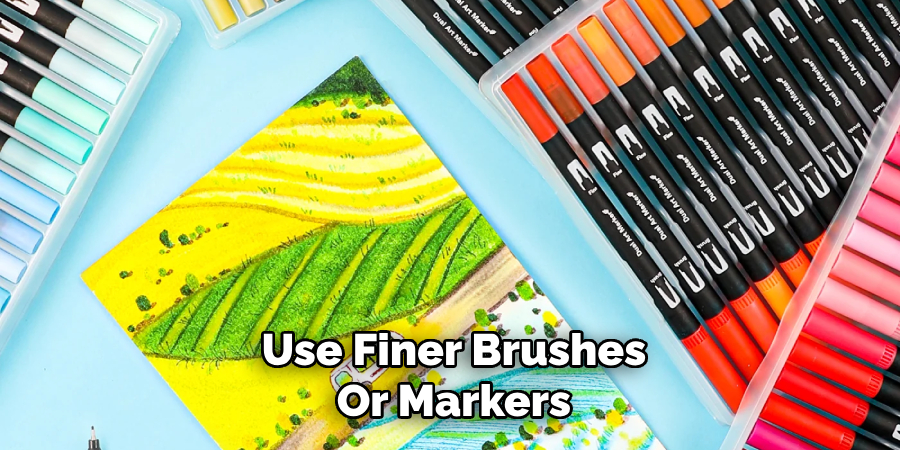
Step 4: Add Details
Once the primary design is applied and dry, it’s time to add details that will bring your creation to life. Use finer brushes or markers to introduce intricate elements, such as delicate patterns, outlines, or highlights. Pay close attention to areas where shadow and depth can enhance your design, as subtle touches can significantly elevate the overall look. For added texture or visual interest, consider incorporating techniques such as dotting or crosshatching.
Be mindful of balancing detailed elements with larger parts of your design to avoid overcrowding or overwhelming the eye. Patience is key here—take your time to ensure every detail is deliberate and well-placed. If at any point you need to correct a detail, use a damp, lint-free cloth to gently remove unwanted sections before they set. With precision and care, your design will start to come together, showcasing a depth and complexity that will captivate those who see it.
Step 5: Let It Dry
After completing the details of your design, it’s crucial to allow ample time for your decorated mug to dry. Place the mug in a safe, well-ventilated area where it won’t be disturbed. The drying process is essential for both paints and markers to set properly and ensures that your design remains intact. Depending on the type of materials used, drying times can vary—typically, it may take a few hours to overnight.
Be patient and resist the urge to touch the surface prematurely, as this can result in smudges or imperfections. Once the mug is entirely dry, gently inspect your work to confirm that all areas are securely set and ready for sealing in the next step. Proper drying is a fundamental aspect of the process, ensuring your artwork remains vibrant and durable for long-term use.
Step 6: Seal Your Design
For protection and permanency, use a clear coat sealant to seal your design onto the mug’s surface. This step is crucial, as it will prevent any potential smudging or fading over time. Make sure to use a food-safe sealant specifically designed for ceramics. Apply the sealant evenly and thinly using a brush, following the manufacturer’s instructions on drying times between coats.
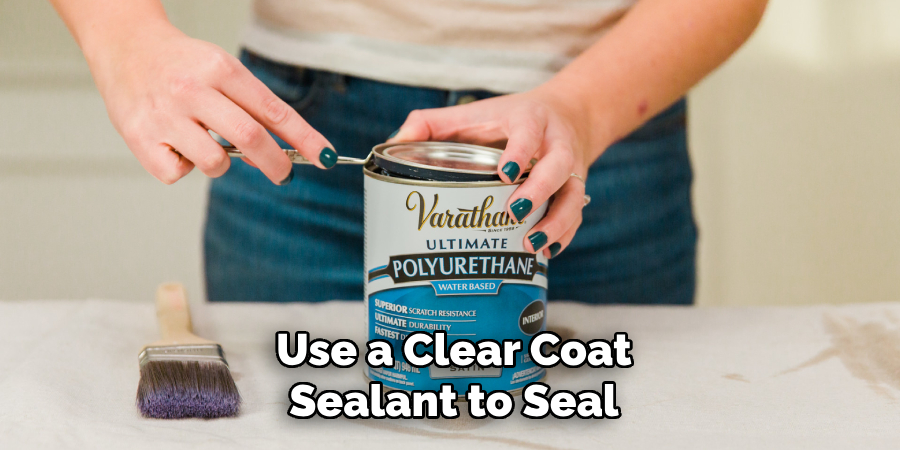
Once you have applied all necessary layers of clear coat, allow the mug to dry fully before handling it again. Depending on the product used, drying times can vary—typically, this may take anywhere from an hour to overnight. The sealing process ensures that your decorated ceramic mug is safe to use, wash, and handle without the risk of damaging your design.
Step 7: Cure Your Mug (Optional)
Curing a mug is an optional step but highly recommended to ensure the longevity and durability of your decorated design. Curing involves baking the mug in an oven at a specific temperature for a set amount of time, which varies based on the materials used. This process helps bond the paint or marker to the ceramic surface and creates a more robust seal.
Follow the instructions on how to decorate a ceramic mug provided by your specific product for accurate curing times and temperatures. After completing this step, allow your mug to cool completely before handling it again. Be cautious when removing from the oven as it will be hot. With proper curing, your decorated mug will be dishwasher-safe, scratch-resistant, and long-lasting.
Additional Tips and Tricks
- Always use materials that are specifically designed for ceramics to ensure the best results.
- Practice on a spare ceramic piece before attempting to decorate your mug.
- Clean the mug thoroughly before starting to remove any dirt or oils that could prevent proper adhesion.
- Avoid placing designs too close to the rim of the mug, as it may become difficult to drink from.
Now that you’ve successfully decorated your ceramic mug be sure to enjoy it and show off your creativity! With these steps, you can easily create a personalized and unique piece for yourself or as a gift for others. Have fun experimenting with different designs and techniques, and don’t be afraid to let your imagination run wild.
Conclusion
Creating a personalized ceramic mug is a rewarding and creative process that allows you to express your artistry and individuality. By following these detailed steps on how to decorate a ceramic mug, you can transform a simple mug into a stunning work of art that reflects your personality or makes a heartfelt gift for someone special. Whether you’re a beginner or an experienced artist, experimenting with different materials and techniques can lead to exciting discoveries and unique designs.
Remember to take your time, pay attention to detail, and most importantly, enjoy the journey of bringing your creative vision to life. With proper techniques and care, your decorated mug is sure to be a cherished item for years to come.
Specialization:
- Master of wheel-throwing, hand-building, and advanced glazing techniques
- Focus on creating both functional pottery and decorative art pieces
Recognition:
- Celebrated by collectors and art enthusiasts for creating one-of-a-kind pieces that blend artistry with functionality
- Participates in local and national exhibitions, earning accolades for his innovative designs and craftsmanship
Passion:
- Deeply committed to exploring and pushing the boundaries of ceramic artistry
- Continuously experiments with new materials, firing techniques, and artistic concepts to evolve his craft
Personal Philosophy:
- Believes in the transformative power of art, aiming to evoke emotions and connections through his ceramic creations
- Advocates for sustainability in ceramics, using eco-friendly materials and practices whenever possible