


A kiln door is an essential component of a kiln, designed to contain high temperatures and maintain a controlled environment during firing. Over time, wear and tear or improper handling can cause the door to become misaligned, damaged, or ineffective in sealing heat.
Fixing a kiln door may seem daunting, but with the right tools and a step-by-step approach, the process can be straightforward and ensure your kiln operates efficiently and safely. This guide on How to fix a kiln door will walk you through the common issues and methods for repairing a kiln door.
Why is It Important to Fix a Kiln Door?
A damaged or misaligned kiln door can cause several problems. It can lead to uneven heat distribution, resulting in underfired or overfired pottery. The lack of a proper seal can also affect the overall efficiency of your kiln and increase energy costs. Additionally, a faulty kiln door poses a safety risk as it may not be able to properly contain high temperatures.
Before starting any repair work on your kiln door, make sure to disconnect all power sources and let your kiln cool down completely. It is also a good idea to have the necessary tools, replacement parts, and safety gear on hand.
Common Issues with Kiln Doors
Misalignment:
One of the most common issues with kiln doors is misalignment. This can occur due to repeated handling or movement of the kiln, causing the door and its hinges to become loose or shift out of place. A misaligned door will not seal properly, resulting in heat loss and uneven firing. To fix this issue, you will need to realign the door by adjusting the hinges and tightening any loose bolts or screws.
Warping:
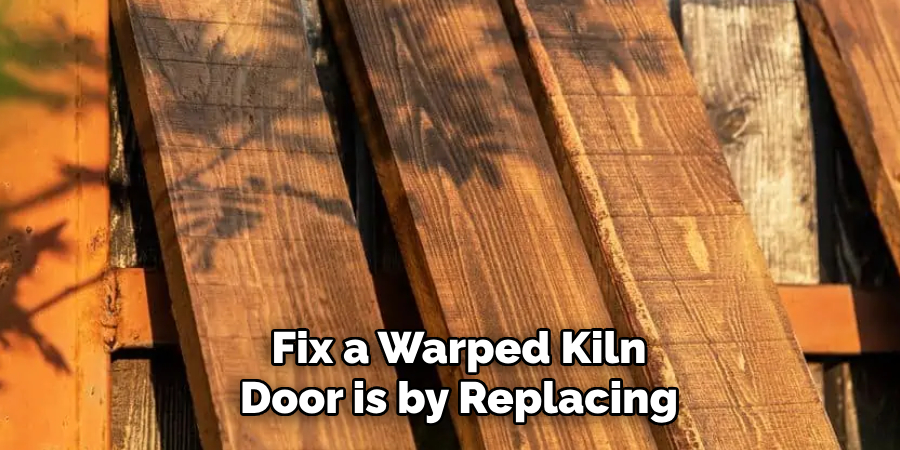
Kiln doors are exposed to extremely high temperatures, which can cause them to warp over time. This is more common with wooden kiln doors but can also happen with metal or ceramic doors.
A warped door will not seal properly and may even crack under pressure. The best way to fix a warped kiln door is by replacing it with a new one. However, if the warping is minimal, you may be able to use shims or sanding techniques to make it fit back into place.
Cracks or Chips:
Cracks or chips on a kiln door can occur due to mishandling, dropping heavy objects, or exposure to high temperatures. These damages compromise the integrity of the door and can lead to further issues if left unfixed. Depending on the severity of the crack or chip, you may be able to repair it using heat-resistant adhesives or fillers. However, in most cases, it is best to replace the damaged section with a new piece.
Needed Materials
Screwdriver:
A screwdriver is essential for adjusting hinges and tightening bolts or screws on your kiln door.
Replacement Parts:
Depending on the issue with your kiln door, you may need to replace certain components such as hinges, handles, or the entire door itself.
Sandpaper:
Sandpaper can be used to smooth out any rough edges or surfaces on a warped kiln door.
Heat-resistant Adhesives/Fillers:
These materials are useful for repairing small cracks or chips in a kiln door.
7 Step-by-step Guidelines on How to Fix a Kiln Door
Step 1: Inspect the Door
Begin by thoroughly inspecting the kiln door to identify the specific issue. Look for visible signs of damage such as cracks, chips, or warping. Check the alignment of the door by closing it fully and observing if there are any gaps between the door and the kiln frame. Examine the hinges and screws to see if they are loose or misaligned.
Understanding the exact problem will help you determine the necessary materials and tools to fix it effectively. Be sure to conduct this inspection carefully to avoid missing any subtle damage that could impact the kiln’s efficiency or safety.
Step 2: Disconnect the Power and Let the Kiln Cool
Safety should always be the top priority when working with a kiln. Before proceeding with any repairs, ensure that the kiln is completely powered off by disconnecting it from its power source. This includes unplugging it from the outlet or turning off the circuit breaker that supplies power to the kiln. After disconnecting the power, allow the kiln to cool down completely.
Kilns retain heat for an extended period, so it’s crucial to verify that every part of the kiln, including the door, is at a safe temperature to touch. Working on a hot kiln can be dangerous and may result in burns or further damage to the door. Once the kiln is cool and the power is fully disconnected, you can safely proceed to the next steps of the repair process.
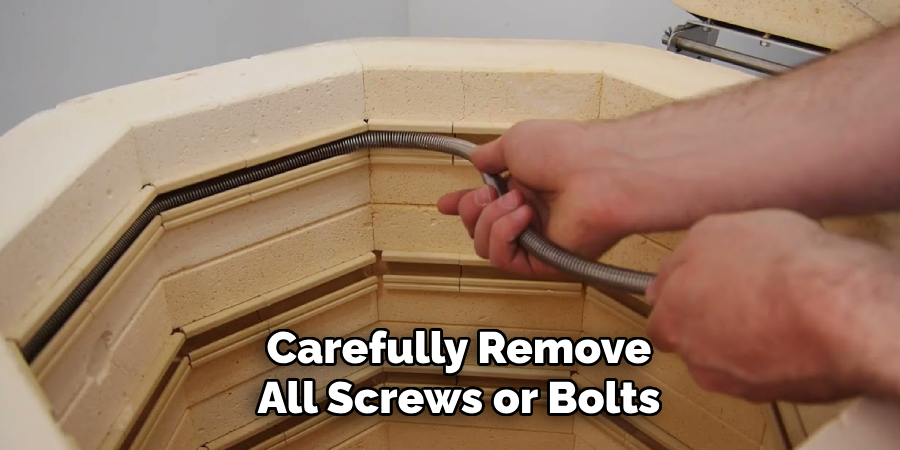
Step 3: Remove the Door
To work on the kiln door, you will need to take it off its hinges. Using a screwdriver, carefully remove all screws or bolts that hold the door in place. Depending on your kiln model, there may be several hinges holding the door. Make sure to keep track of all removed parts and store them safely for later use.
Otherwise, they may get lost or damaged during the repair process, making it challenging to reattach the door. Once all the hinges are removed, carefully lift the door off its frame and place it on a flat surface.
Step 4: Realigning the Door
If your kiln door is misaligned, you can attempt to realign it by adjusting the hinges. Check if any of them are loose and tighten them using a screwdriver.
You can also use shims to adjust the angle of the door and make sure it fits snugly against the frame when closed. Make small adjustments at a time until you achieve proper alignment. It is essential not to over-tighten or force the hinges, as this can cause damage to both the door and the kiln.
Step 5: Repairing Cracks or Chips
If your kiln door has cracks or chips, you can use heat-resistant adhesives or fillers to repair them. Clean the damaged area thoroughly and apply a small amount of adhesive using a brush or spatula. Make sure to follow the instructions on the product for proper application and drying time. Once it is fully cured, sand down any rough edges for a smooth finish.
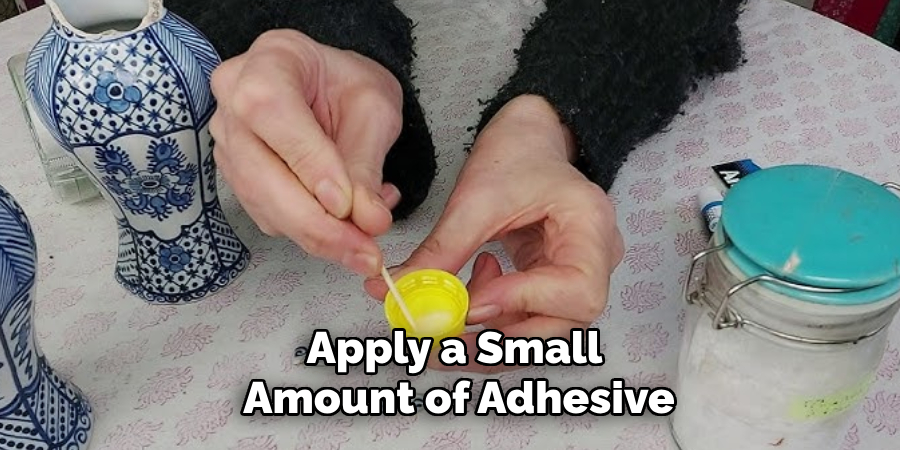
But keep in mind that this method is only suitable for minor damages. If the cracks or chips are significant, it is best to replace the damaged section with a new piece.
Step 6: Replacing Parts
If certain parts of the kiln door, such as hinges, handles, or the entire door itself, are beyond repair, you will need to replace them with new components. Begin by sourcing replacement parts that are compatible with your kiln model. Consult the manufacturer’s manual or contact the manufacturer directly to ensure you select the correct replacements.
When replacing specific parts like hinges, unscrew and remove the damaged hinges, then align and attach the new ones securely using a screwdriver. If the entire door needs replacement, carefully position the new door on the kiln frame and attach it to the hinges using the provided screws or bolts.
Ensure all parts are fastened tightly, but avoid overtightening to prevent damage to the new components. Once replaced, check the door’s alignment and functionality by opening and closing it a few times to confirm it forms a proper seal with the frame.
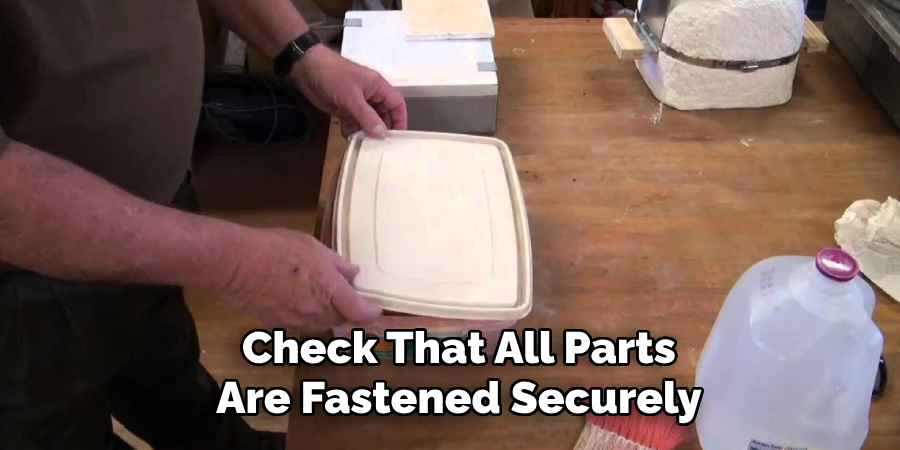
Step 7: Reattaching the Door
After completing any necessary repairs or replacements, reattach the door to the kiln frame. Place the door back onto its hinges and secure it using the screws/bolts removed earlier. Check that all parts are fastened securely,and there are no gaps between the door and frame when closed. Once you have confirmed everything is in place, plug the kiln back into its power source or turn on the circuit breaker.
Congratulations! You have successfully repaired your kiln door and can now resume using your kiln safely and efficiently.
Following these guidelines on How to fix a kiln door, you can fix it on your own without having to spend money on professional repairs. Remember always to prioritize safety and carefully follow the manufacturer’s instructions for your specific kiln model. With proper maintenance and occasional repairs, your kiln door should last for many firing cycles to come. Happy firing!
Conclusion
Repairing a kiln door may seem like a daunting task at first, but with the right tools, materials, and a systematic approach, it can be a straightforward and rewarding process.
By following these step-by-step guidelines on How to fix a kiln door, you can address common issues like misalignment, damaged hinges, or cracks effectively, ensuring your kiln continues to function safely and efficiently.
Regular maintenance and timely repairs not only extend the lifespan of your kiln but also enhance the quality of your firing projects. Always prioritize safety, consult your kiln’s manufacturer guidelines, and don’t hesitate to seek professional assistance for extensive damage. With proper care, your kiln will remain a dependable tool for your creative and industrial needs. Happy firing!
Specialization:
- Master of wheel-throwing, hand-building, and advanced glazing techniques
- Focus on creating both functional pottery and decorative art pieces
Recognition:
- Celebrated by collectors and art enthusiasts for creating one-of-a-kind pieces that blend artistry with functionality
- Participates in local and national exhibitions, earning accolades for his innovative designs and craftsmanship
Passion:
- Deeply committed to exploring and pushing the boundaries of ceramic artistry
- Continuously experiments with new materials, firing techniques, and artistic concepts to evolve his craft
Personal Philosophy:
- Believes in the transformative power of art, aiming to evoke emotions and connections through his ceramic creations
- Advocates for sustainability in ceramics, using eco-friendly materials and practices whenever possible