


Ceramic spoon rests are a staple in many kitchens, serving both practical and decorative purposes. They provide a convenient place to rest spoons, spatulas, and other cooking utensils, helping keep countertops clean and tidy while adding a style to the kitchen décor. However, spoon rests are prone to damage over time, like any ceramic item. Common issues include cracks, chips, or breaks, which detract from the visual appeal and impair their functionality.
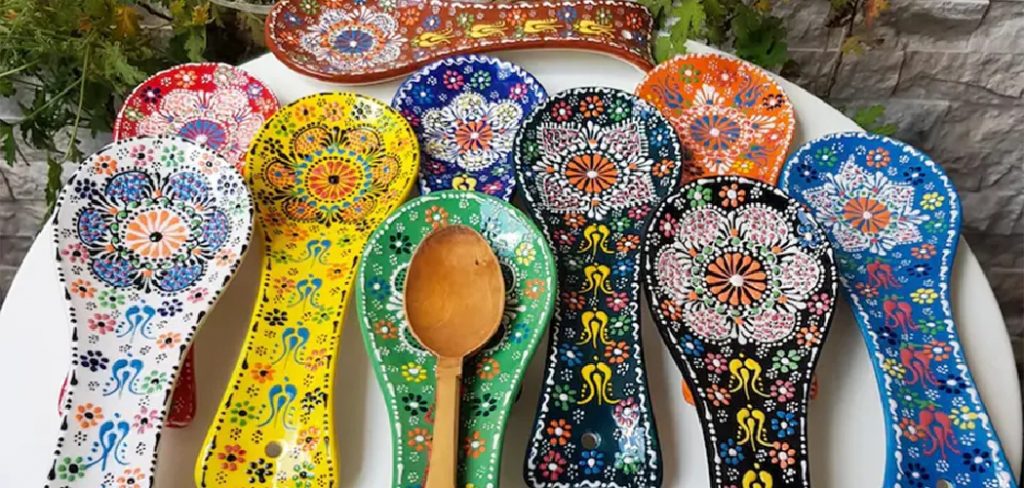
Such damages can occur due to mishandling, falls, or excessive weight. Understanding how to fix ceramic spoon rest is essential for those who wish to restore these items to their former glory. This article aims to offer a comprehensive step-by-step guide for repairing ceramic spoon rests effectively, ensuring that they remain a beloved component of your kitchen toolkit.
Assessing the Damage
Types of Damage
Ceramic spoon rests can suffer from various forms of damage, such as cracks, chips, breaks, or glaze damage. Cracks are often surface-level and may not compromise the structure if small, while chips might affect the integrity depending on their size and location. Breaks are more severe and can make the spoon rest unusable until repaired. Assessing the extent of the damage involves determining whether it affects the overall structure or is more superficial.
Safety Considerations
Handling ceramics during repairs requires caution to prevent further damage or personal injury. Wearing gloves can protect against sharp edges. It’s important to evaluate whether the spoon rest is still safe to use; structural breaks might render it unsafe without repair. Before beginning repairs, ensure the item remains functional and will not pose a risk during subsequent use. Proper assessment guides decisions for necessary repair actions and maintains the safety of the kitchen environment.
Materials Needed for Repair
Essential Materials
To effectively repair a ceramic spoon rest, gather the following materials: ceramic adhesives, such as epoxy or super glue, fine sandpaper for smoothing, damp cloth for cleaning, and a soft brush for applying any necessary touch-ups. Ceramic putty may also be needed if the damage involves larger chips or missing pieces. Safety gear, such as gloves and goggles, is important when working with strong adhesives or performing extensive sanding to protect against potential hazards.
Optional Materials
For more comprehensive repairs, consider having optional materials on hand. These include ceramic glaze or underglaze to match the original design, which is essential for restoring surface continuity. Colorants can be used for detailed touch-ups to achieve a seamless repair. Additionally, clear resin can provide structural reinforcement for addressing larger cracks or chips. These optional materials can enhance the repair process and result in a visually pleasing finish, ensuring the spoon rest’s renewed functionality and aesthetics.
Preparing the Ceramic Spoon Rest for Repair
Cleaning the Damaged Area
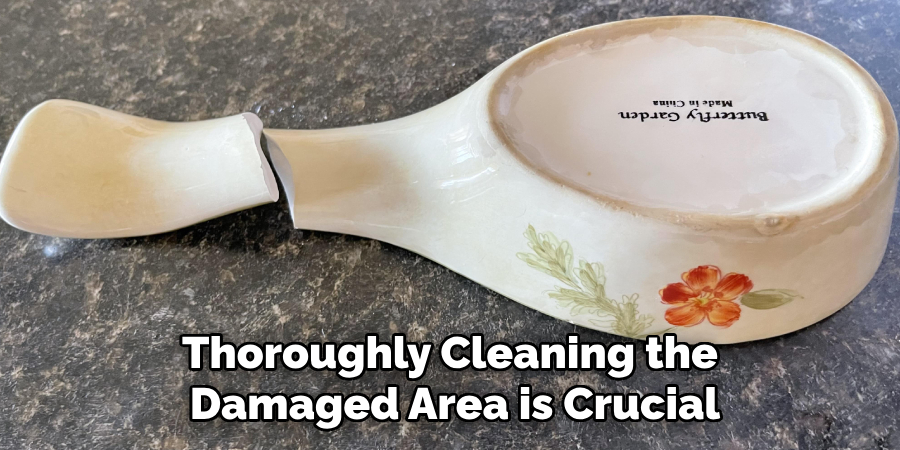
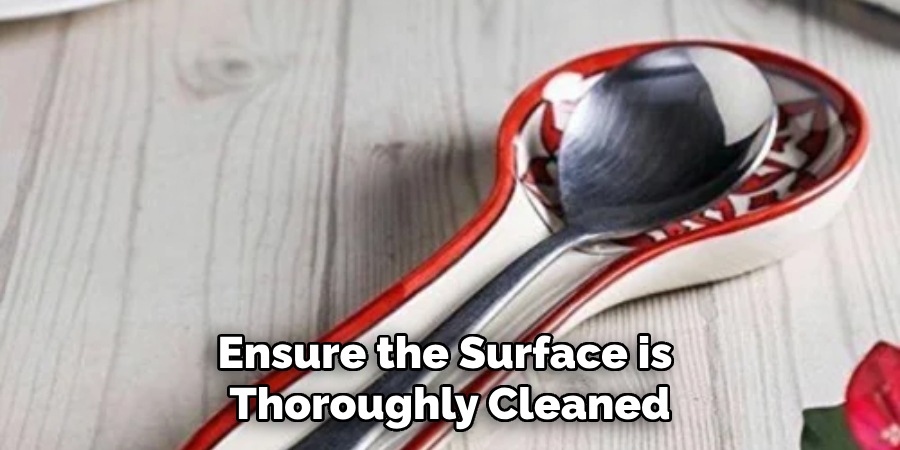
Before repairing a ceramic spoon rest, thoroughly cleaning the damaged area is crucial to ensure a successful fix. Begin by gently wiping the affected sections with a damp cloth to eliminate any dirt, grease, or residue that could interfere with the adhesive process. Make sure to reach crevices or the undersides of chips where dust might accumulate. Once cleaned, it is essential to let the spoon rest dry completely. Any moisture left on the surface can weaken adhesive bonds, resulting in an ineffective repair. Ensuring the surface is dry and spotless sets the foundation for a long-lasting repair.
Prepping for Adhesive
Once the ceramic spoon rest is clean and dry, the next step is to prepare the damaged edges for the adhesive. This involves lightly sanding the jagged edges of cracks or chips using fine sandpaper. The sanding process increases the surface area and creates a slightly roughened texture, enhancing the glue’s ability to adhere firmly. Be gentle during this process to avoid further damage. After sanding, wipe away any resultant dust with a soft cloth to maintain a clean, smooth surface. Proper preparation ensures that the adhesive will bond effectively, making for a seamless and durable repair.
How to Fix Ceramic Spoon Rest: Repairing Cracks and Chips
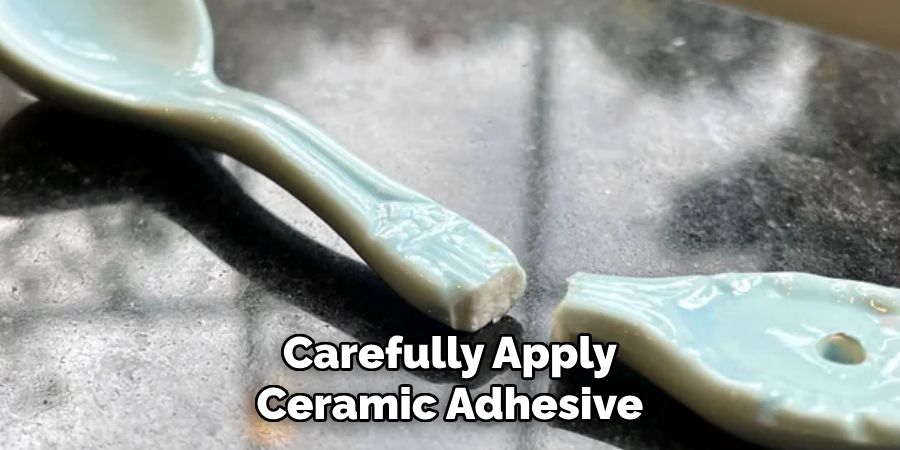
Repairing Small Cracks
To repair small cracks in a ceramic spoon rest, carefully apply ceramic adhesive using a toothpick or a similar precision tool. This allows you to accurately dispense the adhesive directly into the crack, ensuring thorough coverage of the damaged area. Once the adhesive is applied, gently press the sides of the crack together to help the adhesive bond securely. Maintain slight pressure for a few moments as this stabilizes the crack during curing. Follow the manufacturer’s instructions regarding the curing time, ensuring the adhesive achieves full strength before you handle the spoon rest further. Patience during this stage is crucial; letting the adhesive cure adequately will make the repair more durable and maintain its functionality and aesthetic appeal.
Repairing Larger Chips
Addressing larger chips or missing pieces in your ceramic spoon rest requires a different approach, utilizing ceramic putty or epoxy putty to fill the void. Begin by thoroughly mixing the putty according to the manufacturer’s instructions, achieving a consistent texture. Apply the putty to the chipped area, using a small sculpting tool or your fingers to mold and shape it to match the rest of the spoon rest.
Ensure the filled portion aligns with the original contour for a cohesive appearance. To blend the putty seamlessly with the surrounding ceramic, lightly moisten your finger or a smoothing tool and gently smooth out the surface. Take care to remove any excess putty that might interfere with the uniformity of the repair. Allow the putty to dry and cure completely, adhering to the specified drying times provided by the manufacturer. Once cured, the repaired area can be gently sanded to conform with the rest of the surface, preparing it for any finishing touches. This method ensures the structural integrity and visual quality of the spoon rest, making the repair indistinguishable from the rest of the item.
Sanding and Smoothing the Repair
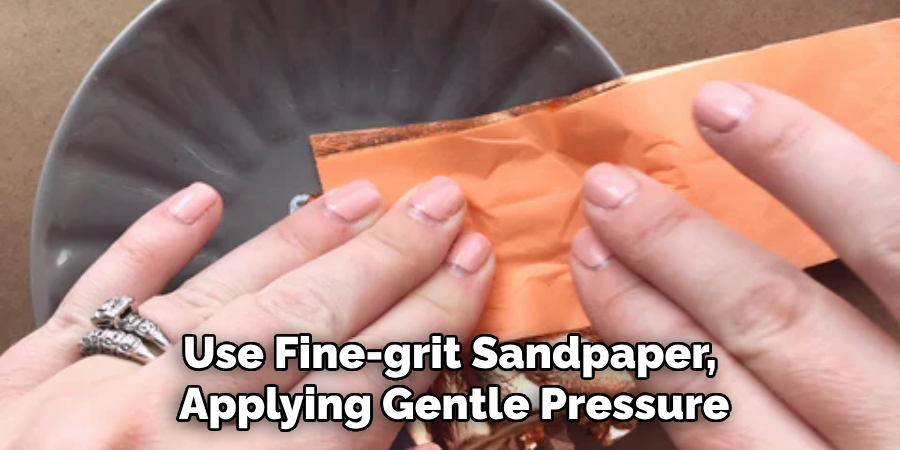
Sanding the Adhesive or Putty
Once the adhesive or putty has dried completely, it’s time to sand down any excess material to ensure a smooth and even finish. Use fine-grit sandpaper, applying gentle pressure to avoid damaging the surrounding ceramic or altering the spoon rest’s overall shape. It is important to move the sandpaper in a circular motion, which helps maintain uniformity and mitigates the risk of creating uneven edges. Taking extra care during this step ensures that the repaired area remains flush with the rest of the item, preserving both its functionality and aesthetic appeal.
Ensuring a Smooth Finish
After sanding, use a damp cloth to wipe away any dust particles generated by the sanding process. This step is crucial as it reveals any areas that might require additional attention. If necessary, perform a final touch-up, using the sandpaper to refine the repaired section to ensure it seamlessly matches the original ceramic surface. Carefully smoothing the blend between the repair and the rest of the spoon rest aids in making the fix as inconspicuous as possible, thus restoring both the spoon rest’s utility and its visual harmony.
Re-glazing or Touching Up the Repair
Glazing Over the Repair
Applying a matching glaze is essential to restore the repaired area of your ceramic spoon and maintain its waterproof surface. Begin by selecting a glaze that closely matches the original finish. Using a small brush, apply the glaze over the repaired section with steady, even strokes to prevent drips. For best results, apply at least two thin layers, allowing each layer to dry fully before applying the next. This method helps avoid pooling and ensures a smooth finish. Ensure the repaired surface is clean and dust-free before glazing to ensure proper adhesion.
Color Touch-Ups
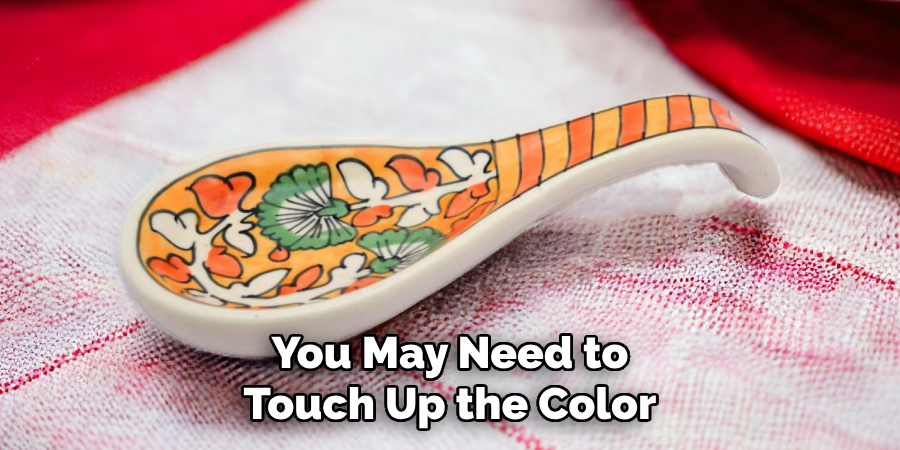
After glazing, you may need to touch up the color for a seamless appearance. Ceramic paints or underglazes can be used to match the original color and finish. To achieve this, mix the chosen pigments until you reach the desired shade, and use fine brushes for precise application. Apply the paint in thin layers, allowing each layer to dry before adding more, and adjust the color as needed. Careful application and blending help the touched-up section integrate smoothly with the rest of the spoon rest, minimizing the visibility of the repair.
Firing the Ceramic Spoon Rest
Firing Process
After glazing or painting the repaired ceramic spoon rest, it’s essential to fire it in a kiln to set the repair and finish the piece. Place the spoon rest carefully in the kiln, ensuring it is stable and supported. Recommended firing temperatures usually range from 1,800°F to 2,200°F, depending on the type of ceramic and glaze used. Distribute the heat evenly by allowing enough space around the piece and possibly using kiln shelves. Monitor the temperature closely, maintaining a slow and steady increase to prevent thermal shock.
Final Inspection
Once the firing process is complete, allow the spoon to rest and cool gradually in the kiln to avoid cracks. After cooling, inspect the spoon rest thoroughly for any remaining flaws, such as cracks or chips, and ensure the repair has held firm. Verify that the glaze has been set properly, providing a smooth, shiny finish that indicates a successful firing. With the final inspection confirming the repair’s durability, the spoon rest can resume its functional use.
Troubleshooting Common Issues
Adhesive Issues
If you encounter problems with adhesion, such as the glue not holding or the repair coming apart, ensure the surface is thoroughly cleaned before application to promote better bonding. Adhesives might fail due to improper curing times or the use of a weak adhesive. Consider using a stronger adhesive formulated for ceramics and follow the manufacturer’s instructions carefully. For optimal results, patience during the curing process is vital to achieving a strong and lasting repair.
Uneven Glaze or Color
To address uneven glaze or color mismatches, apply additional thin layers of glaze or paint, allowing each layer to dry fully before proceeding to ensure a smooth and even finish. Before re-firing, gently sand any rough areas to create a level surface. To prevent future issues, ensure the glaze is applied evenly and the repair fully cured before firing. This careful approach will give a more consistent finish and enhance the overall repair quality.
Conclusion
In conclusion, repairing a ceramic spoon rest involves a detailed process that ranges from crack assessment and putty application to sanding, glazing, and final firing. By following each step carefully, from ensuring the proper adhesion of repairs to applying a seamless final glaze, you can restore both functionality and beauty to your spoon rest. As you learn how to fix ceramic spoon rest, remember to prioritize safety by ensuring the use of food-safe materials and conducting a thorough inspection post-repair. Don’t hesitate to experiment with various techniques to address diverse ceramic damages, resulting in an aesthetically pleasing and practical spoon rest.
Specialization:
- Master of wheel-throwing, hand-building, and advanced glazing techniques
- Focus on creating both functional pottery and decorative art pieces
Recognition:
- Celebrated by collectors and art enthusiasts for creating one-of-a-kind pieces that blend artistry with functionality
- Participates in local and national exhibitions, earning accolades for his innovative designs and craftsmanship
Passion:
- Deeply committed to exploring and pushing the boundaries of ceramic artistry
- Continuously experiments with new materials, firing techniques, and artistic concepts to evolve his craft
Personal Philosophy:
- Believes in the transformative power of art, aiming to evoke emotions and connections through his ceramic creations
- Advocates for sustainability in ceramics, using eco-friendly materials and practices whenever possible