


Chipped pottery can be both frustrating and disheartening, especially when the piece holds sentimental or practical value. Fortunately, with the right tools and techniques, it’s possible to restore your pottery and give it a new lease on life. This guide will walk you through the steps of how to fix chipped pottery.
Why Fixing Chips?
Fixing chipped pottery is not just about restoring its appearance but also about preserving its functionality and value. By repairing chips, you can prevent further damage that could compromise the structural integrity of the piece. Additionally, fixing pottery allows you to hold onto items that may have sentimental significance, turning them into cherished keepsakes rather than discarding them. Crafting a repair also contributes to sustainability by reducing waste and giving new life to an existing object instead of replacing it.
Understanding Chips and Damage Types
Pottery chips and damage can manifest in various forms, each requiring a unique approach to repair. Chips are typically small, surface-level breaks, often located along the edges or rims of pottery. These can range from shallow nicks to deeper gouges, depending on the impact or wear that caused them. Cracks, on the other hand, are linear fractures that may run along the body of the piece and can indicate more severe structural damage.
Additional damage types include flaking or spalling, where small fragments of the material peel away, and crazing, which is characterized by a network of fine surface cracks. Understanding these different types of damage is essential, as it helps determine the appropriate materials and techniques needed for effective restoration.
Materials and Tools You’ll Need
- Protective Gear: Safety gloves, goggles, and a dust mask to ensure personal protection during the restoration process.
- Cleaning Supplies: Soft brushes, sponges, and mild cleaning agents suitable for the material being restored.
- Repair Compounds: Epoxy resins, fillers, or adhesives designed for repairing cracks and structural damages.
- Sandpaper and Abrasives: For smoothing surfaces and removing loose fragments.
- Specialized Tools: Small chisels, scrapers, and scalpels for delicate work.
- Sealants and Coatings: Protective coatings to safeguard the restored surface from future damage.
- Application Tools: Paintbrushes, mixing sticks, and applicator guns for precise application of repair materials.
- Light Source: A bright, focused light to closely inspect the material and work area.
10 Methods How to Fix Chipped Pottery
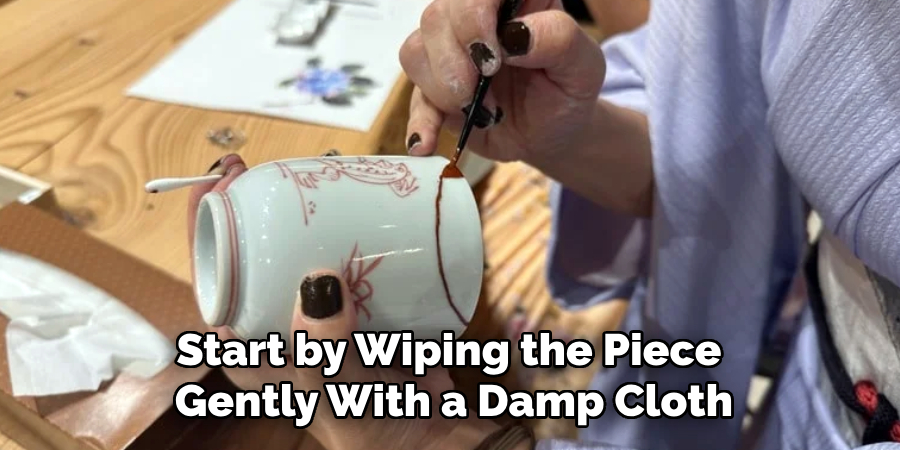
1. Clean the Damaged Area Thoroughly
Before any repair can begin, it’s essential to clean the chipped area properly. Dirt, dust, grease, or residue can interfere with adhesives and fillers, so start by wiping the piece gently with a damp cloth. For deeper cleaning, use a mild dish soap diluted in warm water and a soft toothbrush to scrub the chipped region, taking care not to worsen the damage. Allow the piece to dry completely before proceeding. This ensures that glue or filler will bond well, resulting in a strong and lasting repair.
2. Use Epoxy Glue for Strong Adhesion
When dealing with a clean break or small chip, a high-quality two-part epoxy glue is an excellent choice for mending pottery. Mix the resin and hardener according to the manufacturer’s instructions, then use a toothpick or fine brush to apply a small amount to the chip. Press the chipped piece back into place if you have it, or fill the gap if it’s missing. Epoxy glue dries clear and creates a durable bond, making it perfect for both functional and decorative ceramics. Let the epoxy cure undisturbed for at least 24 hours.
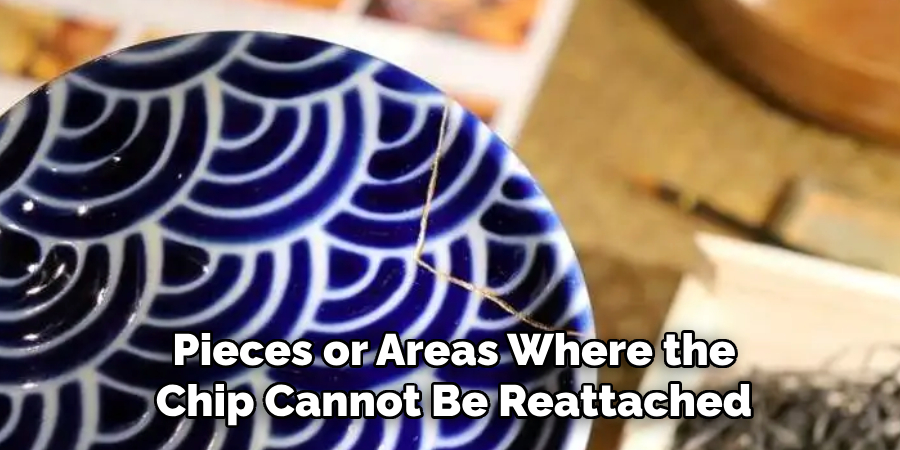
3. Fill Missing Chips with Ceramic Filler
For pottery with missing pieces or areas where the chip cannot be reattached, ceramic filler or putty can be used to rebuild the lost section. These fillers are typically moldable and sandable after drying, making it easy to shape them to match the contours of the original pottery. Apply the filler with a putty knife or sculpting tool, pressing it into the void and smoothing it flush with the surface. Once dry, sand it gently with fine-grit sandpaper to blend the repair into the surrounding area.
4. Sand and Smooth the Repair Area
After glue or filler has fully cured, sanding is the next crucial step in achieving a seamless finish. Use fine-grit sandpaper (around 400 to 600 grit) to gently smooth the surface of the repaired area. This helps blend the transition between the original pottery and the patch or filled space. Be patient and work slowly to avoid scratching the glaze. If needed, gradually step up to higher grit sandpapers for a smoother result, especially if you plan to repaint or reglaze the area afterward.
5. Touch Up with Ceramic Paint
To restore the visual integrity of the repaired area, use ceramic or enamel paint matched to the original glaze color. These paints are available at craft stores and come in various finishes, including gloss, matte, and satin. Apply the paint with a fine-tipped brush, taking your time to layer it gradually for better coverage. If your pottery features intricate patterns, use multiple brush sizes and color mixing to replicate the design. Allow the paint to dry completely between coats for a smooth, even finish.
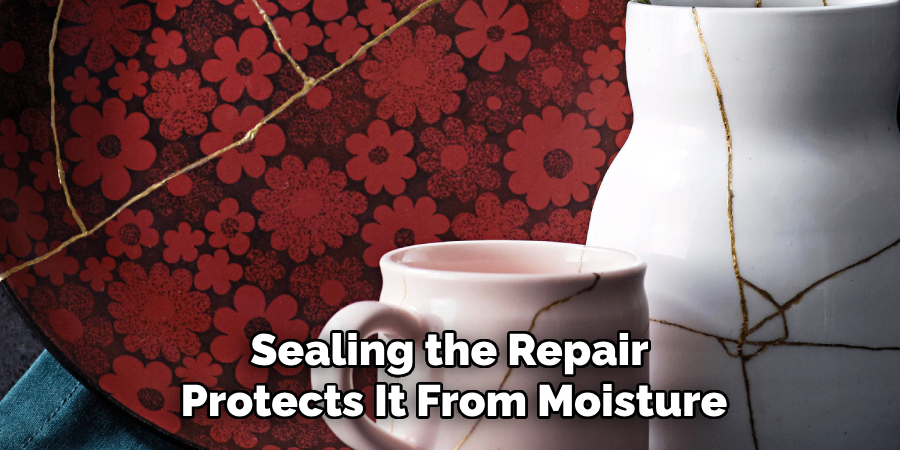
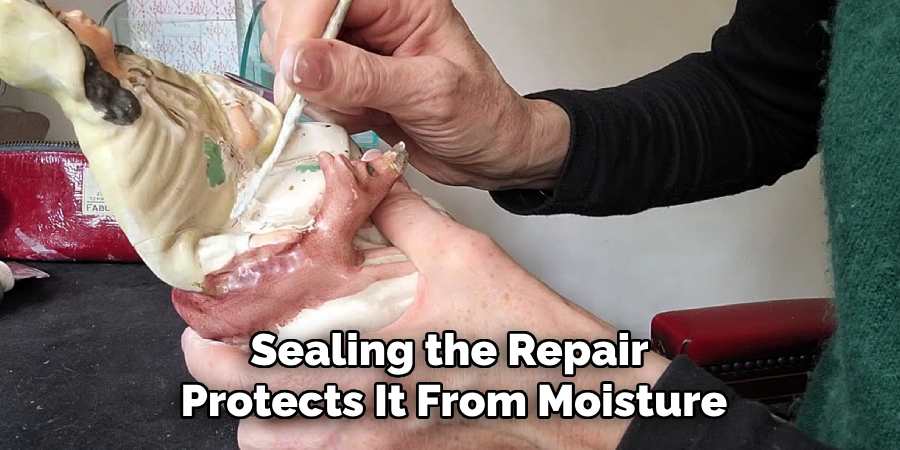
6. Seal the Repair with Glaze or Clear Epoxy
Once the paint has dried, sealing the repair protects it from moisture, wear, and discoloration. A clear ceramic glaze or food-safe epoxy resin can be brushed over the painted area to mimic the original sheen and reinforce durability. Some ceramic glazes require kiln firing to cure, so if a kiln isn’t available, opt for a cold-set alternative like clear epoxy or acrylic sealer. Apply thin, even layers and let each coat cure fully before handling the piece.
7. Use Baking Soda and Super Glue for Quick Fixes
For quick, temporary repairs, a DIY combination of super glue and baking soda can fill chips and cracks effectively. Apply a few drops of super glue to the chipped area, then sprinkle baking soda over it. The mixture hardens almost instantly into a durable, sandable filler. While not ideal for fine art pieces or food-safe pottery, this method works well for non-food decorative ceramics or in situations where you need a fast, no-frills repair.
8. Reinforce Structural Chips with Wire Supports
Larger or structural chips, particularly on handles or rims, may benefit from internal reinforcement. After gluing or filling the chipped area, you can embed a thin wire or mesh into the repair for added strength. For example, use a small drill bit to bore shallow holes on either side of the chip, insert a piece of wire across the gap, and then cover it with epoxy or filler. This method adds internal stability, making it ideal for items that may still see light use.
9. Use a Pottery Repair Kit for a Professional Finish
Several pottery repair kits are available on the market, combining adhesives, fillers, paint, and finishing tools in one convenient package. These kits are especially helpful for beginners who want to follow a guided process. Many kits include color matching components and step-by-step instructions to ensure that the repair is both structurally sound and visually accurate. While typically more expensive than DIY materials, these kits can save time and reduce trial-and-error frustration.
10. Prevent Future Chips with Protective Measures
Finally, the best way to maintain repaired pottery is to take preventive steps against future damage. Place soft felt pads or rubber bumpers under ceramic items to protect them from hard surfaces. Avoid stacking delicate pottery and handle them gently during washing or movement. If the item is functional, reserve it for decorative use to extend its life. Regular cleaning and mindful placement help keep your repaired pottery looking beautiful for years to come.
Maintenance and Upkeep
To ensure your pottery remains in optimal condition, consistent care and attention are essential. Dust your pieces regularly using a soft, lint-free cloth to prevent dirt build-up and maintain their shine. For items displayed near windows, be mindful of direct sunlight exposure, as prolonged UV rays can fade colors or weaken certain materials. When cleaning, avoid harsh chemicals or abrasive cleaners, as these can damage the pottery’s surface, especially if it has previous repairs. Instead, use mild soap and warm water, gently wiping and drying with a soft towel. By practicing these maintenance habits, you can preserve the beauty and integrity of your pottery for generations to enjoy.
Conclusion
Repairing chipped pottery is not just a practical skill—it’s a creative endeavor that blends craftsmanship with care. From preparing the surface to sealing the final touches, each step is an opportunity to breathe new life into broken ceramics. Whether you use epoxy glue, ceramic filler, or a professional repair kit, these ten methods provide a comprehensive guide for restoring both beauty and function to chipped pottery. With time, patience, and the right materials, your once-damaged pieces can proudly return to display or everyday use. So, there you have it – a quick and easy guide on how to fix chipped pottery.
Specialization:
- Master of wheel-throwing, hand-building, and advanced glazing techniques
- Focus on creating both functional pottery and decorative art pieces
Recognition:
- Celebrated by collectors and art enthusiasts for creating one-of-a-kind pieces that blend artistry with functionality
- Participates in local and national exhibitions, earning accolades for his innovative designs and craftsmanship
Passion:
- Deeply committed to exploring and pushing the boundaries of ceramic artistry
- Continuously experiments with new materials, firing techniques, and artistic concepts to evolve his craft
Personal Philosophy:
- Believes in the transformative power of art, aiming to evoke emotions and connections through his ceramic creations
- Advocates for sustainability in ceramics, using eco-friendly materials and practices whenever possible