


Ceramic floor tiles are a popular choice for many homeowners due to their durability, aesthetic versatility, and ease of maintenance. Despite their robust nature, these tiles can sometimes develop hairline cracks, detracting from their appearance and potentially leading to more significant issues over time. Common causes of hairline cracks include temperature fluctuations, which can cause expansion and contraction, heavy impacts from dropped objects, or improper installation techniques that fail to accommodate natural movements.

This article aims to provide a comprehensive, step-by-step guide on how to fix hairline cracks in ceramic floor tile. By addressing these minor imperfections promptly, it is possible to restore the tile’s visual appeal and prevent further damage that could compromise the integrity of your flooring. Following the outlined methods, users will be equipped to handle these common issues efficiently and effectively, ensuring the longevity and beauty of their tile surfaces.
Importance of Repairing Hairline Cracks
Preventing Further Damage
Addressing hairline cracks promptly is essential to prevent them from developing into larger fractures that could necessitate expensive repairs or even full tile replacements. When left unattended, these cracks can act as entry points for moisture, seeping through, causing subfloor damage, and promoting mold growth. Mold compromises indoor air quality and accelerates the deterioration of the underlying structure.
Maintaining Aesthetic Appeal
While seemingly minor, hairline cracks can significantly detract from a tiled floor’s aesthetic appeal. These imperfections can be particularly noticeable in well-lit areas or when viewed from certain angles. By promptly repairing these cracks, homeowners can maintain the seamless and polished look of their flooring. This consistency is key in home environments, where aesthetic appeal often contributes to the overall ambiance and value of the property.
Extending the Life of the Tile
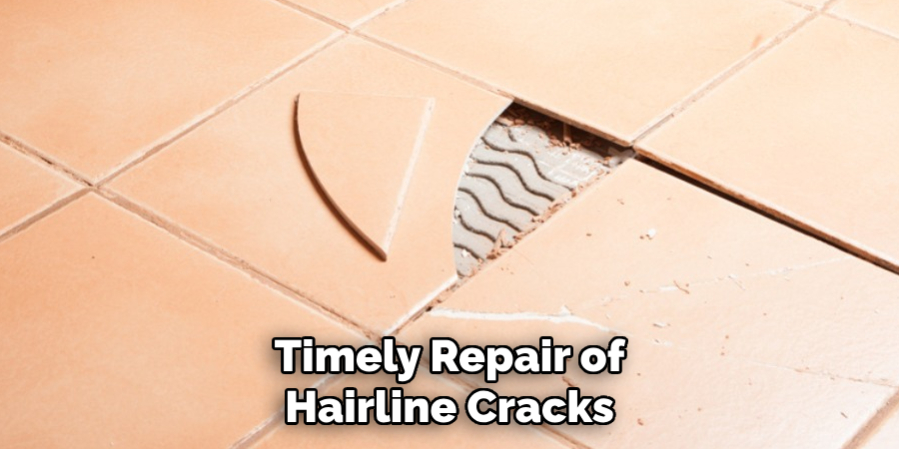
Maintaining the integrity of ceramic tiles is crucial to extending their longevity. Timely repair of hairline cracks ensures that the flooring’s durability is preserved, preventing further damage that might result in more extensive, costly fixes. By proactively managing these issues, homeowners can save money in the long run, avoiding the need for more significant renovations and ensuring their floor remains a functional and attractive feature of their home.
Tools and Materials Needed
List of Tools
- Utility knife or razor blade: Clean the crack and remove loose debris.
- Clean cloth or sponge: To wipe off dust and excess materials.
- Trowel or putty knife: This is used to apply epoxy filler and smooth the surface.
- Grout float (for applying grout): Essential for evenly distributing grout into affected areas.
- Caulking gun (if using caulk): Useful for precisely applying caulk to seal larger cracks.
List of Materials
- Epoxy filler or tile repair kit (specifically for ceramic tiles): Used to fill and mend cracks, providing a strong bond and durable finish.
- Grout (if the crack affects the grout lines): Ensures a seamless repair that blends with existing grout.
- Tile cleaner or mild detergent: Important for preparing the surface and ensuring proper adhesion of repair materials.
- Sealant (optional, for added protection after repair): Enhances durability and resistance to moisture intrusion.
Selecting the appropriate tools and materials is crucial in achieving a successful repair. The type of crack determines whether an epoxy filler or a combination of grout and caulk is needed. Choosing products specifically designed for ceramic tiles ensures compatibility, durability, and lasting repair.
Assessing the Crack
Step 1: Identify the Type of Crack
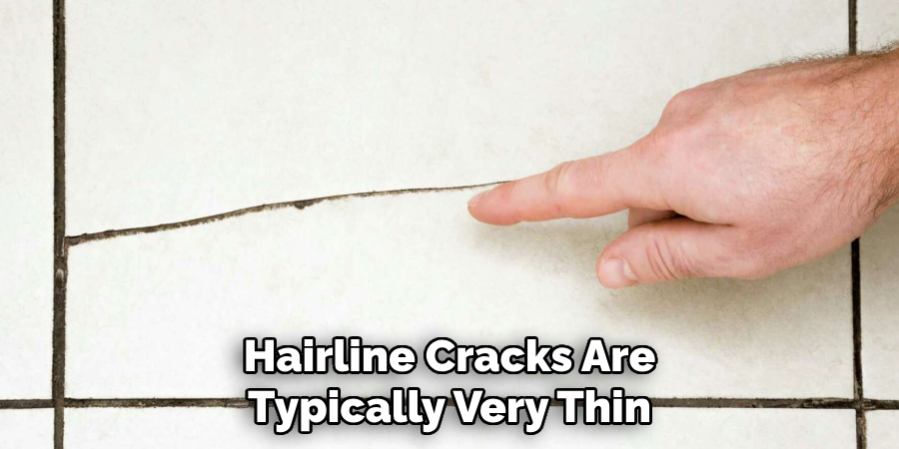
To begin the repair process, it is crucial to accurately identify the type of crack you are dealing with. Hairline cracks are typically very thin and may appear as fine lines on the tile surface, whereas larger fractures are more noticeable and may involve a greater depth or separation. Carefully inspect the tile under good lighting conditions, using a magnifying glass if necessary, to determine the extent of the damage. This close examination will help you decide on the appropriate repair method and materials.
Step 2: Check for Underlying Issues
Before proceeding with any repair, it is important to investigate potential underlying issues that could have contributed to the formation of the crack. Common factors include foundation settling or moisture problems that might undermine the structural integrity of the flooring. If you suspect significant issues, it is advisable to consult a professional who can assess the subfloor and foundation, offering guidance or repairs as needed to prevent future cracks.
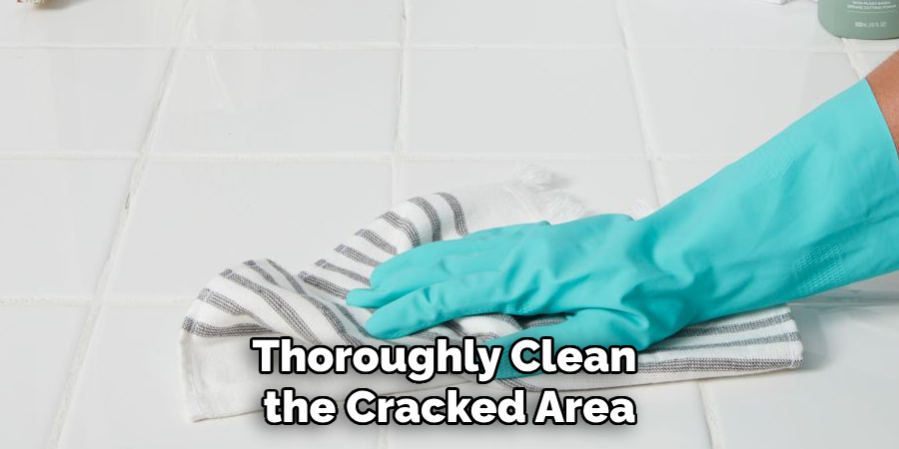
Step 3: Clean the Area
Once the type of crack and any underlying issues have been assessed, thoroughly clean the cracked area. Use a mild detergent mixed with water to gently remove any dirt, grease, or debris from the tile surface. Ensuring the area is completely clean and dry is essential for the proper adhesion of repair materials, promoting a successful and long-lasting repair.
How to Fix Hairline Cracks in Ceramic Floor Tile: Repairing Hairline Cracks
Step 1: Choose the Right Repair Method
When it comes to repairing hairline cracks in ceramic tiles, there are two primary methods to consider: using epoxy filler or grout. The choice between these options depends largely on the size and location of the crack. Epoxy filler is ideal for very thin hairline cracks that do not affect the grout lines, as it provides a strong bond and is less noticeable once cured. On the other hand, grout is better suited for cracks that traverse grout lines or affect the tile surface more broadly.
Using Epoxy Filler
Step 1: Prepare the Epoxy
Start by thoroughly reviewing and following the manufacturer’s instructions for mixing the epoxy filler. This ensures the correct consistency and efficacy of the product. Working in a well-ventilated area is important to avoid inhaling fumes, and wearing gloves for protection against irritants is advisable.
Step 2: Apply the Epoxy
Use a utility knife or putty knife to carefully insert the epoxy filler into the crack. It’s essential to completely fill the crack to prevent further damage. Once the crack is filled, smooth the surface with your tool to ensure an even finish that blends seamlessly with the surrounding tile.
Step 3: Let It Cure
Allow the epoxy to cure for the time specified by the manufacturer, which is usually a few hours to overnight. During this period, keeping the area free from foot traffic is crucial to avoid disturbing the repair and compromising its bonding strength.
Using Grout
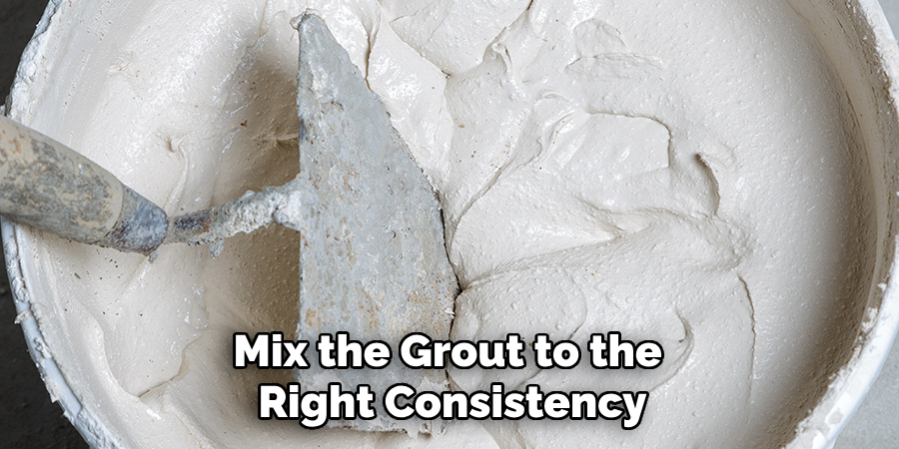
Step 1: Prepare the Grout
If you’re using a repair kit, follow the instructions to mix the grout to the right consistency. To achieve a uniform look, choose a grout color that closely matches your existing grout lines.
Step 2: Apply the Grout
With a grout float, press the mixed grout firmly into the crack, evenly spreading it to ensure it fills the void completely. Carefully smooth the grout to align with the surrounding tiles’ level, maintaining a flat, cohesive surface.
Step 3: Clean the Surface
Before the grout sets, use a damp sponge to gently wipe away any excess grout from the surface of the tiles. This prevents grout residues from hardening on the tiles and ensures they remain clean. Be diligent during this step to maintain a polished finish that enhances the visual appeal of your flooring.
Homeowners can effectively repair hairline cracks in their ceramic tile flooring by following these detailed instructions. Both epoxy filler and grout offer durable solutions, allowing for personalized repair approaches that cater to specific tile needs and aesthetics.
Troubleshooting Common Issues
Issue 1: Cracks Reappearing
If cracks return after repairs, it might be due to movement in the foundation or previous poor tile installation. Such structural issues can resurface despite initial repairs. It’s vital to monitor the repaired area for any signs of recurrence. If the problem persists, consider consulting a professional who can assess the structural integrity of your flooring and provide more comprehensive repair solutions.
Issue 2: Discoloration After Repair
New repair materials might not perfectly match the existing tiles or grout, leading to discoloration. This can occur due to differences in color batches or fading of original materials over time. To address this, use color-matching products designed for tiles and grout. If necessary, adjust the grout color after repairs by applying a grout colorant, ensuring a smoother blend with existing materials and restoring the uniformity of your flooring’s appearance.
Issue 3: Incomplete Repairs
An incomplete repair often results from the crack not being fully filled, which might not be noticeable until after the repair has started. First, identify any remaining gaps or hollow spots in the repair area to remedy this. Remove the inadequately filled section with care, clean the space thoroughly, and apply the repair material again, following all preparation and application steps meticulously. Ensuring proper cleaning and application can prevent future issues and enhance the durability of your repair.
Conclusion
Promptly addressing hairline cracks in ceramic floor tiles is crucial to prevent escalating damage and preserve their aesthetic appeal. You can effectively manage these issues by following key steps—assessing the crack, selecting the appropriate repair method, and applying the necessary finishing touches. Utilizing guides on how to fix hairline cracks in ceramic floor tile ensures a thorough understanding and application of repair techniques. Maintaining a habit of regular inspections and care for your tiles will help extend their lifespan and keep them looking pristine, safeguarding your floors against future issues and enhancing the beauty of your home.
Specialization:
- Master of wheel-throwing, hand-building, and advanced glazing techniques
- Focus on creating both functional pottery and decorative art pieces
Recognition:
- Celebrated by collectors and art enthusiasts for creating one-of-a-kind pieces that blend artistry with functionality
- Participates in local and national exhibitions, earning accolades for his innovative designs and craftsmanship
Passion:
- Deeply committed to exploring and pushing the boundaries of ceramic artistry
- Continuously experiments with new materials, firing techniques, and artistic concepts to evolve his craft
Personal Philosophy:
- Believes in the transformative power of art, aiming to evoke emotions and connections through his ceramic creations
- Advocates for sustainability in ceramics, using eco-friendly materials and practices whenever possible