


Are you tired of seeing stains and chips on your porcelain tub? A cracked or damaged porcelain tub can be an eyesore in any bathroom.

Porcelain tubs can provide a classic and durable addition to any bathroom, but over time, they can become scratched, chipped, or stained through regular use. Fixing a porcelain tub involves several manageable steps that restore its aesthetic appeal and ensure longevity. Whether you’re dealing with minor surface imperfections or more significant damage, understanding the proper repair techniques is essential.
This guide on how to fix porcelain tub will walk you through the tools, materials, and procedures necessary to effectively repair and rejuvenate your porcelain tub, transforming it back to its former splendor. With patience and attention to detail, you can make your bathroom fixture look as good as new.
What Will You Need?
Before you start the process of repairing your porcelain tub, it’s essential to gather all the necessary tools and materials. Here are some items that you will need:
- Safety Goggles and Gloves: It’s crucial to prioritize safety when dealing with any repair project.
- Cleaning Supplies: To begin, thoroughly clean the surface of your tub. Use a non-abrasive cleaner, a soft sponge or cloth, and warm water.
- Sandpaper or Steel Wool: For minor scratches and stains, sandpaper or steel wool can be used to smooth out the surface before applying a new finish.
- Porcelain Filler/Epoxy Putty: This material fills chips and cracks.
- Porcelain Paint: To restore the color of your tub, you will need porcelain paint that matches the original color.
- Paintbrush/Roller: You will need a paintbrush or roller to apply the porcelain paint evenly.
- Terry Cloth Towel: After cleaning and repairs are completed, use a Terry Cloth towel to dry and buff the surface.
You can begin the repair process once you have all the necessary tools and materials.
10 Easy Steps on How to Fix Porcelain Tub
Step 1. Clean the Tub Thoroughly:
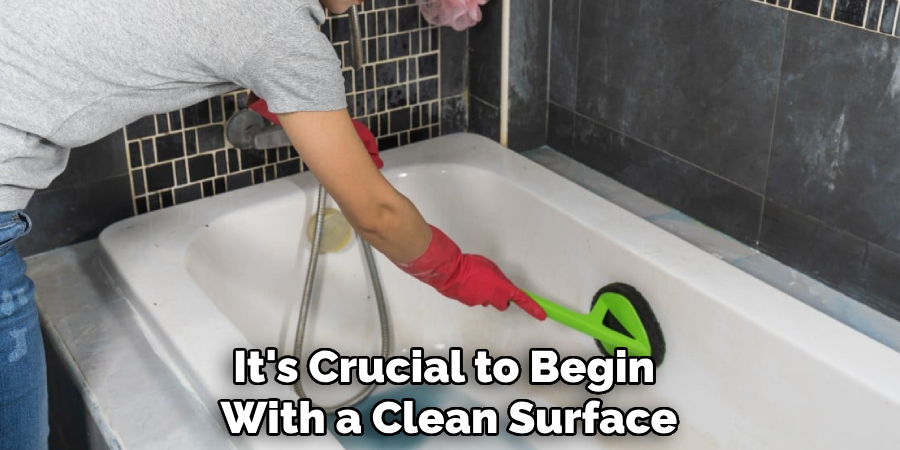
To start any repair process effectively, it’s crucial to begin with a clean surface. Cleaning the tub thoroughly ensures that all grime, soap scum, and residues are removed, providing a pristine canvas for subsequent repair steps. Use a non-abrasive cleaner, which is essential to prevent further scratching or damaging the porcelain surface. Apply the cleaner with a soft sponge or cloth, focusing on any areas with visible stains or buildup.
After applying the cleaner, rinse the tub thoroughly with warm water to remove any cleaning agent residues that could interfere with the adhesion of the filler or paint. Finally, use a terry cloth towel to dry the tub thoroughly, ensuring no moisture remains, as this can affect the effectiveness of the repair materials you will apply in the next steps. This thorough cleaning not only makes the surface ready for repairs but also enhances the durability of the fix, resulting in a longer-lasting finish.
Step 2. Sand the Damaged Areas:
After cleaning, the next step involves sanding the damaged areas to ensure a smooth surface for repair. Use fine-grit sandpaper or steel wool to sand over any chips, cracks, or scratches gently. The goal here is to smooth out uneven edges and create a slightly rough surface that will allow the filler to adhere properly. Be careful not to sand too aggressively, as this can cause further damage to the porcelain. Once the sanding is complete, wipe away any dust or debris with a damp cloth, then dry the area thoroughly using a terry cloth towel.
Step 3. Apply Porcelain Filler:
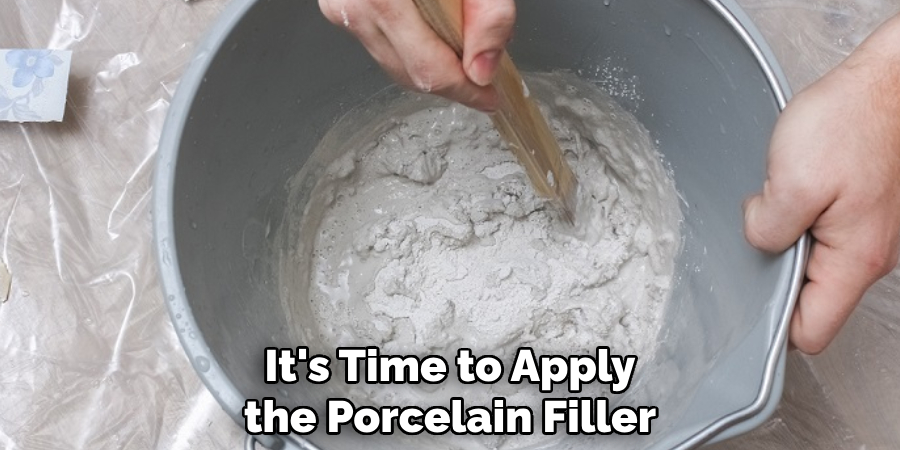
Once you have prepared the surface by cleaning and sanding, it’s time to apply the porcelain filler or epoxy putty. This step is crucial for repairing chips and cracks effectively. Begin by reading the manufacturer’s instructions to mix the filler accurately, as some products may have specific mixing ratios or curing times. Using a small putty knife or an applicator, carefully apply the filler to the damaged areas, ensuring that it fills any chips or cracks.
Smooth out the filler so it is level with the surrounding surface. Allow the filler to dry and cure entirely as per the product’s guidelines; this is vital for achieving a durable and seamless repair. Once the filler is fully hardened, gently sand the area again to ensure a smooth, even finish that seamlessly blends with the rest of the tub. This process creates a solid foundation for applying the porcelain paint, restoring the tub’s aesthetic appeal.
Step 4. Paint the Repaired Areas:
With the filler dried and sanded smooth, you can now paint the repaired sections of your porcelain tub. Choose a porcelain paint that matches the original color of your tub as closely as possible for a seamless look. Before applying the paint, ensure that the surface is immaculate and dry to prevent any imperfections or uneven adhesion. Using a fine paintbrush or a small roller, carefully apply a thin, even coat of paint over the repaired areas.
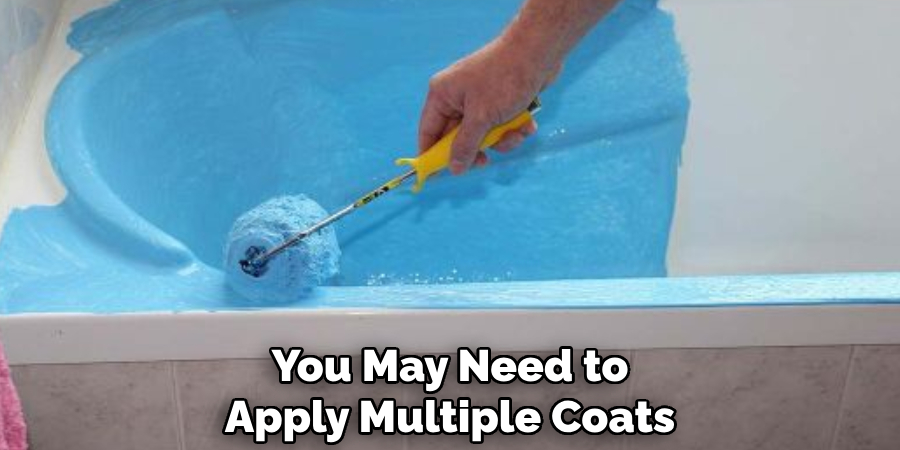
Depending on the manufacturer’s instructions and desired coverage, you may need to apply multiple coats, allowing each one to dry completely before proceeding with the next. Take your time with this step, as precision and patience will produce a professional-looking finish.
Step 5. Seal the Surface:
After painting the repaired areas, it’s essential to seal the surface to protect the finish and prolong the life of your repairs. Apply a thin layer over the painted areas using a high-quality clear sealant designed for porcelain surfaces. This protective sealant helps to guard against future wear and tear, as well as moisture penetration that can cause further damage.
Be sure to follow the manufacturer’s instructions regarding application methods and drying times. Apply the sealant evenly, using a clean paintbrush or a foam roller, to ensure a smooth finish. Allow the sealant to cure completely, according to the product’s guidelines, before exposing the tub to water or heavy use.
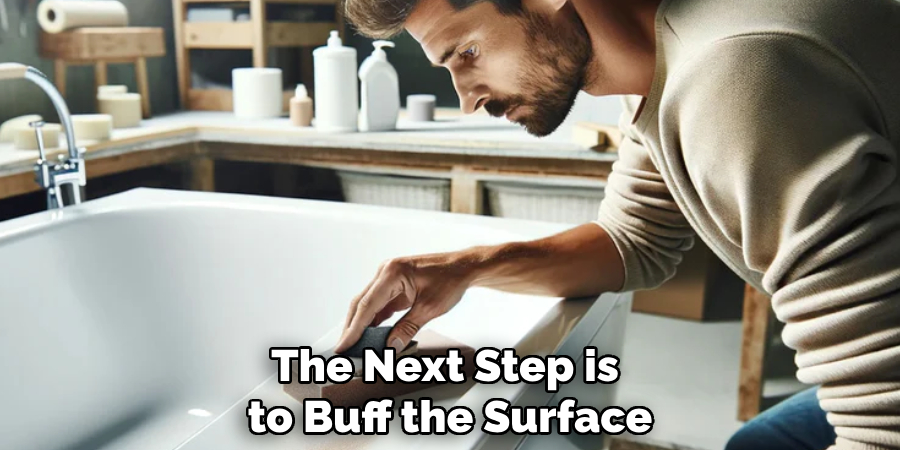
Step 6. Buff the Surface:
Once the sealant has cured completely, the next step is to buff the surface of your newly repaired porcelain tub. Buffing enhances the luster of the finish and ensures that the repaired areas blend seamlessly with the untouched sections. Using a soft, clean terry cloth towel, gently rub the surface in circular motions. This will help to smooth out any minor imperfections in the paint and sealant, giving your tub a glossy and consistent appearance. Be thorough but gentle, as excessive pressure might damage the fresh repairs.
Step 7. Regular Maintenance:
To preserve your newly repaired porcelain tub and maintain its pristine condition, regular maintenance is essential. Begin by establishing a routine that involves using non-abrasive cleaners and a soft cloth or sponge to gently clean the surface weekly.
This practice helps prevent the buildup of grime and soap scum, keeping the tub looking fresh. It’s important to dry the tub thoroughly after each use to avoid water spots or mineral deposits, which can dull the finish over time. Moreover, be cautious about placing heavy objects in the tub, as they can cause chips or cracks. Periodically inspect the tub for signs of wear and promptly address minor issues to avoid extensive future repairs.
Step 8. Inspect and Touch-Up as Needed:
Even with the most meticulous repair, natural wear and tear can gradually affect the surface of your porcelain tub. It is essential to inspect the tub periodically, paying close attention to high-use areas prone to damage. Check for any new chips, cracks, or signs of discoloration. Addressing these issues promptly will prevent more extensive damage and ensure that your repairs remain intact. Keep a small supply of filler, porcelain paint, and sealant on hand for quick touch-ups as needed. For more extensive repairs, revisit the detailed steps outlined previously to guide you in maintaining the tub’s appearance.
Step 9. Enjoy Your Restored Tub:
Now that you’ve restored your porcelain tub to its original glory, it’s time to enjoy the fruits of your labor. Take a moment to appreciate your handiwork and the transformation you’ve accomplished. With the systematic repair and maintenance steps implemented, your tub should now be durable, beautiful, and ready for use. Enjoy relaxing baths or refreshing showers in a tub that looks as good as new. Remember to follow the maintenance advice given to keep it in pristine condition for years.
Step 10. Consider Professional Inspection:
While regular maintenance and timely repairs can significantly prolong the life of your porcelain tub, scheduling an occasional professional inspection could be beneficial. A qualified technician can assess the tub’s overall condition and identify potential issues that might not be apparent to an untrained eye. This proactive approach can catch early signs of wear or damage, allowing you to address minor concerns before they evolve into major problems. Additionally, a professional inspection can offer peace of mind, ensuring that your repair efforts have been effective and reassuring that your tub remains in top condition.
By following these steps and regularly maintaining your porcelain tub, you can keep it looking as good as new for years.
Conclusion
In conclusion, how to fix porcelain tub is an achievable task with the right tools, patience, and adherence to a systematic process.
By carefully following the outlined steps—from assessing damage and applying filler to painting, sealing, and regular maintenance—homeowners can effectively restore their tubs to their former glory. Undertaking this project not only enhances the bathroom’s aesthetic appeal but also extends the functional life of the tub, preventing the need for costly replacements. Additionally, periodic inspections and maintenance are crucial in preserving the tub’s condition over time.
With diligence and care, a repaired porcelain tub can continue to be a source of relaxation and enjoyment for years.
You check this out Use Natural Clay
Specialization:
- Master of wheel-throwing, hand-building, and advanced glazing techniques
- Focus on creating both functional pottery and decorative art pieces
Recognition:
- Celebrated by collectors and art enthusiasts for creating one-of-a-kind pieces that blend artistry with functionality
- Participates in local and national exhibitions, earning accolades for his innovative designs and craftsmanship
Passion:
- Deeply committed to exploring and pushing the boundaries of ceramic artistry
- Continuously experiments with new materials, firing techniques, and artistic concepts to evolve his craft
Personal Philosophy:
- Believes in the transformative power of art, aiming to evoke emotions and connections through his ceramic creations
- Advocates for sustainability in ceramics, using eco-friendly materials and practices whenever possible