


Repairing ritual ceramics is an art that requires patience, precision, and a deep respect for the cultural significance of these objects. Ritual ceramics, often used in spiritual or ceremonial practices, hold immense historical and sentimental value.

They are not just functional items but carry stories and traditions passed down through generations. Proper restoration ensures that these artifacts can continue to serve their purpose and preserve their rich heritage for future generations. This guide will walk you through the steps on how to fix ritual ceramics to effectively and sensitively fix ritual ceramics, ensuring that their beauty and integrity remain intact.
Causes of Damage to Ritual Ceramics
Before diving into the process of fixing ritual ceramics, it is essential to understand the common causes of damage to these objects. This will help you handle them more carefully and take preventive measures to avoid further harm. Here are some of the most common causes of damage to ritual ceramics:
Poor Handling:
The most common cause of damage to ritual ceramics is improper handling. These objects are fragile and require careful handling at all times. Dropping, bumping, or mishandling in any way can result in cracks, chips, or even breakage.
Age and Wear:
Ritual ceramics are often ancient artifacts that have stood the test of time. However, with age and frequent use, they may develop cracks, discoloration, or other forms of wear and tear.
Environmental Factors:
Exposure to extreme temperatures, humidity levels, and sunlight can cause damage to ritual ceramics over time. They may become brittle due to dry conditions or sustain water damage if kept in damp areas.
Materials You Will Need
Before attempting to fix your ritual ceramics, gather all the necessary materials. Here are some items you may need:
- Epoxy Resin or Glue Specifically Designed for Ceramics
- Tweezers
- Fine-grit Sandpaper
- Acetone or Rubbing Alcohol
- Soft Cloths or Cotton Buds
- Paintbrushes
- Color-matching Paints (if Needed)
8 Step-by-step Guides on How to Fix Ritual Ceramics
Now that you have all the necessary materials follow these steps to repair your damaged ritual ceramics:
Step 1: Handle with Care
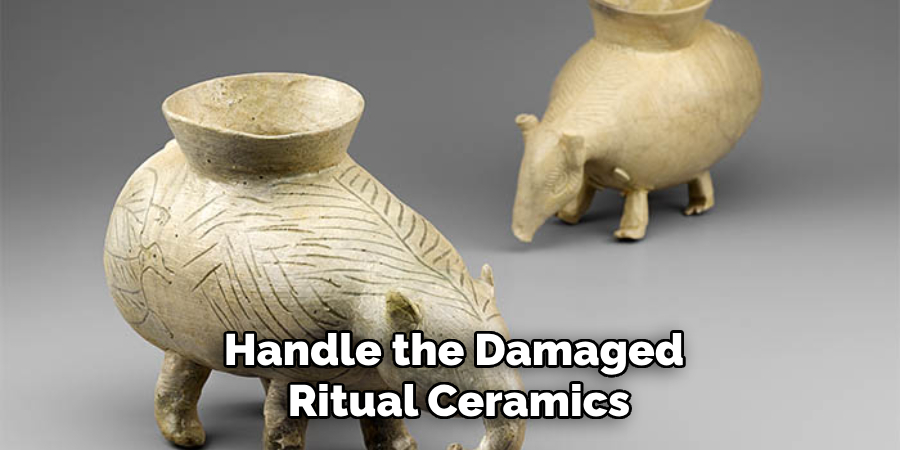
First and foremost, ensure that you handle the damaged ritual ceramics with the utmost care. It is crucial to assess the extent of the damage without causing any additional harm. Gently lift and support the broken pieces, taking care not to apply unnecessary pressure, which could lead to further cracking or chipping.
If the ceramic pieces are scattered, use a pair of tweezers to carefully collect them and place them on a soft surface or padded tray to prevent further damage. Handling the pieces delicately sets the stage for a successful repair process, maintaining the integrity of the artifacts during the restoration journey.
Step 2: Clean the Broken Pieces
Before attempting to repair the ritual ceramics, ensure that they are free from any dirt, dust, or debris. Use a soft cloth or cotton bud dipped in acetone or rubbing alcohol to gently clean the broken pieces. This will help remove any stubborn stains or contaminants that could affect the strength of the repaired piece.
You can also use a fine-grit sandpaper to lightly sand the edges of the broken pieces, removing any rough or uneven areas that may make it difficult for the pieces to fit back together seamlessly.
Step 3: Mix Epoxy Resin or Glue
Next, mix your epoxy resin or glue according to the manufacturer’s instructions. Make sure to work in a well-ventilated area and wear gloves to protect your hands from the strong adhesive. If using glue specifically designed for ceramics, follow the directions on the package carefully.
It is important to note that different types of ceramics may require different types of adhesives. For example, porcelain may need a specialized adhesive specifically designed for high-fired ceramic materials.
Step 4: Apply Adhesive
Using a toothpick or small paintbrush, carefully apply the adhesive to one side of the broken pieces. Be sure to apply it evenly and avoid applying too much, as this could lead to excess glue seeping out when you fit the pieces together.
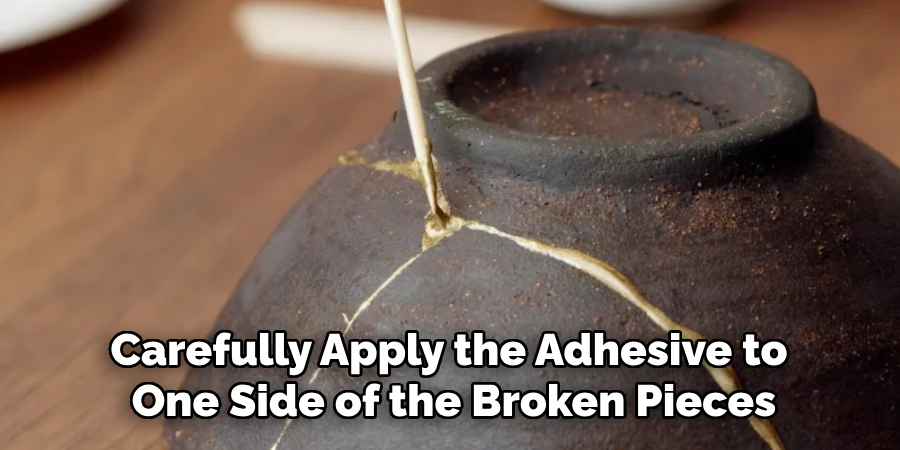
The goal is to create a thin layer of adhesive that will hold the pieces together firmly without any gaps. If working with larger or heavier pieces, you may need to apply the adhesive to both sides for added support.
Step 5: Fit Broken Pieces Together
Once you have applied the adhesive, fit the broken pieces back together carefully. It may take some time and patience to get the pieces in their original position perfectly, but it is worth taking your time to ensure a seamless repair.
If there are any gaps between the broken pieces, use tweezers or toothpicks to gently add more adhesive and press the pieces together until they fit snugly.
Step 6: Hold Pieces in Place
After fitting the broken pieces together, hold them in place for a few minutes to allow the adhesive to set. You can use rubber bands or tape to secure the pieces if needed. Follow the recommended drying time on your adhesive package before moving on to the next step.
It is important to note that some adhesives may have a longer drying time, so be patient and avoid disturbing the pieces before they are fully set.
Step 7: Add Finishing Touches
Once the adhesive has dried completely, you can add any finishing touches to your repaired ritual ceramics. If there are any gaps or cracks in the repaired area, use color-matching paint to blend them into the original design of the ceramic piece.
If desired, you can also apply a layer of clear sealant over the repaired area for added protection and shine. Be sure to carefully follow the instructions for your chosen sealant.
Step 8: Display with Care
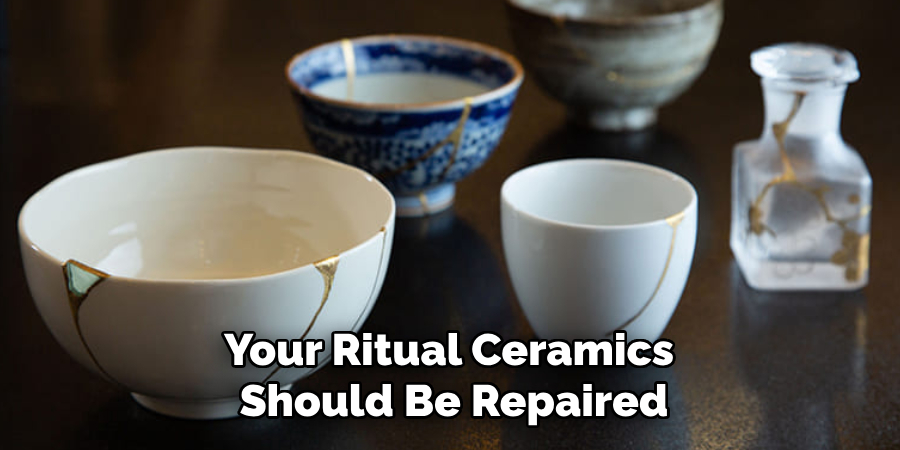
After completing all the steps on how to fix the ritual ceramics above, your ritual ceramics should be repaired and ready to display with care. Be sure to handle them gently and avoid any harsh environmental conditions that could cause damage in the future.
With proper handling and care, your ritual ceramics can continue to be cherished for generations to come. Remember, if the damage is extensive or beyond repair, it is best to seek professional restoration services to preserve the integrity of these precious artifacts. So go ahead and showcase your beautifully restored ritual ceramics with pride!
Additional Tips
- It is always recommended to test the adhesive on a small, inconspicuous area of the ceramic first before applying it to the broken pieces.
- Avoid using superglue or any other fast-drying adhesives, as they may not provide enough bonding strength for ritual ceramics.
- In some cases, using a kiln or high heat can help strengthen the bond between broken pieces. This method is best left to professionals and should only be used if recommended by a restoration expert.
- If possible, try to avoid displaying your repaired ritual ceramics in areas that are prone to vibrations or movement, such as near doorways or windows. This will help prevent any accidental damage in the future.
- Regularly dust and clean your repaired ritual ceramics to keep them looking their best. Avoid using harsh chemicals or abrasive materials, as they could damage the surface of the ceramic.
- Lastly, always handle your ritual ceramics with care and avoid placing any heavy objects on top of them to prevent further damage. By following these steps and tips, you can successfully repair your damaged ritual ceramics and continue to enjoy their beauty and significance for years to come. Happy restoring!

Frequently Asked Questions
Q: Can I Use Regular Super Glue to Repair Ritual Ceramics?
A: No, it is not recommended to use regular superglue as it may contain chemicals that could damage the ceramic. It is best to use an adhesive specifically designed for ceramics or epoxy resin.
Q: Can I Repair Cracks in Ritual Ceramics?
A: Yes, you can repair cracks in ritual ceramics using the steps outlined above. However, it is important to note that the repaired area may not be as strong as the original ceramic piece and should be handled with care.
Q: How Do I Know Which Adhesive to Use for My Ceramic Type?
A: Different types of ceramics may require different types of adhesives. It is best to consult with a professional or do research on the specific type of ceramic you are repairing to determine the most suitable adhesive for optimal results.
Conclusion
In conclusion, the process of repairing ritual ceramics requires patience, precision, and a delicate touch. By following the outlined steps on how to fix ritual ceramics, you can restore the beauty and integrity of your treasured artifacts while ensuring their longevity. Always choose the right adhesive and handle the pieces with care throughout the restoration journey.
Proper cleaning and fitting are essential to achieving a seamless repair, while final touches like color-matching paint and clear sealant add finishing detail. When in doubt, seeking help from a professional conservator is a wise decision to preserve these culturally significant items. With diligence and attention to detail, your restored ceramics can continue to be cherished and admired for years to come, holding their rightful place in both personal and cultural history.
Specialization:
- Master of wheel-throwing, hand-building, and advanced glazing techniques
- Focus on creating both functional pottery and decorative art pieces
Recognition:
- Celebrated by collectors and art enthusiasts for creating one-of-a-kind pieces that blend artistry with functionality
- Participates in local and national exhibitions, earning accolades for his innovative designs and craftsmanship
Passion:
- Deeply committed to exploring and pushing the boundaries of ceramic artistry
- Continuously experiments with new materials, firing techniques, and artistic concepts to evolve his craft
Personal Philosophy:
- Believes in the transformative power of art, aiming to evoke emotions and connections through his ceramic creations
- Advocates for sustainability in ceramics, using eco-friendly materials and practices whenever possible