


The art of glazing is essential in transforming raw ceramic pieces into stunning works of art. Glazing enhances the aesthetic appeal of elegant ceramic vases and adds a protective layer that increases their durability and functionality. Through a variety of finishes, textures, and colors, glazing can bring a sense of elegance and sophistication to any ceramic creation.
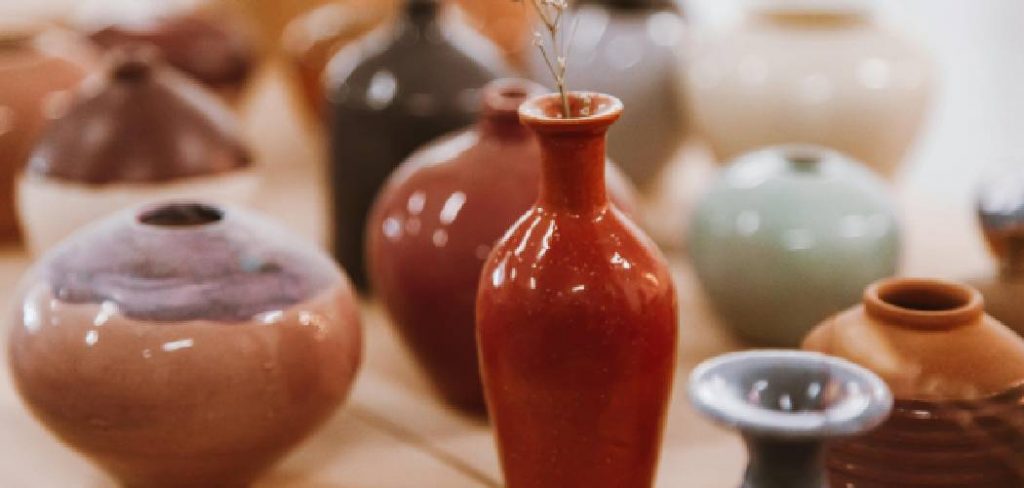
This article aims to provide an in-depth guide on how to glaze ceramic elegant vases, offering a step-by-step approach to achieving breathtaking results. Whether you are a beginner or an experienced ceramicist, understanding the nuances of this process will help you create professional-quality vases that stand out. By following these tips and techniques, you can master the art of glazing and take your ceramic projects to new heights.
Materials and Tools Needed
Essential Materials
You will need a selection of essential materials to successfully glaze elegant ceramic vases. Begin with a bisque-fired ceramic vase, which serves as the foundation for the glazing process. This type of vase is unglazed and fired once, making it the perfect canvas to accept and display the glaze beautifully. Select from a variety of glazes to achieve your desired finish; options include glossy, matte, satin, and specialty glazes like celadon or metallic finishes that offer unique visual effects. Depending on your design preference, combining different types of glazes can result in dynamic and eye-catching patterns on your ceramic vases.
Necessary Tools
Having the right tools is crucial to effectively apply the glaze. Basic tools include brushes and sponges, which are used to directly apply glaze onto the vase. Glaze sprayers can be employed for a more uniform application, especially for larger surfaces. Stirring sticks are essential to thoroughly mix the glaze, ensuring even consistency. Containers for dipping allow for full coverage of the vase in a single step. Protective gear, such as gloves and masks, is vital to safeguard against inhalation of glaze particles and to prevent skin contact with potentially harmful substances. With these tools, you will have everything necessary to execute the glazing process precisely and safely.
Preparing the Vase for Glazing
Cleaning the Surface
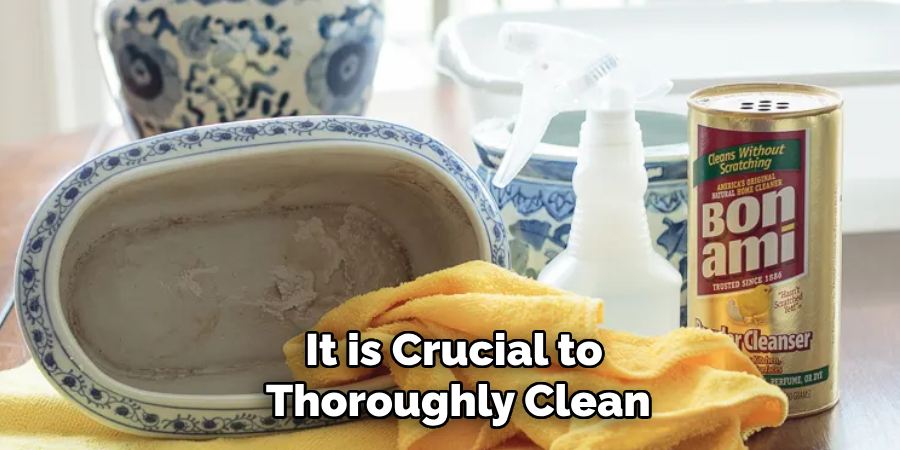
Before applying any glaze, it is crucial to thoroughly clean the bisque-fired ceramic vase. Begin by wiping the vase with a damp sponge to remove any dust, oils, or debris that may have accumulated during handling. Ensure that the vase is completely dry before proceeding. Starting with a smooth, clean surface is essential as it allows the glaze to adhere properly and results in a flawless, even finish. This step prevents imperfections that could disrupt the appearance of the final product.
Planning the Design
Visualizing the finished vase is an important step in the glazing process. Consider experimenting with small glazing samples on test tiles to see how different glazes and combinations will look once fired. This approach helps understand how glazes interact with the vase’s shape and texture, allowing for adjustments in design before committing to the final application. Sample testing is vital for achieving the desired artistic effect and ensuring cohesive glaze coverage.
How to Glaze Ceramic Elegant Vases: Techniques for Glazing
Dipping for Even Coverage
Dipping is an efficient glazing technique that achieves uniform coverage on elegant ceramic vases, giving them a consistent color. To start, ensure that your vase is completely dry and clean, then prepare a glaze mixture with an appropriate viscosity, which should resemble heavy cream. D dip the vase steadily into the glaze using a container large enough to submerge the entire vase.
Hold the vase by its base or internally to prevent fingerprints, swiftly submerge it, and withdraw it in a controlled motion to allow excess glaze to drip back into the container. To avoid any unsightly drips or pooling, carefully shake or tap the vase after dipping, allowing excess glaze to flow off the surface. Let the glaze dry thoroughly before any additional treatment. This method provides solid and even color coverage, which is ideal for simplicity and elegance.
Brushing for Detailed Designs
Brushing glaze onto the vase allows for artistic expression and detailed designs. Start by selecting fine brushes of different sizes to accommodate various detail levels. Dip the brush into the glaze, ensuring it is well-coated but not overloaded to prevent streaks. Carefully apply the glaze onto the vase with smooth, even strokes, letting each coat dry before applying the next.
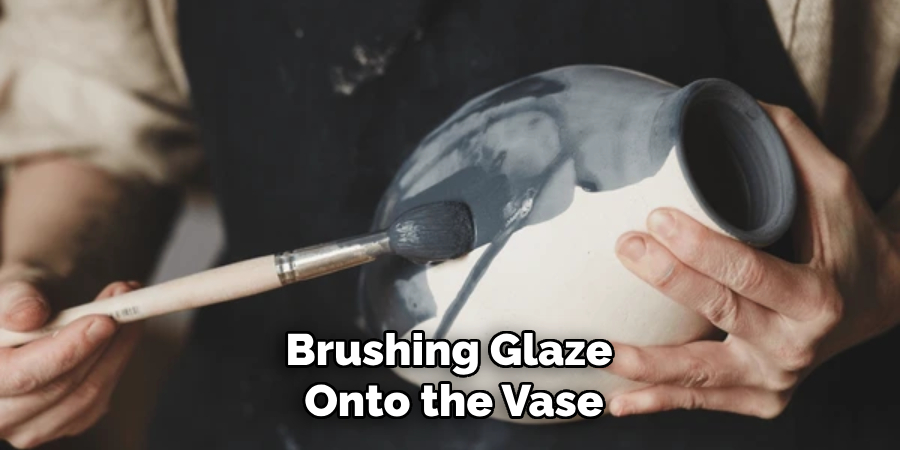
To create intricate patterns or gradients, use layers of glaze, building up textures and depths where necessary. Consider having two or more glaze colors for layering, using the brush to blend them subtly for a more dynamic look. Experimenting with glaze thickness and brush sizes will enable a diverse range of finishes, perfect for crafting elegant, one-of-a-kind designs on your ceramic vases.
Spraying for Smooth, Professional Finishes
Using a glaze sprayer can give your ceramic vases a sleek, professional-looking finish. First, ensure your spray area is well-ventilated and all protective gear is worn. Fill the sprayer with your glaze mixture, adjusting it to achieve a consistent flow. Hold the sprayer approximately 8 to 12 inches from the vase, applying the glaze in even passes from top to bottom, ensuring each stroke slightly overlaps the previous one for seamless coverage.
Adjust the spray pressure to manage the flow and ensure an even coating. For a refined look, apply the glaze in multiple thin layers rather than one thick coat, allowing each layer to dry before adding the next. This technique gives the vase a smooth, polished surface, which can be further enhanced with additional detailing or over-glazing for more complex finishes.
Special Effects for Elegance
Creating Unique Textures and Patterns
Adding special effects to ceramic vases can elevate their elegance by introducing unique textures and patterns. Techniques such as wax resist, sponging, and sgraffito allow for artistic touches that make each piece distinct. Wax resistance involves applying wax to certain areas of the vase before glazing, creating intriguing contrasts where the glaze cannot adhere. Sponging adds texture by dappling glaze with a sponge, producing mottled or gradient effects. Sgraffito artfully removes layers of glaze to reveal contrasting colors underneath, enabling detailed designs and intricate patterns. Additionally, using specialty glazes can produce effects like crackling, ombre transitions, or a metallic shine, each imparting a sophisticated and personalized finish to your ceramic creations.
Combining Glazes for Complex Finishes
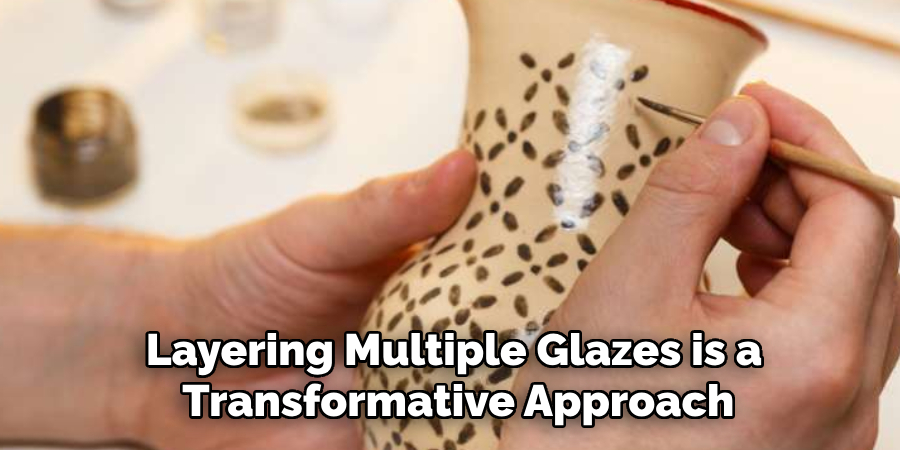
Layering multiple glazes is a transformative approach to achieving complex finishes on ceramic vases. When different glaze types are combined, they can create depth and striking color variations that draw the eye. Applying a base layer of glaze and then topping it with one or more transparent glazes can accentuate underlying textures for a highlighted effect, enhancing the vase’s overall visual appeal. Experimenting with firing temperatures and conditions is essential, as these can significantly impact the final result. By understanding the interaction between glazes, artists can unlock a world of creative potential, crafting vases with multi-dimensional finishes that speak to their artistic vision.
Firing the Glazed Vase
Preparing for Firing
Before firing, it’s crucial to properly clean the base of the glazed vase to prevent any glaze residue from sticking to the kiln shelf. Use a damp sponge or cloth to gently wipe away any excess glaze from the foot of the vase. This step is essential to ensure that the vase doesn’t fuse to the shelf during firing, which could damage both the vase and the kiln. When arranging your vase in the kiln, consider placing it in a position that minimizes the risk of glaze runs or uneven heating. Avoid overcrowding; provide ample space around each piece to ensure even heat distribution and to allow for proper airflow within the kiln.
Final Firing Process
The firing process requires attention to detail, with recommended temperatures varying based on the type of glaze used. Typically, mid-range stoneware glazes mature between 2165°F (1185°C) and 2265°F (1235°C), while low-fire glazes mature at temperatures around 1828°F (998°C). Monitoring the kiln throughout the firing process is crucial, ensuring temperatures rise gradually to avoid thermal shock. After reaching the peak temperature, allow the kiln to cool down slowly through an annealing process. This gradual cooling prevents stress that could lead to cracking, ensuring that the integrity of the glaze finish is maintained.
Evaluating and Perfecting the Vase
Inspecting the Finished Piece
After the vase has cooled, scrutinize the surface to ensure smoothness and even glaze distribution. Look closely for consistent color coverage and check that desired effects, such as specific textures or patterns, have been achieved. It’s important to identify imperfections like pinholes, bubbles, or areas where the glaze may have pooled or run unevenly. These imperfections can detract from the vase’s overall quality, so addressing them is crucial for achieving a professional finish.
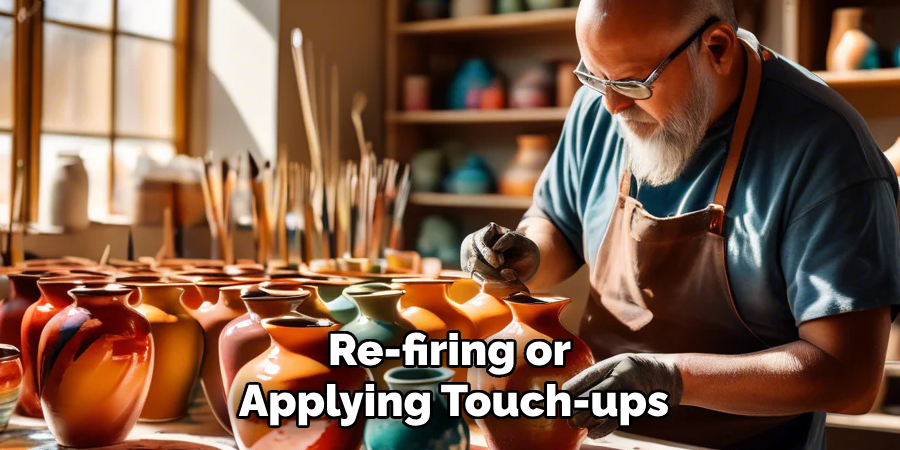
Tips for Refinement
Should you discover imperfections, consider techniques such as re-firing or applying touch-ups to enhance the vase’s appearance. Re-firing can often remedy issues with glaze application, evening out minor flaws. Alternatively, carefully applying additional glaze and firing again can resolve more noticeable defects. Each finished piece offers valuable insights, allowing you to learn from the process and apply those lessons to future glazing projects, continually refining your craft.
Conclusion
In summary, mastering the art of how to glaze ceramic elegant vases involves a series of meticulously executed steps, from initial preparation to the critical firing process. By embracing and experimenting with various techniques—such as spraying, layering glazes, and adding special effects—you can achieve personalized and sophisticated finishes that set your work apart. Each step offers opportunities for creativity, and through hands-on experience, you gain insights that enhance your skillset. Ultimately, the artistic satisfaction derived from creating beautiful, unique ceramic vases is immeasurable, serving as a testament to your dedication and creative expression.
Specialization:
- Master of wheel-throwing, hand-building, and advanced glazing techniques
- Focus on creating both functional pottery and decorative art pieces
Recognition:
- Celebrated by collectors and art enthusiasts for creating one-of-a-kind pieces that blend artistry with functionality
- Participates in local and national exhibitions, earning accolades for his innovative designs and craftsmanship
Passion:
- Deeply committed to exploring and pushing the boundaries of ceramic artistry
- Continuously experiments with new materials, firing techniques, and artistic concepts to evolve his craft
Personal Philosophy:
- Believes in the transformative power of art, aiming to evoke emotions and connections through his ceramic creations
- Advocates for sustainability in ceramics, using eco-friendly materials and practices whenever possible