


Glazing ceramic spoons is an essential step in both protecting the surface and enhancing their aesthetic appeal. This process involves applying a layer of glaze, which, when fired in a kiln, creates a smooth, glass-like finish that is both durable and food-safe.
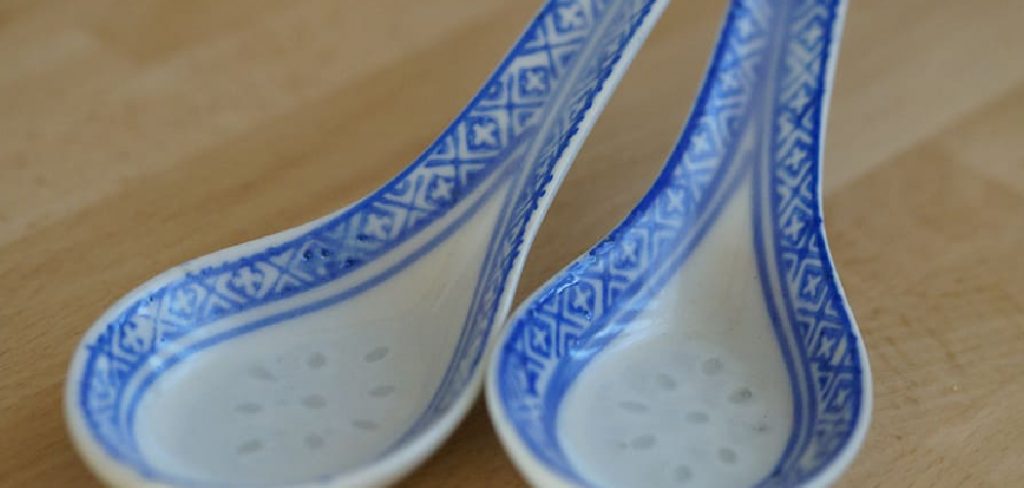
Whether you’re aiming for vibrant colors, subtle textures, or a glossy sheen, mastering the art of glazing can transform simple ceramic spoons into beautiful and functional works of art. This guide explores the key aspects of how to glaze ceramic spoons.
What Is Glazing and Why It Matters
Glazing is the process of coating a ceramic object with a liquid mixture that, once fired, creates a hard and often glossy finish. This technique serves both practical and decorative purposes. On a functional level, glazing makes ceramics waterproof, ensuring that liquid does not penetrate the porous material.
It also enhances durability, protecting the surface from scratches, stains, and wear over time. Aesthetically, glazing allows artists to add texture, color, and shine to their creations, enabling infinite possibilities for design and self-expression. For items like ceramic spoons, glazing not only elevates their visual appeal but also ensures they are safe for daily use, combining beauty with practicality.
Materials and Tools You’ll Need
To successfully glaze ceramics, you’ll need a few essential materials and tools. Here’s a list to get you started:
- Ceramic Pieces (bisque-fired): Ensure the items are clean and free of dust or debris before glazing.
- Glazes: Choose from a variety of colors and finishes, such as glossy, matte, or satin, depending on your desired outcome.
- Brushes: Assorted brushes of different sizes for detailed work or full coverage.
- Glaze Tongs: Used to hold pieces while dipping them into the glaze to avoid fingerprints.
- Sponge and Water: For cleaning surfaces and wiping away excess glaze.
- Wax resist (optional): To protect certain areas from glaze if you want to create unglazed patterns or edges.
- Kiln: A kiln is essential for firing glazed ceramics, ensuring durability and sealing the surface.
- Mixing Tools (if needed): For stirring or diluting glaze to reach the right consistency.
Having these tools and materials ready will ensure a smooth glazing process and help you achieve professional-looking results.
10 Methods How to Glaze Ceramic Spoons
1. Clean and Prepare the Bisque-Fired Spoons
Before any glaze touches your ceramic spoon, the surface must be completely clean and dry. Bisque-fired ceramics tend to attract dust, oils, or residues that can prevent glaze from adhering evenly. Gently wipe the entire spoon with a slightly damp sponge or lint-free cloth to remove dust. Avoid using soap or chemicals that could leave a film.
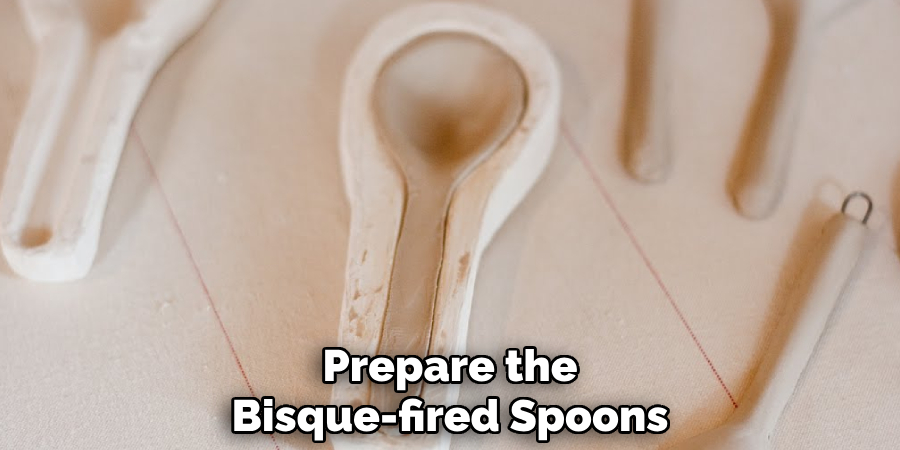
Pay close attention to crevices—especially around the handle or bowl of the spoon—where particles might linger. Allow the spoon to dry thoroughly before glazing to prevent bubbling or patchiness during the firing process.
2. Choose Food-Safe Glazes for Functional Spoons
If your ceramic spoons will be used for eating or serving, always select food-safe glazes. These glazes are formulated to withstand repeated washing, high heat, and contact with food without leaching harmful substances.
Look for glazes clearly labeled as “food-safe” or “non-toxic” by the manufacturer. Avoid glazes containing lead, cadmium, or barium unless the label explicitly states that they are safe for food use after proper firing. Clear, glossy glazes are often favored for spoon bowls, as they resist staining and are easy to clean.
3. Stir and Sieve Your Glaze for Even Consistency
Glazes often settle during storage, separating into thick sediment and water. Before applying, thoroughly stir the glaze with a wooden or plastic stick, then pass it through a fine mesh sieve or strainer. This breaks up clumps and ensures the glaze is smooth and lump-free.
A well-mixed glaze results in an even coat and prevents pinholes or crawling during firing. If you’re using dipping glaze, check its viscosity with a hydrometer or by feel—thick enough to coat, but thin enough to flow smoothly and evenly.
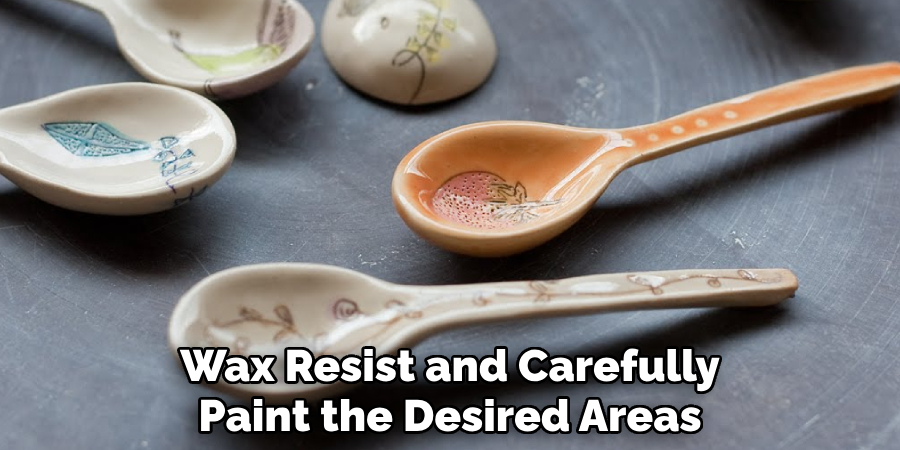
4. Wax the Spoon Handles or Bottoms to Avoid Glaze Mishaps
Applying wax resist to areas that should remain glaze-free is an important step. On spoons, this usually includes the very end of the handle (if it rests on a kiln shelf) or the entire bottom side of the handle, depending on your design. Dip a small brush into wax resist and carefully paint the desired areas.
Allow the wax to dry fully before glazing. Waxed sections will repel glaze, preventing unwanted drips and helping avoid the spoon fusing to the kiln shelf during firing. Be precise—accidental wax in the wrong area can ruin a design.
5. Dip the Spoon for Full Coverage or Gradient Effects
Dipping is a fast and efficient method to apply glaze to ceramic spoons, especially when aiming for full coverage or smooth gradients. Hold the spoon by the handle or use tongs to lower the spoon into the glaze for 1–2 seconds, then lift it out steadily. Allow the excess to drip off and gently tap the spoon to remove any bubbles.
For a gradient effect, dip the spoon halfway into one glaze color, let it dry slightly, then dip into another. Always let dipped spoons dry completely before touching or loading into the kiln.
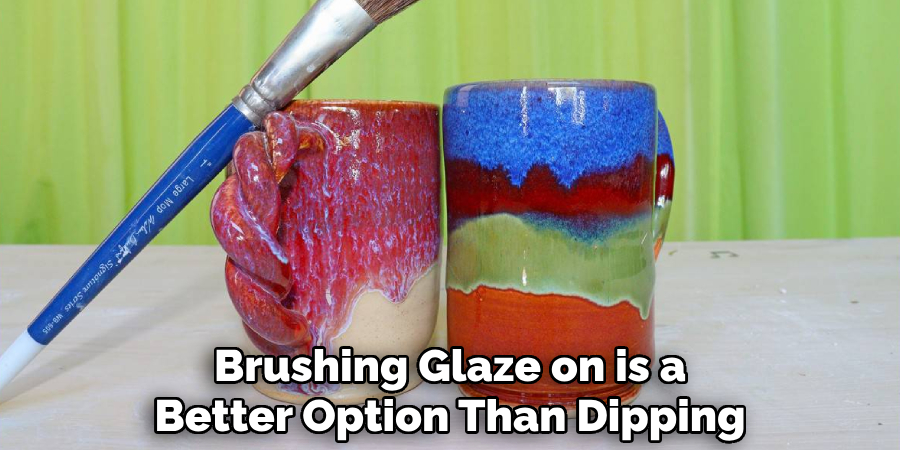
6. Brush on Glaze for Precision and Detailing
For spoons with carved textures, intricate shapes, or multiple colors, brushing glaze on is a better option than dipping. Use a soft-bristled brush to apply 2–3 even coats of glaze, allowing each layer to dry before adding the next.
Brushing gives you control over where the glaze goes, making it ideal for decorating the spoon bowl one way and the handle another. Be mindful of brushstrokes, as they can affect the glaze texture. Stir the glaze often while working, as it can thicken or separate during use.
7. Use Wax Resist Between Layers for Pattern Work
To create decorative patterns, wax resist can be used between layers of glaze. For example, after applying a base coat, paint a simple design like dots, stripes, or floral patterns with wax. Then, apply a second glaze over the entire spoon. The waxed areas will resist the top coat and reveal the color underneath after firing.
This method works well on spoon handles, adding character and artistic flair. Practice designs on test tiles before working directly on your spoon to refine technique and visual impact.
8. Sponge Away Excess Glaze from the Underside
After glazing, it’s essential to clean the base of the spoon—particularly the part that will rest on the kiln shelf. Use a damp sponge to wipe off glaze from the back or bottom of the handle to avoid it sticking during firing. Even a thin coating can melt and fuse to the shelf, damaging both your spoon and the kiln furniture.
Double-check that all glaze has been removed from these areas and touch up the wax if needed. Clean bottoms are a sign of professional craftsmanship and ensure safe, smooth firing.
9. Load Carefully in the Kiln with Proper Support
When loading glazed ceramic spoons into the kiln, support and spacing are key. Place the spoons so the glazed parts don’t touch shelves or other pieces. If firing multiple spoons, use stilts, racks, or place them on edge using kiln-safe supports.
Spoons with curved or deep bowls may need to be placed on soft kiln fiber or a bead of alumina to prevent rocking or glaze pooling. Ensure adequate airflow around each piece so the glaze melts and flows uniformly. Proper placement prevents sticking, warping, or uneven glossing.
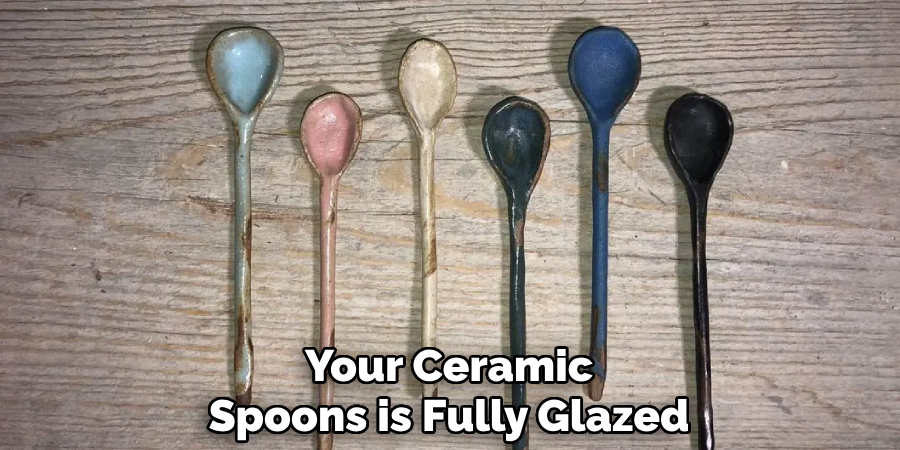
10. Fire to the Appropriate Cone for Your Glaze and Clay
The final step—firing—requires careful attention to temperature. Each glaze has a recommended cone, typically Cone 5 or 6 for mid-fire glazes or Cone 10 for high-fire clay bodies. Verify that your clay and glaze are compatible and match their maturation temperatures.
Program your kiln for a slow ramp to allow moisture to escape and avoid thermal shock. After reaching peak temperature, allow the kiln to cool gradually before unloading. Rushing this stage can cause cracking or crazing. Once cooled, your ceramic spoons will emerge fully glazed, food-safe, and ready for use or display.
Things to Consider When Creating Ceramic Spoons
When embarking on the process of crafting ceramic spoons, several key factors should be kept in mind to ensure success. First, consider the design and functionality of your spoons; they should be comfortable to hold, balanced, and suited for their intended use. Next, ensure that the clay you choose is appropriate for the type of firing you plan to do—some clays perform better at lower, mid, or high-fire temperatures. Proper drying time is essential to prevent cracking during the bisque firing, so allow the spoons to dry completely before loading them into the kiln.
Additionally, glazing must be carefully done to avoid drips or uneven coverage, especially in the areas meant to come into contact with food. Finally, always prioritize safety when handling kilns and glazes, including proper ventilation and protective equipment, to create beautiful and functional ceramics safely.
Conclusion
Glazing ceramic spoons is a thoughtful and rewarding process that combines artistry, chemistry, and craftsmanship. From the first wipe of a dusty bisque surface to the final warm reveal from the kiln, each step contributes to the spoon’s function and beauty.
Whether you dip for a glossy coat, brush on delicate designs, or experiment with layered effects, these ten methods provide a structured yet creative roadmap. Thanks for reading, and we hope this has given you some inspiration on how to glaze ceramic spoons!
Specialization:
- Master of wheel-throwing, hand-building, and advanced glazing techniques
- Focus on creating both functional pottery and decorative art pieces
Recognition:
- Celebrated by collectors and art enthusiasts for creating one-of-a-kind pieces that blend artistry with functionality
- Participates in local and national exhibitions, earning accolades for his innovative designs and craftsmanship
Passion:
- Deeply committed to exploring and pushing the boundaries of ceramic artistry
- Continuously experiments with new materials, firing techniques, and artistic concepts to evolve his craft
Personal Philosophy:
- Believes in the transformative power of art, aiming to evoke emotions and connections through his ceramic creations
- Advocates for sustainability in ceramics, using eco-friendly materials and practices whenever possible