


Accidents happen, and sometimes clay pieces can break, leaving you wondering how to restore them to their original state.
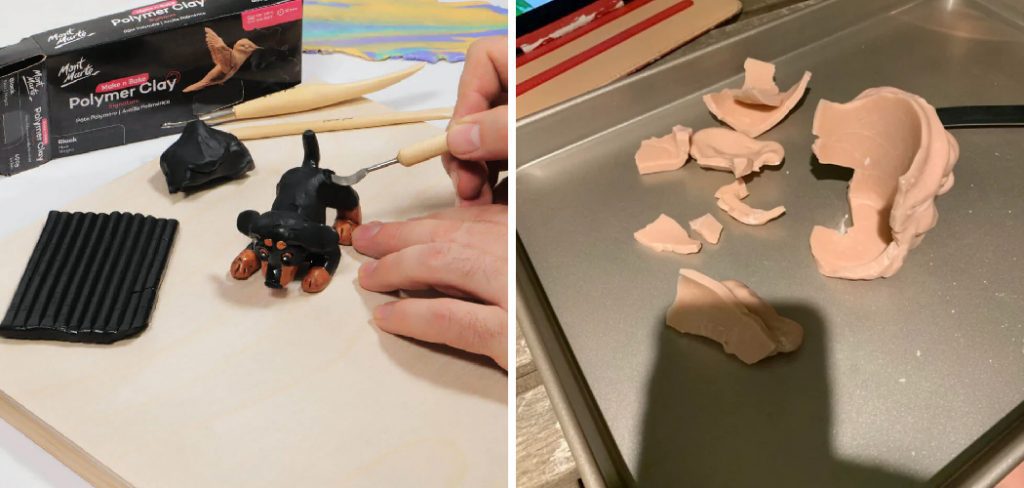
Whether it’s a ceramic decoration, a pottery piece, or a handmade clay item, knowing how to properly glue clay back together can save your treasured items. This guide will walk you through the steps of how to glue clay back together, ensuring a durable and nearly seamless fix.
Why Clay Items Often Break
Clay items are naturally brittle due to their composition and the processes used to create them. Factors such as improper handling, exposure to extreme temperature changes, or physical impacts can lead to cracks or complete breakage.
Additionally, clay can suffer from weaknesses if it wasn’t fired properly during its creation, leaving it more susceptible to damage. Environmental conditions, like humidity or dry air, can also cause clay to weaken over time. Understanding these common causes of breakage can help you take precautions to protect your clay items from future damage.
Can You Glue Clay Back Together?
Yes, broken clay items can often be repaired using the right type of glue and techniques. The most commonly used adhesives for this purpose are epoxy or super glue, as both provide a strong bond suitable for ceramics and clay. Before gluing, it’s important to clean the broken edges of the clay piece to ensure the adhesive adheres properly.
Apply the glue sparingly but evenly, then press the pieces together carefully and hold them in place until the bond sets. For added strength, you may want to reinforce the repair with additional layers of glue on the seam after it has dried. Keep in mind that while gluing can restore the structural integrity of the item, it may not always make the damage completely invisible. To improve aesthetics, consider sanding the glued area lightly and applying paint or glaze to match the original finish.
10 Methods How to Glue Clay Back Together
1. Cleaning and Preparing the Broken Edges
The first critical step in gluing clay back together is meticulous preparation of the broken edges. Dirt, dust, or residual clay can prevent adhesives from bonding properly. Carefully clean both broken surfaces with a soft brush or cloth to remove any loose particles.

For ceramic clay, wiping the edges with rubbing alcohol can eliminate oils and improve adhesion. Avoid using water on porous or air-dry clays before gluing, as moisture may weaken the bond. Ensuring that the edges are dry and clean creates a strong foundation for the glue to hold the parts firmly.
2. Using Two-Part Epoxy Adhesive
Two-part epoxy adhesives are among the most reliable and durable options for repairing clay. These adhesives consist of a resin and hardener that, when mixed, form a strong, water-resistant bond. To use, mix equal parts of resin and hardener on a disposable surface, then apply a thin layer to one broken edge. Carefully align the pieces and press them together, holding firmly for a few minutes. Epoxy cures over several hours to a full day, developing a rigid joint. This method is especially suited for ceramic or polymer clay and is ideal for structural repairs that require strength.
3. Applying Cyanoacrylate (Super Glue) for Quick Repairs
Cyanoacrylate glue, commonly known as super glue, is a convenient choice for quick repairs on many types of clay. It dries rapidly and forms a strong bond on clean, dry surfaces. Apply a small drop of super glue to one edge, then carefully fit the pieces together. Avoid excess glue, which can cause unsightly residue. Hold the parts in place for 30 seconds to a minute to ensure bonding. While super glue is excellent for small cracks and clean breaks, it can become brittle over time and is less suitable for flexible or heavily stressed repairs.
4. Using Polyvinyl Acetate (PVA) Glue for Air-Dry Clay
For air-dry or paper-based clays, polyvinyl acetate glue, commonly called white glue or school glue, provides an effective and non-toxic adhesive option. PVA glue penetrates porous surfaces and dries clear with some flexibility, accommodating slight movements. To repair, apply a thin coat of PVA glue to both broken edges and press them together firmly. Use clamps or tape to hold the pieces in place until the glue dries, which typically takes several hours to overnight. PVA glue is ideal for lightweight repairs but less water-resistant than epoxy or super glue.

5. Mixing Clay Slip as Adhesive for Ceramic Pieces
When working with unfired or greenware ceramic clay, a traditional method involves using clay slip—liquid clay mixed with water—as an adhesive. To use slip for gluing, first score or scratch the broken edges lightly to increase surface area. Then apply slip generously to one edge and press the parts together, smoothing the joint with additional slip as needed. This method creates a chemical bond when the piece is later fired in a kiln, resulting in a seamless repair. Slip is unsuitable for fired ceramics or polymer clays but is essential in ceramic sculpting and wheel throwing.
6. Reinforcing Repairs with Fiberglass or Wire Mesh
For large or heavily broken clay pieces, simply gluing may not provide enough structural support. In such cases, reinforcing the repair with fiberglass mesh or thin wire is advisable. After applying the adhesive (epoxy or PVA), embed a small strip of fiberglass tape or wrap wire carefully around the joint to strengthen the bond. This reinforcement distributes stress and reduces the chance of re-breaking. Once the adhesive cures, excess reinforcement can be trimmed or concealed with additional clay or paint, ensuring both durability and aesthetics.
7. Using Clear Nail Polish for Minor Surface Cracks
For superficial cracks or minor chips that do not compromise structural integrity, clear nail polish can serve as a simple sealing and bonding agent. Clean the crack carefully, then brush several thin coats of clear polish along the damaged area, allowing each layer to dry before applying the next. This method helps prevent dirt ingress and keeps small cracks from worsening. While clear nail polish is not suitable for major breaks, it is a quick cosmetic fix for hairline fractures in polymer or air-dry clays.
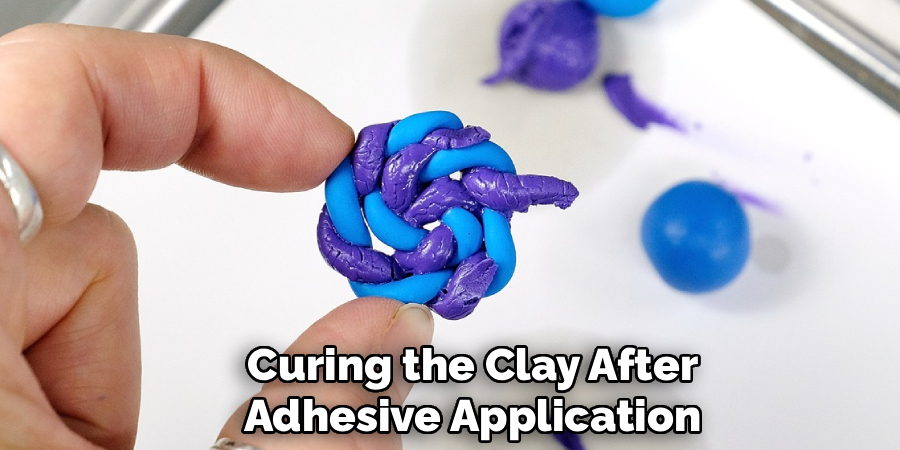
8. Heating Polymer Clay to Cure Repairs
When gluing polymer clay pieces, an additional method involves curing the clay after adhesive application. After bonding broken parts with super glue or epoxy, you can bake the repaired piece according to the clay manufacturer’s instructions. Heat helps solidify the clay further, improving overall strength and integration of the repair. If the break is clean and well-aligned, the baked joint can be almost invisible. Avoid overheating, which can cause discoloration or warping. This method is specific to polymer clay and not applicable to ceramic or air-dry varieties.
9. Filling Gaps with Epoxy Putty or Modeling Clay
Sometimes, broken pieces don’t fit perfectly together due to missing fragments or irregular breaks. In these cases, after gluing the main parts, fill any gaps with epoxy putty or matching modeling clay. Epoxy putty is malleable before curing and adheres well to most surfaces, allowing you to sculpt and smooth the repair area seamlessly. Once cured, it can be sanded and painted to match the original texture and color. This technique enhances both the structural integrity and visual continuity of the repaired object.
10. Finishing Touches: Sanding, Painting, and Sealing
After the glue or filler has fully cured, the final step is restoring the repaired area’s appearance. Light sanding with fine-grit sandpaper smooths rough edges and blends the joint with the surrounding surface. For polymer or ceramic clay, painting or glazing over the repair can camouflage any visible marks. Sealers or varnishes appropriate to the clay type protect the repair and restore surface sheen. Taking time with finishing touches elevates the repair from merely functional to aesthetically pleasing, extending the life and beauty of your clay piece.
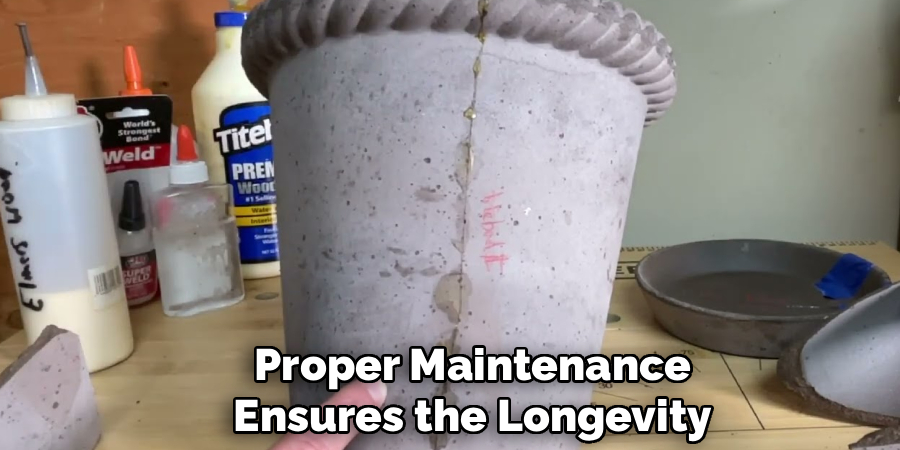
Maintenance and Upkeep
Proper maintenance ensures the longevity and continued beauty of your clay creations. To preserve their condition, keep clay pieces away from direct sunlight and excessive moisture, as these can cause fading, warping, or cracking over time. Regularly dust the surface with a soft, dry cloth to prevent dirt buildup, and handle delicate pieces with care to avoid accidental damage.
If your clay item is functional, such as a dish or sculpture, clean it gently using a damp cloth, avoiding harsh chemicals or abrasive materials that might damage the finish. Periodic inspections for any signs of wear or loosening in repairs will help you catch and address issues early, ensuring your piece remains in pristine condition for years to come.
Conclusion
Gluing clay back together requires not only the right adhesive but also thoughtful preparation, reinforcement, and finishing. Whether you opt for two-part epoxy for strength, PVA glue for air-dry clay, or clay slip for unfired ceramics, each method offers distinct advantages depending on your material and break type.
Reinforcement with fiberglass or filling gaps with epoxy putty can further enhance durability. Thanks for reading our blog post on how to glue clay back together! We hope you found it helpful and informative.
Specialization:
- Master of wheel-throwing, hand-building, and advanced glazing techniques
- Focus on creating both functional pottery and decorative art pieces
Recognition:
- Celebrated by collectors and art enthusiasts for creating one-of-a-kind pieces that blend artistry with functionality
- Participates in local and national exhibitions, earning accolades for his innovative designs and craftsmanship
Passion:
- Deeply committed to exploring and pushing the boundaries of ceramic artistry
- Continuously experiments with new materials, firing techniques, and artistic concepts to evolve his craft
Personal Philosophy:
- Believes in the transformative power of art, aiming to evoke emotions and connections through his ceramic creations
- Advocates for sustainability in ceramics, using eco-friendly materials and practices whenever possible