


Installing ceramic insulation in a kiln is an essential step to ensure optimal performance, energy efficiency, and durability. Proper insulation helps maintain consistent temperatures within the kiln, minimizes heat loss, and enhances the overall firing process.
Whether you’re working with a new kiln or upgrading an existing one, understanding the materials and techniques used for ceramic insulation is key to achieving the best results. This guide will walk you through the process of how to install ceramic insulation in a kiln, providing clear, step-by-step instructions to make the installation as smooth and effective as possible.
What is Ceramic Insulation?
Ceramic insulation is a high-temperature material designed to reduce heat loss and improve the thermal efficiency of kilns, furnaces, and other high-heat environments.
Typically made from ceramic fibers, these materials are lightweight, durable, and capable of withstanding extreme temperatures without losing their insulating properties. Ceramic insulation comes in various forms, including rigid boards, flexible blankets, and paper, allowing customization for different applications.
Its primary role is to retain heat within the kiln, ensuring consistent and efficient firing cycles. Additionally, ceramic insulation is known for its low thermal conductivity, resistance to thermal shock, and ability to endure rapid temperature changes, making it an indispensable component in kiln construction and maintenance.
Importance of Ceramic Insulation in Kilns
Ceramic insulation plays a vital role in the functionality of a kiln by ensuring efficient heat management. Without proper insulation, kilns can lose significant amounts of heat, leading to higher energy consumption and inconsistent firing results. Insulation helps to maintain a stable temperature within the kiln, which is critical for producing high-quality ceramics or glass.
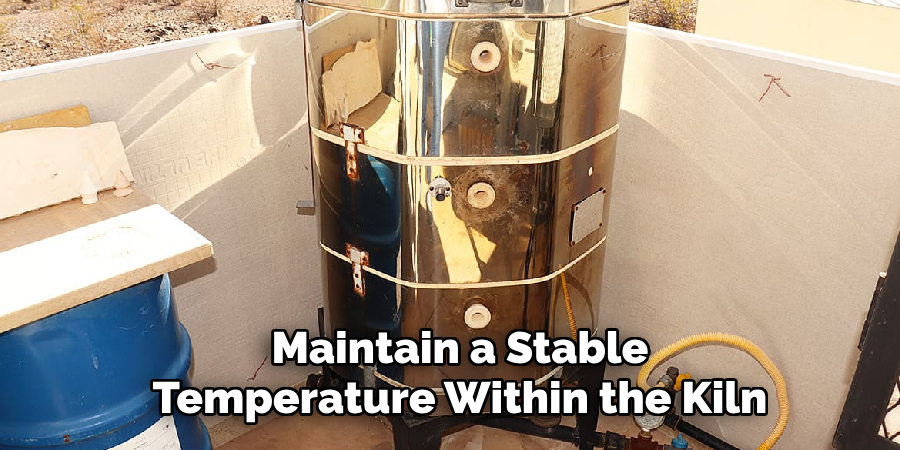
Additionally, effective insulation protects the outer surfaces of the kiln from overheating, ensuring safety for users and extending the life of the equipment. By reducing energy waste and improving firing accuracy, ceramic insulation is essential for both professional and hobbyist kiln users.
Types of Ceramic Insulation
Ceramic insulation is available in several types, each suited to specific applications and kiln designs. The most common types include ceramic fiber blankets, rigid boards, ceramic fiber paper, and insulating fire bricks.
Ceramic Fiber Blankets
These are lightweight, flexible materials made from interwoven ceramic fibers. Ceramic fiber blankets are easy to cut and shape, making them ideal for lining kiln walls, doors, and roofs. They offer excellent thermal efficiency and can withstand high temperatures, often up to 2400°F (1315°C).
Rigid Boards
Rigid boards are made by compressing ceramic fibers into a solid, durable form. They provide excellent structural support and high insulation properties. Rigid boards are commonly used for kiln chambers or areas subject to mechanical stress where a firm surface is necessary.
Ceramic Fiber Paper
This thin, flexible material is produced by layering ceramic fibers into a compact sheet. Ceramic fiber paper is mainly used as an additional insulation layer, gasket material, or backing layer for kiln components. It offers excellent thermal insulation and is easy to install in small gaps or hard-to-reach areas.
Insulating Fire Bricks (IFBs)
Insulating fire bricks are lightweight bricks designed for high thermal resistance and low heat conductivity. These bricks are often used to construct the structure of the kiln, providing both thermal insulation and stability. They are available in various sizes and grades to match kiln specifications.
10 Methods How to Install Ceramic Insulation in a Kiln
1. Choose the Right Type of Ceramic Insulation
Selecting the appropriate insulation material is crucial for achieving the desired results. Ceramic fiber blankets, boards, or bricks are common options. For high-temperature kilns, ceramic fiber blankets are lightweight and easy to install, while ceramic bricks provide better structural integrity.
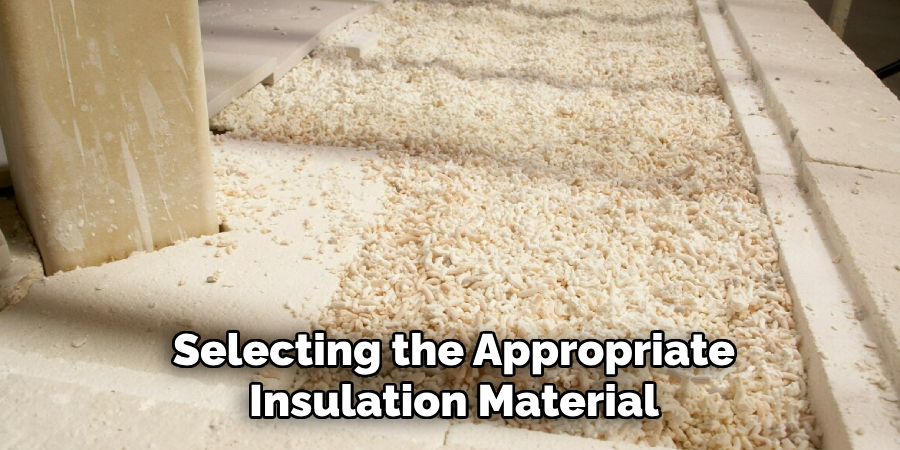
Consider the kiln’s intended use, temperature requirements, and budget to make the best choice. Always purchase materials rated for the maximum operating temperature of your kiln.
2. Plan and Measure the Interior Dimensions
Accurate measurements of the kiln’s interior are vital before installing insulation. Use a tape measure to record the length, width, height, and curves of the kiln walls and roof.
Create a detailed sketch of the interior layout to ensure you purchase the correct amount of insulation. Keep in mind that precise cuts will be necessary to avoid gaps, which can lead to heat loss or inefficiencies during firing.
3. Prepare the Kiln Surface for Installation
Before installing insulation, thoroughly clean the kiln’s interior surfaces to remove debris, dust, or residue from previous firings. Use a vacuum or a soft-bristle brush to clean every nook and cranny.
Smooth out any irregularities in the kiln walls or floor using a grinder or sandpaper. A clean, even surface ensures better adhesion and fit for the insulation material.
4. Cut Ceramic Insulation to Fit
Cutting ceramic insulation to the correct size is a delicate yet essential step. Use a utility knife or specialized ceramic cutting tools to achieve clean, precise edges. For curved sections of the kiln, consider making templates from cardboard or paper to guide your cuts.
Always wear appropriate protective gear, such as gloves and a mask, as ceramic fibers can irritate the skin and respiratory system during handling.
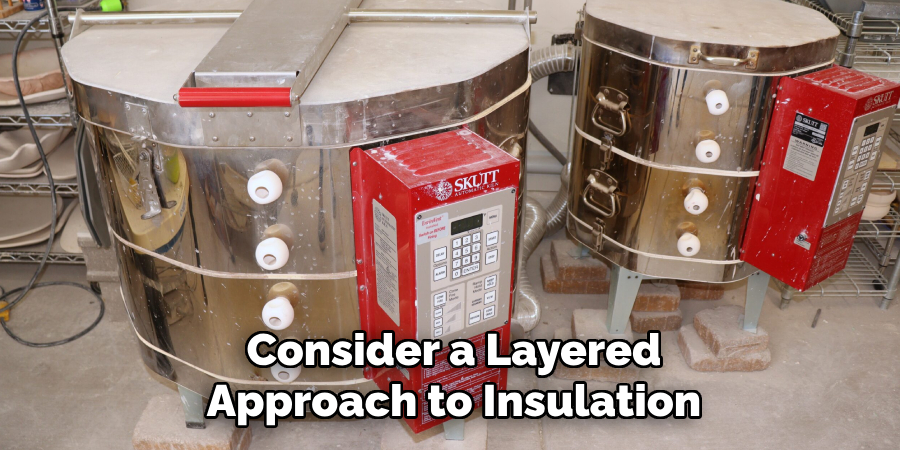
5. Install a Layered Insulation System
For optimal thermal efficiency, consider a layered approach to insulation. Begin with a dense layer, such as ceramic fiber board or refractory bricks, to provide structural support.
Add subsequent layers of ceramic fiber blankets for enhanced thermal resistance. Secure each layer with high-temperature adhesives, pins, or clips designed for kilns. Overlapping seams between layers helps prevent heat leaks and ensures uniform insulation.
6. Anchor Insulation Securely
Anchoring is essential to keep insulation in place, especially for vertical walls and the kiln ceiling. Use high-temperature stainless-steel anchors or pins to secure ceramic fiber blankets or boards.
Drill holes into the kiln frame if necessary, ensuring anchors are spaced evenly for maximum stability. When attaching the insulation, avoid over-tightening, as this can compress the material and reduce its insulating properties.
7. Seal Gaps and Joints Effectively
Small gaps between insulation panels can lead to significant heat loss and uneven temperature distribution inside the kiln. Use high-temperature ceramic sealants or refractory mortars to fill gaps and joints between insulation pieces.
Smooth out the sealant with a trowel or gloved hand to create a uniform surface. Allow the sealant to cure as per the manufacturer’s instructions before proceeding with further installation steps.
8. Install an Insulated Kiln Door
The kiln door is a critical area for heat retention and requires special attention. Line the interior of the door with the same type of insulation used for the walls.
Attach insulation to the door using high-temperature adhesive and secure it with pins or screws. Ensure that the door seals tightly when closed to prevent heat loss. Installing a flexible ceramic fiber gasket along the door frame can further enhance the seal.
9. Test the Insulation for Stability
Once the insulation is installed, test its stability by gently pressing along the walls and roof to ensure it’s securely anchored. Check for loose sections or areas where the material might sag.
For ceramic blankets, adjust anchors as needed. If any gaps or weak points are found, address them immediately with additional insulation material or adhesive.
10. Perform a Low-Temperature Firing Test
Before using the kiln for high-temperature firings, perform a low-temperature test firing to evaluate the insulation’s effectiveness.
Gradually increase the temperature and monitor the kiln’s heat retention and distribution. Check the exterior of the kiln for cold spots, which might indicate insufficient insulation. Address any issues identified during the test firing to ensure the kiln performs efficiently during regular use.
Troubleshooting Common Issues
Even with proper installation, you may encounter some challenges when working with kiln insulation. Below are some common issues and their troubleshooting methods:
1. Heat Loss Through Gaps or Cracks
Cause: Poorly sealed joints, gaps in insulation, or deteriorated materials can lead to significant heat loss.
Solution: Inspect the kiln for visible gaps, cracks, or loose insulation. Use high-temperature ceramic sealants, refractory mortars, or additional insulation material to fill and repair these areas. Regular maintenance checks can help prevent this issue.
2. Sagging or Detached Insulation
Cause: Improper anchoring, insufficient adhesive use, or wear and tear over time can cause insulation to sag or detach.
Solution: Re-secure the insulation using high-temperature stainless-steel anchors or pins. Replace damaged or weakened anchors if necessary. Ensure adhesives are applied uniformly and allow adequate curing time as specified by the manufacturer.
3. Uneven Heat Distribution
Cause: Insufficient insulation in specific sections of the kiln or improper layering of insulation materials.
Solution: Identify the affected areas by monitoring temperature gradients during test firing. Add extra layers of insulation to cold spots, ensuring proper coverage and overlapping seams between layers to prevent heat leaks.
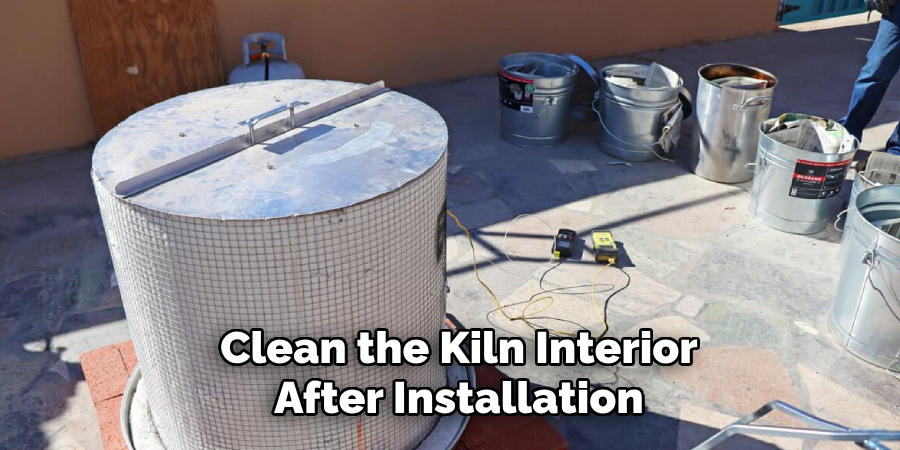
4. Dust or Fibers Released During Firing
Cause: Loose ceramic fibers or debris left from installation may become airborne during firings.
Solution: Thoroughly clean the kiln interior after installation using a vacuum and soft-bristle brush. Seal the surface of ceramic fiber materials with high-temperature rigidizers or coatings to minimize fiber shedding.
Conclusion
Installing ceramic insulation in a kiln requires careful planning, precision, and attention to detail. By following these ten methods, you can ensure your kiln is well-insulated, energy-efficient, and capable of maintaining consistent firing temperatures. So, there you have it – a quick and easy guide on how to install ceramic insulation in a kiln.
Specialization:
- Master of wheel-throwing, hand-building, and advanced glazing techniques
- Focus on creating both functional pottery and decorative art pieces
Recognition:
- Celebrated by collectors and art enthusiasts for creating one-of-a-kind pieces that blend artistry with functionality
- Participates in local and national exhibitions, earning accolades for his innovative designs and craftsmanship
Passion:
- Deeply committed to exploring and pushing the boundaries of ceramic artistry
- Continuously experiments with new materials, firing techniques, and artistic concepts to evolve his craft
Personal Philosophy:
- Believes in the transformative power of art, aiming to evoke emotions and connections through his ceramic creations
- Advocates for sustainability in ceramics, using eco-friendly materials and practices whenever possible