


Are you looking for a way to give your tiled walls a professional and finished look? Installing tile edging trim on walls is the perfect solution. Not only does it provide a clean and polished appearance, but it also protects the edges of your tiles from damage.

How to install tile edging trim on wall is an essential finishing touch that provides both functionality and aesthetics to your tiling project. Trim adds a polished look, covering up unfinished tile edges and protecting them from chipping or damage. Whether tiling a bathroom, kitchen backsplash, or any other wall surface, incorporating tile edging trim is a straightforward process that can significantly enhance the overall appearance.
This guide will take you through the necessary steps and considerations to ensure a successful installation, ensuring your tile work looks professional and lasts for years.
What Will You Need?
Before we dive into the installation process, make sure you have all the necessary tools and materials. Here are the essential items you will need:
- Tile edging trim
- Measuring tape
- Pencil or marker
- Miter saw or hacksaw
- Adhesive (liquid nails)
- Caulk gun
- Level
- Grout
Once you have gathered all the necessary materials, let’s get started!
9 Easy Steps on How to Install Tile Edging Trim on Wall
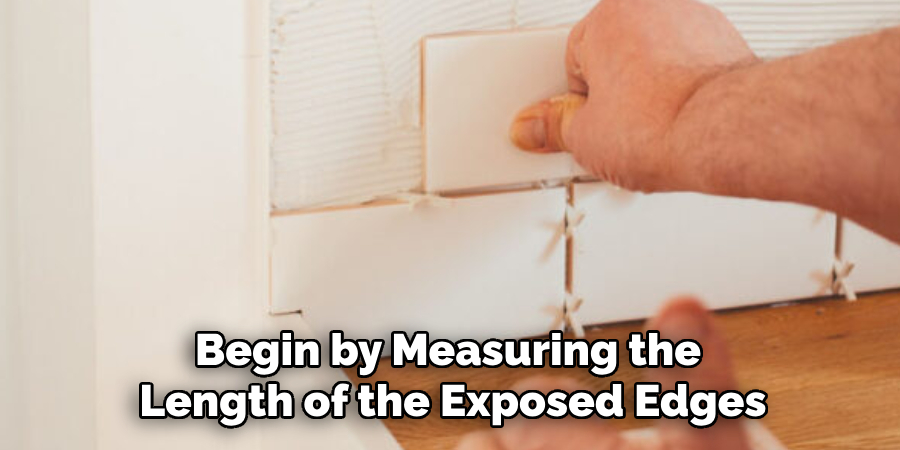
Step 1. Measure and Cut the Trim
Begin by measuring the length of the exposed edges where you plan to install the tile edging trim. Use a measuring tape to get precise measurements and mark the desired length on the trim using a pencil or marker. It’s crucial to be accurate in this step to ensure a seamless finish. Next, use a miter saw or hacksaw to carefully cut the trim at the marked points. If your trim will need to go around corners or meet another section at a 90-degree angle, cut the ends of the trim at a 45-degree angle for a neat look. Make sure to test fit the trim pieces in place before proceeding to ensure they align correctly with the tile edges.
Step 2. Apply Adhesive to the Trim
Once you have cut your trim pieces to size and confirmed their fit, it’s time to secure them to the wall. Load the caulk gun with liquid nails or your chosen adhesive. Carefully apply a thin, even layer of adhesive along the length of the trim, focusing on the areas that will come into contact with the wall. Be careful not to apply too much glue to avoid squeezing out and creating a mess. If any adhesive does ooze out, promptly wipe it away with a damp cloth. Proper application is essential to ensure the trim adheres firmly and maintains its position over time.
Step 3. Position and Secure the Trim
With the adhesive applied, position the tile edging trim carefully along the measured edge of your tile. Start by placing one end of the trim onto the wall and gently press it into place, ensuring the trim aligns perfectly with the tile edge. Use a level to check that it’s straight and adjust as needed. Press the trim evenly along its entire length, securing it firmly against the wall. If you’re working around corners or other trims, ensure that any mitered cuts align neatly and press together for a seamless joint. Allow the adhesive to set according to the manufacturer’s instructions before moving on to the next step.
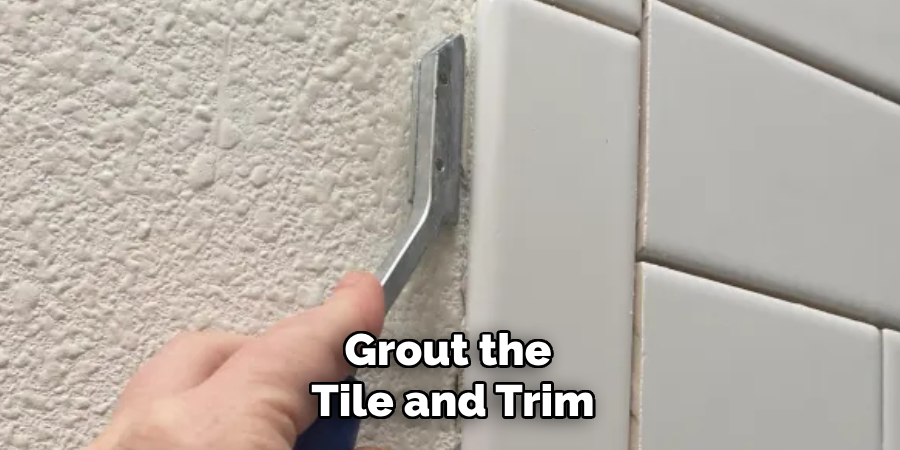
Step 4. Grout the Tile and Trim
Once the trim is securely attached and the adhesive has cured, it’s time to grout the tile and trim. Apply grout to the joints between the tiles and the trim using a grout float at a 45-degree angle. Ensure you press the grout into the joints thoroughly to fill all gaps. Remove excess grout from the surface by holding the float at an angle and scraping it diagonally across the tiles. Afterward, use a damp sponge to wipe away any remaining grout residue, and be careful not to disturb the grout lines. Proper grouting ensures that the tile and trim look cohesive and enhances the structural integrity of the installation. Allow the grout to dry for the recommended time before proceeding to the final steps.
Step 5. Apply Caulk to the Edges
After the grout has fully dried, applying caulk is the next step to ensure a watertight and seamless finish along the edges of the tile edging trim. Begin by selecting a caulk that matches the color of your grout or is transparent, depending on the desired look. Load the caulk into the caulk gun and cut the nozzle at a 45-degree angle for a more straightforward application. Gently apply a continuous bead of caulk along the edges where the trim meets the wall and at any joints where sections of trim meet. Smooth the caulk with a caulking tool, or your finger dipped in water to create a clean, unified edge. The caulk is a barrier against moisture and helps prevent mildew growth, ensuring the longevity of your installation.
Step 6. Final Inspection and Cleanup
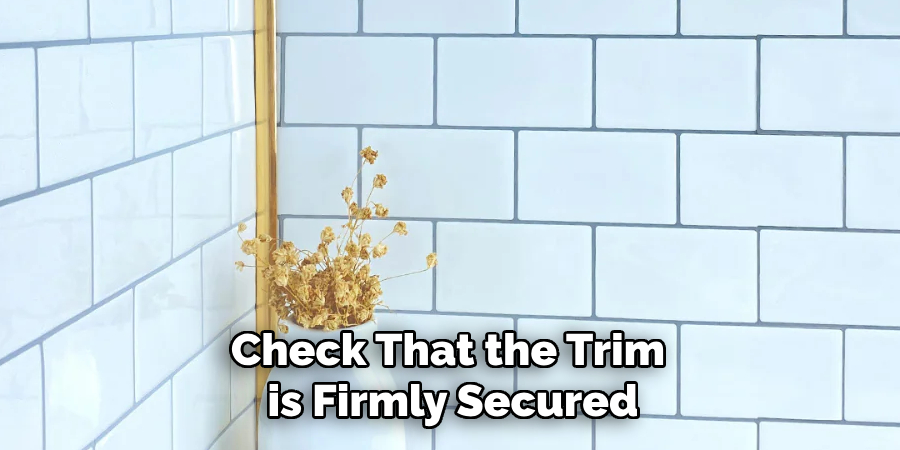
Once all the significant steps are complete, conducting a thorough final inspection of your work is essential. Carefully examine the trim, grout, and caulk to ensure everything is in place and no adjustments are needed. Look for any gaps, uneven sections, or excess materials that may affect the overall appearance and integrity of the installation. If any issues are identified, take the time to address them adequately. For instance, if there’s any excess caulk or grout, gently remove it using an appropriate tool.
Additionally, check that the trim is firmly secured and that there are no loose sections, often indicative of insufficient adhesive application. Cleanup involves wiping down the tiles and trim to remove fingerprints, adhesive smears, or grout haze. A clean, soft cloth or sponge can assist in bringing out the fresh, new look of your work. Properly disposing of waste materials and safely storing your tools will conclude the installation process, leaving you with a tidy workspace. Conducting a final inspection and cleanup instills confidence in the quality of your work and ensures that the installation is both durable and visually appealing, standing the test of time.
Step 7. Maintenance and Care
Proper maintenance and care are essential to ensure the longevity and pristine appearance of your tile edging trim and installed tiles. Regularly clean the tiled area with a non-abrasive cleaner to remove dirt and mildew, which can degrade the tile and grout over time. Avoid using harsh chemicals or scrubbing pads that could scratch the tiles or damage the caulk. Instead, opt for mild, soapy water and a soft cloth or sponge. Check the caulk and grout periodically for any signs of cracking or shrinkage, and promptly address these issues to prevent water intrusion. Repair any compromised areas by reapplying caulk or grout as necessary. Routine inspection and maintenance will preserve the aesthetic appeal of your installation and protect it from moisture damage and wear, ensuring it remains a beautiful part of your space for years to come.
Step 8. Troubleshooting Common Issues
Even with careful planning and execution, sometimes issues can arise during or after the installation of tile edging trim. One common problem is the trim not adhering properly, often due to insufficient adhesive or uneven surfaces. To resolve this, remove the trim carefully, clean off any old adhesive, and reapply with a fresh, even layer. Another potential issue is uneven grout lines, which can occur if the grout isn’t applied consistently. Sand or grind down uneven areas carefully, then regrout as needed. If the caulk begins to peel or crack, it may be due to poor-quality caulk or application in an area with excess moisture. In this case, remove the old caulk, clean the area thoroughly, and apply the new caulk.
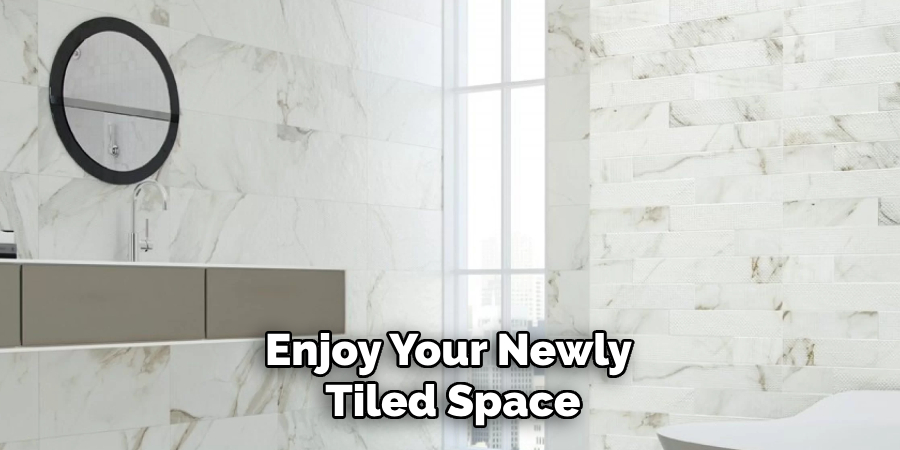
Step 9. Enjoy Your Finished Space
After completing all the installation and maintenance procedures, it’s time to enjoy your newly tiled space with its expertly installed edging trim. Whether it’s a kitchen backsplash, bathroom wall, or any other tiled area, the clean lines and polished look will add a touch of elegance to your home. Take a moment to admire the craftsmanship and effort of creating such a beautiful finish. The refreshed look of the space can entirely transform the atmosphere, making it feel more modern, inviting, and functional. As you utilize the space, take pride in knowing that the quality of your work ensures durability and style that will last for years.
By following these steps and tips, you can successfully install tile edging trim and achieve a professional-looking finish that adds both style and function to your tiled space.
Conclusion
How to install tile edging trim on wall is an effective way to enhance the aesthetic appeal and durability of your tiled surfaces.
You can achieve a professional-quality finish by following a systematic approach, from preparation to final touches. The process begins with careful selection of materials and meticulous planning to ensure the trim complements the space’s overall design. Attention to detail is paramount at each step, from cutting and installing the trim to applying caulk and performing a thorough cleanup. Regular maintenance and addressing common issues keep the installation fresh and intact.
Ultimately, this project showcases your craftsmanship and adds value to your home by updating the look of your tiled areas with clean, defined edges. Whether for a novice or an experienced DIY enthusiast, these guidelines are a comprehensive resource for achieving stunning results in tile trim installation.
Specialization:
- Master of wheel-throwing, hand-building, and advanced glazing techniques
- Focus on creating both functional pottery and decorative art pieces
Recognition:
- Celebrated by collectors and art enthusiasts for creating one-of-a-kind pieces that blend artistry with functionality
- Participates in local and national exhibitions, earning accolades for his innovative designs and craftsmanship
Passion:
- Deeply committed to exploring and pushing the boundaries of ceramic artistry
- Continuously experiments with new materials, firing techniques, and artistic concepts to evolve his craft
Personal Philosophy:
- Believes in the transformative power of art, aiming to evoke emotions and connections through his ceramic creations
- Advocates for sustainability in ceramics, using eco-friendly materials and practices whenever possible