


Are you an artist or potter using an electric kiln to fire your clay creations? If so, you know how important it is to maintain your kiln to ensure it continues functioning efficiently.
Proper maintenance of an electric kiln is essential to ensure its efficiency, longevity, and safety. Regular upkeep can prevent costly repairs and ensure consistent firing results, whether you’re a professional ceramist or a hobbyist. Maintenance involves cleaning, inspecting key components, and addressing any wear and tear before it leads to more significant issues.
By dedicating time to care for your kiln, you protect your investment and ensure the quality of your projects. This guide will cover the fundamental steps of how to maintain an electric kiln.
What Are the Benefits of Maintaining Your Electric Kiln?
As with any equipment, regular maintenance offers numerous benefits. Here are some advantages to keeping your electric kiln in top condition:
- Efficiency: A well-maintained kiln can operate optimally, meaning lower energy costs and faster firing times.
- Safety: By regularly inspecting and cleaning your kiln, you can identify potential hazards, such as worn or damaged wires, before they become a safety concern.
- Cost Savings: Proper maintenance prevents significant breakdowns and costly repairs, saving you money in the long run.
- Consistency: A maintained kiln will produce consistent results, allowing for more reliable and predictable firings.
These are just some of the benefits of maintaining your electric kiln. Now, let’s dive into the steps you can take to ensure it stays in top shape.
What Will You Need?
Before you begin, gather the following materials:
- A soft-bristled brush or vacuum cleaner
- A shop vac or compressed air canister
- Mild soap and water
- Refractory cement (if needed)
Let’s get started!
10 Easy Steps on How to Maintain an Electric Kiln
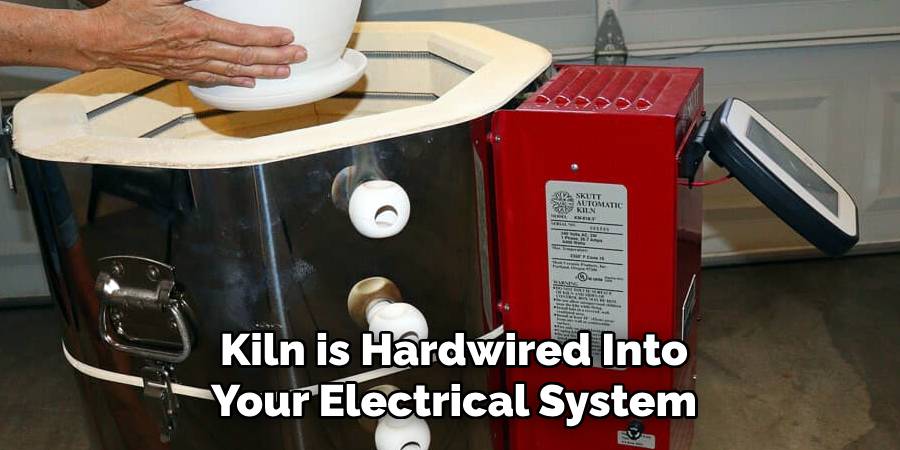
Step 1: Turn Off and Disconnect the Kiln
Safety should always be your top priority when working with an electric kiln. Before beginning any maintenance, ensure the kiln is turned off and unplugged from its power source. If your kiln is hardwired into your electrical system, switch off the corresponding circuit breaker to ensure no electricity flows to the unit. This step reduces the risk of electric shock and ensures you work in a safe environment. Additionally, it’s a good idea to wait until the kiln is cool to the touch after its last use, as many components may retain heat for hours after firing. Taking these precautions not only safeguards you but also prevents accidental damage to sensitive parts of the kiln during maintenance.
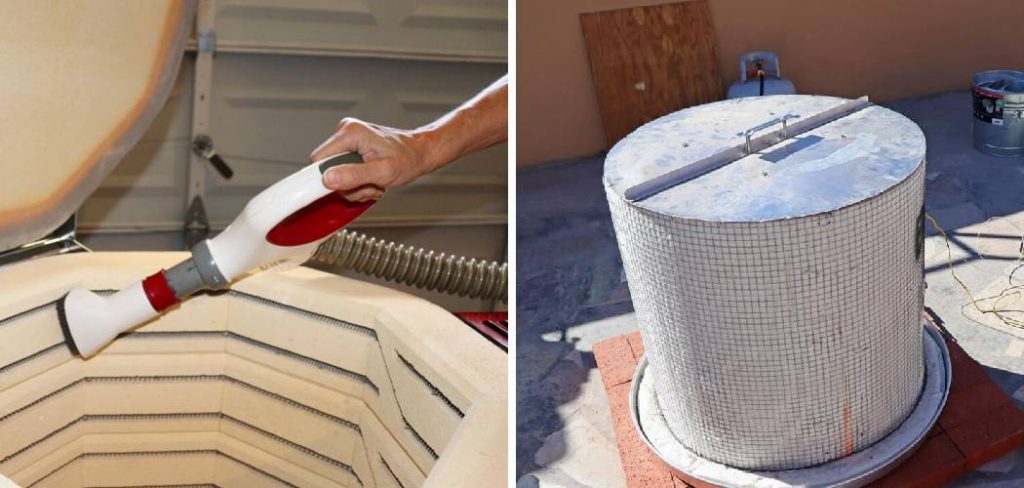
Step 2: Remove and Clean the Shelves
Begin by carefully removing the kiln shelves and setting them aside. Use a soft-bristled brush or vacuum cleaner to gently remove any debris, such as kiln wash flakes or accumulated dust, from the surface of the shelves. If the shelves have stubborn residue stuck to them, you can lightly sand the affected spots or wash them with mild soap and water, then allow them to dry completely before reinserting them into the kiln. Regular cleaning of the shelves helps maintain a smooth firing surface and prevents imperfections from transferring to your work.
Step 3: Inspect and Clean the Kiln Interior
After removing the shelves, carefully examine the kiln’s interior walls, floor, and ceiling for any signs of damage, such as cracks or loose brick pieces. Use a vacuum cleaner with a soft brush attachment to gently clean the interior, removing dust, debris, and loose kiln wash. Be cautious not to scratch or damage the kiln’s lining during this process. If you notice any significant damage, such as large cracks in the firebrick, consider consulting a professional for repairs before continuing use. Regular inspection and cleaning of the interior help prolong the kiln’s lifespan and ensure consistent firing results.
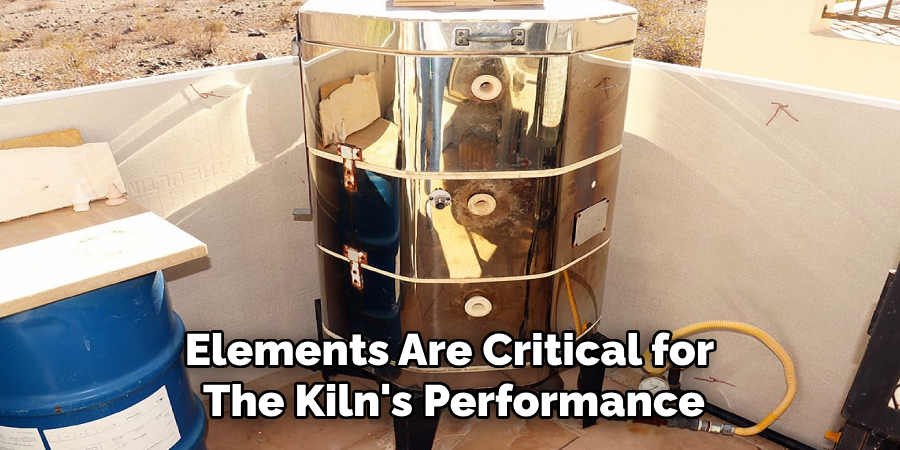
Step 4: Check and Maintain Kiln Elements
Inspect the kiln’s heating elements for signs of wear, such as sagging, corrosion, or breaks. These elements are critical for the kiln’s performance, providing the necessary heat for firing. If you notice any issues, such as uneven heating during previous firings, it may indicate the need to replace worn elements. Use a soft brush or compressed air to gently remove dust or debris from the elements, being cautious not to damage them. Additionally, check the element grooves to ensure the elements are securely seated. Maintaining the heating elements ensures proper kiln operation and consistent temperature distribution.
Step 5: Inspect the Kiln Door or Lid
Ensure the kiln door or lid functions correctly and seals tightly when closed. Check the hinges, latches, or any other mechanisms for wear or damage that could compromise the seal. A proper seal is essential for maintaining consistent temperatures during firings. Inspect the door or lid gasket for cracks, hardening, or other signs of degradation, as a damaged gasket can lead to heat loss. Replace the gasket if necessary to avoid uneven heating. Maintaining the door or lid ensures efficient kiln operation and prevents heat leakage.
Step 6: Test the Kiln’s Safety Features
Verify that all the kiln’s safety features are functioning correctly. Check the operation of the kiln’s temperature controller to ensure it accurately monitors and regulates the firing process. Inspect the thermocouple for wear, corrosion, or other damage, as a faulty thermocouple can result in inaccurate temperature readings. Test any emergency shutoff mechanisms and confirm that the kiln automatically shuts down at the designated temperature if required. Ensuring the safety features are in good working condition is crucial for preventing accidents and maintaining a safe firing environment.
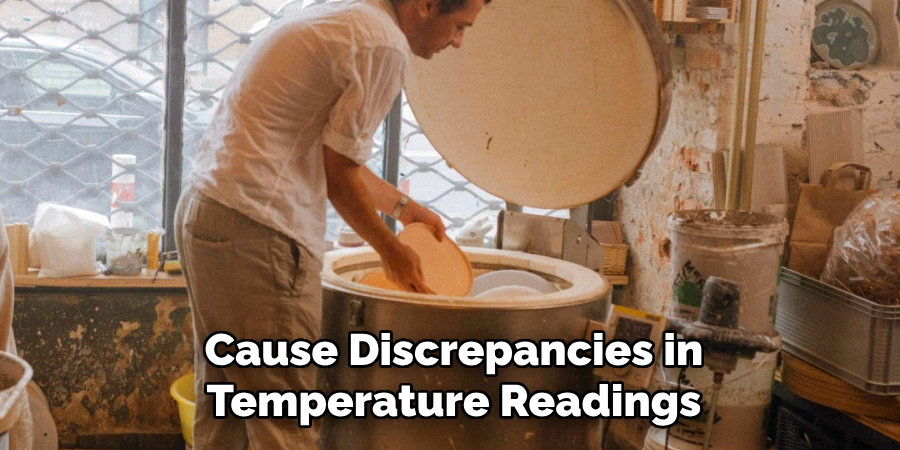
Step 7: Calibrate the Kiln Regularly
Periodic calibration of the kiln is essential to maintain firing accuracy. Over time, factors such as thermocouple wear and controller drift can cause discrepancies in temperature readings. Use a reliable pyrometer to compare the kiln’s displayed temperature with the actual temperature inside the chamber. Adjust the temperature controller as needed to ensure precise firing conditions. Regular calibration helps achieve consistent results, especially for projects requiring tight temperature tolerances and prolongs the life of the kiln and its components.
Step 8: Perform Routine Maintenance
Regular maintenance is key to extending the lifespan of the kiln and ensuring consistent performance. Inspect the kiln’s elements for signs of wear or damage, such as breaks or uneven discoloration, which may indicate the need for replacement. Clean the kiln interior to remove residue, dust, or glaze drips that could affect future firings. Additionally, check the door or lid seals for wear and ensure they create a proper seal when closed. Keeping the kiln in optimal condition minimizes the risk of malfunctions and supports safe and efficient operation over time.
Step 9: Monitor Firing Cycles
Carefully monitoring firing cycles is essential to achieving desired results and maintaining the kiln’s performance. Observe the temperature rise and ensure it follows the programmed schedule without sudden spikes or drops. Use a firing log to document each cycle, including temperature settings, duration, and any issues encountered. This data can help diagnose problems and refine firing programs for future projects. Regularly reviewing firing logs allows you to identify patterns or inconsistencies, aiding in achieving consistent and reliable outcomes.
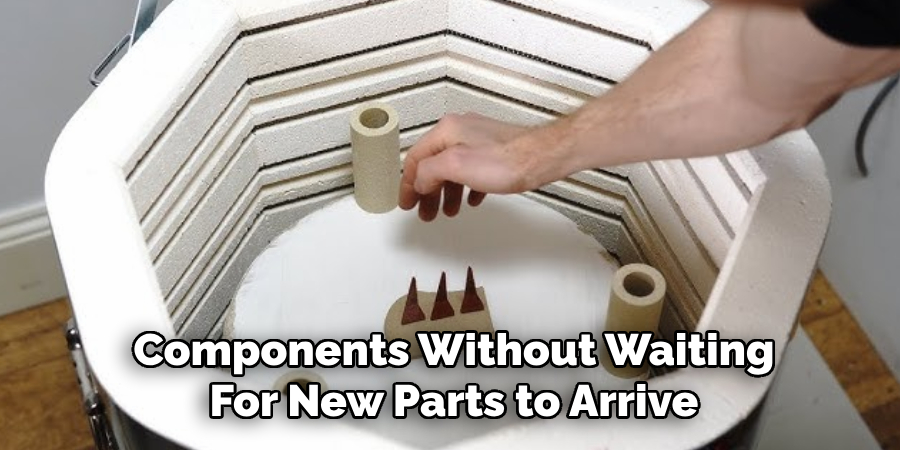
Step 10: Keep a Spare Parts Kit
To be prepared for unforeseen issues or malfunctions, keep a spare parts kit on hand, including elements, fuses, and thermocouples. This will allow you to quickly replace essential components without waiting for new parts to arrive. Additionally, keeping spare parts can save time and reduce potential downtime during busy production periods. It is also advisable to have contact information for a professional kiln technician in case of more complex repairs or maintenance needs.
Following these steps and regularly maintaining your kiln can ensure optimal performance and extend its lifespan.
5 Things You Should Avoid
- Overloading the Kiln: Avoid overloading your kiln with too many pieces or arranging items too closely. Overloading can lead to uneven heating, damage to your ceramic pieces, and increased strain on the kiln’s components, ultimately shortening its lifespan.
- Skipping Routine Cleaning: Neglecting to clean your kiln regularly can lead to the accumulation of dust, debris, and glaze drips, which can stick to the kiln shelves or elements. These residues can impair the kiln’s functionality and result in defects in future firings.
- Using the Wrong Temperature Settings: Always ensure you are firing at the appropriate temperature for the materials and glazes you use. Running your kiln at temperatures higher or lower than recommended can damage your work and harm the kiln’s components, such as the elements and thermocouples.
- Ignoring Small Repairs: Failing to address minor issues, such as cracks in the kiln bricks or loose wires, can lead to significant problems over time. It’s crucial to fix minor repairs promptly to prevent further damage and ensure the kiln operates safely and efficiently.
- Operating Without Ventilation: Running your kiln without proper ventilation can lead to harmful fumes and heat buildup in your workspace. Ensure that your kiln room has adequate ventilation to protect your health and maintain a safe environment.
Conclusion
Proper maintenance of an electric kiln is essential for ensuring its longevity, safety, and reliable performance. Regular cleaning, monitoring temperature settings, addressing small repairs promptly, and ensuring adequate ventilation are all critical steps to keep your kiln in optimal condition.
By following these guidelines and staying attentive to the signs of wear and tear, you can extend the lifespan of your kiln and achieve consistent, quality results in your ceramic work. Remember, a well-maintained kiln is the key to both safety and creativity in your studio.
Hopefully, the article on how to maintain an electric kiln has been informative and helpful. Happy firing!
Specialization:
- Master of wheel-throwing, hand-building, and advanced glazing techniques
- Focus on creating both functional pottery and decorative art pieces
Recognition:
- Celebrated by collectors and art enthusiasts for creating one-of-a-kind pieces that blend artistry with functionality
- Participates in local and national exhibitions, earning accolades for his innovative designs and craftsmanship
Passion:
- Deeply committed to exploring and pushing the boundaries of ceramic artistry
- Continuously experiments with new materials, firing techniques, and artistic concepts to evolve his craft
Personal Philosophy:
- Believes in the transformative power of art, aiming to evoke emotions and connections through his ceramic creations
- Advocates for sustainability in ceramics, using eco-friendly materials and practices whenever possible