


Ceramic cat figurines are a delightful and imaginative pottery project that captures the charm and personality of our feline friends. Whether you are a complete beginner or a seasoned artist, crafting a ceramic cat is a rewarding way to explore your creativity. But why make a ceramic cat? These figurines make wonderful additions to home décor, serve as thoughtful personalized gifts, or can even become a unique piece in a pottery collection. Beyond their aesthetic appeal, creating your own ceramic cat allows you to experiment with shaping, detailing, and glazing techniques.
This article serves as a comprehensive step-by-step guide on how to make a ceramic cat. From gathering the necessary materials to sculpting, drying, firing, and glazing your piece, this guide will provide everything you need to bring your ceramic creation to life.

Materials and Tools Needed
Gathering the right materials and tools before starting your ceramic cat project is essential to ensure a smooth creative process. Below is a list of what you’ll need:
Clay Types
- Air-dry clay – Ideal for beginners or projects that don’t require firing. It hardens as it dries naturally.
- Kiln-fired clay – Choose from earthenware, stoneware, or porcelain for more durable and professional-looking creations, but these require access to a kiln.
Tools Required
- Sculpting tools – These include loop tools, a wire cutter, and wooden modeling tools for shaping and refining details.
- Rolling pin – Use to flatten clay evenly if making smooth surfaces.
- Water and sponge – Essential for keeping the clay moist and smoothing rough edges during sculpting.
- Needle tool – This is Perfect for adding textures like fur details or carefully crafting facial features.
- Slip or scoring tool – Necessary for securely attaching separate clay parts, such as attaching the ears, tail, or limbs.
Additional Materials
- Kiln – Required to fire and harden kiln-fired clay.
- Glazes or acrylic paints – These are used to decorate and finish your ceramic cat as desired, adding color and personality to your creation.
With these materials and tools ready, you are all set to begin sculpting your very own ceramic masterpiece!
Designing Your Ceramic Cat
Choosing the Style
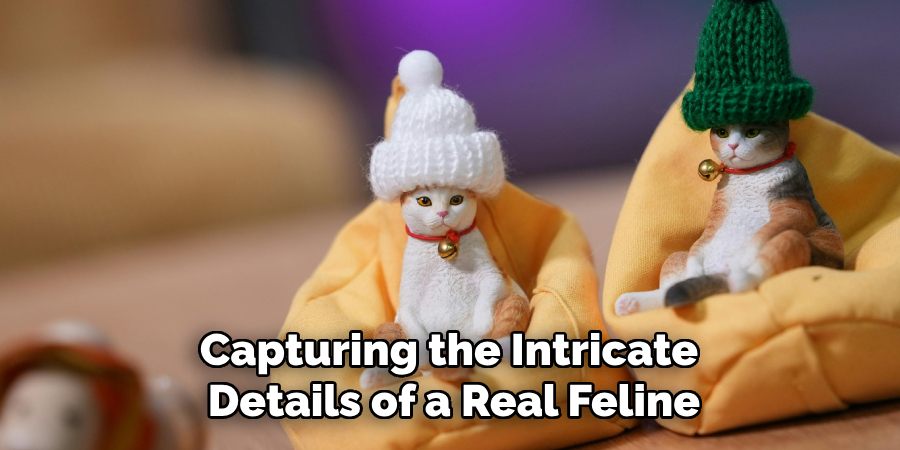
Before beginning your ceramic cat sculpture, decide on a style that resonates with you. Should it have a realistic appearance, capturing the intricate details of a real feline, or a cartoonish design that emphasizes playful, exaggerated features? The style you choose will influence your approach to sculpting and detailing. Next, consider the pose of your ceramic cat. Would you prefer it sitting regally, lying down in a relaxed posture, or standing in a dynamic pose? The chosen pose will communicate the personality and essence of your creation, so take your time exploring which option best aligns with your vision.
Sketching the Shape
Once you’ve decided on the style and pose, sketching a rough outline of your cat is helpful. These sketches will guide the overall shape and proportions of your sculpture. Start with basic shapes to define the body, head, and limbs, ensuring they complement each other harmoniously. Pay attention to details like the size and position of the eyes, the curve of the whiskers, and the texture of the fur. Planning these elements beforehand will make the sculpting process more intuitive and result in a more cohesive and well-proportioned ceramic cat.
How to Make a Ceramic Cat: Sculpting the Basic Shape
Creating the basic structure of your ceramic cat is the foundation for a successful final piece. Carefully following these steps will help you achieve the desired form for your sculpture.
Step 1: Forming the Body
Start by rolling a chunk of clay into a smooth ball or oval, depending on the pose you’d like your cat to take. For a seated cat, an upright oval shapes the torso, while a flatter oval may be better suited for a lying-down pose. Gently mold and taper the base to ensure it balances on a flat surface. Pay close attention to the proportions, keeping the body in line with your planned dimensions and sketches.
Step 2: Creating the Head
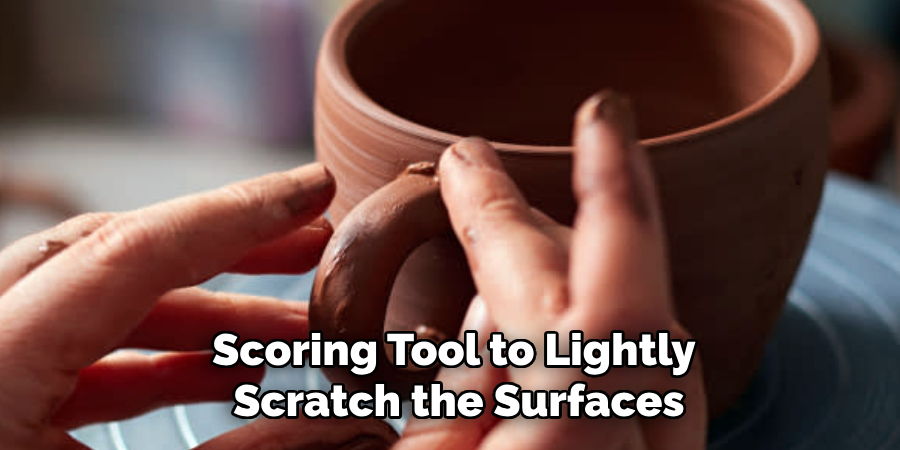
Next, form a separate ball of clay for the cat’s head. Adjust the size to ensure it looks proportional to the body. Use a scoring tool to lightly scratch the surfaces on both the body and head where they will connect. Apply slip—liquid clay used as an adhesive—before securely attaching the head to the body. Smooth the edges at the joint to create a seamless transition.
Step 3: Shaping the Ears and Tail
Pinch and shape small amounts of clay to form the ears. Adjust their size, angle, and position as per your design, keeping in mind the natural curvature of a cat’s ears. Roll out a piece of clay into a thin cylinder for the tail. Please attach it to the body using the same scoring and slip technique. Position the tail to flow naturally with the cat’s pose, whether curled around the body or stretched along the surface.
Adding Facial Features and Details
Step 1: Eyes, Nose, and Mouth
Start by carefully sculpting the facial features of your clay cat. Use a needle tool or a similar fine-tipped instrument to etch delicate lines for the mouth, ensuring symmetry and balance. For the nose, press a small piece of clay into place and use your tools to refine its shape, giving it dimension. When it comes to the eyes, you can sculpt them directly from the clay or to indent shallow sockets and insert small beads for a glossy, lifelike effect. This approach adds depth and personality to the cat’s expression, making it look more lifelike.
Step 2: Texturing the Fur
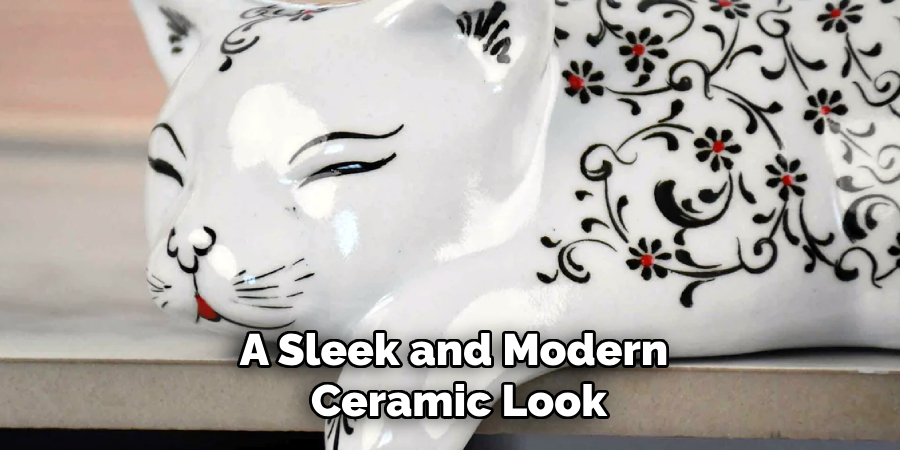
To give the sculpture a realistic appearance, use a needle tool or fine-bristled brush to create short, fine strokes across the surface. These strokes can mimic the fur texture, especially around areas like the face, ears, and body, where detail is most prominent. Consider the natural flow and direction of fur to enhance the realism. Alternatively, if you are aiming for a sleek and modern ceramic look, keep the surface smooth by using a damp sponge or your fingers to refine the texture gently. This polished approach lends a minimalist elegance to your clay cat while retaining its charm.
Drying and Firing the Ceramic Cat
Step 1: Air Drying (If Not Using a Kiln)
Place the ceramic cat in a well-ventilated area for 24-48 hours to allow it to air dry thoroughly. Ensure it is on a flat, stable surface to avoid warping or deformation as the clay hardens. Avoid exposing the piece to direct sunlight, as the intense heat can cause uneven drying, which may lead to cracks. Check for any lingering dampness, especially in thicker areas, before moving on to the next step. Patience during this stage is essential to maintain the structural integrity of your ceramic cat.
Step 2: Kiln Firing (For Fired Clay)
If you are using a kiln to fire your piece, make sure the ceramic cat is dehydrated to avoid steam-related cracking or explosions during firing. Set the kiln to the appropriate firing temperature for your clay type, typically between 1800 and 2200°F (982-1204°C). Check the manufacturer’s guidelines for your specific clay to ensure the proper heat settings. Place the ceramic cat carefully into the kiln, ensuring it is stable and not touching any other objects to prevent sticking or damage. Once the firing cycle is complete and the kiln has cooled to a safe temperature, remove your finished ceramic cat, now transformed into a durable and charming work of art.
Glazing and Painting
Step 1: Choosing a Finish
Decide on the type of finish you want for your ceramic cat. A glossy glaze will give your figurine a polished, reflective appearance, vibrating its colors. Alternatively, a matte finish provides a softer, handcrafted feel, giving it a more organic, natural look. Consider the aesthetic you wish to achieve before making your choice.
Step 2: Applying the Glaze
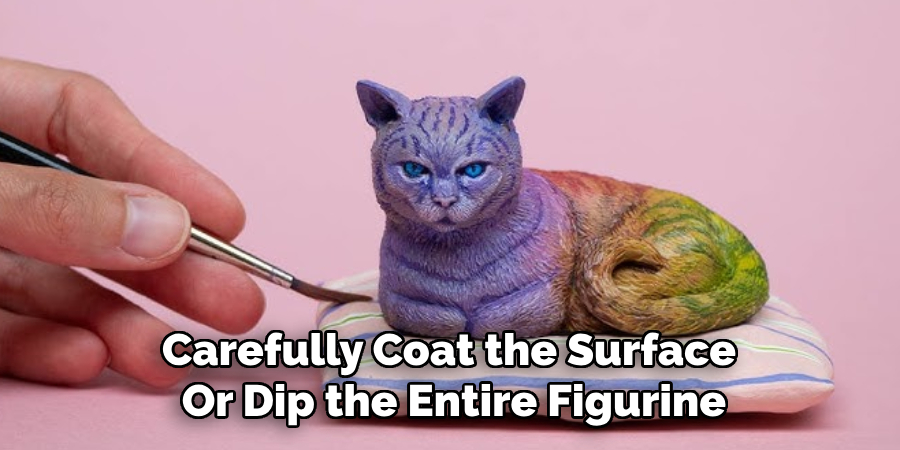
If you choose to glaze your ceramic cat, start by preparing the glaze according to the manufacturer’s instructions. You can either use a brush to carefully coat the surface or dip the entire figurine into the glaze for an even application. Be sure to avoid applying glaze to the base unless using stilts to prop it up during firing. Once the glaze is applied, allow it to dry completely before proceeding to the second firing, which will set the glaze and enhance the decorative finish.
Step 3: Painting (If Not Using Glaze)
For those opting not to use glaze, acrylic paints are a fantastic alternative, especially for air-dried clay pieces. Use fine brushes to paint intricate details like stripes, spots, or facial features. Allow the paint to fully dry; a clear sealant can be applied afterward for extra durability. This method allows for greater creative freedom while still achieving a remarkable finish.
Conclusion
Creating a ceramic cat is a rewarding process that combines creativity and craftsmanship. Each step contributes to the final piece from sculpting the initial shape to adding fine details, drying, firing, and finishing. Mastering how to make a ceramic cat requires patience, practice, and a willingness to learn from mistakes. Experimenting with different designs, colors, and styles allows endless possibilities for personal expression. Whether you use glaze or paint, the joy of bringing your vision to life makes the effort worthwhile. With dedication, your unique ceramic cat can become a cherished art piece or gift.
Specialization:
- Master of wheel-throwing, hand-building, and advanced glazing techniques
- Focus on creating both functional pottery and decorative art pieces
Recognition:
- Celebrated by collectors and art enthusiasts for creating one-of-a-kind pieces that blend artistry with functionality
- Participates in local and national exhibitions, earning accolades for his innovative designs and craftsmanship
Passion:
- Deeply committed to exploring and pushing the boundaries of ceramic artistry
- Continuously experiments with new materials, firing techniques, and artistic concepts to evolve his craft
Personal Philosophy:
- Believes in the transformative power of art, aiming to evoke emotions and connections through his ceramic creations
- Advocates for sustainability in ceramics, using eco-friendly materials and practices whenever possible