


In this guide on how to make a ceramic hob, we will explore the process of creating a ceramic hob, detailing each step to help you craft your own functional and attractive cooking surface. Ceramic hobs offer a sleek, modern look and deliver efficient heat distribution, making them a popular choice in many kitchens.

Whether you are a hobbyist or an aspiring craftsman, understanding the materials and techniques involved in making a ceramic hob will empower you to produce a high-quality product. We’ll cover everything from selecting the right materials to final installation, ensuring you have a comprehensive understanding of this rewarding project.
Why Make a Ceramic Hob?
Ceramic hobs offer many benefits, including:
Heat Efficiency:
Ceramic hobs heat up quickly and distribute heat evenly across the surface, reducing cooking time and energy consumption. This makes them a more environmentally friendly option and reduces your utility costs.
Easy to Clean:
The smooth surface of ceramic hobs makes them incredibly easy to clean. Unlike gas or electric cooktops, there are no crevices for food particles to get stuck in, making maintenance a breeze.
Modern Aesthetic:
Ceramic hobs offer a sleek and modern look that can elevate the style of any kitchen. With various colors and styles available, you can choose one that best fits your personal taste and kitchen design.
Materials Needed
To make a ceramic hob, you will need:
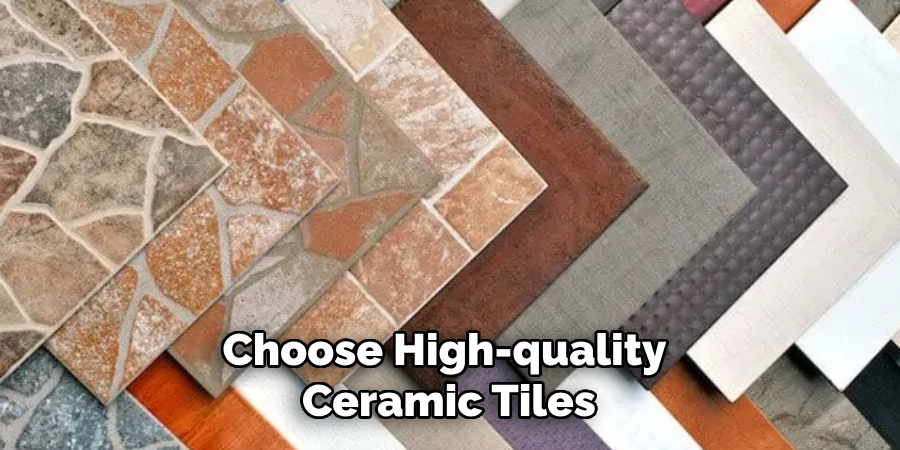
Ceramic Tiles or Slabs:
Choose high-quality ceramic tiles or slabs that are specifically designed for cooktops. They should be able to withstand high temperatures and have a smooth, flat surface.
Heat Resistant Adhesive:
Select an adhesive that is specifically designed for use with ceramic tiles and can withstand high temperatures.
Grout:
Choose a heat-resistant grout that will provide a durable and waterproof bond between the ceramic tiles. It’s important to select a color that complements your chosen ceramic tiles.
Plywood Board:
The base of your hob will need to be made from a sturdy material such as plywood. Make sure it is thick enough to support the weight of the ceramic tiles and any pots or pans placed on top.
Tools:
- Trowel
- Grout Float
- Tile Cutter or Wet Saw
- Level
- Measuring Tape
8 Steps on How to Make a Ceramic Hob
Step 1: Measure and Cut the Plywood Board
Begin by measuring the area where you plan to install the ceramic hob. Use a measuring tape to determine the length and width required for your plywood board to fit snugly in its intended location.
Once you have accurate measurements, mark these dimensions on the plywood board. Using a saw, carefully cut the plywood to the marked dimensions, ensuring clean and precise edges. It’s important to verify the measurements before cutting to avoid any inaccuracies that could affect the stability and fit of the finished hob. Once cut, place the plywood board in a position to confirm a proper fit.
Step 2: Prepare the Surface
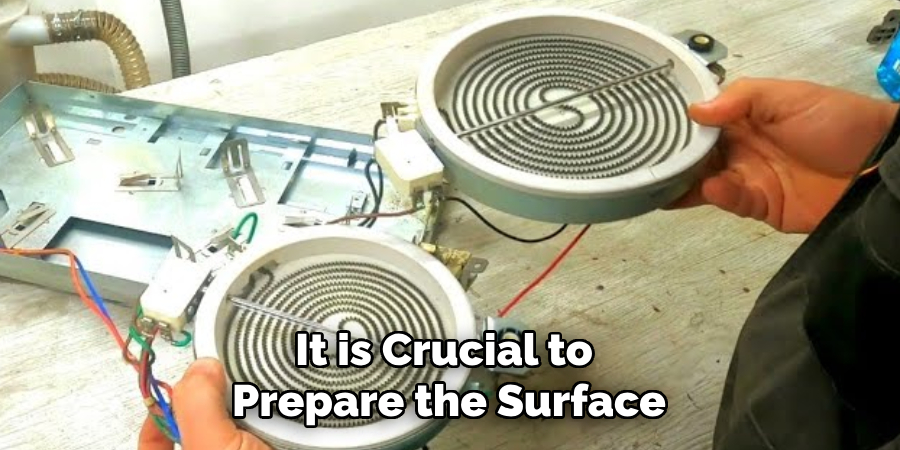
Before you begin laying the ceramic tiles, it is crucial to prepare the surface of the plywood board to ensure optimal adhesion. Start by cleaning the plywood surface with a damp cloth to remove any dust or debris that might hinder the adhesive’s effectiveness. Allow the surface to dry completely. Next, use a level to make sure the plywood board is perfectly flat and even. If there are any uneven areas, sand them down until the surface is smooth.
This step is essential for creating an even and stable base for the tiles. Following this, a primer is applied to the plywood to enhance the bonding strength between the plywood and the adhesive. Allow the primer to dry thoroughly before proceeding to the next step. Preparing the surface properly will ensure a durable and lasting ceramic hob installation.
Step 3: Apply the Adhesive
Once you have prepared the surface, it’s time to apply the heat-resistant adhesive. Using a trowel, spread an even layer of adhesive on the plywood board. Start at one end and work your way across the entire surface in a smooth motion. Make sure to cover the entire area where you will be placing the tiles.
Butter the back of each tile with adhesive before placing it on the board. This will ensure a strong bond between the tile and the board. Place each tile gently onto the adhesive, pressing down firmly to ensure proper adhesion.
Step 4: Cut Tiles to Fit
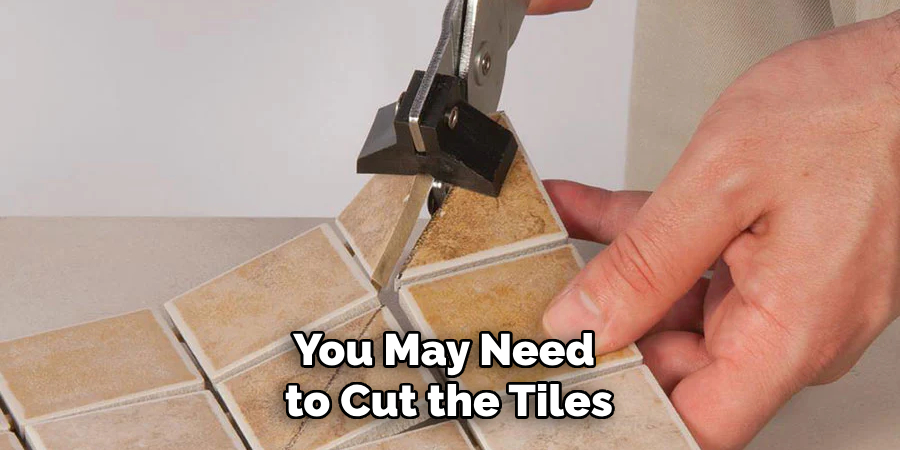
As you reach the edges or corners of the hob, you may need to cut the tiles to fit properly. Use a tile cutter or wet saw to make precise cuts according to your measurements. Take your time and be careful when making these cuts as they will determine how well your hob fits together in the end.
The key is to measure accurately and cut slowly, making small adjustments until the tile fits perfectly into place. Repeat this process as needed for all remaining tiles.
Step 5: Allow for Drying Time
After you have placed all the tiles on the adhesive, allow it to dry according to the manufacturer’s instructions. This can take anywhere from 24-48 hours depending on the type of adhesive used. It’s important not to rush this step as proper drying time will ensure a secure bond between the tiles and plywood board.
It’s also a good idea to place some weight on top of the tiles while they are drying, such as a stack of books. This will help ensure even pressure and proper adhesion.
Step 6: Apply Grout
Once the adhesive has fully dried, it’s time to apply the grout. Start by mixing the grout according to the manufacturer’s instructions. Using a grout float, spread an even layer of grout over the entire surface, filling in the gaps between each tile.
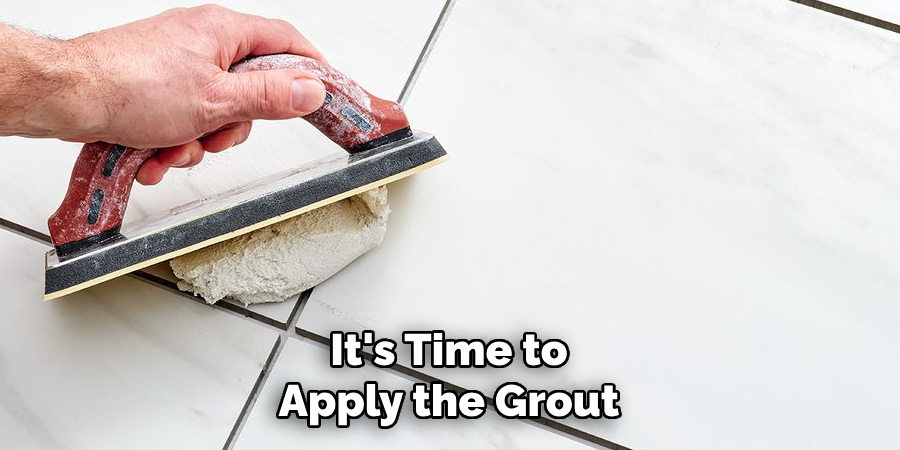
After applying the grout, use a damp cloth or sponge to wipe away any excess from the surface of the tiles. Allow the grout to dry for about 30 minutes before wiping it down again with a damp cloth to remove any remaining residue.
Step 7: Finishing Touches
After the grout has fully dried, you can add any finishing touches to your ceramic hob. This could include applying a sealant to protect the grout and tiles from stains or adding a matching backsplash for a cohesive look.
It’s also important to clean and maintain your ceramic hob regularly to keep it looking new. Use a non-abrasive cleaner and avoid using abrasive sponges or scrubbers that could damage the tiles.
Step 8: Enjoy Your New Ceramic Hob!
Congratulations, you have successfully made your own ceramic hob! Now it’s time to enjoy cooking on your new stylish and functional cooktop. Remember to clean up any spills or messes promptly to maintain the pristine look of your ceramic hob.
Following these steps on how to make a ceramic hob and using the right materials will ensure a durable and long-lasting ceramic hob that adds value to your kitchen. With proper maintenance, your ceramic hob can provide a beautiful and functional cooking surface for years to come. Happy cooking!
Frequently Asked Questions
Q: How Long Does It Take for the Adhesive to Dry?
A: The drying time can vary depending on the type of adhesive used, but it’s typically recommended to allow 24-48 hours for proper drying.
Q: Do I Need to Seal the Grout?
A: It’s not necessary, but sealing the grout can help protect it from stains and make it easier to clean in the future.
Q: Can I Use Any Type of Plywood for This Project?
A: No, it’s important to use plywood specifically designed for tiling projects. These types of plywood are resistant to moisture and have a smooth surface that is suitable for adhesion.
Q: Is It Difficult to Cut Tiles?
A: While cutting tiles may seem intimidating, with the right tools and measurements, it can be done easily. Take your time and be careful when making cuts for the best results.
Q: How Do I Clean and Maintain My Ceramic Hob?
A: To clean your ceramic hob, use a non-abrasive cleaner and avoid using abrasive sponges or scrubbers that could damage the tiles. Regularly cleaning up spills and messes will also help maintain its pristine look. Remember to avoid placing hot pans directly onto the ceramic tiles as this can cause damage.
Conclusion
Creating a ceramic hob can be a rewarding project that not only adds a personalized touch to your kitchen but also enhances its functionality. By following the steps on how to make a ceramic hob outlined above, you can ensure a successful installation that combines both aesthetics and practicality.
The key to a durable and effective ceramic hob lies in careful preparation, precise measurements, and the use of high-quality materials. With regular maintenance, your ceramic hob will remain a beautiful and efficient cooking surface for many years. Embrace the creativity and satisfaction that comes with crafting your own kitchen essentials, and enjoy the fruits of your labor every time you cook.
Specialization:
- Master of wheel-throwing, hand-building, and advanced glazing techniques
- Focus on creating both functional pottery and decorative art pieces
Recognition:
- Celebrated by collectors and art enthusiasts for creating one-of-a-kind pieces that blend artistry with functionality
- Participates in local and national exhibitions, earning accolades for his innovative designs and craftsmanship
Passion:
- Deeply committed to exploring and pushing the boundaries of ceramic artistry
- Continuously experiments with new materials, firing techniques, and artistic concepts to evolve his craft
Personal Philosophy:
- Believes in the transformative power of art, aiming to evoke emotions and connections through his ceramic creations
- Advocates for sustainability in ceramics, using eco-friendly materials and practices whenever possible