


Creating a ceramic pottery wheel can be a rewarding project for those who enjoy working with their hands and exploring the art of pottery. Pottery wheels are essential tools for shaping clay into beautiful and functional forms, combining both precision and creativity.
This guide on how to make a ceramic pottery wheels will walk you through the process of designing and building your own pottery wheel using accessible materials and straightforward techniques. Whether you’re an experienced potter or a beginner looking to expand your skills, building your own wheel can provide a deeper appreciation for the craftsmanship involved in pottery.
What is a Pottery Wheel?
A pottery wheel, also known as a potter’s wheel, is a mechanical tool used in the art of pottery to shape round ceramic pieces such as bowls, vases, and plates. The wheel head, which is the flat circular surface on top of the wheel, rotates smoothly at adjustable speeds, allowing the potter to manipulate the clay with precision.
Pottery wheels can be powered manually, with a foot-operated treadle, or electrically for greater ease and control. They are integral to the crafting process, enabling both beginners and professionals to create symmetrical and visually appealing designs.
Materials Needed
Before starting your project, gather all the necessary materials. Here are the basic items you will need:
- Plywood or MDF board for the base
- Lazy Susan bearing or ball bearing swivel plate
- PVC pipe for legs
- Bolts, washers, and wing nuts
- Wood screws
- Metal rods or dowels for centering pins
- Clay or other pottery materials
7 Steps on How to Make a Ceramic Pottery Wheels
Step 1: Prepare the Base
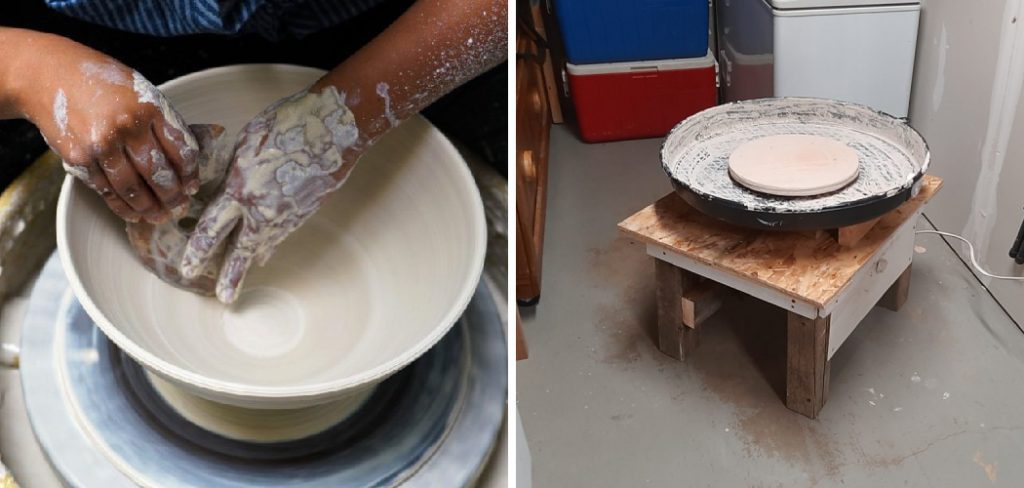
Start by cutting a sturdy piece of plywood or MDF board to serve as the base of your pottery wheel. The base should be large enough to accommodate the wheelhead and support the weight of the components and your hands while shaping clay.

Measure and mark the board to ensure even edges, and use a saw to cut it to the desired dimensions. Once the board is cut, sand the edges and surface to smooth out any rough areas. This will provide a clean and stable foundation for building the rest of the pottery wheel.
Step 2: Install the Lazy Susan Bearing
The lazy susan bearing, also known as a ball-bearing swivel plate, will act as the rotating mechanism for your pottery wheel.
Place the bearing in the center of the base and mark where the holes are located. Next, drill holes through the marked spots on both the base and bearing. Use bolts, washers, and wing nuts to secure the bearing onto the base.
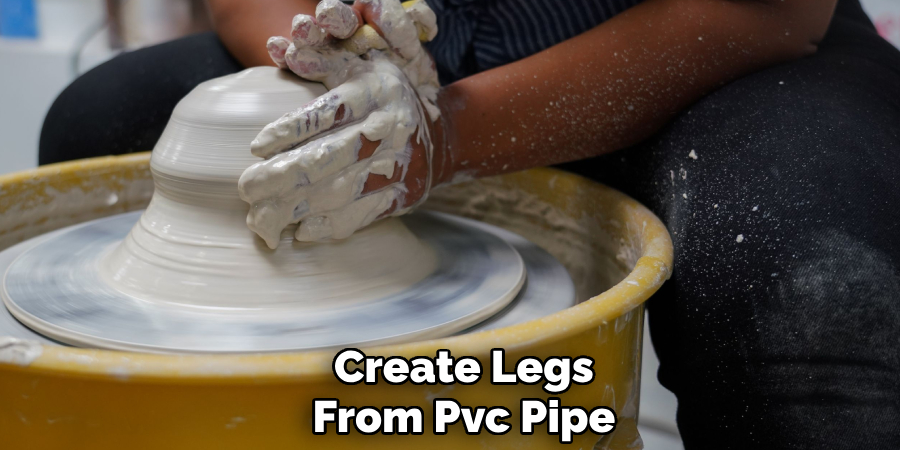
Step 3: Create Legs from PVC Pipe
To give your pottery wheel stability and proper height, create legs using PVC pipes. Cut the PVC pipes to your desired length, ensuring they are all of equal size to maintain balance. Attach the pipes to the base by drilling holes in the corners of the plywood or MDF board and inserting the pipes securely.
Bolts and washers are used to fasten the PVC pipes in place, making sure they are tightly secured to prevent wobbling during use. If stability is a concern, consider adding rubber caps to the bottom of the pipes or attaching cross-braces for additional support. This step ensures a sturdy foundation for your pottery wheel and ergonomic working height.
Step 4: Install the Wheelhead
Now that the base and legs are assembled, it’s time to install the wheelhead. The wheelhead can be made from various materials such as plywood, MDF, or even a thick piece of metal. It should have a diameter of at least 12 inches to provide enough surface area for shaping clay.
To attach the wheelhead to your pottery wheel, place it on top of the lazy susan bearing and mark where the holes align. Drill holes in both pieces and use bolts and washers to secure them together. Make sure the wheel head is centered and level before tightening all bolts.
Step 5: Add Centering Pins
Centering pins are essential for keeping the clay centered and stable while shaping. These can be made from metal rods or wooden dowels, and they will fit into holes drilled in the wheelhead.
Start by drilling two holes on opposite sides of the wheelhead, about an inch deep and slightly wider than the diameter of your centering pins. Insert the pins into the holes, leaving enough length on both sides to accommodate your hands comfortably.
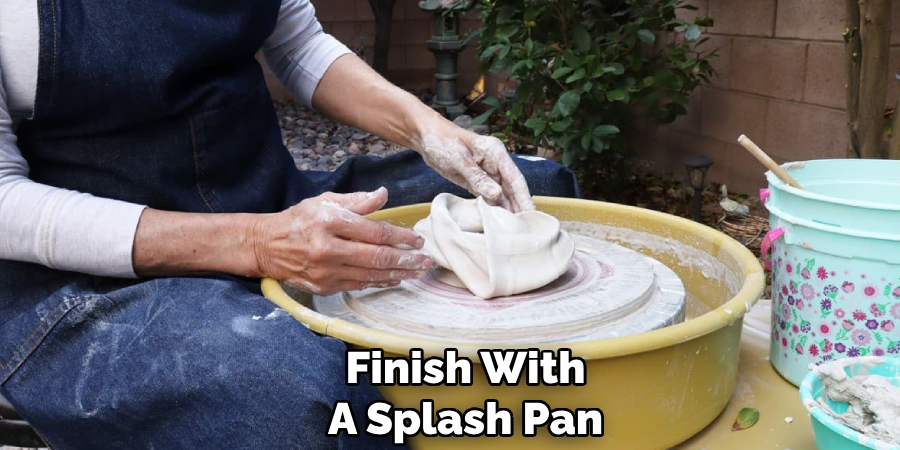
Step 6: Finish with a Splash Pan
A splash pan is a tray that surrounds the wheelhead and prevents water and clay from splattering onto your work surface. It also collects excess water during use and keeps it contained for easy cleanup.
To create a splash pan, cut a shallow tray from plastic or metal and attach it to the base of your pottery wheel using wood screws. Make sure the splash pan is level with the wheel head and doesn’t interfere with its rotation.
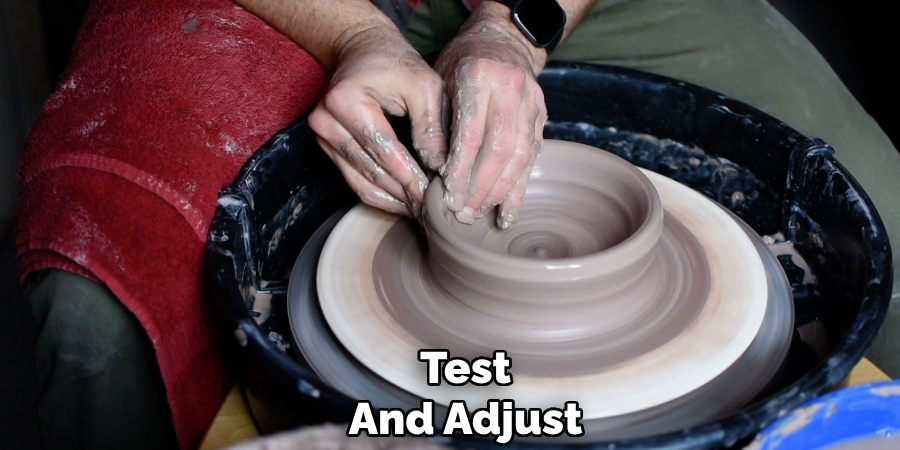
Step 7: Test and Adjust
Congratulations, you’ve built your own ceramic pottery wheel! Before starting to work on your first clay project, test out the wheel by turning it on and gradually increasing the speed. Make sure all components are secure and functioning correctly. If any adjustments need to be made, now is the time to do so before adding clay onto the wheelhead.
Following these steps on how to make a ceramic pottery wheels, you can build your own pottery wheel at a fraction of the cost of purchasing one. This project is not only budget-friendly but also customizable to fit your specific needs and preferences. With practice, patience, and creativity, your handmade pottery wheel will be an invaluable tool for crafting beautiful ceramic pieces that reflect your unique style. Happy potting!
Safety Tips and Maintenance
- Wear protective gear, including gloves and a dust mask, when working with power tools and chemicals used in pottery.
- Keep the area around your pottery wheel clean and free of clutter to prevent accidents or injuries.
- Regularly check all components for wear and tear and replace any damaged parts immediately.
- Clean your pottery wheel after each use to ensure it remains in good working condition.
- Store your pottery wheel indoors in a dry place to prevent rust or damage from moisture.
- Disconnect your pottery wheel from the power source when not in use to prevent accidental activation.
- If using an electric motor for your pottery wheel, make sure it is properly grounded and follows all safety guidelines specified by the manufacturer.
- Regularly inspect the cords and wires of your pottery wheel for any fraying or damage, and replace them if needed.
- Properly dispose of any waste materials or chemicals used in pottery according to local regulations.
Additional Tips and Tricks
- To customize your pottery wheel even further, consider adding a foot pedal to control the speed instead of using a switch on the base.
- Experiment with different materials for the base, such as repurposed furniture or metal frames, to create a unique look for your pottery wheel.
- Use recycled materials, such as old bicycle parts or scrap wood, to reduce costs and make your project more environmentally friendly.
- Consider adding a splash guard around the wheel head using an old shower curtain or plastic sheeting to prevent water from splashing onto you and your workspace.
- Practice proper posture and ergonomics while using your pottery wheel to prevent strain or injury on your body.
- Have fun and get creative with decorating and personalizing your pottery wheel with paint, decals, or other embellishments.
Frequently Asked Questions
Q: Can I Use My Homemade Pottery Wheel for Commercial Purposes?
A: It is not recommended to use a homemade pottery wheel for commercial production as it may not be as durable or reliable as a professional-grade one. It is best to use your homemade pottery wheel for personal projects and small-scale production.
Q: Can I Make a Pottery Wheel without Power Tools?
A: Yes, it is possible to make a pottery wheel using hand tools instead of power tools. However, the construction process may require more time and effort.
Q: How Often Should I Clean and Maintain My Pottery Wheel?
A: It is recommended that you clean and maintain your pottery wheel after each use to ensure longevity and proper functioning. Regular maintenance checks should also be done every few months or as needed.
Conclusion
Building a ceramic pottery wheel can be an enjoyable and fulfilling project for any pottery enthusiast. Not only does it save money, but it also allows you to customize your wheel to fit your specific needs and preferences.
With the right materials and following these simple steps, you can have a functional pottery wheel in no time. So why not give it a try and see where your creativity takes you? Thanks for reading this article on how to make a ceramic pottery wheels. We hope it inspires you to start your own pottery wheel-building project! Keep crafting and creating beautiful pottery pieces. Happy potting!
Specialization:
- Master of wheel-throwing, hand-building, and advanced glazing techniques
- Focus on creating both functional pottery and decorative art pieces
Recognition:
- Celebrated by collectors and art enthusiasts for creating one-of-a-kind pieces that blend artistry with functionality
- Participates in local and national exhibitions, earning accolades for his innovative designs and craftsmanship
Passion:
- Deeply committed to exploring and pushing the boundaries of ceramic artistry
- Continuously experiments with new materials, firing techniques, and artistic concepts to evolve his craft
Personal Philosophy:
- Believes in the transformative power of art, aiming to evoke emotions and connections through his ceramic creations
- Advocates for sustainability in ceramics, using eco-friendly materials and practices whenever possible