


Clay modeling is a versatile and therapeutic craft that has captivated creators of all ages for centuries. By shaping and molding clay, individuals can relax, explore their creativity, and produce tangible representations of their imagination.
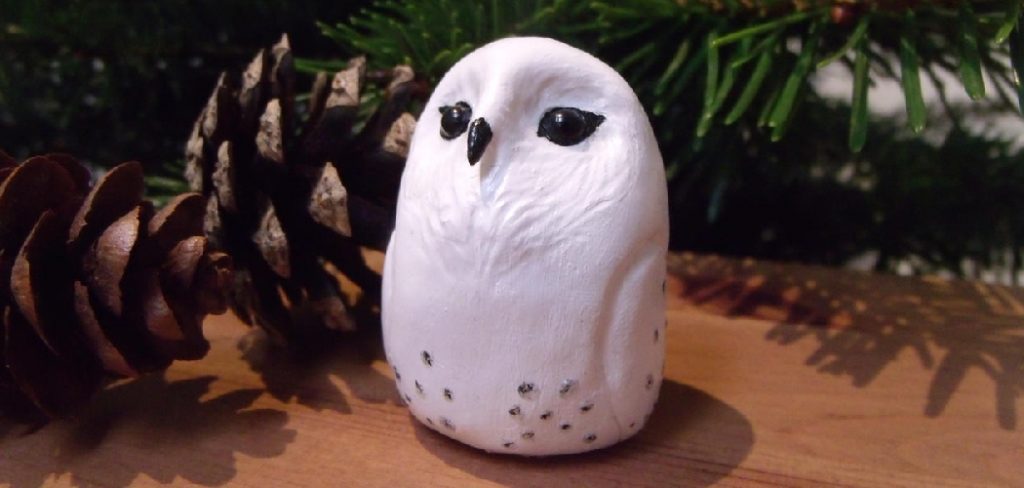
Among the many forms of clay art, crafting animal figures, such as owls, has gained significant popularity. Owls, with their intricate feather patterns and symbolic connection to wisdom, make for charming decorations and heartfelt, handmade gifts. This article is dedicated to teaching you how to make a clay owl with a step-by-step guide tailored for beginners and intermediate crafters.
Through this process, you will learn essential clay modeling techniques, gain confidence in your skills, and create a detailed owl design that you can proudly display or share with others. Whether you’re experienced or just discovering clay art, this guide offers an enjoyable and rewarding experience.
Materials and Tools Needed
Before starting your clay owl project, it’s essential to gather the right materials and set up an efficient workspace. Below, we’ve outlined the types of clay you can use, the basic tools required, and some tips for keeping your workspace tidy and organized.
Types of Clay
- Air-dry clay: This clay is beginner-friendly, easy to mold, and doesn’t require baking. However, it can be less durable over time and may not handle water exposure well.
- Polymer clay: Ideal for detailed projects, polymer clay remains pliable until baked in the oven. It’s durable but slightly more expensive and requires careful handling to avoid sticking.
- Ceramic clay: Often used for pottery, it requires kiln firing to harden. While this option yields sturdy and professional results, it may not be accessible to all due to the equipment required.
Basic Tools
- Sculpting tools: A small knife, shaping tools, and toothpicks are perfect for carving and detailing your owl.
- Smoothing tools: Help refine the surface for a polished finish.
- Additional supplies:
- Acrylic paints and brushes to add color to your creation.
- A sealant to protect and preserve your owl.
- Optional embellishments like beads or feathers to add personality.
Workspace Setup
Select a flat, clean surface to work on, such as a table covered with a protective mat. Keep tools and materials organized in small containers for easy access. Use a damp cloth to wipe away clay residue and keep your workspace tidy throughout the project.
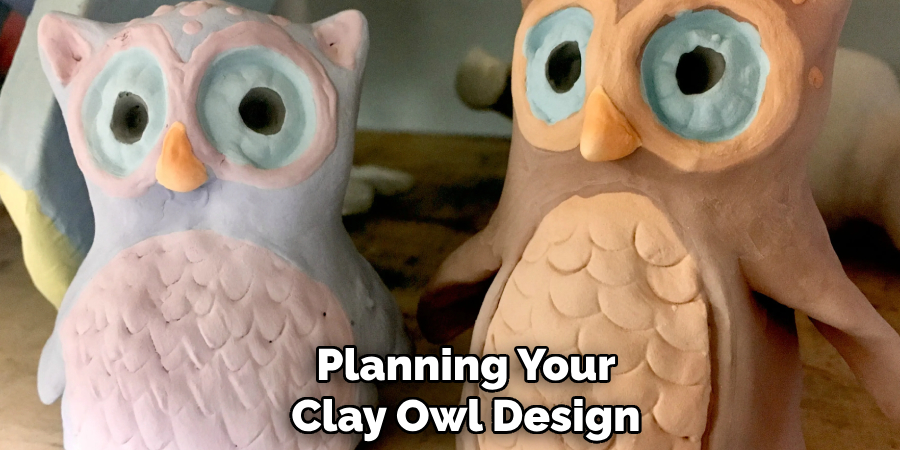
Planning Your Clay Owl Design
Choosing an Owl Style
Before starting, decide on the style of owl you’d like to create. Do you prefer a realistic representation of this majestic bird, or would you rather explore a whimsical, cartoonish, or even abstract design? A realistic owl can showcase intricate details, such as layered feathers and nuanced textures, while a cartoonish or abstract version allows for more creative expressions, playful proportions, and vibrant color schemes. Reflect on your personal style and the intended purpose of your owl when selecting an approach.
Sketching Your Owl
Creating a sketch or using a reference photo is a key step in planning. A clear visual guide helps you stay on track during the sculpting process, ensuring that the final product matches your vision. A reference drawing doesn’t have to be overly detailed, but should outline the basic features and proportions of your owl. Use simple shapes like circles and ovals to map out the head, body, wings, and other elements.
Deciding on Size and Details
Think about the size of your clay owl and the level of detail you’d like to incorporate. Larger owls can accommodate intricate features, such as textured feathers or detailed eyes, while smaller designs may require simpler embellishments. Plan the shapes and sizes of the key features, such as the eyes, beak, wings, and tail, ensuring they complement the overall proportions of your owl. Having a clear plan will lead to a cohesive and polished creation.
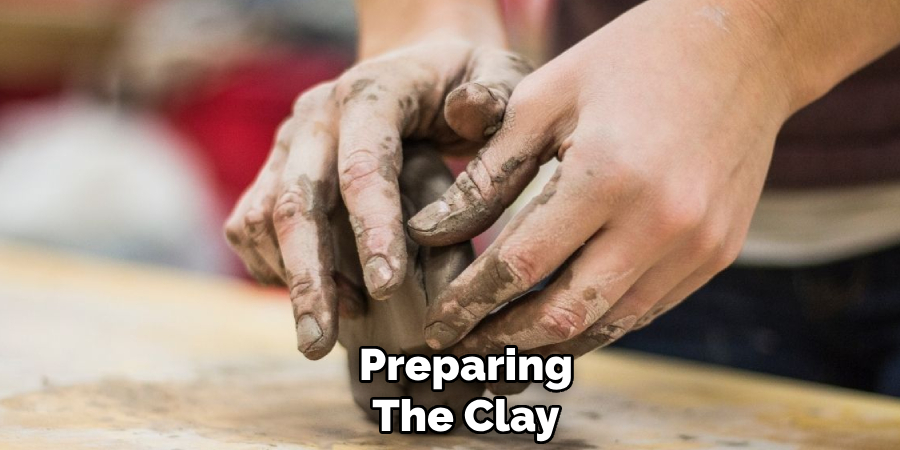
Preparing the Clay
Conditioning the Clay
Before you start shaping your clay owl, it’s crucial to condition the clay properly. Conditioning involves kneading and softening the clay to make it pliable and easier to work with. Begin by rolling the clay in your hands or on a flat surface, allowing the warmth from your hands to soften it. Fold and compress the clay repeatedly until it becomes smooth and free of cracks. This process ensures the clay is evenly mixed and prevents it from crumbling during shaping.
Coloring the Clay (if applicable)
If you are using uncolored or plain clay and wish to add color, now is the time to mix in your chosen hues. To mix colors, take small portions of differently colored clays and knead them together until the shade is uniform. Alternatively, pre-colored clay can save time and effort, especially if you need consistent tones across multiple parts. For more intricate designs, consider blending complementary shades to add depth and character to your owl.
Creating Basic Shapes
Begin shaping the clay by creating simple geometric forms such as spheres and cylinders. A sphere can serve as the owl’s head, while a larger sphere or egg-shaped form can represent the body. Roll and flatten smaller pieces to form wings, a tail, or even textured feather details. These basic shapes will form the foundation of your owl’s structure.
Working with Multiple Pieces
When assembling your owl from several clay pieces, ensure they are securely joined. You can lightly press the parts together, but for stronger bonds, use tools to blend the edges where pieces meet. A small amount of water or clay-specific adhesive can also help. Properly connected components will create a durable and seamless sculpture.
How to Make a Clay Owl: Step-by-Step Sculpting Process
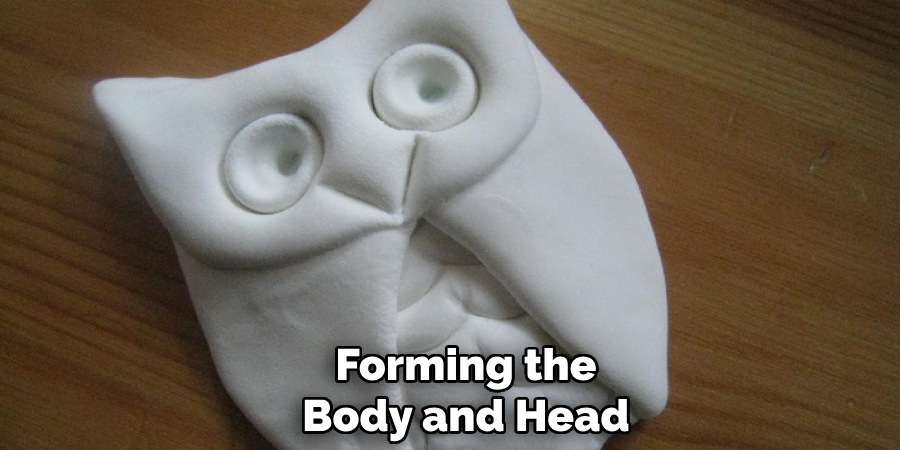
Forming the Body and Head
Begin by shaping a solid piece of clay into an oval or rounded cylindrical form to serve as the owl’s body. Gently flatten the bottom to ensure the sculpture stands stably. Next, form a smaller spherical piece of clay for the head. Attach the head to the body by blending the clay at the point of connection. Be sure to smooth out any seams using your fingers or a sculpting tool to create a seamless transition between the two parts.
Adding Facial Features
To craft facial features, start with the eyes by rolling out two small balls of clay and placing them symmetrically on the head. Flatten them slightly and add details like pupils or eyelids with a fine tool. For the beak, shape a small triangle or cone and attach it between the eyes, blending the edges securely. If you want to include ear tufts, roll out two small pieces of clay, shape them into pointed or curved forms, and position them at the top of the head.
Detailing the Wings and Feathers
Form the wings by rolling out two oval shapes from the clay, ensuring they are proportionate to the body. Attach the wings to the sides of the body, blending the edges for a smooth attachment. Use sculpting tools to etch feather patterns into the wings or add texture by pressing with a toothpick or other pointed object. For body feathers, carve lines or press textured materials into the clay surface.
Refining the Shape
Once all major components are in place, refine the overall shape of the owl. Smooth any rough edges or uneven surfaces with a damp sponge or your fingers. Adjust the proportions as needed to create a balanced and polished look.
Final Touches Before Drying or Baking
Before setting the clay through drying or baking, enhance the sculpture with final textural details. Add intricate details to the feathers or emphasize specific features, such as eyelids or claws. Please review the entire piece for any imperfections, ensuring it’s ready for the finishing process. These details will bring depth and realism to your owl sculpture.
Drying and Baking
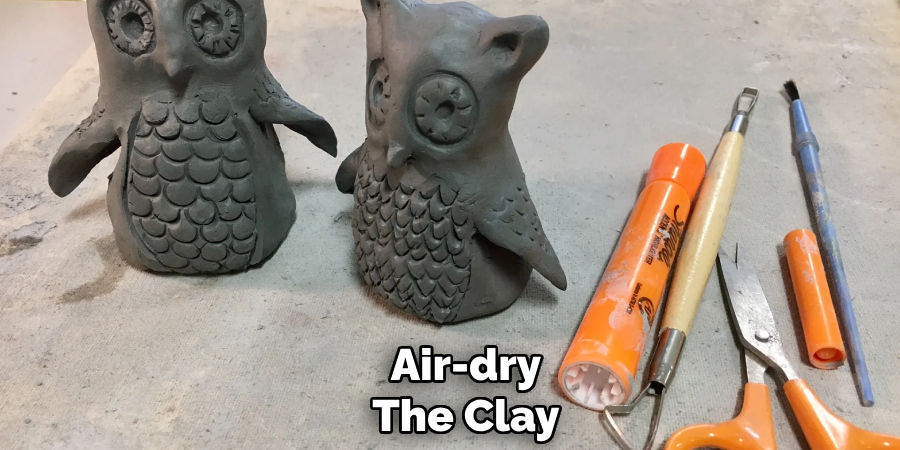
Air-Dry Clay Tips
When working with air-dry clay, it’s crucial to allow ample time for the sculpture to dry completely. Place your owl sculpture on a clean, flat surface in a well-ventilated area, away from direct sunlight or heat sources, which can cause uneven drying and cracks. Depending on the clay’s thickness, drying can take 24-72 hours. To prevent cracks, ensure the piece dries evenly by flipping it gently or rotating it periodically. If small cracks appear during the drying process, they can be smoothed out using a bit of water and clay.
Polymer Clay Baking Instructions
Polymer clay requires baking to cure and harden properly. Preheat your oven according to the manufacturer’s recommended temperature—typically between 230°F and 275°F (110°C-135°C). Place the sculpture on a baking sheet lined with parchment paper or a ceramic tile to minimize direct heat contact. Bake the clay for approximately 15-30 minutes per 1/4 inch (6mm) of thickness, ensuring even results. Avoid overbaking as it can cause discoloration or release fumes. Always follow proper ventilation practices for safety during the process.
Ceramic Clay Firing in a Kiln (Optional)
For advanced crafters working with ceramic clay, firing in a kiln is the final step. This process requires the sculpture to be entirely dried before being fired at temperatures between 1,800°F and 2,400°F (982°C-1,316°C). This step ensures durability and a professional finish. Kiln use is optional but offers a more refined and lasting result.
Post-Drying/Baking Inspection
Once the owl sculpture has dried or baked, carefully inspect it for imperfections like surface roughness or small cracks. Sand down any uneven surfaces with fine-grit sandpaper, if necessary. After inspection and touch-ups, your sculpture will be ready for the next step—painting and decorating!
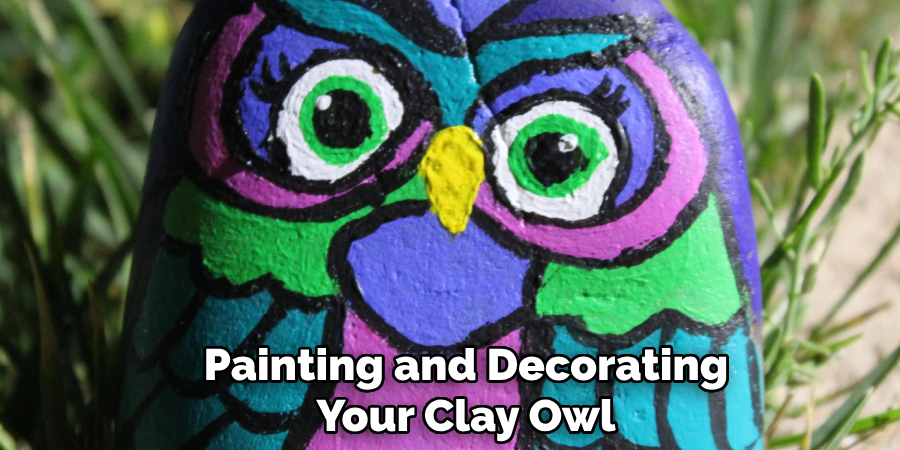
Painting and Decorating Your Clay Owl
Choosing Paint Types
For best results, acrylic paints are highly recommended for painting clay sculptures. They are easy to work with, dry quickly, and provide a vibrant, long-lasting finish. Select a variety of colors to bring your owl to life, whether you prefer natural tones or a more whimsical palette.
Painting Techniques
When painting your clay owl, start with a base coat to ensure even coverage. Build up layers of colors for depth, and use shading techniques to add dimension to features like the wings, feathers, and facial details. Highlights can be applied sparingly to make certain areas stand out and give the sculpture a lifelike or dynamic appearance.
Adding Embellishments
For an extra touch of creativity, consider gluing on embellishments like beads, small feathers, or sequins. Additionally, applying a clear sealant will not only enhance shine but also protect the paint from wear and environmental damage.
Tips for Success and Troubleshooting
Avoiding Common Mistakes
To ensure your clay owl turns out beautifully, avoid common mistakes such as overworking the clay, which can lead to cracking or loss of detail. Be mindful of allowing the clay to dry unevenly, as this can cause warping. Work in a well-ventilated space and keep your tools clean to maintain precision and prevent unintentional marks.
Fixing Minor Issues
Small cracks or rough areas can often be repaired before finishing. For cracks, apply a small amount of water or slip (a mixture of clay and water) to fill the gaps, then gently smooth the surface with your fingers or a soft tool. Sanding lightly after drying helps refine imperfections and prepare the sculpture for painting.
Storage and Care for Finished Owls
To preserve the life of your finished clay owl, avoid exposing it to extreme temperatures or humidity. Apply a protective sealant to add durability and guard against dust or damage during display. Store or display it in a stable, dry area away from direct sunlight to maintain its vibrancy for years to come.
Conclusion
Making a clay owl is a creative and rewarding process that allows you to bring your imagination to life. From shaping the clay to adding intricate details, each step offers a fulfilling sense of accomplishment.
By experimenting with different styles and techniques, you can personalize your design and develop your craftsmanship further. Learning how to make a clay owl also provides an opportunity to enjoy a mindful and relaxing activity. Share your handmade creations with friends and family, or use them as unique gifts. Most importantly, have fun and take pride in your artistic expression!
Specialization:
- Master of wheel-throwing, hand-building, and advanced glazing techniques
- Focus on creating both functional pottery and decorative art pieces
Recognition:
- Celebrated by collectors and art enthusiasts for creating one-of-a-kind pieces that blend artistry with functionality
- Participates in local and national exhibitions, earning accolades for his innovative designs and craftsmanship
Passion:
- Deeply committed to exploring and pushing the boundaries of ceramic artistry
- Continuously experiments with new materials, firing techniques, and artistic concepts to evolve his craft
Personal Philosophy:
- Believes in the transformative power of art, aiming to evoke emotions and connections through his ceramic creations
- Advocates for sustainability in ceramics, using eco-friendly materials and practices whenever possible