


Creating a hand out of clay is a rewarding and creative process that allows you to explore the intricacies of sculpting. Whether you are an experienced artist or a beginner, this activity can help you develop your skills and express your imagination. By following a few simple steps, you can craft a realistic or stylized clay hand that showcases your unique artistic touch. In this blog post we will show you how to make a hand with clay so that it functions properly. Read on to learn more about which components and tools are needed for the job as well as detailed instructions on completing the task!
Essential Tools and Materials
To create a detailed and polished hand sculpture, having the right tools and materials is just as important as choosing the right clay. Below is a list of essentials you’ll need to get started:
- Clay – Choose the type of clay best suited for your project, as discussed in the previous section.
- Sculpting Tools – A variety of sculpting tools is essential to shape, carve, and refine details. Look for tools such as loop tools, needle tools, ribbon tools, and silicone-tipped shapers for precision work.
- Wire Armature – For larger or more complex sculptures, a wire armature provides a sturdy framework to support the clay and maintain the accuracy of the hand’s structure.
- Clay Cutters and Knives – Use these to cut and trim excess clay, ensuring clean edges and proper proportions.
- Rolling Pin or Brayer – These tools help to flatten or condition clay evenly, making it easier to work with.
- Water or Slip – To smooth surfaces and attach clay pieces, use water for air-dry and polymer clays, or create slip (a clay-water mixture) for ceramic clays.
- Sponges and Brushes – Soft sponges and brushes are perfect for blending and smoothing out rough areas, as well as adding texture to your sculpture.
- Work Surface – A non-stick work surface or a rotating turntable makes it easier to access all angles of your hand sculpture.
- Reference Materials – Having detailed photos, sketches, or even a live model of a hand will help to accurately represent proportions and details.
These tools and materials will equip you to handle every step of the sculpting process, from rough shaping to intricate detailing, ensuring your hand sculpture turns out exactly as envisioned.
10 Methods How to Make a Hand with Clay
1. Start with Basic Hand Shapes Using the Pinch Method
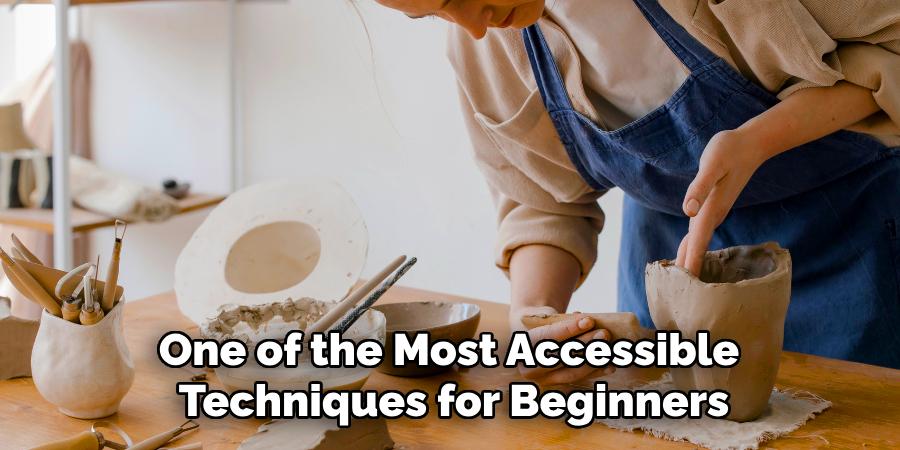
The pinch method is one of the most accessible techniques for beginners. Begin by rolling a small ball of clay for the palm of the hand. Pinch and shape the clay using your fingers to gradually form a flat oval. The pinch technique involves pressing the clay between your thumb and fingers while turning the ball, helping create a hollowed-out palm. Once the base shape of the palm is formed, shape the fingers by rolling out small coils of clay, attaching them to the palm and gradually pinching them to form the finger contours.
Once all parts are attached, blend the clay at the joints with your fingers to smooth the transitions. Allow the hand to dry or fire in a kiln, depending on the clay type used.
2. Sculpting a Realistic Hand with Coils
If you are aiming for a more detailed hand, the coil method allows you to build up more defined shapes and textures. Start by creating a solid base for the palm using a flat slab of clay. Roll out coils of clay for the fingers, starting with the thumb, and progressively make the other fingers. The coils can be molded into a cylindrical shape for the fingers, then flattened and pinched at the ends to mimic fingernails and joints.
For a more lifelike appearance, make sure to model the knuckles by gently indenting the clay, using your fingers or a sculpting tool to create smooth lines along the joints. Use a steady hand to attach each coil, blending and smoothing the areas where they meet the palm for a seamless look.
3. Using a Mold for a Detailed Hand Sculpture
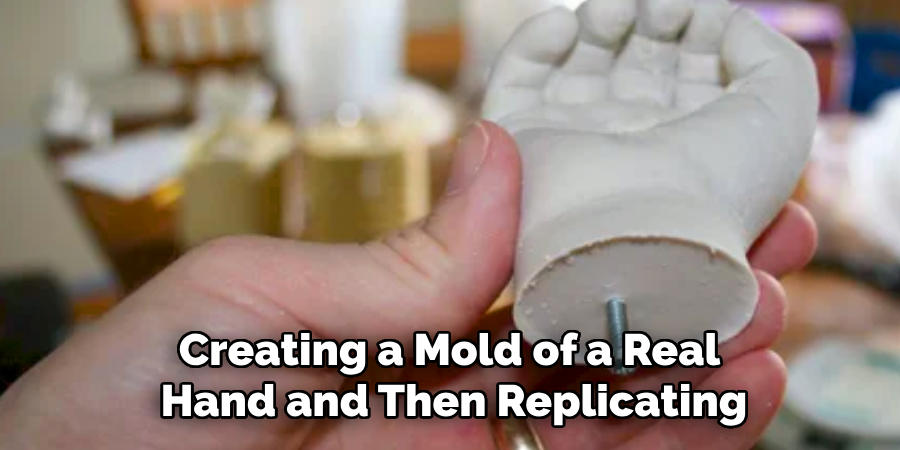
For a more precise and consistent hand shape, creating a mold of a real hand and then replicating it in clay can save time and enhance accuracy. First, you’ll need to make a mold using either plaster or silicone. Start by coating your hand with a mold release agent to prevent the clay from sticking. Then, press your hand into a mold-making material and let it cure. Once the mold is set, remove your hand, leaving a detailed cavity for the clay. Roll out your chosen clay and press it into the mold, ensuring it fills all the crevices. After the mold has set, remove the clay hand and let it dry.
4. Creating an Abstract Hand Sculpture
For those interested in an abstract or stylized hand, simplifying the form can lead to unique and modern art pieces. Rather than focusing on realistic proportions and details, use broad shapes and exaggerated features to create an artistic representation.
For example, use thick coils for fingers, blocky forms for the palm, and geometric shapes for the wrist. Focus on texture and form rather than lifelike details, allowing the hand to evoke emotion through its simplification. You can use carving tools to add geometric or flowing textures to the surface, creating a striking contrast between the smooth and rough areas of the sculpture.
5. Hand as a Functional Piece—Clay Hand Bowl
A functional and decorative way to make a hand with clay is to turn it into a bowl or container. Start by shaping the palm of the hand as a flat slab, then build up the fingers by rolling coils. Attach each coil to the palm, curving the fingers inward to form the sides of the bowl. Once the basic hand shape is in place, press the thumb out to create a lip for the opening. Blend the seams between the coils and smooth out the surface to ensure that the fingers appear unified with the palm.
This type of hand sculpture can serve as a decorative bowl or a creative holder for small items. Allow it to dry thoroughly and fire in a kiln if using ceramic clay.
6. Using a Carving Technique for Detailing
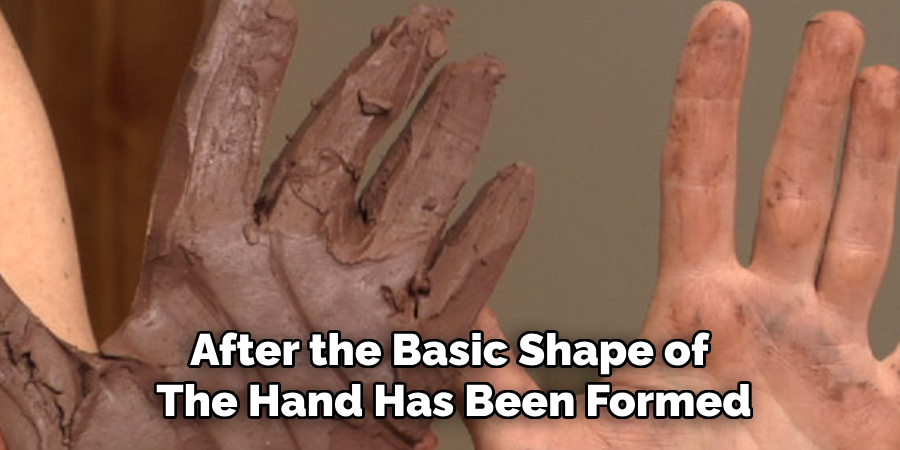
To enhance the realism of your clay hand, you can use carving techniques to add intricate details such as skin textures, veins, and wrinkles. After the basic shape of the hand has been formed and dried to a leather-hard state, use carving tools to carefully etch details into the surface. For example, small, shallow cuts can create fine lines to represent skin folds, while slightly deeper carvings can represent wrinkles or tendons in the hand. You can also carve out the fingernails for more realistic features.
7. Adding Color and Glaze for a Finished Look
Once your clay hand sculpture is dry and fired, adding color through painting or glazing can elevate its appearance. Use underglazes to paint intricate designs or add color to the skin of the hand. Terracotta and natural-colored clays can be painted in realistic skin tones, or you can opt for more artistic colors, such as metallic or vibrant hues. After painting, apply a clear glaze to protect the surface and enhance the shine, especially if you want to give the piece a polished look. Firing the clay again after glazing will ensure the color stays intact and that the surface is durable.
8. Incorporating Other Materials into the Clay Hand
To add dimension or texture to your clay hand, consider incorporating other materials like wire, fabric, or beads. For example, use thin wire inside the fingers to create internal supports, making the hand more stable. You can wrap the wire in fabric or other textures for a mixed-media effect. Adding small beads, shells, or stones can also create a more decorative appearance for the hand. These materials will not only enhance the look of the hand but also provide structural integrity to delicate or thin parts of the sculpture.
9. Using the Slab Building Method for a Flat-Handed Sculpture
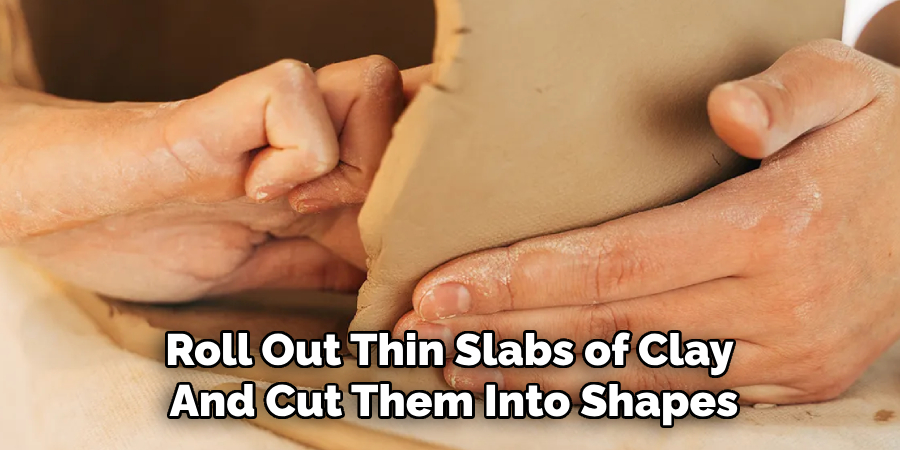
For a unique take on hand sculptures, try creating a hand out of flat slabs of clay, particularly when making wall art or large relief pieces. Roll out thin slabs of clay and cut them into shapes that make up the hand’s outline, including the palm, fingers, and wrist. Once all the slabs are cut, attach them carefully, ensuring the fingers overlap the palm to form the hand’s contour. The slab method works well for creating dramatic wall hangings or large, three-dimensional hand representations.
10. Making Clay Hand Jewelry
For a small-scale, wearable version of a clay hand, consider turning your hand sculpture into a pendant, brooch, or charm. Start by rolling out a thin sheet of clay, then either mold it into a simplified hand shape or cut the outline of a hand from the slab. Create a small hole at the top of the hand for threading a string or chain through. Once the shape is complete, smooth the edges, and allow it to dry. If using polymer clay, bake the hand shape according to the manufacturer’s instructions.
Conclusion
Making a hand with clay is a rewarding and creative process that allows for a variety of artistic expressions, from realistic sculptures to functional objects. Whether you’re shaping a simple pinch pot, using coils for detail, or creating an abstract design, there are numerous ways to approach this project. Techniques such as carving, glazing, and incorporating mixed materials can further personalize your clay hand. With practice, you can refine your skill and create unique, expressive pieces that showcase the beauty of clay as a medium. So, there you have it – a quick and easy guide on how to make a hand with clay.
Specialization:
- Master of wheel-throwing, hand-building, and advanced glazing techniques
- Focus on creating both functional pottery and decorative art pieces
Recognition:
- Celebrated by collectors and art enthusiasts for creating one-of-a-kind pieces that blend artistry with functionality
- Participates in local and national exhibitions, earning accolades for his innovative designs and craftsmanship
Passion:
- Deeply committed to exploring and pushing the boundaries of ceramic artistry
- Continuously experiments with new materials, firing techniques, and artistic concepts to evolve his craft
Personal Philosophy:
- Believes in the transformative power of art, aiming to evoke emotions and connections through his ceramic creations
- Advocates for sustainability in ceramics, using eco-friendly materials and practices whenever possible