


Self-watering pots provide an innovative solution for easy plant care, allowing for consistent watering without needing daily attention. These pots are especially beneficial for busy plant owners or those who frequently travel, as they help ensure plants receive the right amount of moisture even when life gets hectic.
The self-watering system works by utilizing a reservoir at the bottom of the pot, which provides a continuous water supply through a wicking mechanism, delivering moisture directly to the plant roots. This setup helps reduce water wastage and prevents overwatering, which can harm plant health. This article aims to equip you with the knowledge and steps needed to create your own functional and aesthetically pleasing self-watering ceramic pot. By following this guide on how to make a self watering ceramic pot, you can enhance your plant care routine and enjoy thriving greenery with less effort.
Materials and Tools You’ll Need
Essential Materials
You will need a few basic materials to construct your self-watering ceramic pot. A ceramic pot serves as the primary body of the planter and should be chosen in size appropriate for the plants you intend to grow. Unglazed ceramic or clay is also necessary for crafting the water reservoir, as this porous material allows moisture to permeate. Wick material, such as cotton or nylon, is vital to draw water from the reservoir into the soil; opt for a thickness that matches the size of your pot’s drainage holes. A drill is essential for making holes in the pot and reservoir for the wicks, while waterproof sealant is crucial to ensure all joins are leak-free and robust.
Optional Tools and Materials
You might consider several optional tools and materials to enhance your self-watering pot construction process. A clay cutter can aid in shaping the reservoir, while a kiln becomes necessary if you are crafting pottery from scratch. Decorative elements like stones, paints, or varnishes allow you to personalize and customize your pot to suit your style. When sourcing materials, local craft stores, gardening centers, or online retailers are good starting points. Considerations include selecting a pot size that accommodates your plant’s root system without crowding, allowing ample space for growth and soil aeration.
Understanding the Self-Watering Mechanism
How Self-Watering Pots Work
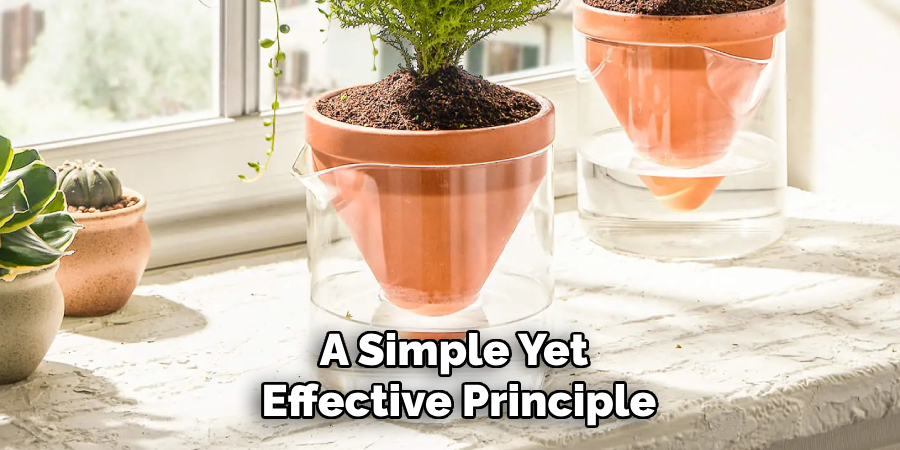
The self-watering mechanism operates on a simple yet effective principle: a wick transports water from a reservoir into the plant’s soil. This wick, typically made from absorbent materials such as cotton or nylon, draws water upward through capillary action, allowing it to gradually seep into the soil. This process keeps the soil consistently moist and ensures that plants receive adequate water without the risk of overwatering, thus maintaining healthy growth.
Advantages of Self-Watering Pots
Self-watering pots provide several significant benefits. They help prevent root rot by avoiding overwatering, which can damage plants. These pots ensure that plants receive steady and consistent moisture levels, which is crucial for their health, especially during dry spells. Additionally, they reduce the need for frequent watering, making plant care more manageable and ideal for people who may not have the time to water their plants regularly.
Preparing the Ceramic Pot
Cleaning and Prepping the Pot
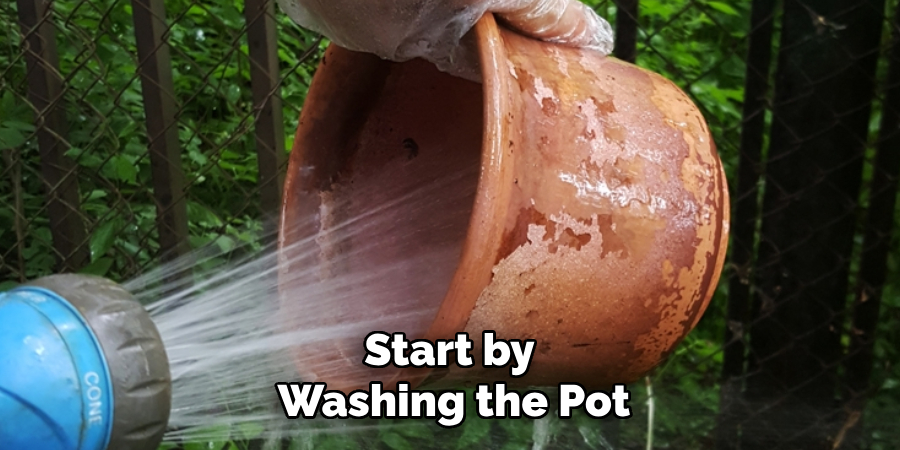
Before you begin transforming your ceramic pot into a self-watering system, it’s important to thoroughly clean it. Start by washing the pot with mild soap and water to remove any dirt, dust, or grease that may have accumulated on the surface. Rinse well to ensure no soap residue remains. This step is crucial because any debris or grease can interfere with the adhesion of the reservoir and wick materials, potentially compromising the functionality of your self-watering system.
Drilling Holes for the Wick and Drainage
To ensure your self-watering pot functions effectively, you must drill two holes in the bottom of the ceramic pot. Use a drill with a ceramic drill bit to create a wick hole large enough for the wick material to fit snugly through without leaving gaps. Next, drill a slightly larger hole for drainage, which is necessary to prevent excess water from accumulating in the soil. The wick hole facilitates the upward movement of water from the reservoir, allowing it to reach plant roots consistently. Meanwhile, the drainage hole ensures that the soil remains well-aerated and prevents waterlogging, thereby maintaining an optimal environment for healthy plant growth.
How to Make a Self Watering Ceramic Pot: Creating the Water Reservoir
Preparing the Base for the Water Reservoir
To create an efficient water reservoir, you will need to use unglazed ceramic or clay, as its porous nature allows water to be absorbed gradually through the walls, providing a consistent supply of moisture to the plant roots. Begin by forming a base that fits snugly into the bottom of your ceramic pot. The unglazed ceramic should be shaped into a shallow bowl or plate that can conform to the pot’s interior curves. This base separates the potting soil from the water storage area while facilitating moisture-wicking.
Adding the Water Storage Area
Once the base is prepared, the next step is establishing a small water storage area within the ceramic pot. You can either mold a custom reservoir from clay or use a pre-made, unglazed ceramic container that fits the available space at the bottom of the pot. Ensure the reservoir is at least a few inches deep to store sufficient water for several days, allowing adequate self-watering during your absence.
Secure it in place using waterproof sealant around the edges, ensuring no water can leak out. This reservoir should be carefully positioned so that the wick can easily extend from the water area into the soil, allowing for optimal absorption and distribution of water to the plant roots. As you finalize, make certain the reservoir is properly leveled and fits tightly within the pot to facilitate consistent water delivery without compromising plant health.
How to Make a Self Watering Ceramic Pot: Inserting the Wick for Watering
Choosing the Right Wick Material
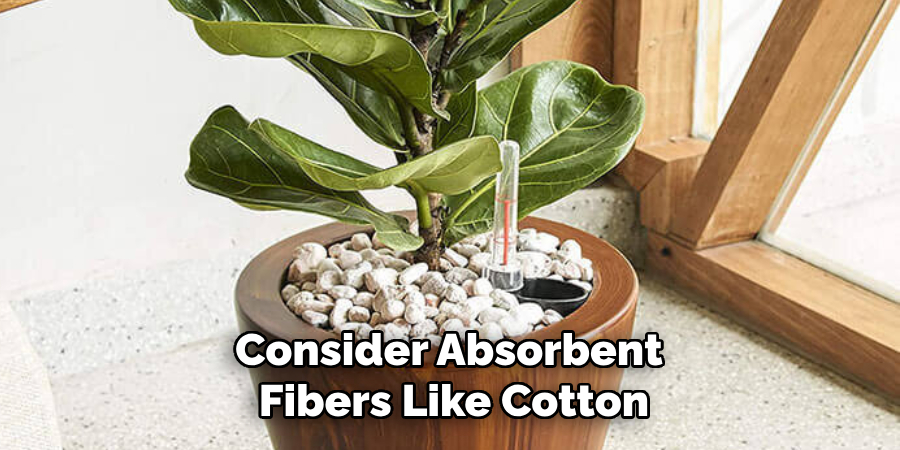
When selecting a wick material, consider absorbent fibers like cotton or nylon. These materials effectively draw water from the reservoir to the soil through capillary action. Choose a thicker wick for larger plants to ensure sufficient water delivery, while smaller plants may require a thinner wick.
Attaching and Positioning the Wick
To install the wick, first measure the distance from the base of the water reservoir to the soil level. Cut the wick material to a length that ensures it extends fully into the reservoir while reaching up toward the top of the soil layer. Thread one end of the wick through the drilled wick hole at the bottom of the ceramic pot, ensuring it fits snugly to maintain a secure water transfer. Ensure that the other end of the wick is fully submerged in the reservoir and tucked into the potting soil but away from the drainage hole to prevent blockage. Position the wick to deliver water uniformly across the soil, enabling even moisture distribution and healthy plant growth.
Sealing and Assembling the Pot
Sealing the Reservoir and Pot
To ensure your self-watering pot functions effectively, it is crucial to seal the reservoir inside the pot with a waterproof sealant. Start by applying a generous sealant layer around the edges where the reservoir meets the ceramic pot. This prevents leaks, ensuring water is absorbed slowly into the soil through the wick. Once the sealant is applied, let it dry completely according to the manufacturer’s instructions, which typically takes 24 hours. It is essential to allow sufficient drying time to ensure the integrity of the seal before proceeding to the final assembly.
Final Assembly
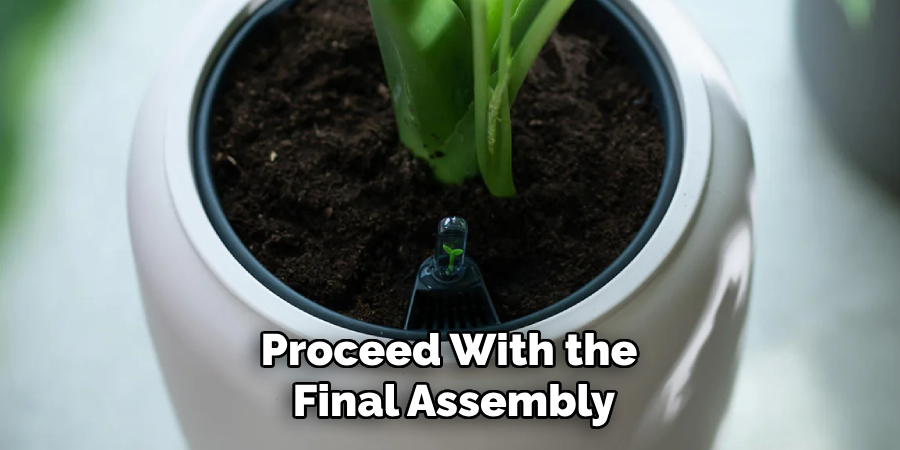
After confirming the sealant has dried, proceed with the final assembly of your self-watering pot. Begin by positioning the wick securely in the soil, ensuring it is properly routed through the drilled hole at the pot’s base and fully extends into the reservoir. Once the wick is in place, pack the potting soil evenly to support plant growth while allowing room for root expansion. Finish by ensuring that all components are tightly fixed and the pot stands upright securely. With minimal maintenance, your self-watering system is now ready to support healthy plant growth.
Testing the Self-Watering System
Checking the Wick and Water Flow
To test your self-watering system, begin by filling the reservoir with water. Observe the wick to ensure it draws water into the soil effectively. If you notice the soil remains dry, consider adjusting the wick’s position, ensuring it fully extends into the reservoir and up through the soil. If the wick is too short or too long, cut or extend it accordingly to optimize water flow. Consistent inspection during the initial stages is crucial for proper functionality.
Troubleshooting Common Issues
If your self-watering system faces issues such as the wick not drawing sufficient water or the reservoir leaking, there are simple solutions. For a non-absorbing wick, ensure it’s made of suitable absorbent material and fully submerged. If there’s a leak, inspect the sealant application and reapply if necessary for a watertight finish. Frequent monitoring and tweaking solve most issues efficiently, ensuring your plants receive consistent moisture.
Conclusion
In conclusion, learning how to make a self watering ceramic pot involves several key steps: preparing a base and reservoir, choosing and positioning a suitable wick, sealing components securely, and conducting thorough tests for effectiveness. The benefits of this system include reduced maintenance and reliable moisture delivery, catering to busy plant enthusiasts. Experiment with various designs, plant types, and decorative touches to personalize your pot. For enduring success, ensure proper sealing to prevent leaks and use durable materials. With these guidelines, your self-watering pot will support healthy plants with minimal effort, enhancing your indoor gardening experience.
Specialization:
- Master of wheel-throwing, hand-building, and advanced glazing techniques
- Focus on creating both functional pottery and decorative art pieces
Recognition:
- Celebrated by collectors and art enthusiasts for creating one-of-a-kind pieces that blend artistry with functionality
- Participates in local and national exhibitions, earning accolades for his innovative designs and craftsmanship
Passion:
- Deeply committed to exploring and pushing the boundaries of ceramic artistry
- Continuously experiments with new materials, firing techniques, and artistic concepts to evolve his craft
Personal Philosophy:
- Believes in the transformative power of art, aiming to evoke emotions and connections through his ceramic creations
- Advocates for sustainability in ceramics, using eco-friendly materials and practices whenever possible