


Are you a fan of Link and his adventures in The Legend of Zelda? Want to make your very own ocarina just like the one he uses in the game? Look no further because we have a step-by-step guide on how to make an ocarina out of clay!
Creating your own ocarina out of clay can be a fun and rewarding project that combines art, music, and craftsmanship. This traditional wind instrument, often shaped like a small vessel, produces beautiful tones and has been cherished across various cultures for centuries.
Following a few simple steps, you can craft a fully functional ocarina while exploring your creativity and improving your clay-working skills. Whether you’re a seasoned artist or a beginner, making an ocarina is a process that is both accessible and enjoyable.
What Are the Benefits of Making an Ocarina Out of Clay?
When you make your own ocarina, you are honing your crafting skills and experiencing the joy and satisfaction of creating something with your own two hands. Working with clay allows for a hands-on approach to making art that can be relaxing and therapeutic. Shaping and molding the clay into a functional instrument can also be meditative and rewarding.
Moreover, making an ocarina out of clay is a cost-effective alternative to purchasing one. While some high-quality ocarinas can come at a steep price, creating one yourself allows you to have complete control over the materials used and the design of your instrument.
What Will You Need?
Before making your ocarina, gather all the materials and tools necessary for the project. Here’s a list of items you’ll need:
- Clay (preferably air-dry or polymer clay)
- Rolling pin
- Sculpting tools (such as dental tools, clay knives, and wire loop tools)
- Modeling clay or play dough
- Sandpaper (various grits)
- Water
- Acrylic paint or glaze
Once you have all the materials, it’s time to get started on your clay ocarina!
8 Easy Steps on How to Make an Ocarina Out of Clay
Step 1: Plan Your Design

Before you start working with the clay, it’s essential to have a clear plan for your ocarina’s design. Begin by deciding on the shape and size of your instrument, as this will impact both its functionality and aesthetics. Common shapes include oval, fish, or even abstract designs, depending on your creativity and the purpose of the ocarina.
Sketching your design on paper is highly recommended—it will serve as a visual guide as you proceed. Consider where the finger holes will be placed and how many you’d like to include. Remember that the number of holes will determine the range of notes your ocarina can produce, with more holes allowing for a greater variety of pitches. Ensure the arrangement of the holes is ergonomic and easy to cover with your fingers while playing.
Additionally, consider decorative elements or patterns you want to incorporate into the final product. Whether you’re aiming for a simple, smooth finish or a more intricate, textured design, having a plan in place will make the crafting process much smoother and enjoyable.
Step 2: Preparing the Clay
The next step in crafting your ocarina is to prepare the clay. Choose a type of clay suitable for shaping and firing, such as earthenware or polymer clay, depending on your resources and the desired durability of your instrument. Start by kneading the clay thoroughly to remove any air bubbles and make it pliable. This process is crucial because air pockets can lead to cracks or imperfections during the drying or firing stages.
Once your clay is smooth and ready to work with, divide it into sections based on the size and shape you have planned for your ocarina. This ensures you have enough material to build the ocarina’s body and any additional features, such as decorative elements or a mouthpiece. Preparing the clay properly provides the foundation for a well-crafted and functional instrument.
Step 3: Shaping the Body
Once the clay is prepared, it’s time to shape the body of your ocarina. Depending on your design, begin by forming the main structure, usually an oval or elongated shape. Use your hands or shaping tools to mold the clay evenly, ensuring the walls are neither too thick nor too thin. After forming the base shape, carefully create a hollow interior by splitting the clay into two halves and carving out the center of each side. Then, combine the halves using slip or water, smoothing out the seams to create a unified structure.
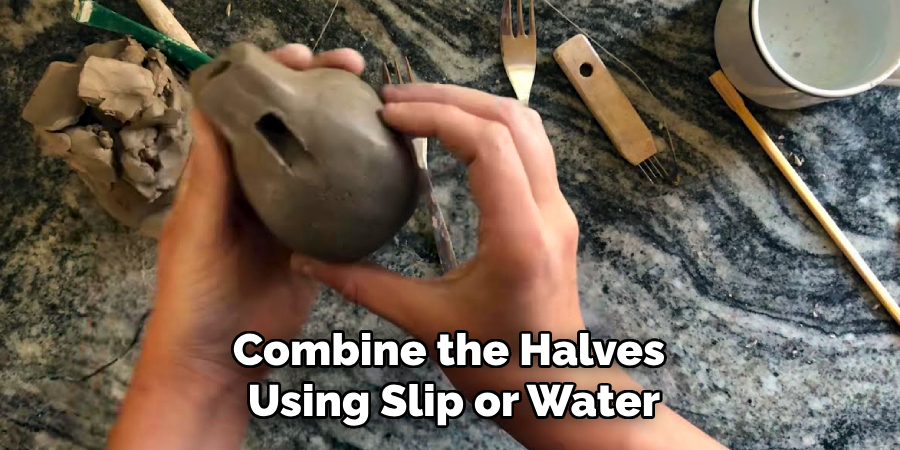
This hollow body is essential for producing the resonant sound of the ocarina. Handle the clay gently during this step to avoid unintended distortions. Proper shaping at this stage lays the groundwork for the instrument’s acoustic quality and overall appearance.
Step 4: Creating the Mouthpiece
The mouthpiece is a crucial component of the ocarina, as it directs airflow into the instrument to produce sound. To create the mouthpiece, start by shaping a small tubular piece of clay that will connect smoothly to the main body. Carefully attach it to the designated end of the ocarina, ensuring a secure bond by using slip or water. Smooth out any seams and check that the angle and alignment allow for a clear and unobstructed air flow.
The interior of the mouthpiece should taper slightly toward the opening to enhance the instrument’s sound production. Take your time with this step, as precision is key to the ocarina’s playability and tonal quality.
Step 5: Adding the Finger Holes
The finger holes determine the range of notes the ocarina can produce, making their placement and size essential to the instrument’s functionality. Begin by marking the locations for the finger holes on the surface of the ocarina, using a reference or template if needed. Once marked, carefully pierce the clay with a tool such as a needle or carving knife, gradually enlarging the holes to the desired diameter.
Be mindful to keep the holes evenly spaced and symmetrical to ensure proper tuning and ease of play. After creating the holes, smooth the edges with water or a fine tool to avoid any sharp or uneven areas. Test the placement and size of the holes by gently blowing into the mouthpiece and covering different combinations of holes to confirm the desired range of notes is achievable.
Step 6: Drying and Firing the Ocarina

Once the finger holes and overall shape are finalized, the ocarina must be thoroughly dried before firing. Place the instrument in a cool, dry area with good airflow, avoiding direct sunlight to prevent cracks from forming in the clay. Drying times may vary depending on the thickness of the material, but ensure the ocarina feels completely hardened and no longer cool to the touch before proceeding.
After drying, the ocarina needs to be fired in a kiln to harden the clay further and make it durable. Follow the specific firing recommendations for the type of clay used, paying attention to temperature settings and durations. The firing process transforms the delicate structure into a robust and playable instrument.
Step 7: Tuning and Finishing the Ocarina
After the firing process is complete and the ocarina has cooled, it’s time to tune the instrument. Using a tuner or a piano as a reference, test each note by blowing into the mouthpiece while covering the appropriate finger holes. Make minor adjustments by sanding or carefully enlarging the holes if a note is out of tune. Be cautious during this step, as any alterations may affect the ocarina’s overall sound quality and pitch.
Once tuning is finalized, smooth out any rough edges and apply a finish to protect the surface and enhance its appearance. Standard finishes include glaze, paint, or a natural oil coating, depending on your preference and the type of clay used. Allow the finish to dry completely before playing your ocarina, ensuring it is both functional and aesthetically pleasing.
Step 8: Testing and Playing Your Ocarina
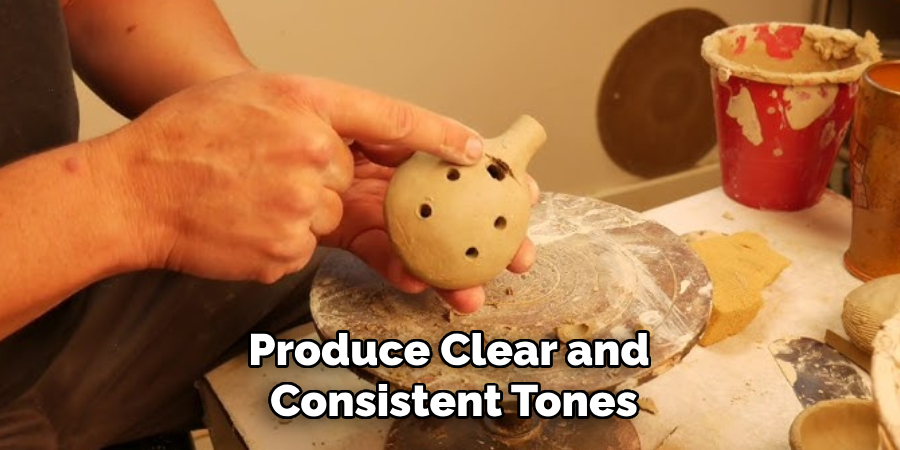
With your ocarina fully tuned and finished, the final step is to test its sound quality and start playing. Begin by experimenting with different breath pressures to produce clear and consistent tones. Practice covering and uncovering the finger holes to play various notes and familiarize yourself with the ocarina’s range. Simple melodies and scales are excellent starting points for beginners.
By following these steps and putting time and care into the process, you can create a unique and functional ocarina that produces beautiful music.
5 Things You Should Avoid
- Using the Wrong Type of Clay: Avoid using clay that is too brittle or does not retain shape well when dried. Opt for high-quality, air-dry, or kiln-fired clay that is suitable for sculpting and ensures durability.
- Skipping the Hollowing Process: Failing to hollow out the clay properly can result in an ocarina that doesn’t produce sound. Ensure the inner chamber is smooth and hollow for proper airflow and resonance.
- Making Uneven Walls: Uneven walls can lead to structural weakness and affect the sound quality of the ocarina. Take your time to mold uniform thickness throughout.
- Improper Placement of Finger Holes: Avoid randomly placing finger holes without proper measurement, as this can disrupt the pitch and tuning. Use a guide to mark their positions precisely.
- Drying or Firing Too Quickly: Rushing the drying or firing process can cause cracks or warping in the clay. Follow slow, controlled methods for drying or firing to maintain the ocarina’s integrity.
Conclusion
How to make an ocarina out of clay is a rewarding process that combines artistry with functionality.
By carefully choosing the right materials, following precise techniques for shaping and hollowing, and taking the time to correctly position and refine the finger holes, you can craft an instrument that looks beautiful and produces harmonious sounds. Remember to exercise patience during the drying and firing stages to prevent any structural damage.
With practice and attention to detail, you can create a durable and well-tuned ocarina that reflects your creativity and skill.
Specialization:
- Master of wheel-throwing, hand-building, and advanced glazing techniques
- Focus on creating both functional pottery and decorative art pieces
Recognition:
- Celebrated by collectors and art enthusiasts for creating one-of-a-kind pieces that blend artistry with functionality
- Participates in local and national exhibitions, earning accolades for his innovative designs and craftsmanship
Passion:
- Deeply committed to exploring and pushing the boundaries of ceramic artistry
- Continuously experiments with new materials, firing techniques, and artistic concepts to evolve his craft
Personal Philosophy:
- Believes in the transformative power of art, aiming to evoke emotions and connections through his ceramic creations
- Advocates for sustainability in ceramics, using eco-friendly materials and practices whenever possible