


Creating ceramic butterflies is a delightful and creative craft that combines artistry with technique. Whether you’re a seasoned ceramicist or a beginner, this project allows you to explore your creativity while making decorative pieces that can brighten up any space. These handcrafted butterflies are perfect for wall decor, gifts, or adding a touch of charm to your garden.
This guide on how to make ceramic butterflies will walk you through the basic steps and tips to make your own ceramic butterflies, from shaping the clay to adding intricate details and vibrant colors.
Why Make Ceramic Butterflies?
Ceramic butterflies are not only beautiful and unique, but they also have a special meaning and symbolism. In many cultures, butterflies symbolize transformation, growth, and hope. They also represent the fragility of life and the beauty that can be found in imperfection. By making your own ceramic butterflies, you can infuse these meanings into your art and create something truly meaningful.
Materials Needed
- Clay (Can Be Air-dry or Oven-baked, Depending on Your Preference)
- Rolling Pin
- Butterfly-shaped Cookie Cutter
- Knife or Clay Carving Tools
- Texture Mats or Stamps (Optional)
- Acrylic Paints
- Paintbrushes
- Clear Glaze Spray
8 Step-by-step Guides on How to Make Ceramic Butterflies
Step 1: Prepare Your Work Surface
Start by setting up a clean and organized work surface. Choose a flat, sturdy table and cover it with a non-stick surface, such as wax paper or a silicone mat, to prevent the clay from sticking. Make sure all your materials and tools are within reach before you begin.
Having a tidy and well-prepared area will make the process smoother and help you focus on your creative work. Additionally, wear an apron or old clothing to protect yourself from any clay residue or paint splatters.
Step 2: Condition the Clay
Before shaping your ceramic butterflies, it’s essential to condition the clay to ensure it is pliable and free from cracks. Take a portion of your clay and knead it with your hands for a few minutes. This process warms up the clay and improves its consistency, making it more manageable to work with.
If the clay feels too stiff, you can add a small amount of water to soften it, but be careful not to overdo it, as too much moisture can make the clay sticky. Properly conditioned clay will make it much easier to roll out and shape into your desired butterfly form.
Step 3: Roll Out the Clay
Once your clay is conditioned, place it on your prepared work surface. Use a rolling pin to flatten the clay evenly to your desired thickness, which is typically around 1/4 inch for durability. Roll the clay in smooth, even strokes to achieve a uniform surface.
If you want to add texture to your butterflies, now is the time to press texture mats or stamps gently onto the rolled-out clay. This can create interesting patterns that will make your butterflies stand out. Be sure to work quickly yet carefully to prevent the clay from drying out before you move on to the next step.
Step 4: Cut Out the Butterfly Shapes
Take a butterfly-shaped cookie cutter and press it firmly into your rolled-out clay to cut out the desired number of butterflies. You can also use a knife or clay carving tools to hand-cut your butterfly shapes if you don’t have a cookie cutter on hand.
Carefully remove the excess clay from around the butterfly shape, leaving only the outline of the butterfly form. Smooth out any rough edges using your fingers or a smoothing tool.
Step 5: Create Details
Using your carving tools or a toothpick, add details such as lines for wings, antenna, and other markings onto your butterfly shape. You can also gently fold and manipulate the clay to create a 3D effect, such as raising the wings or shaping the body of the butterfly. Let your creativity guide you in this step.
The details you add will give your ceramic butterflies a unique and personalized touch. Take your time with this step and don’t be afraid to experiment with different patterns and designs.
Step 6: Bake or Air-dry the Clay Butterflies
If you are using oven-bake clay, follow the instructions on the package for baking times and temperatures. If you choose air-dry clay, let the butterflies dry completely according to the instruction manual before moving on to the next step.
Once your butterflies are fully dry or baked, gently remove them from your non-stick surface and inspect them for any imperfections. You can use sandpaper or a smoothing tool to fix any rough edges or bumps.
Step 7: Paint Your Butterflies
Now comes the fun part – painting your ceramic butterflies! Acrylic paints work well on both air-dry and oven-bake clay. Use a variety of colors to add depth and dimension to your butterflies. You can also use different types of paintbrushes, such as fine-tipped brushes for details and larger ones for broader strokes.
Let your butterflies dry completely before moving on to the next step.
Step 8: Seal with Clear Glaze
Using a clear glaze spray, seal your painted ceramic butterflies to protect the paint from chipping or fading over time. Follow the instructions on the glaze product carefully for best results.
Once dried, your ceramic butterflies are ready to be displayed or given as gifts. You can attach them to walls, shelves, or even create a beautiful mobile using multiple butterflies.
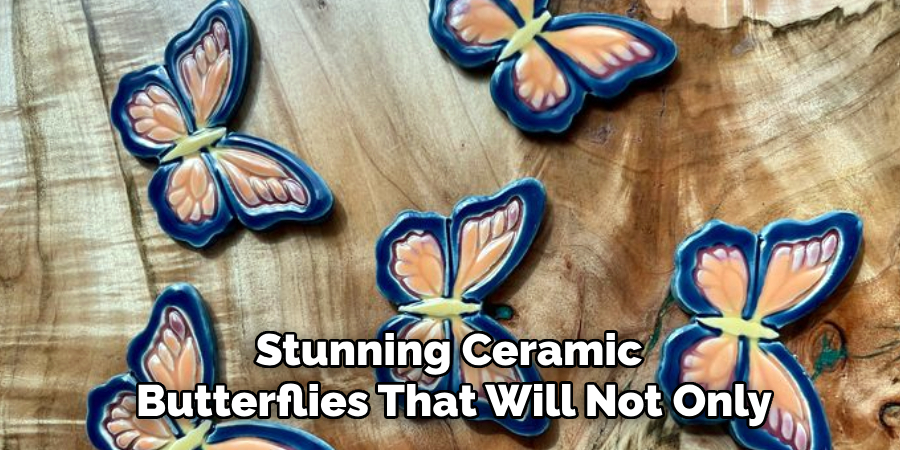
Following these steps on how to make ceramic butterflies and adding your personal touch, you can create stunning ceramic butterflies that will not only be a beautiful addition to your home decor but also hold special meaning and symbolism. So why not give it a try and see what unique creations you can come up with? The possibilities are endless!
Troubleshooting and Common Mistakes
- If your clay is too dry or cracking, add a small amount of water to moisten it.
- If the clay is too sticky, try adding cornstarch or baby powder to reduce stickiness.
- Make sure to smooth out any air bubbles before baking or drying the clay.
- When painting, thin layers work better than thick ones to avoid paint cracks.
- Remember to thoroughly clean and dry your tools after each use.
- If your butterflies are too fragile, you may need to make them thicker or use a stronger type of clay.
- Don’t be afraid to experiment and make mistakes, that’s part of the creative process!
Customizing Your Ceramic Butterflies
- Use different types of clay, such as porcelain or polymer clay, for different effects and textures.
- Add glitter or metallic paint for some extra sparkle.
- Experiment with butterflies of different shapes and sizes.
- Create a pattern or design using multiple butterfly shapes.
- Use different painting techniques, such as splattering or stamping, for unique effects.
- Add beads or gems onto your butterflies for added dimension and texture.
- Display your butterflies in various ways, such as hanging on a string or placing them in a shadow box.
- Personalize your butterflies with names or quotes using clay stamps or carving tools.
- Create themed sets of butterflies, such as a garden-inspired set or a rainbow-colored set.
The possibilities for customization are endless, so have fun and let your creativity soar! With these tips and steps, you can enjoy making beautiful ceramic butterflies that will be cherished for years to come.
Frequently Asked Questions
Q: Can I Use Air-dry Clay Instead of Oven-bake Clay?
A: Yes, you can use air-dry clay instead of oven-bake clay for this project. Just make sure to follow the instructions on the package for drying times and methods.
Q: Do I Need Special Tools to Make Ceramic Butterflies?
A: Having specific tools, such as a rolling pin or clay carving tools, can make the process easier and more precise, but you can also use household items like toothpicks or knives for this project.
Q: Are These Butterflies Safe for Outdoor Use?
A: It depends on the type of clay and paint used. If using oven-bake clay and outdoor-safe paint, your butterflies should be safe for outdoor display. However, it is recommended to keep them indoors to preserve their longevity.
Q: Can I Make Different Shapes and Designs Using This Technique?
A: Absolutely! This technique can be applied to different shapes and designs, so feel free to let your imagination run wild and create unique ceramic pieces. You can also use this technique to make other types of animals or objects, adding your personal touch and creativity. So why not give it a try and see what amazing creations you can come up with? The possibilities are endless!
Conclusion
Making ceramic butterflies is not only a fun and creative activity but also allows you to infuse meaning and symbolism into your art. With the simple materials and steps outlined in this guide on how to make ceramic butterflies, you can create your own unique and personalized ceramic butterflies that will bring joy and beauty wherever they are displayed.
So gather your materials, unleash your creativity, and start making some stunning ceramic butterflies today! Happy crafting!
Specialization:
- Master of wheel-throwing, hand-building, and advanced glazing techniques
- Focus on creating both functional pottery and decorative art pieces
Recognition:
- Celebrated by collectors and art enthusiasts for creating one-of-a-kind pieces that blend artistry with functionality
- Participates in local and national exhibitions, earning accolades for his innovative designs and craftsmanship
Passion:
- Deeply committed to exploring and pushing the boundaries of ceramic artistry
- Continuously experiments with new materials, firing techniques, and artistic concepts to evolve his craft
Personal Philosophy:
- Believes in the transformative power of art, aiming to evoke emotions and connections through his ceramic creations
- Advocates for sustainability in ceramics, using eco-friendly materials and practices whenever possible