


Creating ceramic giant candy is a fun and rewarding project that combines artistic expression with playful creativity. Whether you’re looking to craft bold decor for a whimsical display or unique art pieces to brighten up a space, this guide on how to make ceramic giant candy will walk you through the process step by step.

With a little clay, some tools, and your imagination, you’ll soon be shaping sweets that are as delightful to look at as they are impressive in size.
Why Make Ceramic Giant Candy?
There are many reasons why you may want to make ceramic giant candy. Some of the most popular include:
Decor:
If you have a sweet tooth or simply love cute and colorful decor, then creating ceramic giant candy is a great way to add some fun and whimsy to your space. These oversized treats make great conversation pieces and can add a touch of playfulness to any room.
Gifts:
Ceramic giant candy also makes for unique and thoughtful gifts. You can customize the flavor, color, and size of your creation to match the recipient’s taste or fit their home decor. Plus, handmade gifts are always cherished and appreciated.
Art:
For those with a passion for pottery or sculpture, making ceramic giant candy is an opportunity to push your creative boundaries and explore new techniques. It’s also a chance to showcase your skills and create one-of-a-kind pieces that are sure to stand out.
Materials Needed
Clay:
The most important material you will need for this project is clay. You can use any type of clay, but polymer or air-dry clays are recommended as they are easier to work with and do not require a kiln for firing.
Rolling Pin:
To flatten and roll out your clay, you will need a rolling pin. A regular kitchen rolling pin works well, or you can purchase one specifically designed for pottery.
Sculpting Tools:
Sculpting tools come in various shapes and sizes and are essential for shaping and detailing your ceramic giant candy. You can find these at your local art store or online.
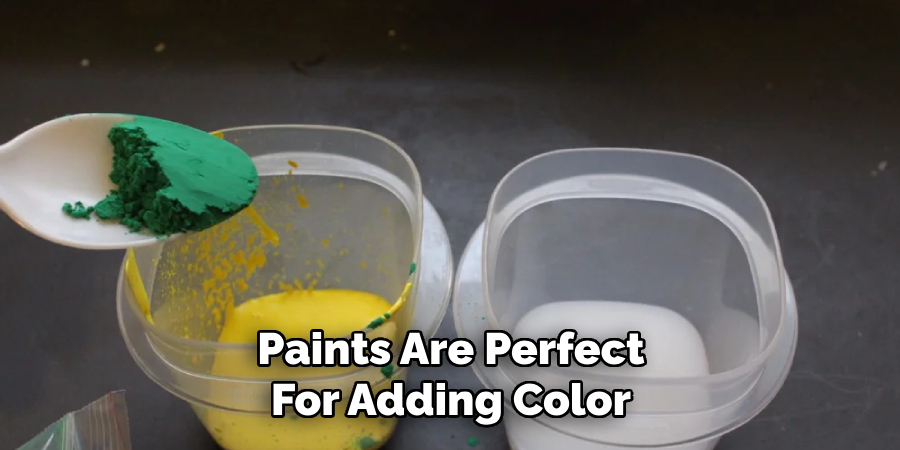
Acrylic Paints:
Acrylic paints are perfect for adding color and detail to your creations. They come in a wide range of colors and can be mixed together to create custom shades.
Brushes:
Invest in a variety of paintbrushes, including small detail brushes and larger ones for covering larger areas.
Clear Glaze (optional):
If you want to give your ceramic giant candy a glossy finish, you can apply a clear glaze over the painted surface. This also helps protect the clay from wear and tear.
8 Step-by-step Guidelines on How to Make Ceramic Giant Candy
Step 1: Prepare Your Clay
Start by kneading your clay to ensure it’s soft, pliable, and free from air bubbles. This process, often called conditioning, makes the clay easier to work with and helps prevent cracking or uneven textures later on.
Once the clay is properly kneaded, shape it into a ball or flatten it slightly, depending on the type of candy design you’re planning to create.
If you’re using air-dry clay, be sure to keep the clay you’re not actively working on covered with plastic wrap or kept in an airtight container to prevent it from drying out prematurely.
Step 2: Roll Out the Clay
Using your rolling pin, roll out the clay evenly to your desired thickness. Aim for a consistent thickness throughout to ensure your candy design remains uniform and sturdy. If you’re creating a flat candy shape like a lollipop or wrapped candy, a thickness of about 1/4 inch is ideal. For three-dimensional designs, you may need to adjust accordingly.
To prevent the clay from sticking to your work surface or the rolling pin, consider placing parchment paper or a silicone mat underneath and lightly dusting the surface with cornstarch or flour. Keep in mind the proportions of your finished piece as you roll out the clay.
Step 3: Cut Out Your Shape
Using a sharp knife or sculpting tool, carefully cut out the shape of your candy from the rolled-out clay. You can also use cookie cutters for more intricate designs. For perfectly round shapes, gently press down and twist a circular object onto the rolled-out clay to create an even imprint before cutting along the outline.
It’s essential to be precise and careful when cutting your clay as any mistakes or uneven edges will affect the final look of your ceramic giant candy.
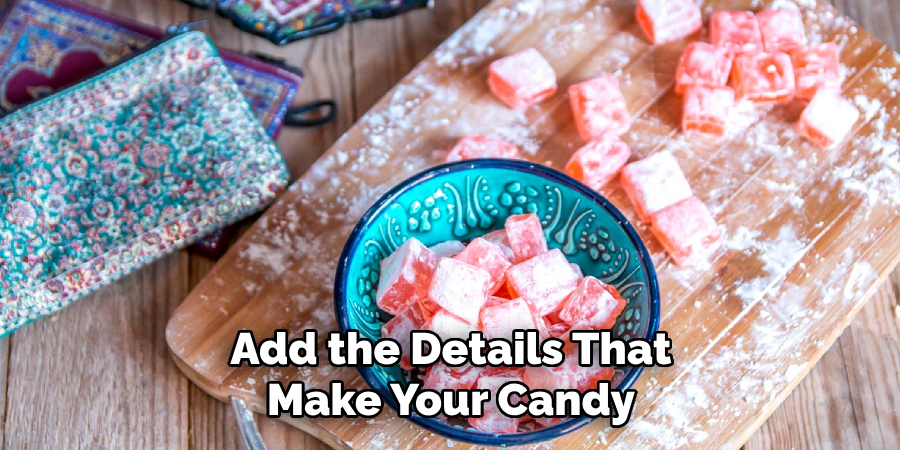
Step 4: Add Details
Now, it’s time to add the details that make your candy come to life. You can use a variety of sculpting tools to create lines, textures, and shapes on the surface of your clay. For example, you can use a toothpick or skewer to create swirls on lollipops or indentations on wrapped candies. Get creative with different patterns and designs for a truly unique result.
The details can also be added after the clay is baked and cooled using paint or markers. This allows for more precision and control over the final look of your candy.
Step 5: Bake Your Creation
If you’re using air-dry clay, skip this step and proceed to the finishing touches. For polymer clay, you’ll need to bake your creation according to the manufacturer’s instructions. Typically, this involves preheating an oven to a specific temperature (usually between 265-275°F), placing your pieces on a baking tray lined with parchment paper, and baking for about 30 minutes per ¼ inch of thickness.
Be sure to keep an eye on your creations while they are baking to prevent burning or uneven coloring.
Step 6: Paint Your Candy
Once your clay has cooled, it’s time to paint! Use acrylic paints and various sizes of brushes to add color and detail to your creation. You can also mix colors together to create custom shades. Be sure to let each layer of paint dry before adding another one on top.
If you’re using a clear glaze, apply it after painting and allow it to dry completely before handling your ceramic giant candy.
Step 7: Finishing Touches
To make your candy look even more realistic, consider adding some finishing touches like sprinkles, glitter, or a glossy coating with a clear glaze. You can also experiment with different painting techniques like dry brushing or adding a metallic finish for a unique touch.
It’s also a good idea to seal your finished piece with a clear acrylic sealant to protect the paint and ensure it lasts for a long time.
Step 8: Display and Enjoy
Once your ceramic giant candy is complete, find the perfect spot to display it in your home or gift it to a loved one. These handmade pieces make great decorations for any room and are sure to be cherished for years to come.

Following these step-by-step guidelines on how to make ceramic giant candy, you can create your very own ceramic giant candy in a variety of shapes and designs. Let your imagination run wild and have fun bringing these sweet treats to life! Happy crafting!
Frequently Asked Questions
Q: How Long Does It Take to Make Ceramic Giant Candy?
A: The time it takes to make ceramic giant candy varies depending on the complexity of the design and the type of clay used. On average, it can take anywhere from 1-3 hours to complete one piece.
Q: Can I Use Air-Dry Clay Instead of Polymer Clay?
A: Yes, you can use air-dry clay instead of polymer clay for this project. However, keep in mind that air-dry clay does not require baking and may have a different texture and finish compared to polymer clay.
Q: Is This Project Suitable for Beginners?
A: Yes, this project is suitable for beginners as long as they take their time and follow the instructions carefully.
Q: Can I Make Edible Giant Candy Using These Instructions?
A: No, these instructions are specifically for crafting ceramic giant candy using non-edible materials. It is not recommended to consume or use them as actual candy.
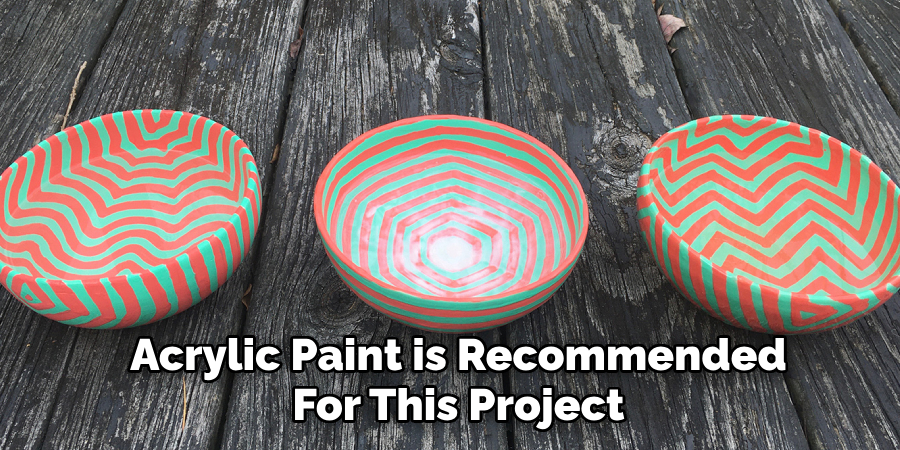
Q: Can I Use Any Type of Paint for This Project?
A: Acrylic paint is recommended for this project as it adheres well to the clay and provides a vibrant finish. However, you can also use other types of paint such as enamel or spray paint if desired.
Conclusion
Creating ceramic giant candy is not only a fun and enjoyable activity, but it also allows you to express your creativity and make unique pieces of art. With just a few materials and some simple steps on how to make ceramic giant candy, you can create beautiful sculptures that will add a touch of whimsy and sweetness to your home decor.
So gather your supplies and get ready to make some delicious-looking candy that will last for years to come! Remember, the possibilities are endless when it comes to designing and painting your ceramic giant candy, so don’t be afraid to experiment and have fun with it. Happy crafting!
Specialization:
- Master of wheel-throwing, hand-building, and advanced glazing techniques
- Focus on creating both functional pottery and decorative art pieces
Recognition:
- Celebrated by collectors and art enthusiasts for creating one-of-a-kind pieces that blend artistry with functionality
- Participates in local and national exhibitions, earning accolades for his innovative designs and craftsmanship
Passion:
- Deeply committed to exploring and pushing the boundaries of ceramic artistry
- Continuously experiments with new materials, firing techniques, and artistic concepts to evolve his craft
Personal Philosophy:
- Believes in the transformative power of art, aiming to evoke emotions and connections through his ceramic creations
- Advocates for sustainability in ceramics, using eco-friendly materials and practices whenever possible