


Are you interested in making a unique ceramic lamp for your home? Look no further! This guide will take you through the step-by-step process of creating your very own ceramic lamp.
How to make ceramic lamp is a rewarding and artistic process that combines craftsmanship with creativity. Whether you’re looking to add a personal touch to your home decor or explore the art of pottery, making your ceramic lamp can be an exciting project. It involves several stages, including designing, shaping the clay, glazing, and assembling the lamp components. This guide will walk you through each step, ensuring that even beginners can produce a functional and beautiful piece.
With patience and attention to detail, you can enjoy the satisfaction of illuminating your space with a lamp that reflects your style and skill.
What Will You Need?
Before getting started, gathering all the necessary materials and tools is essential. Here is a list of what you’ll need:
- Clay: The first step in making a ceramic lamp is choosing the suitable clay. You can opt for earthenware, stoneware, or porcelain clay. Each type has its unique characteristics that will affect your final product.
- Pottery Wheel: While hand-building is an option, using a pottery wheel gives you more control and precision over shaping your lamp.
- Tools: Some essential tools include a wire cutter, trimming tool, sponge, needle tool, and rib. These tools are used for cutting, shaping, texturing, and smoothing the clay.
- Glaze: Glazing adds color and shine to your ceramic piece. You can choose from various glaze colors, textures, and finishes to create your desired look.
- Lamp Kit: This includes all the electrical components needed to turn your ceramic piece into a functional lamp. Make sure to purchase one suitable for the size and weight of your lamp design.
- Kiln: Firing your clay in a kiln will ensure it becomes durable and water-resistant. If you don’t have access to a kiln, you can opt for air-dry clay or take your pieces to a local pottery studio for firing.
Once you have all your materials and tools ready, it’s time to start the lamp-making process!
10 Easy Steps on How to Make Ceramic Lamp
Step 1: Design Your Lamp
Before you begin working with the clay, having a straightforward design in mind for your lamp is essential. Consider the overall shape, size, and style you want your light to reflect. Do you prefer a modern, minimalist design, or are you leaning toward a more traditional or ornate style? Sketch your ideas on paper to help visualize the final product.
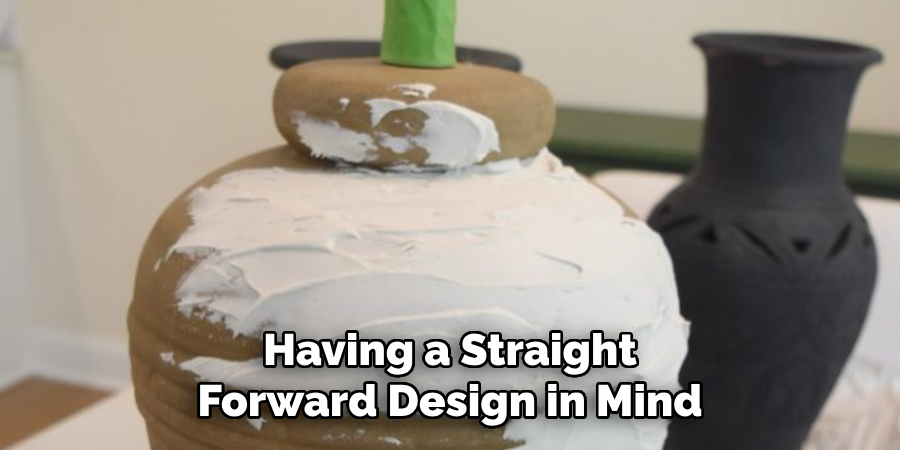
Consider the aesthetic aspects and the functional elements, such as where the lamp will reside in your home and how it will fit with the existing decor. Consider the type of lighting effect you wish to achieve and how the design can accommodate this. A well-thought-out design serves as a roadmap for the project, guiding you through each stage of creation and helping you to make decisions that align with your vision.
Step 2: Prepare the Clay
Once you have a straightforward design for your lamp, it’s time to prepare your clay. Begin by wedging the clay to remove air bubbles and ensure a smooth texture. This process is crucial as it prevents cracking or breaking during firing. Take a piece of clay and knead it with your hands, applying pressure while turning the clay over repeatedly. Continue this until the clay is pliable and uniformly smooth. Properly prepared clay will give you better control when shaping and enhancing the quality of the final product.
Step 3: Shape the Lamp Base
With your clay prepared, you can begin shaping your lamp’s base. If you’re using a pottery wheel, center the clay on the wheel and mold it according to your design. Use your hands and pottery tools to shape the clay, adjusting the height and width as necessary. For those opting for hand building, shape the clay piece by piece, using tools to smooth out the surface and add details. Keep a sponge handy to keep the clay moist, making it more malleable and easier to work with. As you shape the base, focus on creating a stable and even surface, ensuring it can support the weight of the lamp without tipping.
Step 4: Create the Lamp Body
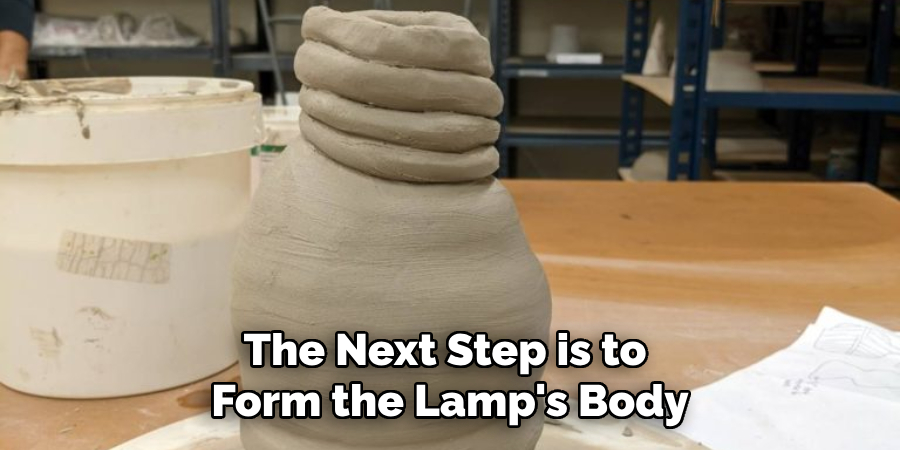
Once the base is complete, the next step is to form the lamp’s body. If you’re using a pottery wheel, continue shaping from the base upwards, gradually adding more clay as needed to build up the height. Maintain a consistent thickness throughout to prevent weak spots that may crack during firing. Use your hands and tools to refine the shape, and smooth the surface with a sponge for an even finish. Add patterns or textures using a needle tool or rib for a more intricate design. If you prefer hand-building, you can create coil or slab forms to construct the lamp body, joining pieces securely by scoring and slipping the joining surfaces.
Step 5: Form the Lamp Neck
With the base and body in place, you can now shape the neck of the lamp. The neck connects the body to the top opening, where the light fixture will be installed. Using the pottery wheel, taper the top of the lamp body, gradually narrowing it to create a natural transition from the body to the neck. Ensure the neck is proportionate to the rest of the lamp and tall enough to support the fixture without overpowering the design.
For that hand-building, add clay to the top of the body, carefully shaping and smoothing it to form the neck, ensuring it remains stable and well-joined. Pay attention to the flow and continuity of your design, as the neck can accentuate the lamp’s elegance by adding height and definition. Use pottery tools to refine the neck’s shape, maintaining a smooth surface and uniform thickness.
Step 6: Add Details and Decorations
With the lamp’s basic structure complete, it’s time to incorporate details and decorative elements that will bring your design to life. Use small sculpture tools or a needle tool to carve intricate patterns, etch designs, or add textural elements to the lamp body. If you want to highlight specific areas, consider using underglazes in different colors to paint intricate motifs or to outline certain features.
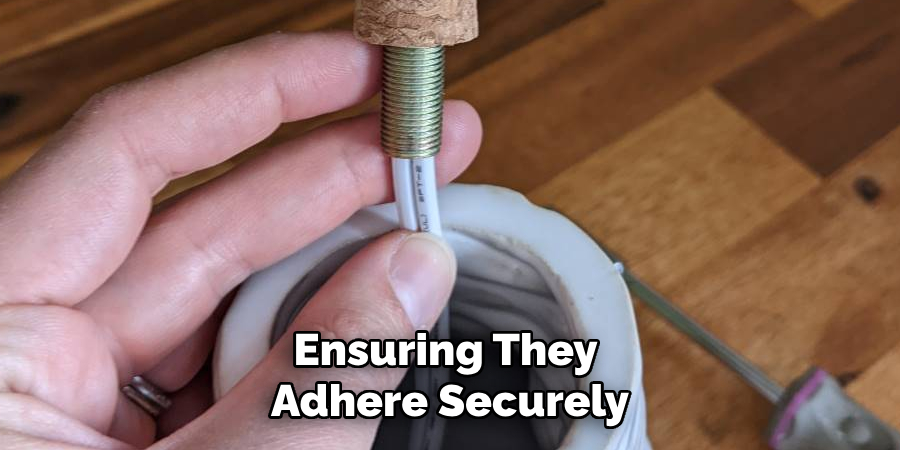
Additionally, you can attach appliqué elements made from clay to the lamp, such as floral designs, geometric shapes, or other embellishments. To attach clay pieces, score and slip the areas where the elements will be joined, ensuring they adhere securely. Pay attention to your design’s cohesion, ensuring that any decorations enhance rather than overpower the lamp’s overall appearance.
Step 7: Drying and Bisque Firing
Once the decorative elements are completed, allow the lamp to dry thoroughly before moving on to the kiln. This step is crucial to prevent any cracking or breaking during firing. Place the lamp in a well-ventilated area and let it dry slowly over several days. Keep it covered with plastic during the initial drying phase to control the moisture loss and avoid warping. Check that the clay has dried evenly by feeling for moisture and inspecting for color consistency throughout the lamp. Once the lamp completely dries, it’s ready for the bisque firing. Load the lamp into the kiln carefully, avoiding any contact with other pieces that could cause damage.
Step 8: Glazing Your Lamp
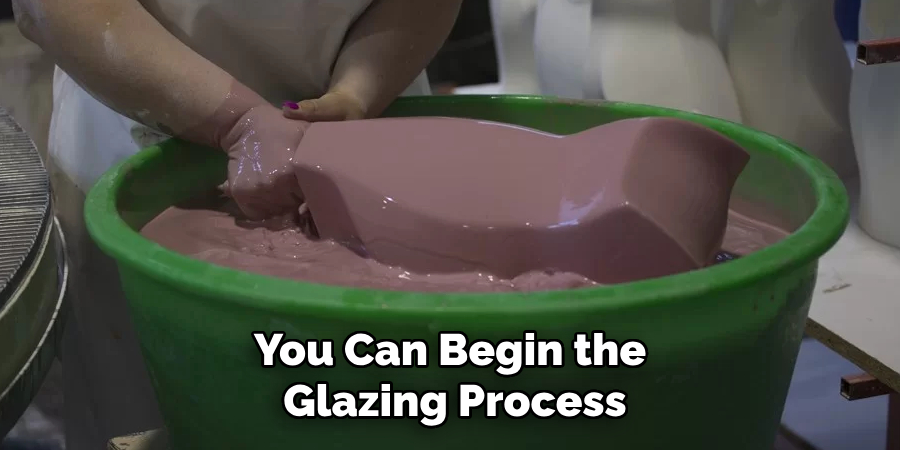
Once the bisque firing is complete, you can begin the glazing process to add color and a protective finish to your lamp. Choose glazes that complement your design, considering how different glaze colors may interact and blend. Before applying glaze, ensure the lamp is clean and free of dust or debris, as this could affect the final finish. Use a brush, dipping, or pouring method to apply the glaze, covering all areas evenly. Avoid applying too much glaze, which can drip or form uneven surfaces during the final firing. Consider using a finer brush to apply glaze to detailed sections or highlight specific elements for intricate designs.
Step 9: Final Assembly and Wiring
After the glaze has cooled and hardened, it’s time to assemble and wire the lamp. Carefully remove the lamp from the kiln and inspect it for imperfections or areas needing touch-ups. Attach the electrical components, such as the light fixture and wiring, to the lamp. Feed the lamp cord through the neck and secure the socket, ensuring all connections are tight and secure. Follow the manufacturer’s instructions for wiring the lamp to ensure safety and compliance with electrical standards. Once the wiring is complete, attach the lampshade to finish the assembly. Test the lamp to ensure it functions appropriately, adjusting any fittings as necessary.
Step 10: Displaying Your Handcrafted Lamp
With your lamp fully assembled, it’s time to find the perfect spot to showcase your creation. Consider placing your lamp in a location that complements the room’s décor and enhances the ambient lighting. A side table, desk, or nightstand can serve as an ideal setting where the lamp’s features and craftsmanship can be appreciated. Ensure the area is adequately ventilated and avoid areas prone to excessive moisture or direct sunlight to maintain the lamp’s integrity over time.
By following these steps and incorporating your unique design, you can create a beautiful and functional work of art that adds character and warmth to any room.
Conclusion
How to make ceramic lamp is a rewarding endeavor that combines artistic creativity with practical application.
From the initial concept and design sketch to the final assembly and wiring, each step offers an opportunity to tailor the lamp to your unique aesthetic and functional preferences. The process involves various skills, including pottery techniques, careful attention to drying and firing stages, and proficiency in glazing effects. As you follow these steps, you’ll gain a deeper understanding of working with clay and develop a personal item that reflects your artistic expression.
Ultimately, crafting a ceramic lamp is a blend of precision and creativity. It results in a stunning piece that illuminates your environment while showcasing your craftsmanship skills.
Specialization:
- Master of wheel-throwing, hand-building, and advanced glazing techniques
- Focus on creating both functional pottery and decorative art pieces
Recognition:
- Celebrated by collectors and art enthusiasts for creating one-of-a-kind pieces that blend artistry with functionality
- Participates in local and national exhibitions, earning accolades for his innovative designs and craftsmanship
Passion:
- Deeply committed to exploring and pushing the boundaries of ceramic artistry
- Continuously experiments with new materials, firing techniques, and artistic concepts to evolve his craft
Personal Philosophy:
- Believes in the transformative power of art, aiming to evoke emotions and connections through his ceramic creations
- Advocates for sustainability in ceramics, using eco-friendly materials and practices whenever possible