


Creating a ceramic pitcher is a rewarding and creative process that combines artistry with functionality. Whether you’re a beginner or an experienced potter, crafting your own pitcher allows you to explore techniques in shaping, decorating, and glazing while producing a practical item for everyday use.
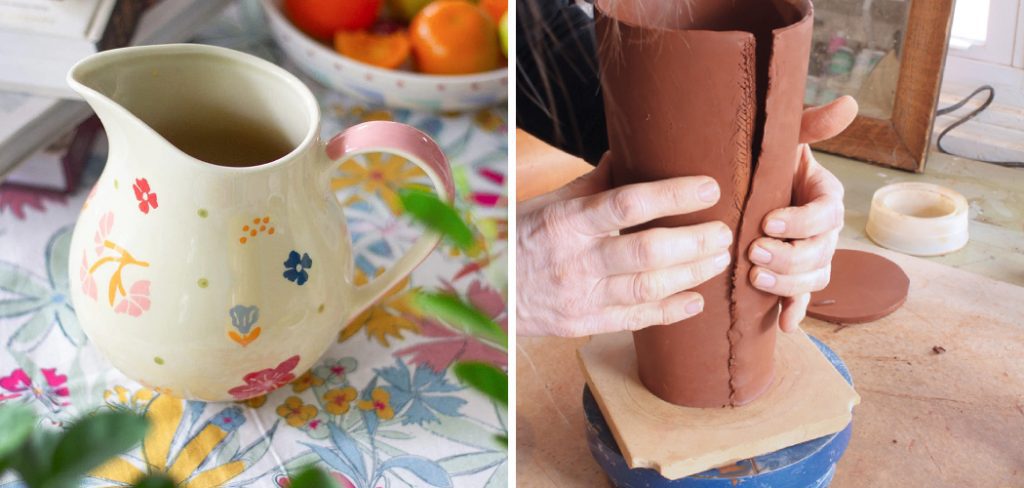
This guide on how to make ceramic pitcher will take you through the essential steps, from gathering materials to achieving a finished product, ensuring you have the knowledge and confidence to bring your vision to life.
Why Make a Ceramic Pitcher?
Before diving into the process, it’s important to understand why making a ceramic pitcher can be a fulfilling experience. Here are some reasons why you should consider making your own pitcher:
Personalization:
Making your own pitcher allows you to create a unique piece that reflects your personal style and taste. You can choose the shape, size, and design that best suits your preferences, making it a one-of-a-kind item.
Creative Outlet:
Crafting pottery is a form of self-expression and can be a great way to relieve stress and relax. Working with clay allows you to tap into your creativity and explore different techniques in shaping and decorating.
Practical Use:
A ceramic pitcher serves as both a functional and decorative piece in any household. It can be used for serving drinks or as a vase for flowers, adding beauty to everyday tasks.
Now that you have some motivation to make your own ceramic pitcher let’s dive into the steps involved.
Materials Needed
Before starting, gather all the necessary materials to ensure a smooth and successful process. Here’s a list of the basic materials you will need:
Pottery Clay:
Choose a type of clay that is suitable for wheel throwing or handbuilding, depending on your preferred technique. Make sure the clay is soft and pliable but not overly wet.
Pottery Wheel:
If you’re using a pottery wheel, make sure it is sturdy and in good condition. You can also opt for hand-building techniques if you don’t have access to a wheel.
Tools:
Some essential tools you will need include a sponge, wire tool, trimming tools, ribs, scoring tool, and cutting wire. These can be purchased at any pottery supply store or online.
Glazes:
Choose the type of glaze you want to use for your pitcher. There are various colors and finishes available to add a personal touch to your creation.
8 Step-by-step Guidelines on How to Make Ceramic Pitcher
Step 1: Wedge the Clay
Wedging the clay is an essential first step in preparing your material for pottery. This process involves kneading the clay on a flat surface to remove any air bubbles and ensure uniform consistency. Start by cutting off a manageable piece of clay and pressing it firmly onto a clean work surface, such as a plaster or wooden board. Use your hands to rotate and press the clay in a rhythmic motion, folding it over itself repeatedly.

This technique not only helps to eliminate air pockets that could cause cracks during firing but also aligns the clay particles, making it easier to work with on the wheel or by hand. Spend several minutes wedging until the clay feels smooth and pliable.
Step 2: Center the Clay on the Wheel
If you’re using a pottery wheel, it’s essential to center the clay before starting. This ensures that your pitcher will be symmetrical and well-balanced. Place a lump of clay at the center of a clean pottery wheel head and secure it with water or a bat.
Start by pressing down on the top of the clay firmly with one hand while supporting it from below with your other hand. Make sure to maintain equal pressure and keep the clay moist by splashing some water on it as needed. Continue doing this until the clay is centered.
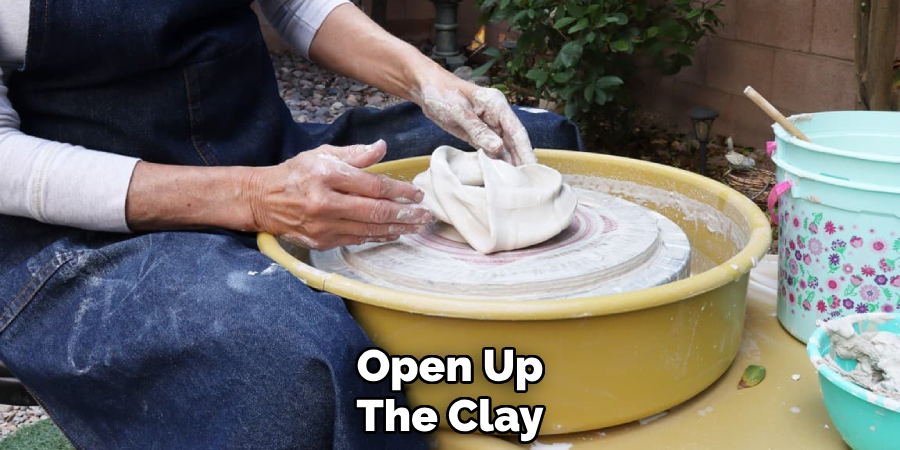
Step 3: Open up the Clay
Once the clay is centered, the next step is to open it up to form the base of your pitcher. Begin by placing your thumbs at the top center of the clay and pressing downward while the wheel is spinning slowly. Apply steady pressure to create an indentation that will serve as the starting point for the interior space.
Gradually push your thumbs deeper into the clay, being mindful of the thickness of the bottom. It’s crucial to leave enough clay at the base—approximately half an inch—to prevent the bottom from becoming too thin or weak. Once the opening is the desired depth, use your fingers to gently widen the hole, creating a smooth and even base for your pitcher. Keep the clay well-lubricated with water to avoid tearing and ensure a consistent texture.
Step 4: Pull Up the Walls
After opening up the base, it’s time to pull up the walls of your pitcher. Begin by positioning your hands around the opening and applying gentle pressure while slowly pulling upward. Keep your fingers in a V shape to create an even thickness as you pull up. Use your thumbs on the inside and fingers on the outside to guide and shape the form.
Be mindful of maintaining an even thickness throughout, gradually working your way from bottom to top. Continue pulling until you reach a desired height for your pitcher.
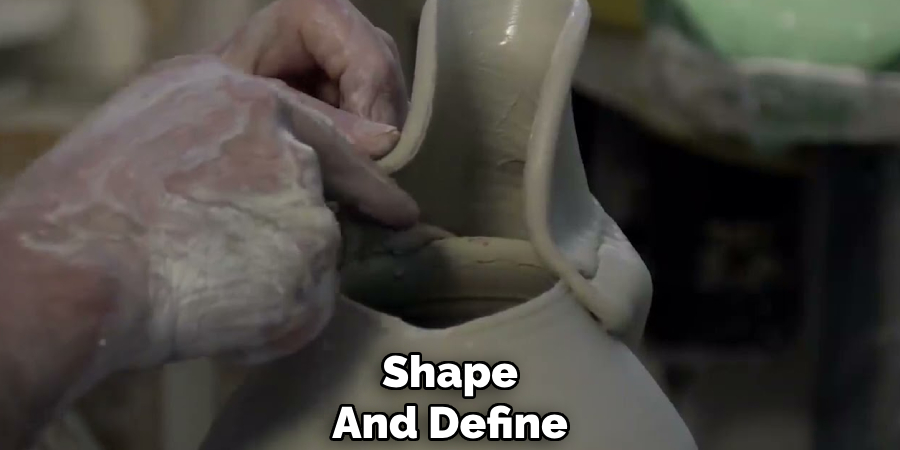
Step 5: Shape and Define
With the walls of your pitcher pulled up to the desired height, the next step is to shape and define its form. Begin by slowing the speed of your pottery wheel to gain better control. Use a rib tool to smooth and refine the surface of the walls, running it gently along the outside and inside to achieve a uniform thickness and remove any imperfections.
At this point, you can start shaping the pitcher into your preferred style. For a classic form, slightly taper the walls inward near the top to create a neck while maintaining a broader base. Use your fingers or shaping tools to add curves or angular elements, depending on the design you envision. Maintain consistent pressure to avoid warping the structure of the walls.
Step 6: Pull Up and Shape the Spout
To create a spout for your pitcher, use the same technique of pulling up and shaping the walls. Start by pinching off one side of the rim to form a beak-like shape, then gently pull it upward to elongate and define the spout. Use your fingers or rib tools to smooth out any unevenness and refine the overall shape.
It’s essential to pay close attention to the desired angle, length, and width of your spout. You can opt for a straight or curved design, depending on your preference.
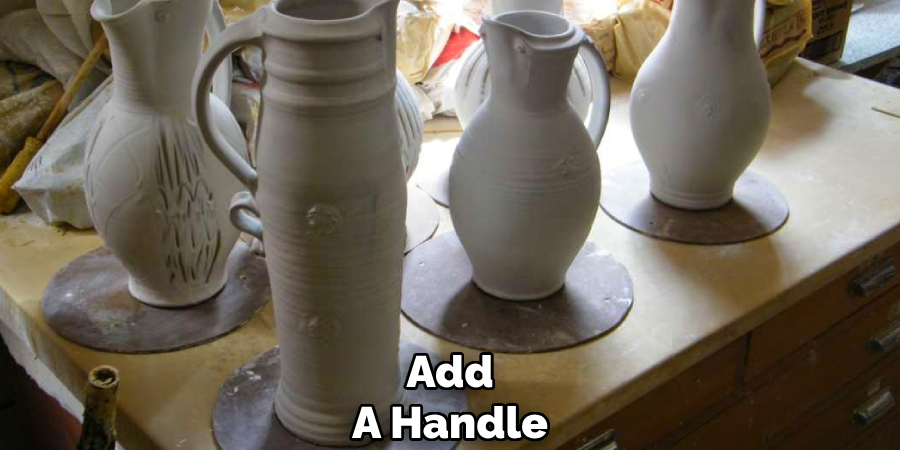
Step 7: Add a Handle
Many pitchers have handles attached to make them easier to hold and pour. To create one for your pitcher, use a separate piece of clay and shape it into a handle by pulling and shaping it like you did with the walls and spout.
Make sure the handle is thick enough to support the weight of the pitcher when filled with liquid. Apply some scoring marks on both ends of the handle using a scoring tool, then attach it firmly onto the side of your pitcher where you want it to sit. Blend and smooth the edges of the handle with the pitcher for a seamless finish.
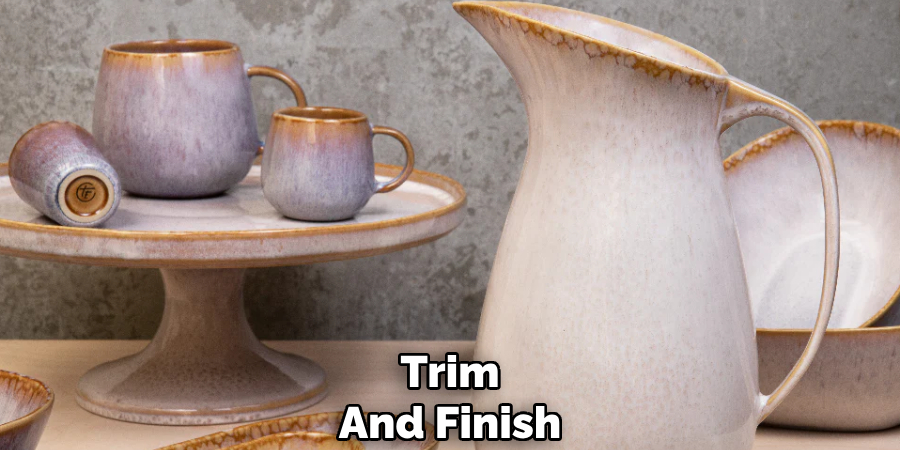
Step 8: Trim and Finish
Once your pitcher is shaped, it’s time to trim and finish it. Use trimming tools to remove any excess clay from the bottom of the pitcher, creating a clean and even foot. Run a wire tool underneath to remove it from the wheel head carefully.
Next, let your pitcher dry completely before adding any decorative elements or glazes. Once dry, you can sand down any rough spots or imperfections using fine-grit sandpaper before firing it in a kiln according to package instructions.
Following these steps on how to make ceramic pitcher will result in a beautiful and functional pitcher that you can use for serving beverages or as a decorative piece in your home. With practice, you’ll be able to create pitchers of different styles and sizes to suit your needs and personal aesthetic. Have fun experimenting with shapes, handles, and glazes to make each pitcher unique. Happy potting!
Frequently Asked Questions
Q: Can I Use Any Type of Clay to Make a Pitcher?
A: It’s best to use a clay specifically formulated for wheel-throwing or hand-building pottery. These types of clays are more pliable and easier to work with, making them ideal for creating pitchers.
Q: Do I Need a Pottery Wheel to Make a Pitcher?
A: While using a pottery wheel can make the process more efficient, you can also create a pitcher by hand-building with clay coils or slabs. This technique may take longer but can still result in a functional and beautiful pitcher.
Q: How Do I Glaze My Pitcher?
A: Once your pitcher has been fired in the kiln and has cooled down, you can use glazes to add color and shine to it. Follow package instructions on how to apply glazes properly, as different types may have varying techniques. It’s also essential to fire your pitcher again after glazing to achieve a finished look. As you continue to learn and improve your pottery skills, the possibilities for creating unique and personalized pitchers are endless. Keep experimenting with different techniques, shapes, and styles to create one-of-a-kind pieces that reflect your creativity and personality.
Conclusion
Creating a ceramic pitcher is a rewarding and creative process that combines skill, patience, and artistry. By following the steps on how to make ceramic pitcher outlined above, you can transform a simple lump of clay into a functional and visually appealing piece that embodies your personal style. Whether you are new to pottery or an experienced maker, each piece you create will reflect your growth and unique perspective.
With practice, you’ll not only improve your technique but also find joy in experimenting with shapes, designs, and finishes. Remember, every pitcher you craft tells a story—one shaped by your hands and imagination. Happy crafting!
Specialization:
- Master of wheel-throwing, hand-building, and advanced glazing techniques
- Focus on creating both functional pottery and decorative art pieces
Recognition:
- Celebrated by collectors and art enthusiasts for creating one-of-a-kind pieces that blend artistry with functionality
- Participates in local and national exhibitions, earning accolades for his innovative designs and craftsmanship
Passion:
- Deeply committed to exploring and pushing the boundaries of ceramic artistry
- Continuously experiments with new materials, firing techniques, and artistic concepts to evolve his craft
Personal Philosophy:
- Believes in the transformative power of art, aiming to evoke emotions and connections through his ceramic creations
- Advocates for sustainability in ceramics, using eco-friendly materials and practices whenever possible