


Crafting with clay is a delightful and educational activity that has captured the interest of people of all ages. It provides a way to express creativity while also developing fine motor skills and artistic abilities. Among the many possibilities in clay crafting, creating clay fish stands out as a favorite.
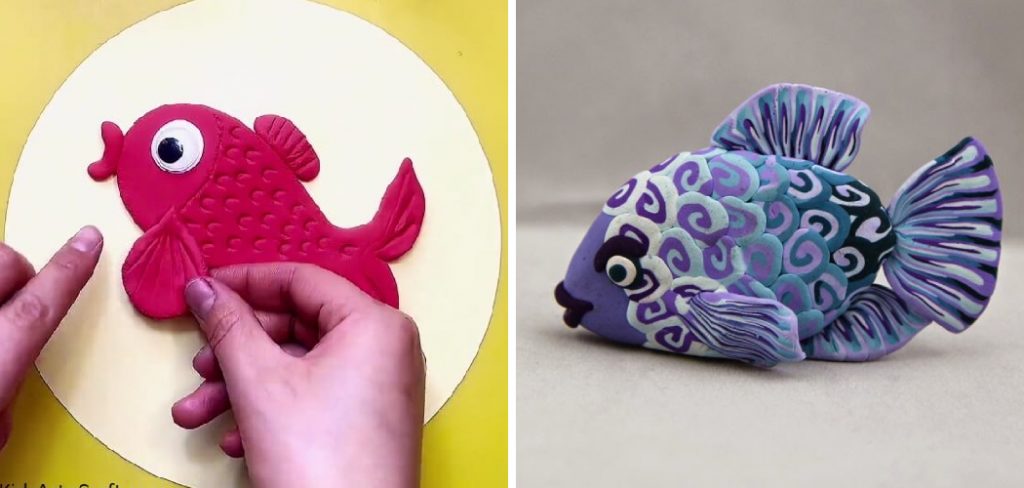
This project is particularly popular among kids, hobbyists, and art students due to its simplicity and the opportunity to personalize each design with unique touches. Whether you’re a beginner or an experienced crafter, this activity offers endless possibilities for creativity. The purpose of this article is to guide you through the step-by-step process of how to make clay fish using simple tools and techniques. By the end, you’ll have a beautiful handmade creation and a deeper appreciation for the art of clay crafting.
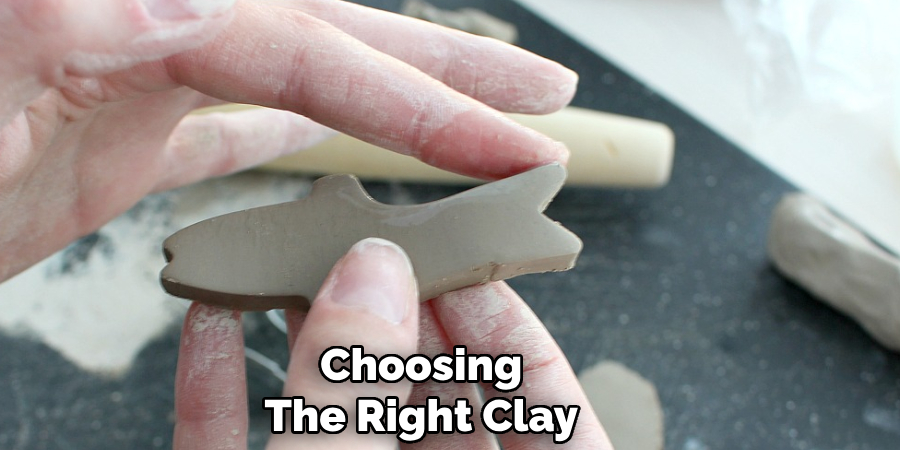
Choosing the Right Clay for Your Project
Selecting the right clay is a crucial first step in creating your clay fish. The type of clay you choose will determine the ease of crafting, the durability of your finished product, and the tools you’ll need along the way. Below are the main types of clay to consider:
Types of Clay
- Air-dry Clay: This type of clay is easy to use and does not require a kiln for hardening, making it a great choice for beginners and younger users. It dries naturally in the air and is perfect for simple projects.
- Polymer Clay: Known for its flexibility and ability to hold fine details, polymer clay is ideal for intricate designs. However, it requires baking in a regular oven to set, so adult supervision is needed for kids.
- Natural Clay: Traditional and versatile, natural clay is used in professional pottery and ceramics. It requires access to a kiln for firing, making it better suited for experienced crafters or those with access to specialized resources.
Factors to Consider
When choosing clay, think about the following:
- Age of the user: Air-dry clay is most suitable for kids, while polymer clay or natural clay may appeal to adults or advanced hobbyists.
- Purpose of the fish: Decide if your fish will be used as a toy, decoration, or piece of jewelry, as this may affect the type of clay you select.
- Availability and budget: Consider locally available clays and choose an option within your price range.
Preparing the Clay
Before shaping your clay fish, it’s essential to prepare the material properly:
- Softening and kneading: Work the clay with your hands to ensure it is soft and pliable. This helps to remove any air bubbles and makes it easier to mold.
- Keeping the clay moist: Use a spray bottle or a damp cloth to keep the clay moist during the crafting process. This prevents cracks and ensures a smooth, workable texture.
By choosing and prepping the right clay, you’re well on your way to creating a unique and beautiful clay fish!
Tools and Materials Needed
To craft your clay fish, gathering the right tools and materials is crucial for a smooth and enjoyable process.
Basic Tools
Clay modeling tools are ideal for shaping and detailing. However, household items like toothpicks, plastic knives, or pencils can be great substitutes for beginners. These basic tools help you carve, sculpt, and add intricate designs to your clay creation.
Additional Supplies
To bring your clay fish to life, you’ll need paints (acrylics work well), brushes of various sizes, and a water cup for cleaning brushes. A sealer is optional if you prefer a glossy finish to protect your work. Working on wax paper or a craft mat helps prevent the clay from sticking to your surface.
Workspace Setup
Select a clean, flat surface to set up your workspace. Ensure the area is well-lit to make detailing easier. Keep a small container of water nearby to moisten the clay and prevent it from drying out during the process.
How to Make Clay Fish: Shaping the Body of the Fish
Forming the Base Shape
Begin by taking a portion of your clay and rolling it into a ball or an oval shape. This will serve as the main body of the fish. Once the shape is formed, gently flatten it to create the fish’s profile.
This step is crucial for establishing the overall shape and size of your fish before proceeding to finer details. Keep the edges smooth by rolling the clay carefully between your palms or lightly pressing with your fingers.
Creating the Fish Head and Tail
To shape the head, pinch one end of the flattened clay gently to create a rounded or slightly pointed shape that resembles the fish’s head. At the opposite end, taper the clay into a thinner form to define the tail. Ensure the transition between the body, head, and tail is smooth for a natural appearance. If necessary, use a modeling tool to refine the shapes and adjust proportions.
Adding Fins
Fins are crucial for making your fish look realistic. Take small pieces of clay to shape fins for the fish. The dorsal fin is positioned on top of the body, while the pectoral fins are located on either side. Lastly, create the tail fin and attach it carefully to the tapered end.
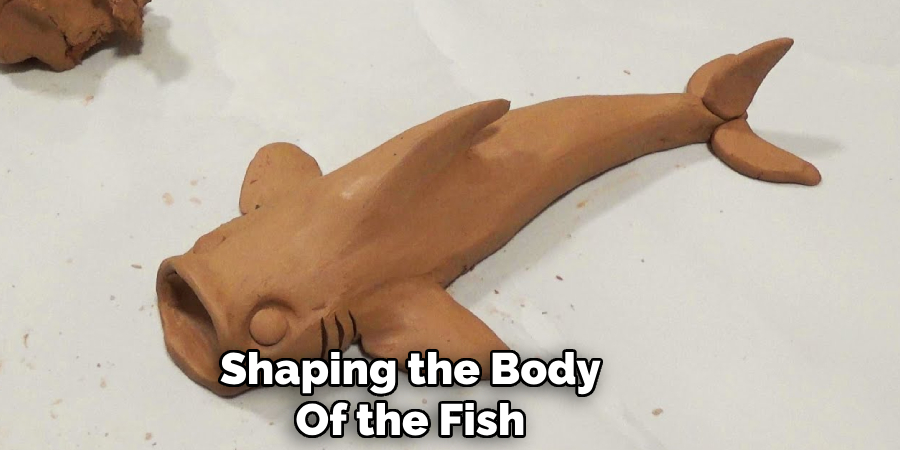
To secure the fins to the body, use a small amount of water or slip (a mixture of clay and water) as an adhesive. Blend the edges of the fins into the body for a seamless connection.
Ensuring Balance and Smoothness
Once all the parts are in place, use your fingers or sculpting tools to smooth the fish’s surface and refine its overall shape. Check for symmetry, making adjustments to align the head, fins, and tail properly. Take your time to ensure a balanced and polished appearance before moving forward.
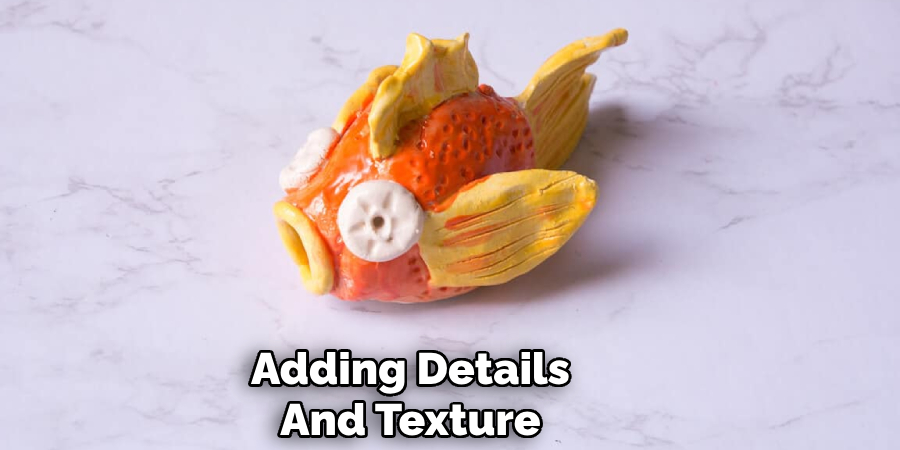
Adding Details and Texture
Eyes and Mouth
To give your clay fish a lifelike or stylized appearance, start by adding the eyes and mouth. Roll tiny clay balls to create protruding eyes, then gently attach them to the head using a small amount of water or slip. If you prefer indented eyes, use a rounded tool to press shallow sockets into the clay.
For the mouth, use a pointed tool, such as a skewer or toothpick, to carve or press a small line or circular shape, depending on the expression you want your fish to convey. Experiment with these features to achieve the character or realism you’re aiming for.
Scales and Skin Texture
Next, add texture to the body to mimic scales or smooth skin. Using simple tools like a toothpick, fork, or texture mat, gently imprint a series of overlapping patterns onto the body for scales. Work methodically across the surface to maintain consistent and even patterns. If scales aren’t part of your fish’s design, go for a smooth or naturally rippled texture instead. Adding these details will enhance the overall realism and make your model more visually engaging.
Customizing Features
Finally, personalize your fish with added details like gills, lines, or playful expressions. Use a fine-tipped tool to carve delicate gill marks on the sides of the head, or add cartoon-like details for humor and charm. Whether you want a realistic or stylized fish, these custom touches will bring your creation to life and reflect your artistic vision.
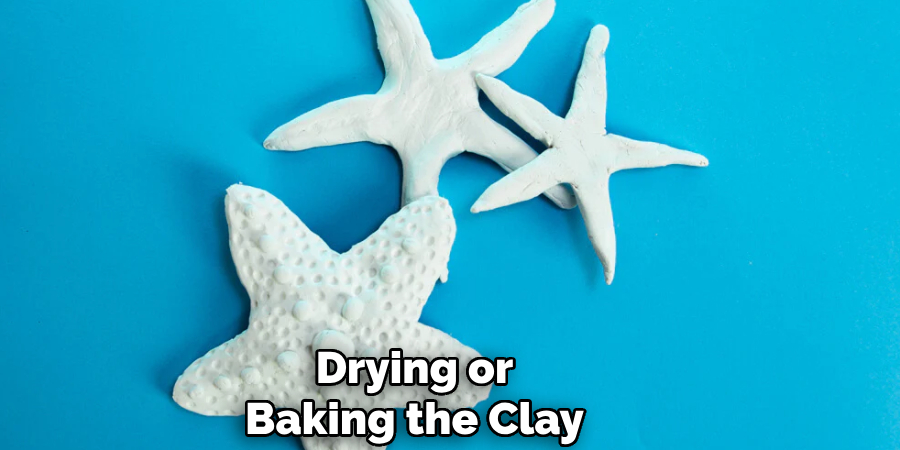
Drying or Baking the Clay
Air-Dry Clay
If you’ve chosen air-dry clay, allow your fish model to dry naturally for 24–72 hours, depending on its thickness. To ensure even drying, place the model on a flat, non-stick surface and turn it periodically. Avoid placing it in direct sunlight or near heat sources, as this can cause the clay to warp or crack. Patience is key—rushing the drying process may lead to structural issues.
Polymer Clay
For polymer clay, the oven-baking process is crucial. Preheat your oven to the manufacturer’s recommended temperature, typically between 265°F and 275°F. Place your fish on a baking tray lined with parchment paper or aluminum foil to prevent sticking and ensure clean results. Bake the clay for 15–30 minutes, depending on the size and thickness of the model. Be sure to monitor it closely to prevent overheating, which can discolor or damage the clay.
Avoiding Cracks and Breakage
To protect your creation from cracks or breakage, take care to dry or bake it slowly and evenly. Repair any small cracks while the clay is still slightly malleable by smoothing it out with a damp tool or adding fresh clay. Proper handling during this stage will ensure a durable and polished final piece.
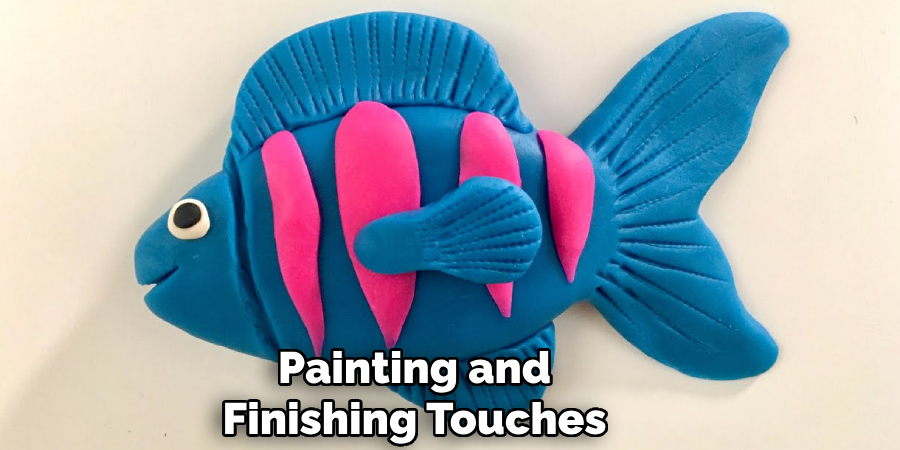
Painting and Finishing Touches
Choosing the Right Paint
Selecting the appropriate paint is crucial to achieving your desired look. Acrylic paints are an excellent choice for vibrant, long-lasting colors and work well on both baked and air-dry clay. For more subtle effects, watercolors can add a delicate touch but are best suited for air-dry clay, where they can seep naturally into the surface.
Decorating Techniques
Unleash your creativity by experimenting with various decorating techniques. Layering colors can add depth and dimension to your design, while adding patterns or intricate details can bring your creation to life. For a more realistic effect, try dry brushing, which involves lightly brushing a small amount of paint onto raised surfaces to highlight textures.
Sealing the Finish
To protect your painted piece and add a polished shine, consider applying a clear sealant once the paint has fully dried. This extra step enhances durability, making your creation both beautiful and long-lasting.
Creative Display and Usage Ideas
Where to Use or Display Your Clay Fish
Clay fish make wonderful additions to various spaces. Use them as unique decor pieces for your home, playful displays in kids’ rooms, or even as accents for an aquarium-themed setting. Their charm can brighten up any area with a whimsical touch.
Making It Functional
Transform your clay fish into functional items like keychains, fridge magnets, or ornaments. These customized creations can be both practical and decorative, adding an extra layer of usefulness to your craft.
Gift and Project Ideas
Handmade clay fish make excellent gifts, engaging classroom projects, or eye-catching items to sell at craft fairs. Their versatility allows you to personalize each piece, making them perfect for a variety of occasions.
Conclusion
Learning how to make clay fish is a simple yet delightful process that anyone can enjoy. Start by choosing the right type of clay that suits your crafting needs, then shape it into your desired fish design.
Add unique details like fins, scales, and textures to bring your creation to life before finishing with vibrant paint. This activity encourages experimentation and creativity, allowing you to customize each piece to reflect your style. Whether you’re a beginner or experienced crafter, making clay fish is a fun and rewarding way to develop artistic skills while enjoying quality time alone or with others.
Specialization:
- Master of wheel-throwing, hand-building, and advanced glazing techniques
- Focus on creating both functional pottery and decorative art pieces
Recognition:
- Celebrated by collectors and art enthusiasts for creating one-of-a-kind pieces that blend artistry with functionality
- Participates in local and national exhibitions, earning accolades for his innovative designs and craftsmanship
Passion:
- Deeply committed to exploring and pushing the boundaries of ceramic artistry
- Continuously experiments with new materials, firing techniques, and artistic concepts to evolve his craft
Personal Philosophy:
- Believes in the transformative power of art, aiming to evoke emotions and connections through his ceramic creations
- Advocates for sustainability in ceramics, using eco-friendly materials and practices whenever possible